audiocodes C455HD Microsoft Teams IP Phone User Guide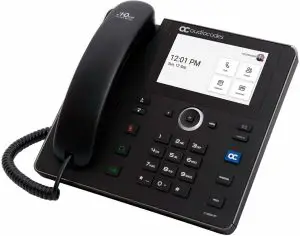
Before Installing
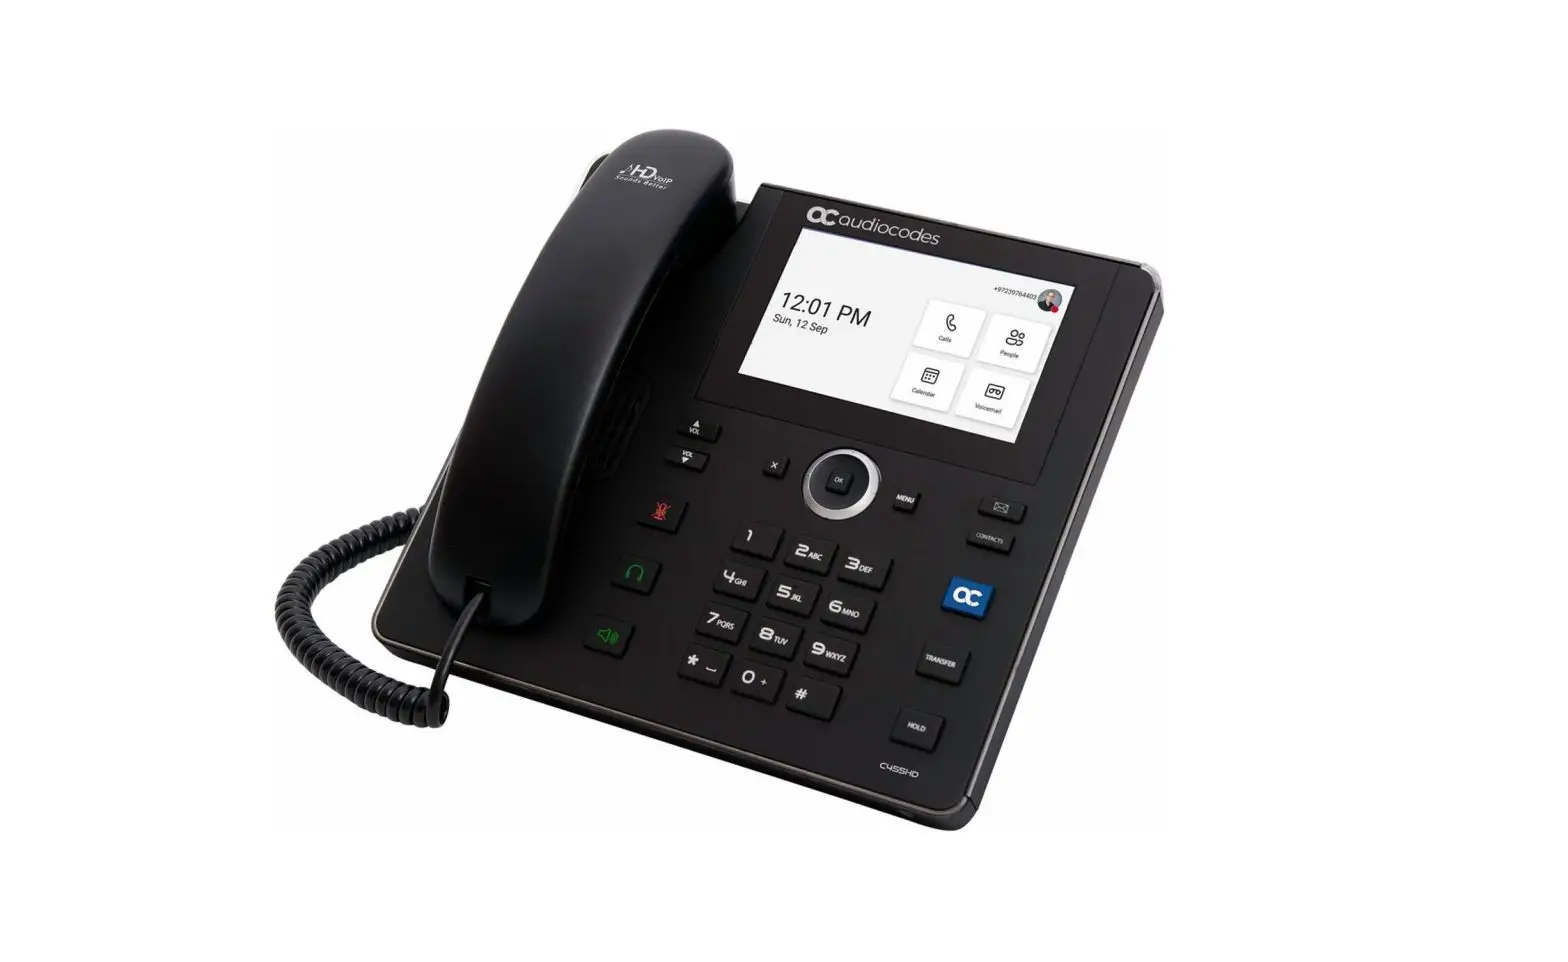
Congratulations on purchasing your AudioCodes C455HD for Microsoft Teams IP Phone!
Before installing your phone, make sure the following items are included in the shipped box:
- C455HD IP Phone
- AC power adapter (optional)
- Cat 5e Ethernet cable
- Handset
- Handset cord
- Desktop stand
- Wall mount
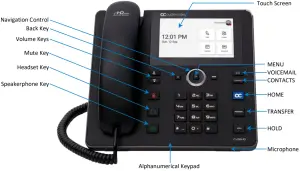
Physical Description

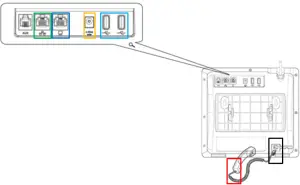
Cabling the Phone
![]() Warning: Prior to connecting power, refer to the Compliancy and Regulatory Information document at https://www.audiocodes.com/library/technical-documents.
Warning: Prior to connecting power, refer to the Compliancy and Regulatory Information document at https://www.audiocodes.com/library/technical-documents.
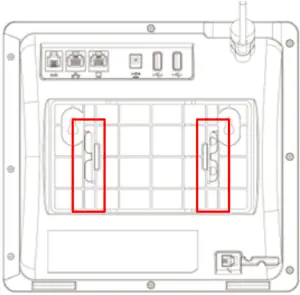
To cable the phone:
- [Refer to the illustration below] Connect the
 of the phone cord to the handset and the
  of the cord to the handset jack on the phone.
 - (Optional) Connect a USB headset to one of the two
 .
. - Connect the
 to your LAN network (LAN port or LAN switch/router) with a CAT5 / 5e Ethernet cable.
 - Connect the
 to a computer with a CAT5 /5e straight-through Ethernet cable.
 - Connect the connector tip of the AC power adapter to the phone’s
 and connect the two-prong AC adapter directly to the electrical wall outlet. When the phone powers up, all the LEDs momentarily light up.
Mounting the Phone on a Desktop or Wall
- Desktop: Slide the L-shaped stand’s short or long edge
 onto
onto  rails.
 - Wall: Slide the
 onto rails.
 - Desk Mount
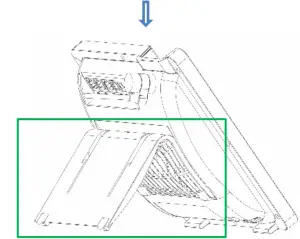
- Wall Mount

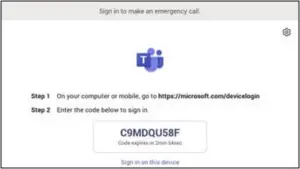
Signing in
To sign in to your account:
- Connect the device to the network.

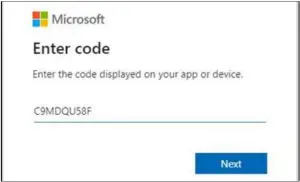
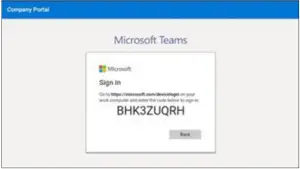
- Point your browser to https://microsoft.com/devicelogin as instructed.

- Key in the code and click Next.

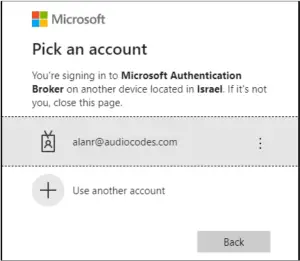
- Click the account.

- Key in your password (it’s the same password as the Windows password on your PC) and then click Sign in.
- Close the ‘Microsoft Authentication Broker’ window; your phone returns to the initial code screen. In that screen, touch Sign in on this device.

- Touch the ‘Email, phone or username’ field; a virtual keyboard pops up. Enter one of them and then touch Sign in. The ‘home’screen opens.
- If you opt to Sign in from another device, complete authentication from your PC or smart phone. This is recommended if you’re using Multi Factor Authentication (MFA).
- If you opt to Sign in from another device, complete authentication from your PC or smart phone. This is recommended if you’re using Multi Factor Authentication (MFA).
- In the browser on your PC or smart phone, enter the URL and then in the phone’s Web interface that opens, perform sign-in (as noted previously, this option is recommended if using MFA).


Changing your Presence Status
To change your presence status:Swipe right, touch the current presence status, and then select
the status you require.

Basic Phone Operations
For basic phone operations, refer to Microsoft documentation and the User’s and Administrator’s Manual.
Connecting to a Router via Wi-Fi
![]() Note: This section is applicable only to models with Wi-Fi functionality.
Note: This section is applicable only to models with Wi-Fi functionality.
The phone can connect to an Access Point via Wi-Fi. The Wi-Fi interface can be used to make VoIP calls over Wi-Fi, when the phone is installed in an environment free of LAN/cables.
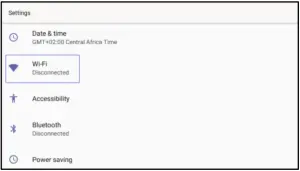
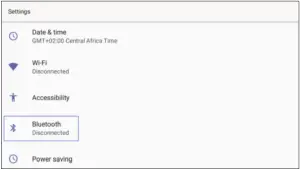
- You can connect to Wi-Fi by navigating to the ‘Settings’ menu, and then selecting the Wi-Fi option.
Enabling or Disabling Wi-Fi
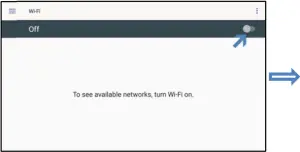
To enable Wi-Fi:
- Turn Wi-Fi on by moving the switch in the upper right corner (Wi-Fi is disabled by default).


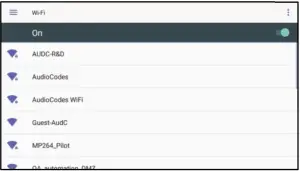
- After enabling Wi-Fi, “Searching for Wi-Fi networks…” is displayed. The phone then displays the available Wi-Fi Access Points. Select the desired Wi-Fi Access Point (network).
- Enter the Wi-Fi password if needed, and then tap Connect.
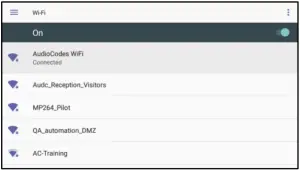
- When connected to the Access Point, “Connected” is displayed:
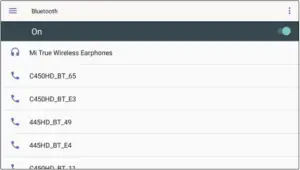
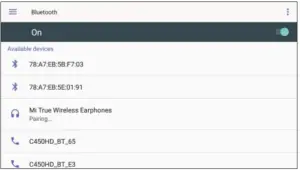
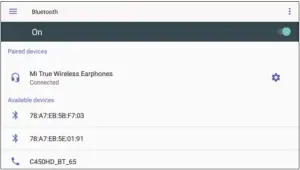
Configuring Bluetooth
![]() Note: This section is applicable only to models with Bluetooth functionality.
Note: This section is applicable only to models with Bluetooth functionality.
The Bluetooth interface is used to connect the phone to a wireless headset or speaker.
To pair and connect a remote Bluetooth device:
- Press the phone’s MENU hard key to access the ‘Settings’ menu.
- In the Settings screen, select the Bluetooth option, and then in the Bluetooth screen, move the switch to On to start Bluetooth scanning.
- Select the desired Bluetooth device to pair. If prompted for the Bluetooth Pairing code, enter it, and then touch Pair.
- Once successfully paired, the Bluetooth audio device appears under the ‘Paired devices’
section. To connect, touch the device name. - To unpair, touch the gear icon
 on the right of the device name, and then click Forget

FCC WARNING
- FCC Guidelines for Human Exposure This equipment complies with FCC radiation exposure limits set forth for an uncontrolled environment. This equipment should be installed and operated with minimum distance of 20 cm between the radiator and your body.
- This product does not contain any user serviceable components and is to be used with approved antennas only. Any product changes or modifications will invalidate all applicable regulatory certifications and approvals.
- We, Audiocodes Ltd., 1 Hayarden St., Airport City, Lod, Israel, declare under our sole responsibility that the C455HD IP phone complies with Part 15 of FCC Rules. Operation is subject to the following two conditions:
- This device may not cause harmful interference, and
- This device must accept any interference received, including interference that may cause undesired operation.
For any questions or problems please contact our local office AudioCodes Inc., at 200Cottontail Lane Suite A101E, Somerset NJ 08873.
Tel: +1-732-469-0880
Fax: +1-732-469-2298, Director of QC and operations
[email protected]
- Note: This equipment has been tested and found to comply with the limits for a Class B digital device, pursuant to part 15 of the FCC Rules. These limits are designed to provide reasonable protection against harmful interference in a residential installation. This equipment generates, uses and can radiate radio frequency energy and, if not installed and used in accordance with the instructions, may cause harmful interference to radio communications. However, there is no guarantee that interference will not occur in a particular installation. If this equipment does cause harmful interference to radio or television reception, which can be determined by turning the equipment off and on, the user is encouraged to try to correct the interference by one or more of the following measures:
- Reorient or relocate the receiving antenna.
- Increase the separation between the equipment and receiver.
- Connect the equipment into an outlet on a circuit different from that to which the receiver is connected.
- Consult the dealer or an experienced radio/TV technician for help.
Notice Information
Information contained in this document is believed to be accurate and reliable at the time of printing. However, due to ongoing product improvements and revisions, AudioCodes cannot guarantee accuracy of printed material after the Date Published nor can it accept responsibility for errors or omissions. Updates to this document can be downloaded from https://www.audiocodes.com/library/technical-documents.
This document is subject to change without notice.
Date Published: Dec-19-2021
Document #: LTRT-13365