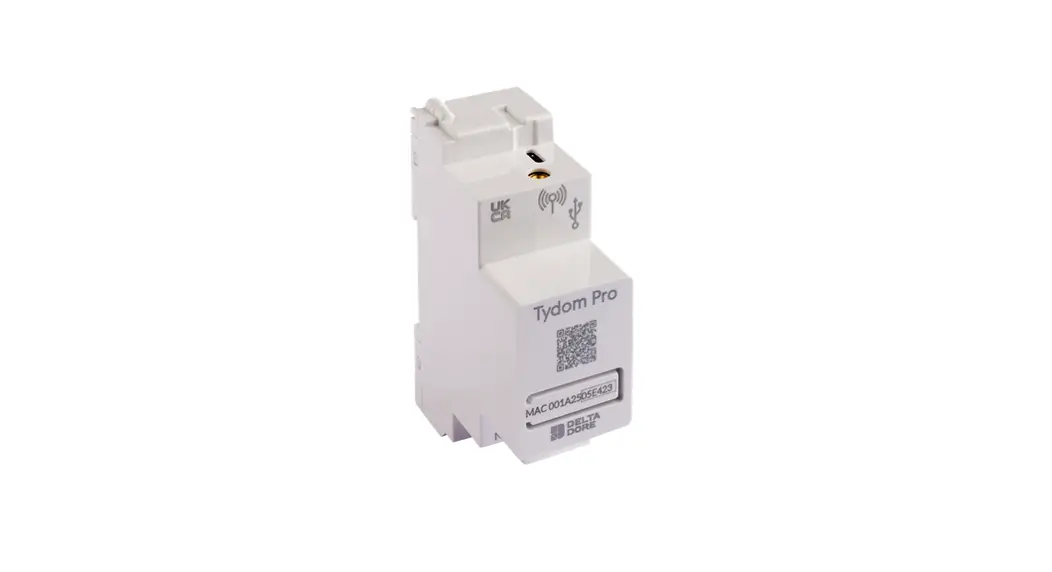
![]() Tydom Pro
Tydom Pro
Connected home box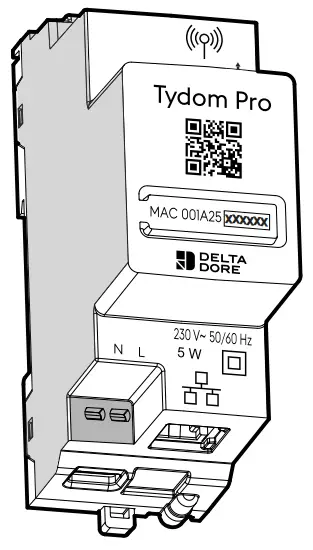
 http://opn.to/a/b3xcy
Presentation
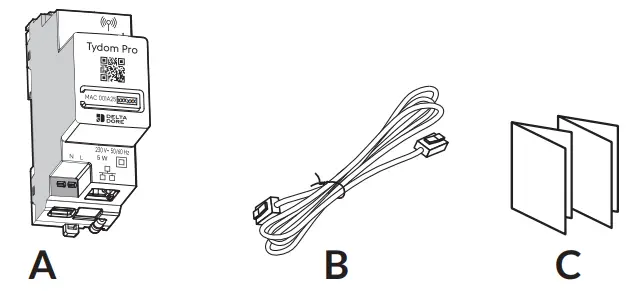
Box contents
- A. Tydom Pro
- B. Ethernet cable
- C. Important Product Information
Description
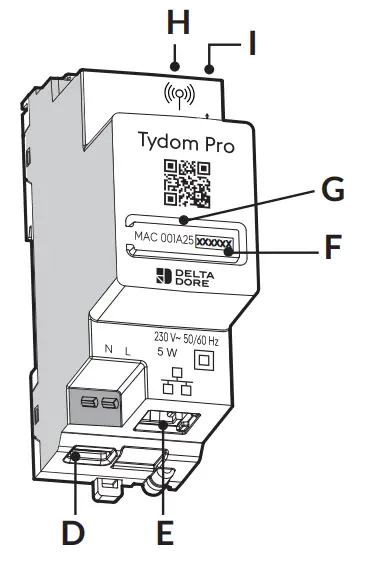
- D. 230 V power supply terminal
- E. Ethernet port
- F. Configuration/Information/MAC address button
- G. System status light
- H. Remote antenna connection (optional)
- I. USB port connection (optional)
Installation

- Tydom Pro must be installed on a DIN rail, either within a consumer unit or in a VDI cabinet.
- The equipment must be installed by a suitably qualified person.
- Tydom Pro must be protected by a 2A circuit breaker, which will also serve as a power switch.
- Avoid proximity with power controls (of the type used for domestic hot water contractors)
- Disconnect your installation’s 230V power supply.
Connect your Tydom Pro
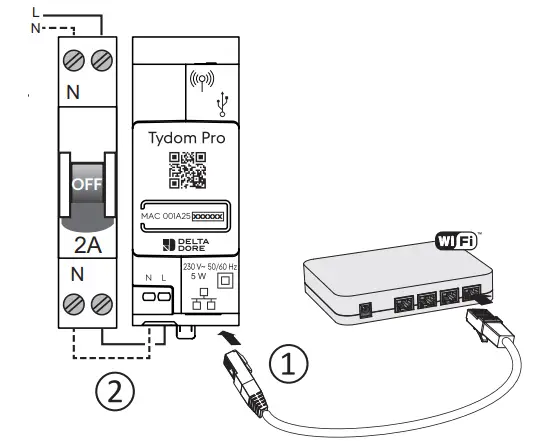
- connect the Ethernet cable (B).
- then, connect the main power line.
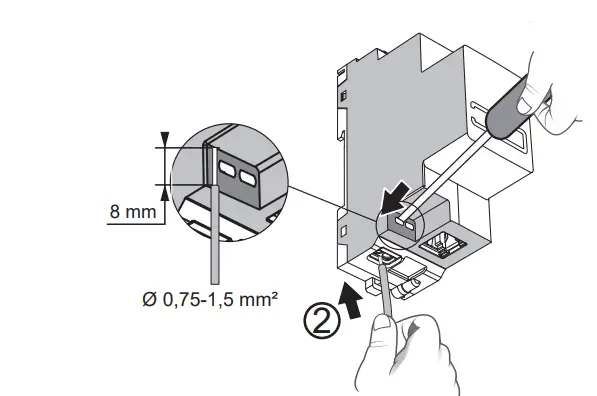
The 230 V power line must be stripped back to a length of 8 mm. To do so, you can make use of the design of the casing as shown below.
- Restore the power to the installation.
- Download the Tydom app.


http://opn.to/a/FCF9K http://opn.to/a/JPzL4 Log in to either the Google Play or App Store, depending on your device.
- Search for and download the free «Tydom» app.
- Activate the Wi-Fi connection on your smartphone or tablet, and connect to the same local network as your Tydom Pro.
- Configure the Tydom app.
- Note the last 6 characters of your Tydom Home’s MAC address (stated on the front).
- Log in to the app and follow the instructions.


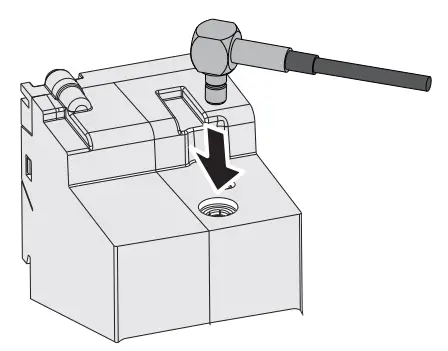
Remote antenna
- Some installation cases will require the use of a remote antenna (available as an accessory)
- The radio range can be adjusted based on the installation conditions.
- This is advised, for example, in the case of installation in a metallic cabinet or in proximity to a metallic mass.
Help
| LED | System status |
| Flashing white | System accessible locally and remotely, a user connected |
| Steady white | System accessible locally and remotely |
| Flashing orange | System accessible locally, user connected |
| Steady Orange | System accessible locally |
| Steady Red | No IP address allocated |
| 5 red flashes | Thermal safety mechanism. Leave a clear space around the Tydom Pro in the event that it starts to heat up. |
Advanced functions
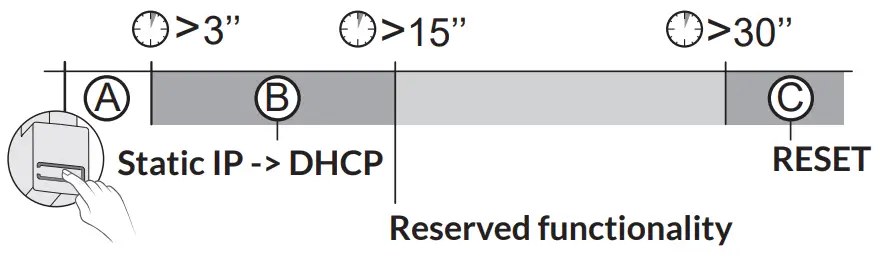
Below are the functions accessible depending on how long the button on the back of your Tydom Home is pressed.
Secure connection and viewing connection status
- Briefly press the button. LED displays for 10 seconds.
| Flashing yellow | Static IP mode |
| Flashing blue | DHCP mode |
| Flashing blue (3x) | DHCP in progress Check the DHCP activation on the router |
| Flashing red | No network connection Check the Ethernet link |
Change from static IP to DHCP
- Press the button for 3 seconds until the pink LED flashes slowly. Release.
Reset to factory settings
Press the button for 30 seconds until the LED stops flashing. Release.
System status
- DHCP mode
- Clear product associations
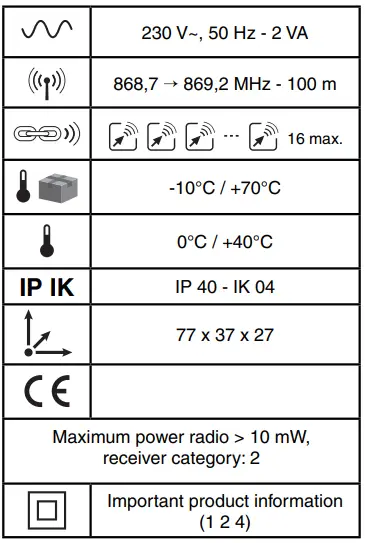
Technical specifications
 | 230V, 50/60 Hz power supply Class II insulation |
| X3D transmission frequency: 868.7 MHz to 879.2 MHz Maximum wireless power < 10mW – Category 2 receiver Zigbee transmission frequency: 2.4 GHz to 2.4835 GHz | |
| Maximum consumption (without USB connection): 1,1 W | |
| -20°C / +70°C | |
| -10°C / +40°C | |
| IP | IP 30 |
| 4-module unit, height = 53 mm Installation in an environment with normal pollution levels |
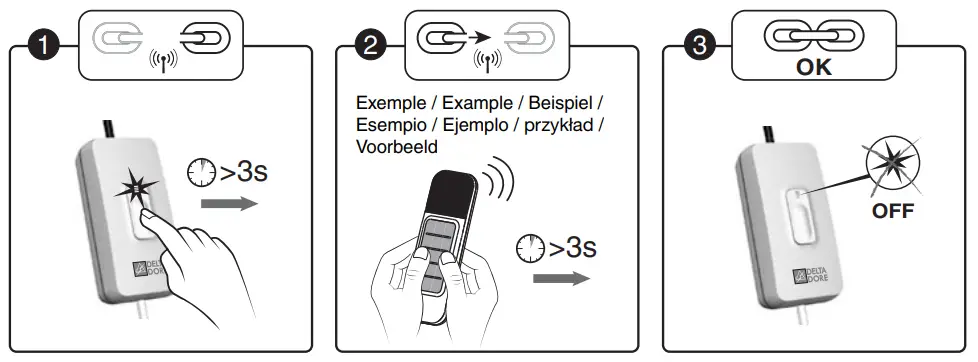
Association
- Switch on the installation.
Press the receiver button for 3 seconds until its LED flashes.
Release. - Send the association command to the transmitter (refer to the user guide).
- Make sure that the receiver LED is no longer flashing.
The products are associated.
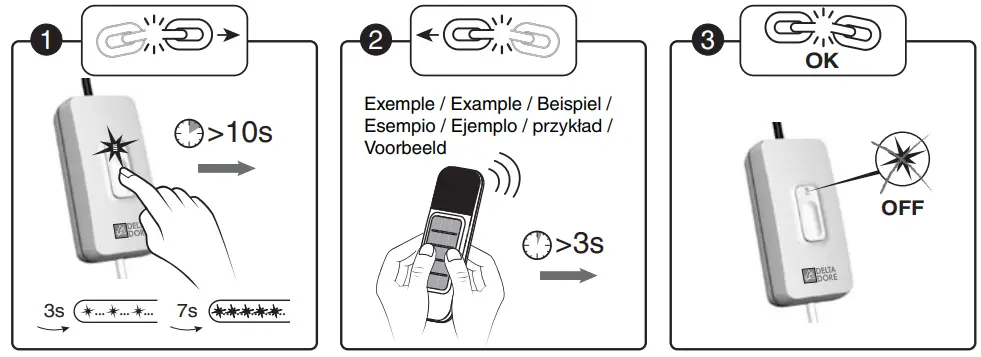
Remove an association
- Press and hold for 10 seconds :
– after 3 seconds, the LED flashes slowly.
– after 7 seconds, the LED flashes quickly. Release. - Confirm on the transmitter (refer to the user guide).
- Make sure that the receiver LED has stopped flashing.
The products are no longer associated.
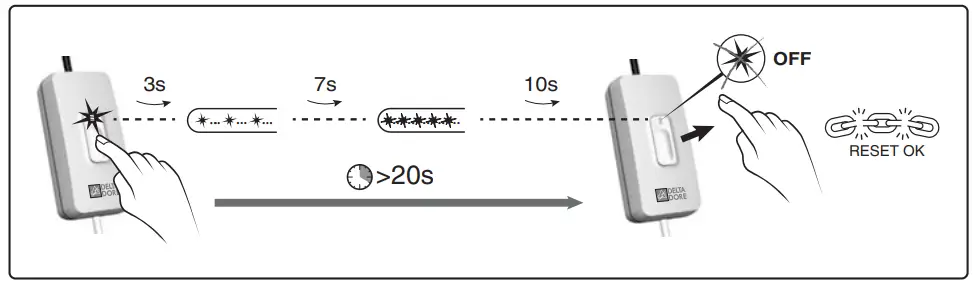
Remove all associations
Hold down the receiver button for 20 seconds.
After 3 seconds, the LED flashes slowly.
After 7 seconds, the LED flashes quickly.
Press and hold the button until the LED goes out. Release.
- Pollution level: 2
- Rated impulse withstand voltage: 2.5 kV
- Operation type: S1 continuous duty service S1
- Switch type: 1 single pole
- Number of operating cycles: 100,000
- Circuit cut-off: brownout
The connection quality of the product may be affected by different modifications of the IP architecture on which it operates. These modifications can be but are not limited to, a change of hardware, a software update or configuration, work conducted on your operator’s equipment or any other multimedia equipment such as tablets, smartphones, etc. IOS is a Cisco trademark or registered trademark in the United States and in other countries and is used under licence. AndroidTM and Google Play are Google LLC registered trademarks. Wi-FiTM is a trademark registered by Wi-Fi Alliance. Because of changes in standards and equipment, the characteristics given in the text and the illustrations in this document are not binding unless confirmed.
![]() Systec Therm AG · Letzistrasse 35 · CH-9015 St-Gall
Systec Therm AG · Letzistrasse 35 · CH-9015 St-Gall
Téléphone +41 71 274 00 50 · www.systectherm.ch
www.deltadore.com