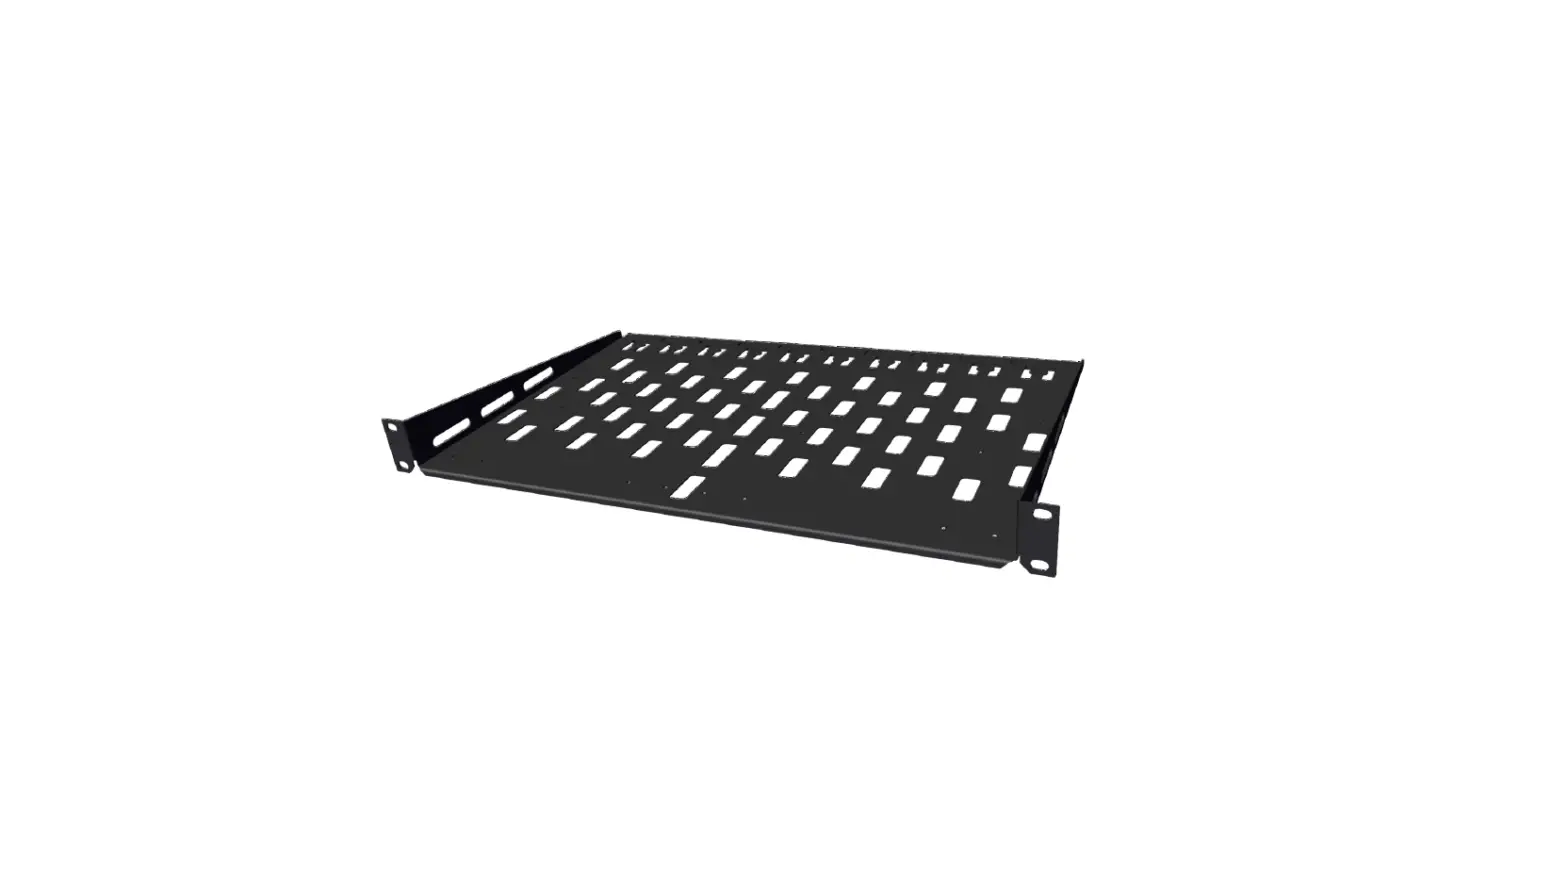
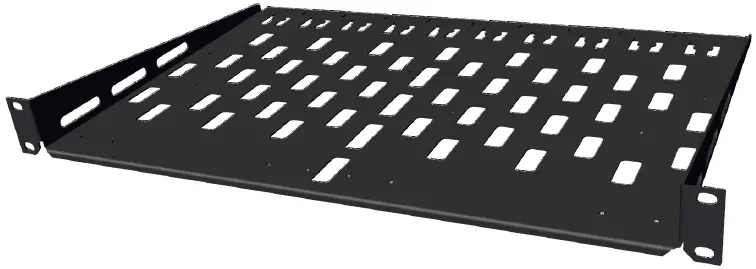
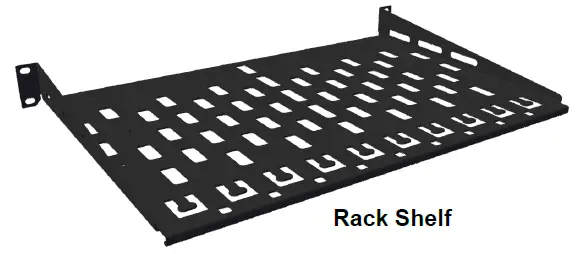
biamp RMX 100 Rack Shelf
Product Information
The RMX 100 Rack Shelf is a hardware accessory used for mounting devices onto a rack. It comes with screws, washers, and cable ties for device attachment and cable organization. The rack shelf can accommodate one or two devices and is compatible with various configurations.
Package Contents:
- 8 M3 x 10 Phillips Screw – Device attachment
- 8 M3 Flat Washer – Device attachment
- 8 M3 Lock Washer – Device attachment
- 4 #10-32 x .75 Rack Screw – Rack attachment
- 4 #12-24 x .75 Rack Screw – Rack attachment
- 4 M6 x .75 Rack Screw – Rack attachment
- 25 Cable ties – Cable organization
- 1 Rack Shelf
Usage Instruction
Installation Guide:
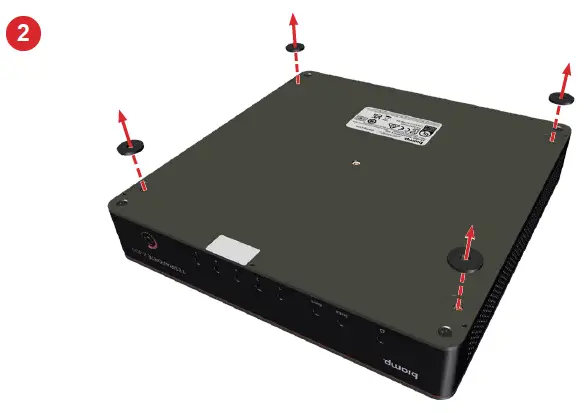
Before assembly, remove the wall mount bracket if the device comes attached to it. Review the attachment holes for each type of device and place the devices upside down on a protected surface. Remove the rubber feet on the bottom of each device.
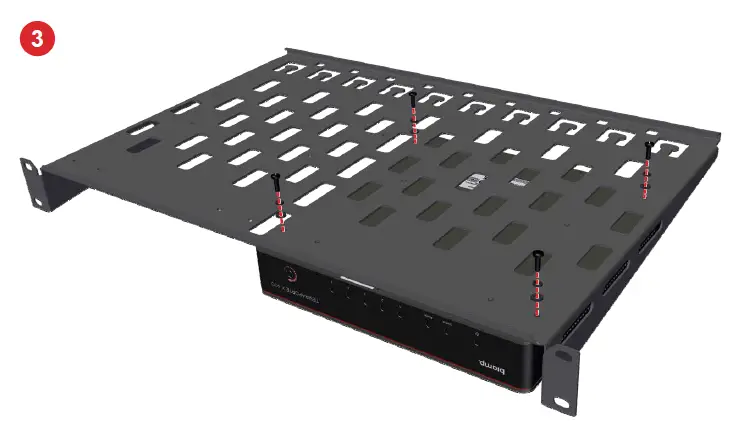
- Place the rack shelf on top of the devices, align the appropriate 3-hole pattern, and screw the rack shelf to the device using lock washers and flat washers with the M3 screws.
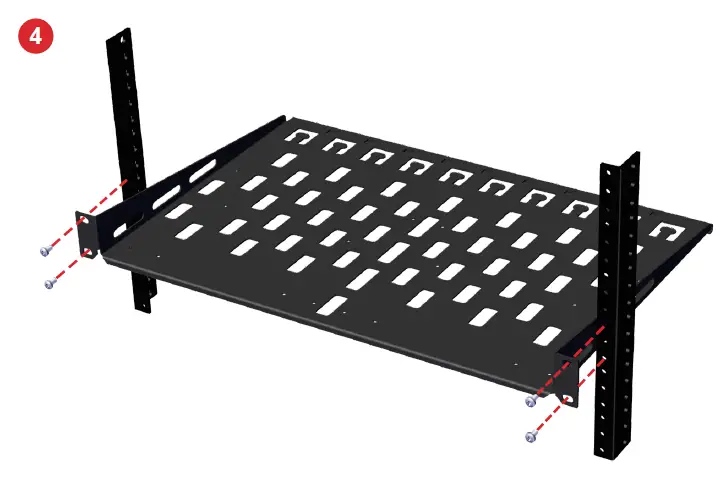
- Install the rack shelf using the provided hardware that matches the rail threads and makes connections to the devices per their installation guide.
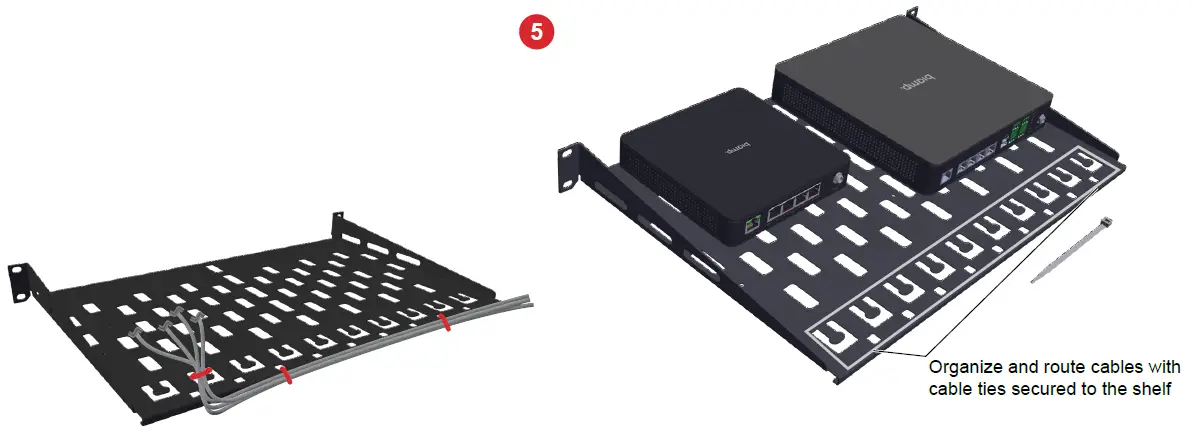
- Use the cable ties to manage the cables coming from the devices. Cables can also be routed along the back of the shelf by using the holes along the edge of the shelf.
For any support or warranty-related queries, please contact [email protected] or visit biamp.com for more information on safety and compliance.
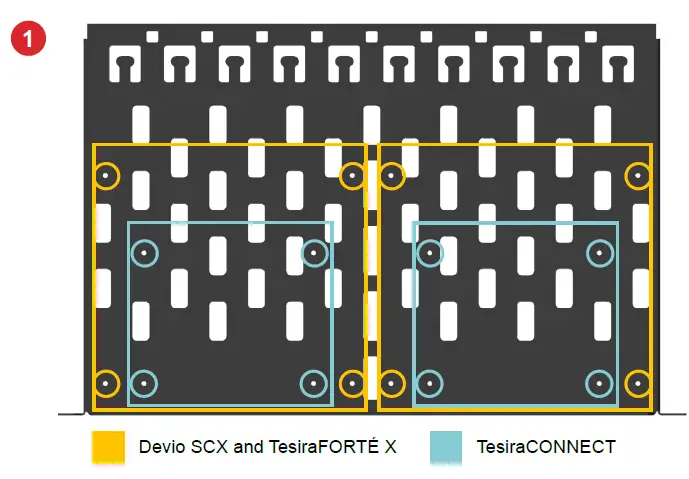
Representative configurations

PRODUCT DESCRIPTION
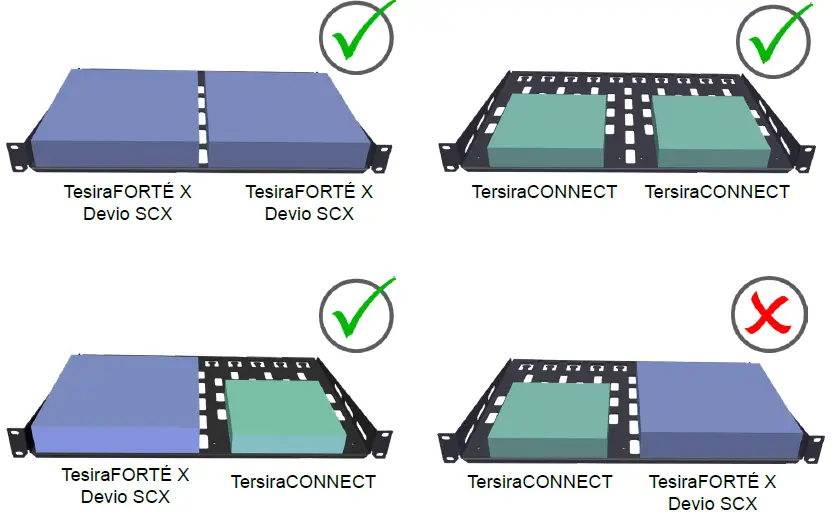
The RMX 100 is specially tailored to mount two TesiraFORTÉ X, Devio SCX and/or Tesira CONNECT devices side by side in a typical rack (1RU).
CONTENTS
Hardware, etc
| Qty | Size / Type | Use |
| 8 | M3 x 10 | Phillips Screw – Device attachment |
| 8 | M3 | Flat Washer – Device attachment |
| 8 | M3 | Lock Washer – Device attachment |
| 4 | #10-32 x .75″ | Rack Screw – Rack attachment |
| 4 | #12-24 x .75″ | Rack Screw – Rack attachment |
| 4 | M6 x .75″ | Rack Screw – Rack attachment |
| 25 | Cable ties | Cable organization |
INSTALLATION
Configurations
- One or two devices can be mounted to the rack shelf. See at right for applicable configurations. Mount the devices to the shelf before installing it in the rack.
- Do NOT place a TesiraCONNECT to the left of either a TesiraFORTÉ X or Devio SCX.
- Ambient Operating Temperature: 32-104° F (0–40° C)

Before assembly
If the device comes attached to a wall mount bracket, remove the bracket before attaching it to the shelf.
- Review the attachment holes for each type of device.

- Place the devices upside down on a protected surface and remove the rubber feet on the bottom of each device.

- Place the shelf on top, align the appropriate hole pattern and screw the rack shelf to the device using lock washers and flat washers with the M3 screws.

- Install the rack shelf using the hardware that matches the rail threads (hardware provided), and make connections to the devices per their installation guide.

- Use the cable ties to manage the cables coming from the devices. Cables can also be routed along the back of the shelf by using the holes along the edge of the shelf (see example below).

Warranty
biamp.com/legal/warranty-information.
Safety & Compliance
CONTACT US
Email: [email protected].
Web: support.biamp.com.
A: 9300 S.W. Gemini Drive Beaverton, OR 97008 USA
W: www.biamp.com.


