![]() SKU: DRPTACWS
SKU: DRPTACWS
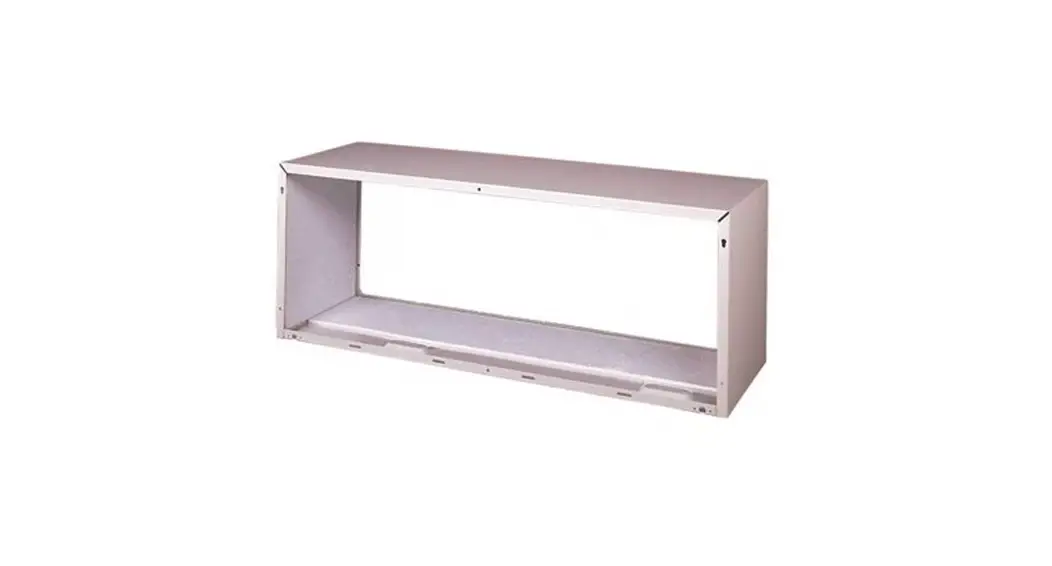
Foldable PTAC Wall Sleeve
WALL SLEEVE ASSEMBLY INSTRUCTIONS
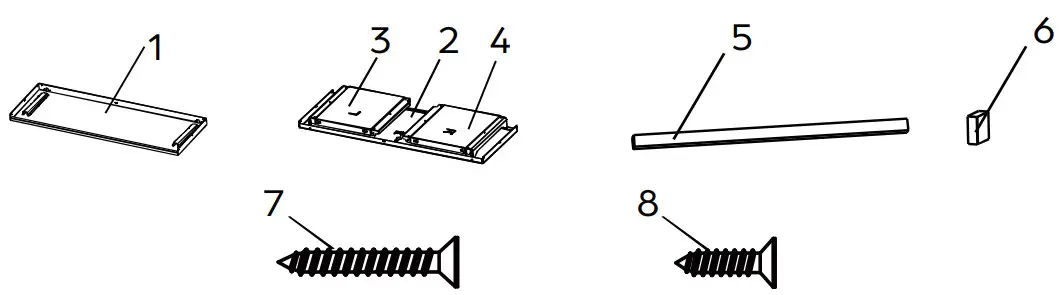
SLEEVE HARDWARE
| ITEM | DESCRIPTION | QTY | DIMENSIONS |
| 1 | BOTTOM COVER | 1 | 41 7 ⁄8” x 14 3 ⁄4“ |
| 2 | TOP COVER | 1 | 41 7 ⁄8” x 14 3 ⁄4“ |
| 3 | LEFT COVER | 1 | 14 3 ⁄4“ x 15 7 ⁄8” |
| 4 | RIGHT COVER | 1 | 14 3 ⁄4“ x 15 7 ⁄8” |
| 5 | SEAL A | 1 | 26 3 ⁄8” |
| 6 | SEAL B | 2 | 1 5 ⁄8” |
| 7 | LONG SCREW | 4 | #8 x 3 ⁄4“ |
| 8 | SHORT SCREW | 14 | #8 x 3 ⁄8” |
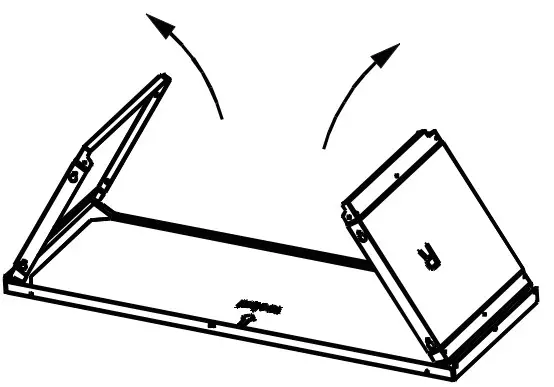
SLEEVE ASSEMBLY
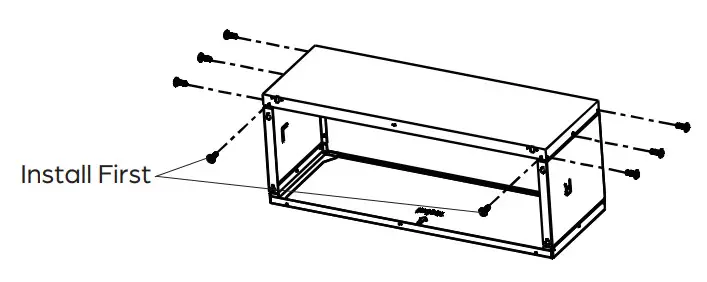
- Open the LEFT COVER and RIGHT COVER as shown below.

- Install 6 short screws as shown below.

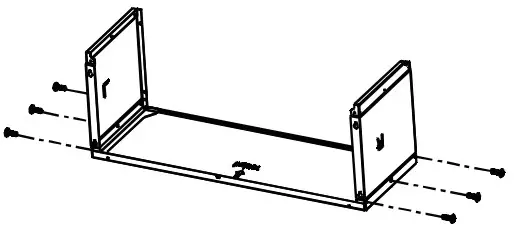
- Attach the BOTTOM COVER to the LEFT COVER and RIGHT COVER using 8 short screws as shown below.

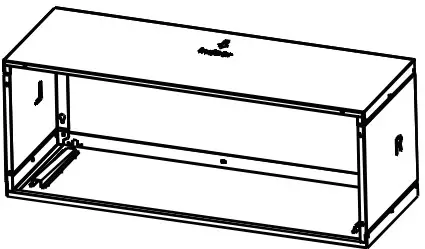
- Turn the SLEEVE as shown below.

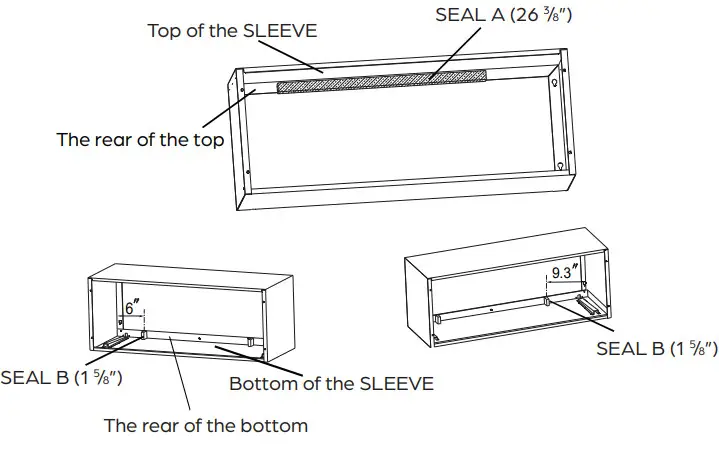
- Attach SEAL A and SEAL B to the SLEEVE in the locations shown below.

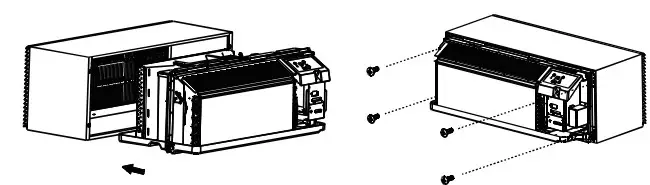
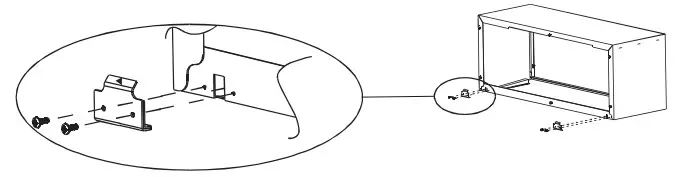
UNIT INSTALLATION
These instructions are for reference only. See the Unit Manual for more detailed instructions.
- Lift unit level and slide unit into wall sleeve until firmly against front of wall sleeve and secure with 4 long screws through the unit flange holes.

DRAIN KIT INSTALLATION INSTRUCTIONS
DRAIN KIT PARTS LIST
| ITEM | DESCRIPTION | QTY |
| 1 | DRAIN OUTLET PLATE | 1 |
| 2 | FOAM GASKET WITH DRAIN OUTLET | 6 |
| 3 | COVER PLATE | 2 |
| 4 | BENT TUBE | 1 |
| 5 | STRAIGHT TUBE | 1 |
| 6 | SCREWS (#8 x ½”) | 6 |

HOW TO INSTALL THE DRAIN KIT
The Drain Kit can be installed for back-side drainage or bottom-side drainage. Follow the instructions for the desired drainage location.
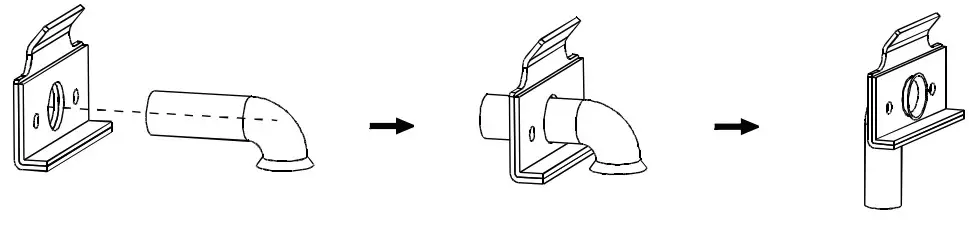
Back-Side Drain Installation
- Attach a foam gasket to the drain outlet plate and cover plate as shown below.

- Insert the bent tube into the drain outlet plate and rotate the tube to the proper position as shown below.

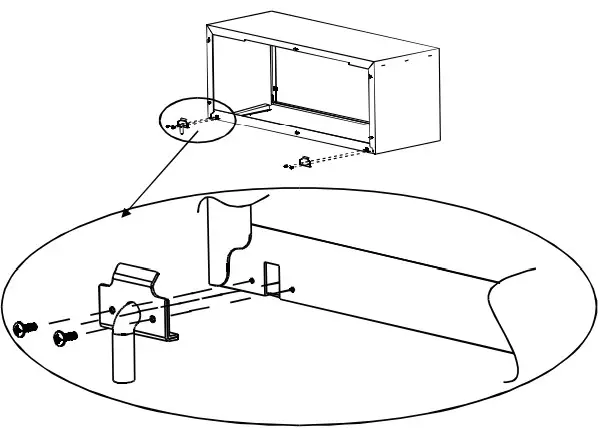
- Install the tube and drain outlet plate to the outlet located at the back of the sleeve with two screws and install the cover plate to the other outlet using two screws as shown below.
NOTE: The drainage tube may be placed on either side of the sleeve. Before tightening the screws, make sure the tube’s position will allow the sleeve to fit through the wall.

Bottom-Side Drain Installation
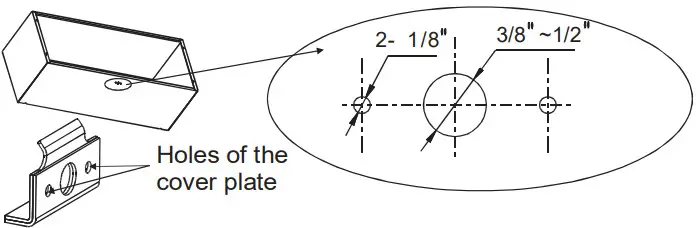
- Attach a foam gasket to the drain outlet plate and cover plates as shown below.

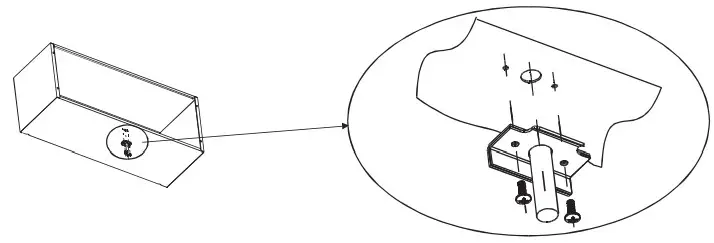
- Insert the straight tube into the drain outlet plate as shown below.

- Drill two 1/8” holes in a suitable position of the bottom of the wall sleeve to line up with the holes of the drain outlet plate. Then drill one 3/8” ~1/2” hole in the middle of the two holes as shown below.

- Attach the tube and drain outlet plate to the bottom of the wall sleeve using two screws. Gently tighten the screws at the same time to avoid damaging the tube.

- Install the two cover plates over the outlets on the back of the sleeve using four screws. Fasten tightly to avoid leaks.


©2022 Durastar
V1.0 0822


