anko ROLLER BLIND
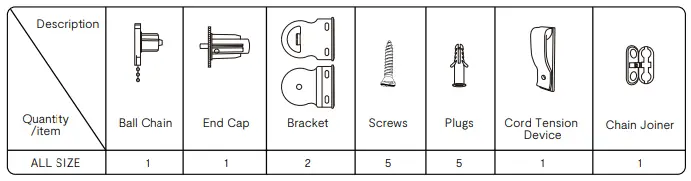
TOOLS REQUIRED
Installation Options
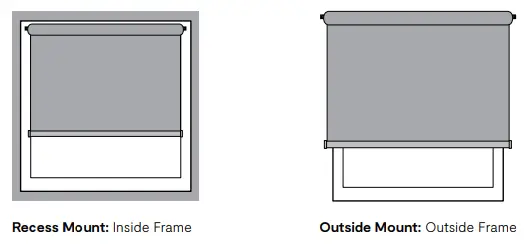
Determine whether you prefer the fabric to roll ‘forwards’ or ’ backward’. Check your window space for winders and sills that may obstruct the operation of the roller blind. This may alter your preference.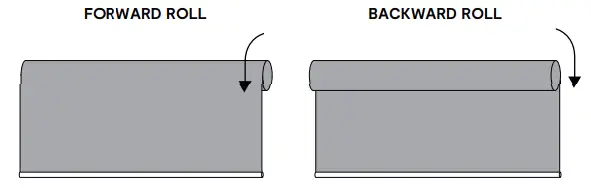
Installation Instructions
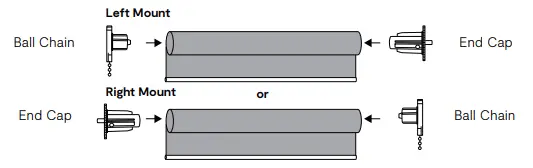
- Insert the ball chain system and end plug into the openings of the roller tube.
Note: The ball chain system and end plug may be inserted on either end of the roller tube depending on the mounting side that best suits your window.
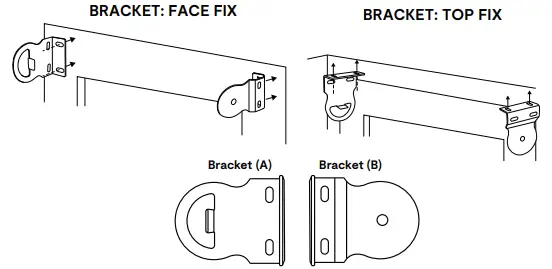
- Note: Brackets are universal and can be top-mounted or face-mounted to the side of your window.

- On the window frame, determine the locations for the brackets and mark with a pencil. IMPORTANT: Ensure bracket markings are level before proceeding.
- Two brackets are provided. Bracket (A) is used for the ball chain system. Bracket (B) is used for the end plug.
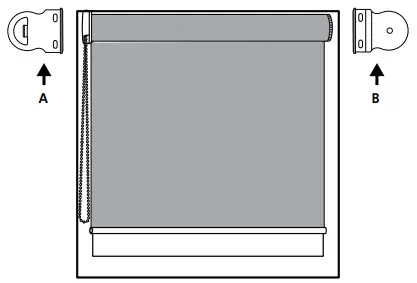
- Mount bracket (A) on one side of the window frame chosen for the ball chain system. Drill pilot holes and then secure with screws (provided).
Note: use the masonry plugs if drilling into brick or concrete walls. - Mount bracket (B) on the opposite side of the window frame using the same process as bracket (A).
- Hanging your blind:
- Attach the end of the ball chain system on to bracket (A)
- Insert the end of the plug side into bracket (B)

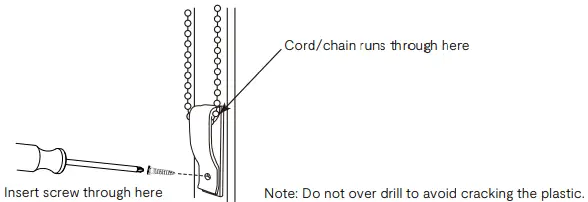
- IMPORTANT: Installation of Child Safety Device
WARNING: A chain/cord tension device is required to be fixed to a wall or window frame to reduce the chance of strangulation of young children.- Position the cord tension device on the solid timber/aluminum window frame or stud behind plasterboard wall, that allows the ball chain to move easily through the tension device. Ensure the ball chain is entirely lowered, stretched and tangle-free and operates smoothly.
- Mark the hole with a pencil. Pre-drill hole with a smaller drill bit, then secure the tension device with the screws provided (as seen in diagram below). Note: use the masonry plugs if drilling into brick or concrete walls.

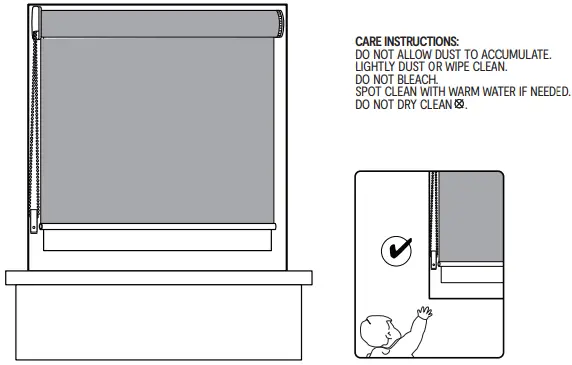
- Blind: Ready for use

WARNING: To avoid creating a possible strangulation hazard for children, the corded internal window covering must be installed in such a way that a loose cord cannot form a loop 220mm or longer, at a height of less than 1600mm above floor level;
SUGGESTIONS FOR INSTALLING CORDED INTERNAL WINDOW COVERINGS:
- A cord guide may be installed lower than 1600mm above floor level if the *cord is sufficiently secured or tensioned to prevent a loop 220mm or longer from being formed; and
- If a cord guide is installed lower than 1600mm above floor level it must be designed to prevent a child from being able to remove the cord; and
- lf a *cleat is used to secure the cord it must be at least 1600mm above floor level because a child is capable of unwinding a cord from a cleat.
cord:
rope, strap, string, chain, line or wire used to manipulate a corded internal window covering.
cleat:
a device having a bar with arms around which a cord can be wound and that can be attached to a wall or other structure.
WARNING:
CURTAIN AND BLIND CORDS HAVE CAUSED THE DEATH OF YOUNG CHILDREN AND MUST BE INSTALLED SO THAT THEY ARE NOT A STRANGULATION HAZARD. FOLLOW THE INSTALLATION INSTRUCTIONS.


