
![]() 2go Electric Blackout Titan Bone White Roller Blind
2go Electric Blackout Titan Bone White Roller Blind
Installation Guide
Electric Roller Blinds
Fitting the brackets
The brackets offer three methods of installation:
Top-Fixing
Where the brackets are screwed into the lintel (or ‘ceiling’ of the recess)
Face-Fixing
Where the brackets are screwed onto a facing surface (a wall or window frame)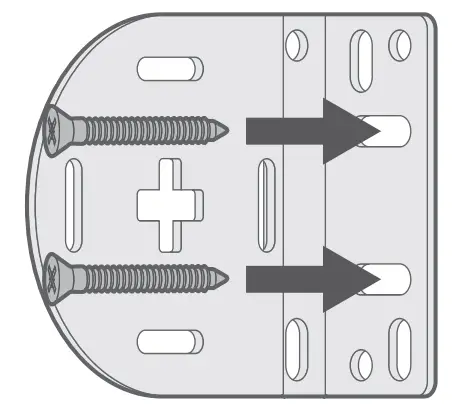 Side-Fixing
Where the brackets are screwed into the side walls of the recess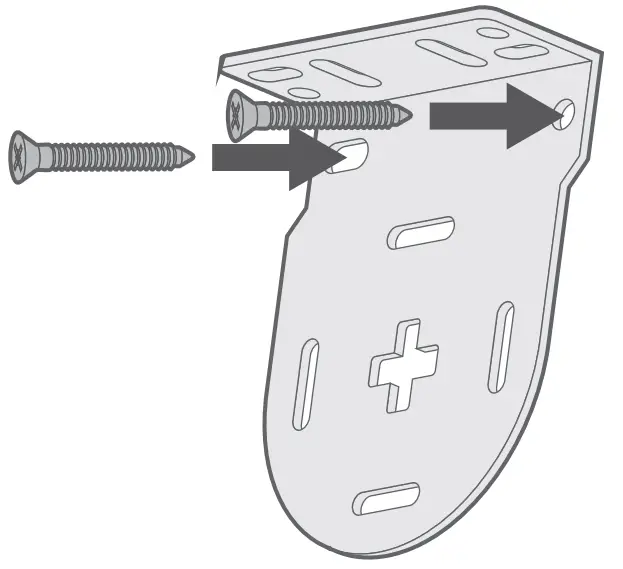
Top Tip

Top-fixing or face-fixing are recommended for most installations, whereas side-fixing is only recommended if the width you gave us was taken right at the top of the recess.
Fitting the blind
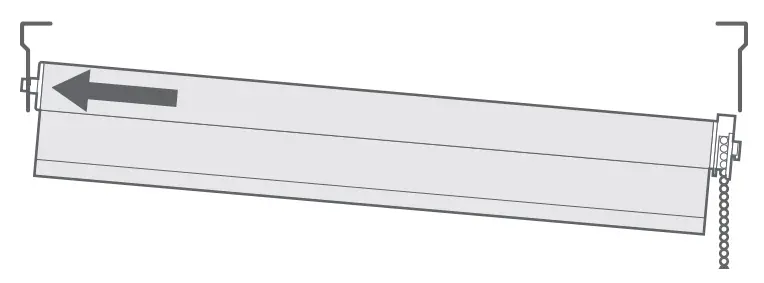
Locate the depression end (the opposite end to the controls) of the blind into the circular hole in the corresponding bracket.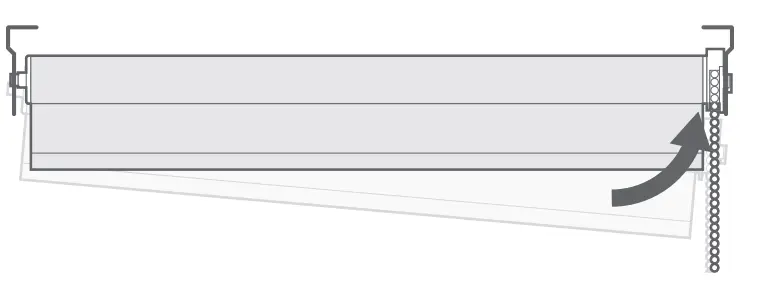
Top-Tip:
Make sure that the receiver cable is hanging down straight from the mechanism, that it is not touching anything metal, and that the motor’s controls and ports are facing down.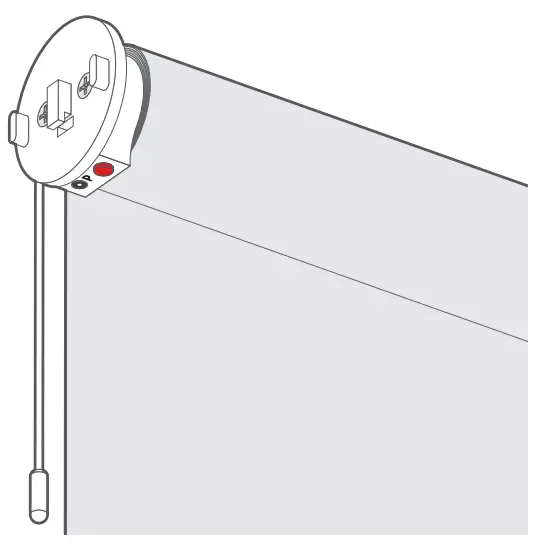
Using the remote control
The remote control will be pre-programmed during manufacture to work with your blind, so there’s no need to perform the initial programming (the programming of automatic stop points is optional). In the case of multiple blinds with multi-channel remotes, each blind will be pre-programmed to a particular channel on the remote, and a label showing the channel number assigned will be attached to the back of the bottom bar on each blind.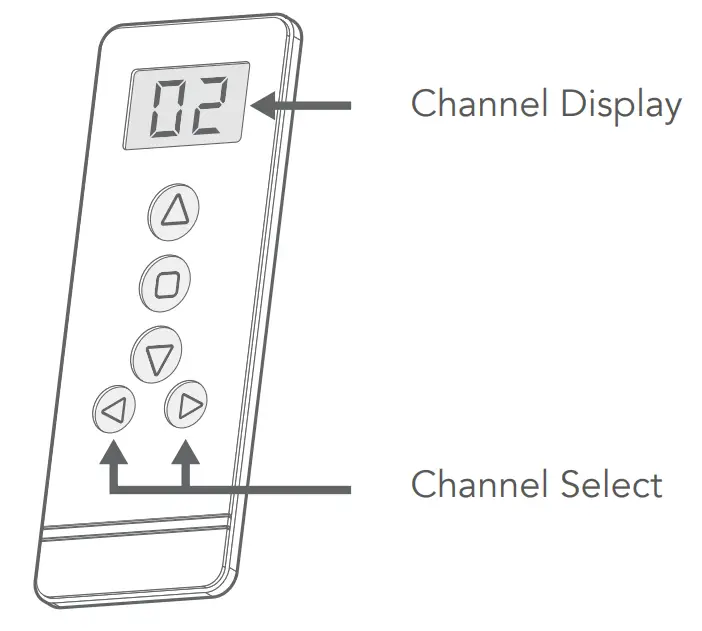 To insert the battery when you first unpack the remote, open the battery compartment (bottom of the remote), insert the lithium-ion battery into the round slot in the battery compartment, then clip the compartment back into the remote.
(Insert the battery so that the textured side is facing down)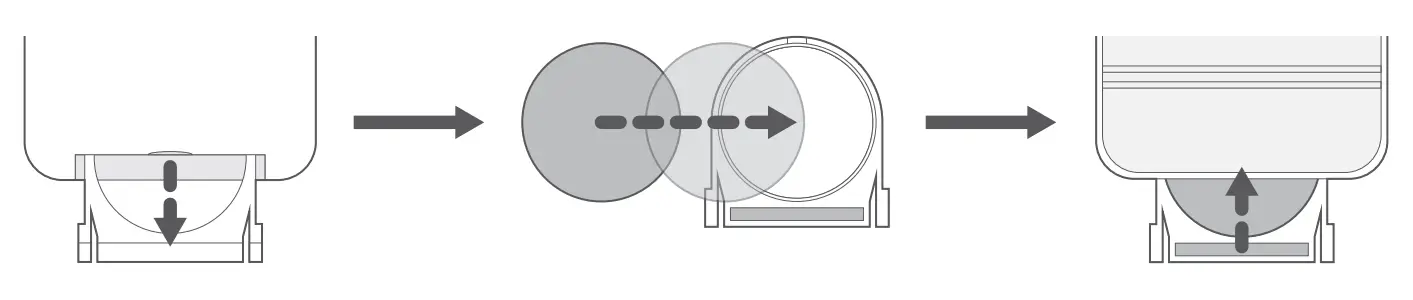
![]() By default, pressing the ‘Up’ button will raise the blind. Press once, and the blind will continually raise until you press the ‘Stop’ button.
By default, pressing the ‘Up’ button will raise the blind. Press once, and the blind will continually raise until you press the ‘Stop’ button.![]() Stops the blind when in motion. If an intermediate stop point has been set, pressing this button while the By default, pressing the ‘Down’ button will lower the blind. Press once, and the blind will continually lower until you press the ‘Stop’ button. blind is not in motion will raise or lower the blind to its intermediate stop point, where it will then stop automatically.
Stops the blind when in motion. If an intermediate stop point has been set, pressing this button while the By default, pressing the ‘Down’ button will lower the blind. Press once, and the blind will continually lower until you press the ‘Stop’ button. blind is not in motion will raise or lower the blind to its intermediate stop point, where it will then stop automatically. By default, pressing the ‘Down’ button will lower the blind. Press once, and the blind will continually lower until you press the ‘Stop’ button.

Top-Tip:
A label is affixed to the back of the bottom bar of each blind to indicate which channel on the remote the blind is programmed to.
Charging the battery
To charge the battery, plug the charger cable into the charging port on the motor.
Charge for around 2½ hours, or until the LED on the charger plug turns green.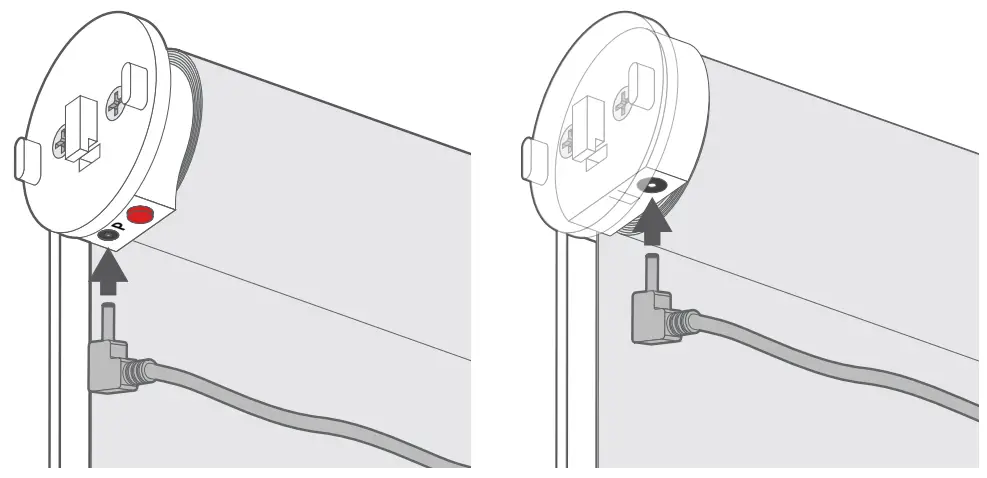 If you do not have a plug socket close enough for the charger cable to reach, then the motor can be easily removed from the roller tube to make charging easier.
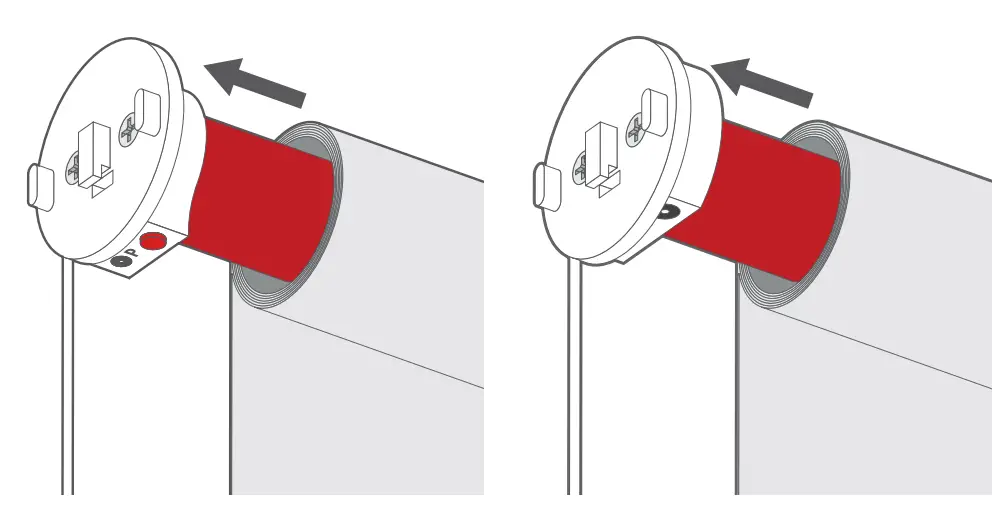
Top-Tip:
Over-charging can be harmful to the battery and degrade battery life, so try to limit the charge time to no more than 2½ hours wherever possible.![]()


