
logitech Tap Scheduler for Meeting Rooms

logitech Tap Scheduler for Meeting Rooms
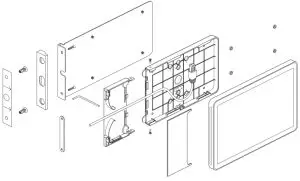
WHAT’S IN THE BOX
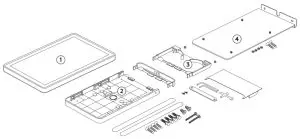
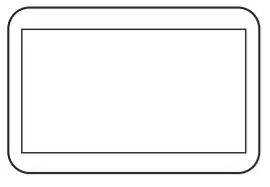
- Touch panel

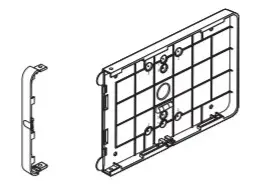
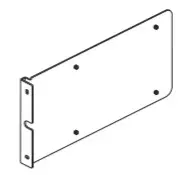
- Multi-surface mount

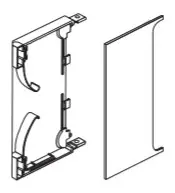
- Bridge and cover

- Mullion mount bracket

- Documentation

BEFORE YOU BEGIN
You will need
- Scheduling Service Credentials
- Ethernet Cable(s)
- PoE enabled network OR
- PoE Injector and network (Ethernet or WiFi)
RECOMMENDED PLACEMENT
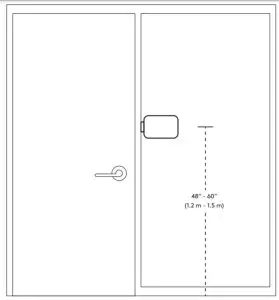
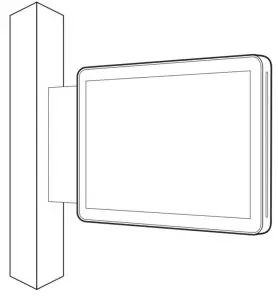
WALL MOUNT
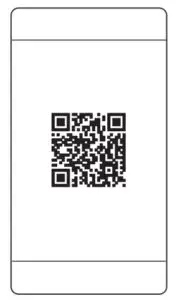
 https://www.logitech.com/tapscheduler/setup-wall

GLASS MOUNT
 https://www.logitech.com/tapscheduler/setup-glass

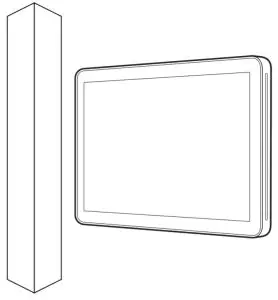
MULLION MOUNT
 https://www.logitech.com/tapscheduler/setup-mullion

JUNCTION BOX MOUNT
- Gang
- Gang
- 60mm
CONNECT TO POE
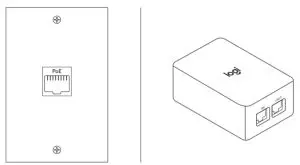
Connect to PoE enabled network or PoE Injector
CONFIGURE DEVICE
Follow on-screen prompts to complete setup
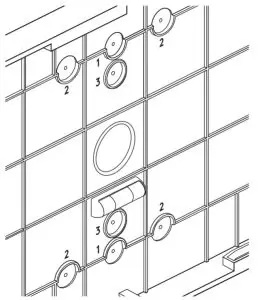
FACTORY RESET
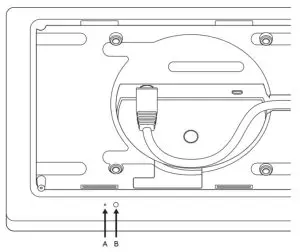
Press and hold (A) Pinhole Button for 5 seconds, press (B) Reset button, release (B) then release (A)
 www.logitech.com/tapscheduler
www.logitech.com/support/tapscheduler
© 2021 Logitech, Logi, and the Logitech Logo are trademarks or registered trademarks of Logitech Europe S.A. and/or its affiliates in the U.S. and other countries. All other trademarks are the property of their respective owners. Logitech assumes no responsibility for any errors that may appear in this manual. Information contained herein is subject to change without notice.
TEL: 620-010678 005
DOWNLOAD RESOURCES
- logitech Tap Scheduler for Meeting Rooms [pdf] User Guide 66142, Tap Scheduler for Meeting Rooms
- Read more: https://#manualsee.com/logitech/tap-scheduler-for-meeting-rooms-manual#ixzz7hwE5h7Pj
FAQ’S
Visit www.logitech.com/support/tapscheduler for more information.
Press and hold the (A) Pinhole Button for 5 seconds, then press the (B) Reset button, release (B) then release (A).
The default password is 1234. If you have changed it, you can access your device by using the new password.
The time zone can be changed in the settings menu of the device.
Logitech Tap Scheduler for Meeting Rooms.
Configure Logitech Tap Scheduler
Switch On the Logitech Tap Scheduler device, and select App space from the Select video service provider screen.
Once selected, Skip the Logitech Sync Portal screen.
At the Confirm Installation screen, click the Right Arrow icon to proceed with the installation.
Room solutions with the Logitech Tap include everything you need to deploy touch-enabled Microsoft Teams, Zoom or Google video conferencing in meeting rooms.
Share Effortlessly. Bring instant content sharing via wireless or HDMI connections to video meetings rooms with Tap.
To install the Logitech Tap against the wall you will need to first screw the panel to the wall in the place you desire. Next attach the Logitech Tap to the second panel and once that is secured attach the panel with the Logitech Tap to the panel screwed to the wall.
Boasting a spacious 10.1” touchscreen, low-profile enclosure, and multiple mounting accessories, Logitech Tap delivers a sleek appearance and convenient placement options that support a wide range of room sizes and layouts.
Open Outlook on your computer. On the Home tab, choose New Items > Meeting. Or, from your Calendar, just select New Meeting. In the To field, type the name of the conference room or equipment you want to reserve, in addition to any attendees you’d like to invite.
Switch off the device.
Press and hold the reset button.
Switch on the device while holding the reset button for 15 seconds.
VIDEO
www://logitech.com/


