
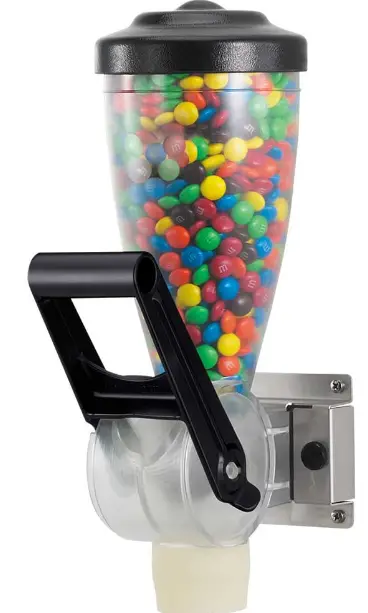
SERVER DPD 86670 Dry Product Dispenser
PARTS
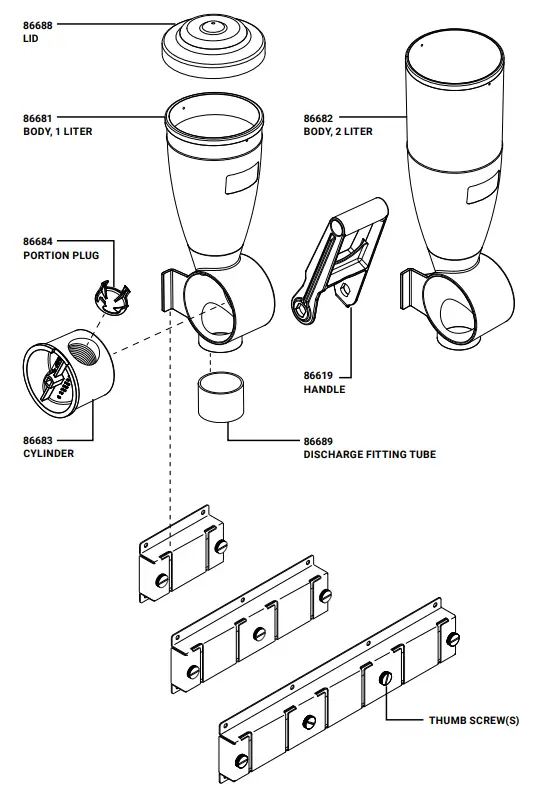
BRACKETS
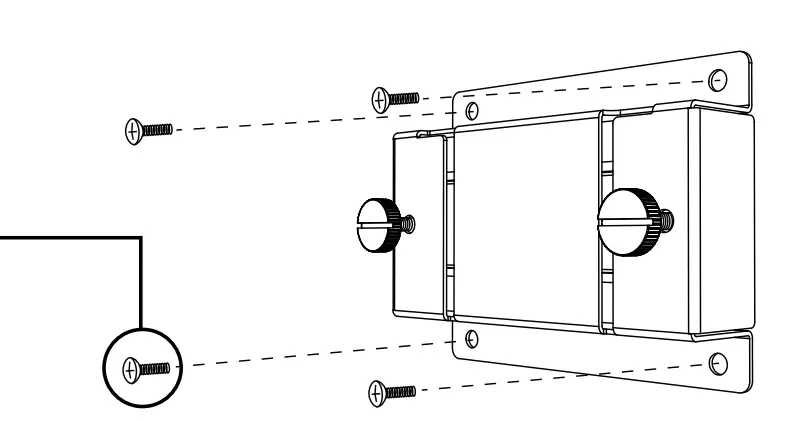
INSTALL WALL BRACKET
- Select wall location or sturdy vertical surface for mounting.
- Consider best location for ease of access to unit and clearance of all movable parts.
- Determine proper mounting hardware you will need to supply.
- Secure bracket to wall stud(s), anchor bolts in wall, or sturdy vertical surface
SINGLE BRACKET
You need to supply 4 fasteners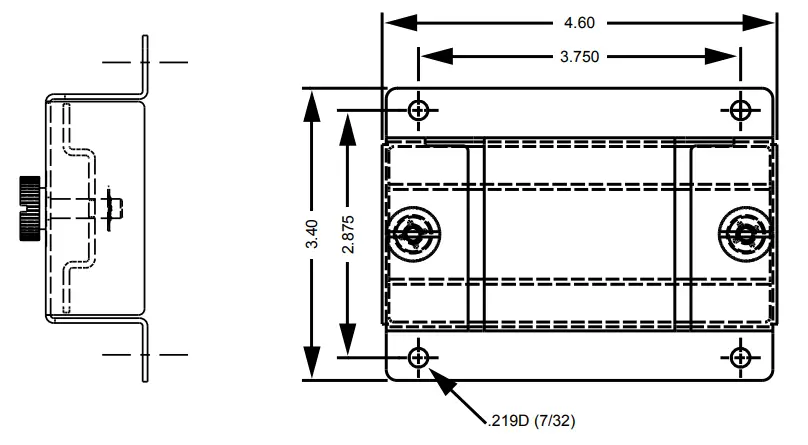
DOUBLE BRACKET
You need to supply 6 fasteners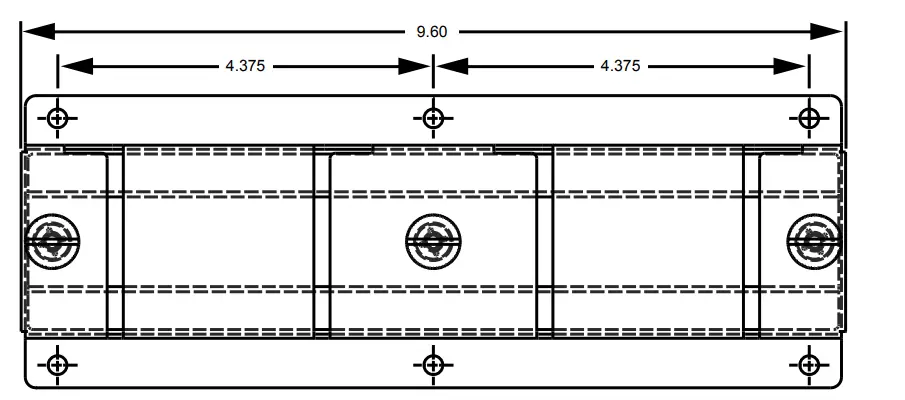
TRIPLE BRACKET
You need to supply 8 fasteners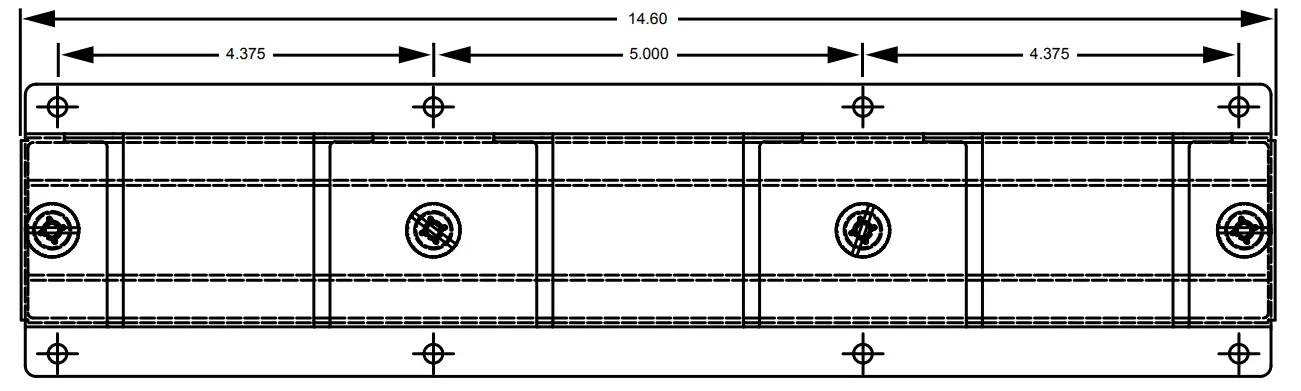
SAFETY
According to food and safety regulations, most foods must be stored and/or served at certain temperatures or they could become hazardous. Check with local food and safety regulators for specific guidelines. Be aware of the product you are serving and the temperature the product is required to maintain. Server Products, Inc. cannot be responsible for the serving of potentially hazardous product. IMPORTANT Clean, rinse, sanitize, and dry parts daily or regularly to comply with local sanitization requirements. CAUTION Keep fingers clear of all moving parts to prevent operator injury when dispensing product, during cleaning, assembly and disassembly.
CLEANING
- CLEAN
- After disassembling clean all washable parts with soap and hot water
- RINSE
- fully with clear water
- SANITIZE
- all parts according to local sanitization requirements. All parts in contact with food must be sanitized
- AIR DRY
- all parts fully
LID: HAND WASH ONLY
- The rest of the dispenser components are dishwasher safe.
- External surfaces may be wiped clean with a clean damp cloth.
- Glass and surface cleaners approved for use in food contact areas may be used.
- Do not use abrasive, caustic or ammonia based cleansers.
- Do not use metal scrapers or cleaning pads that could scratch surfaces.
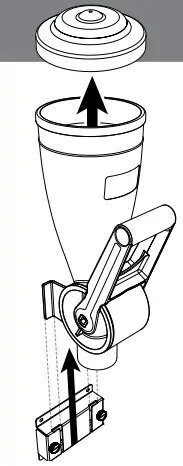
DISASSEMBLY
- LOOSEN BRACKET THUMB SCREWS & REMOVE UNIT FROM BRACKET
- REMOVE LID
- EMPTY INGREDIENTS FROM UNIT

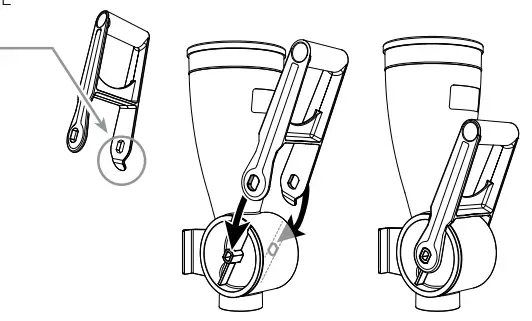
- REMOVE HANDLE
- Use the pull-tab on right side to assist.
- REMOVE DISCHARGE FITTING TUBE
- from bottom opening of dispenser.

- from bottom opening of dispenser.
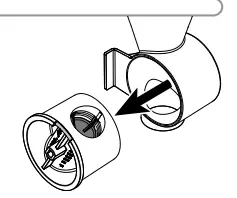
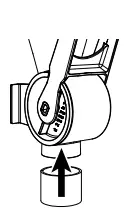
- REMOVE CYLINDER
- from side of unit body

- from side of unit body
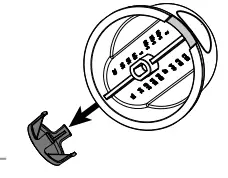
- REMOVE PORTION PLUG
- from cylinder.Push portion plug out the end of cylinder marked “ML” and “OZ”. If your fingers cannot reach through the end of the cylinder, use a blunt, food-safe kitchen utensil to expel plug.

- from cylinder.Push portion plug out the end of cylinder marked “ML” and “OZ”. If your fingers cannot reach through the end of the cylinder, use a blunt, food-safe kitchen utensil to expel plug.
QUICK START
- SET PORTION CONTROL
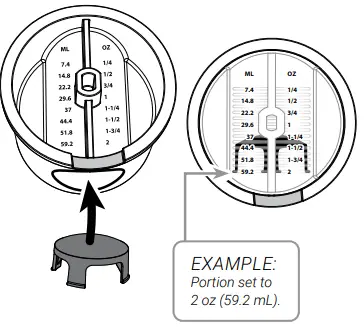
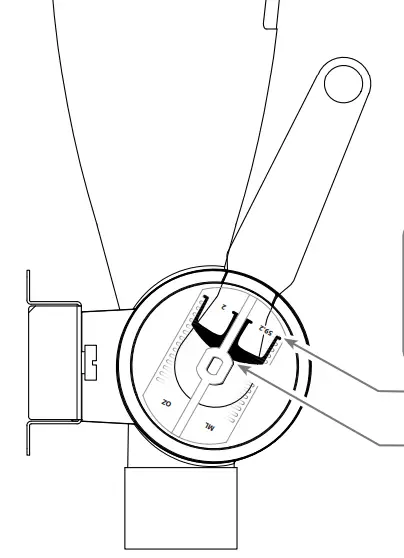
- Hold cylinder with “ML” and “OZ” markings right-side up. Insert portion plug, round-side up, into bottom opening of cylinder. Push plug up to snap into ribs on interior of cylinder. Ribs indicate portion sizes, marked in 1/8 oz (3.7 mL) increments. Align bottom tabs on plug with rib indicating desired portion size

- Hold cylinder with “ML” and “OZ” markings right-side up. Insert portion plug, round-side up, into bottom opening of cylinder. Push plug up to snap into ribs on interior of cylinder. Ribs indicate portion sizes, marked in 1/8 oz (3.7 mL) increments. Align bottom tabs on plug with rib indicating desired portion size
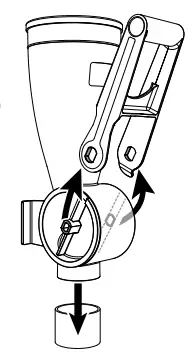
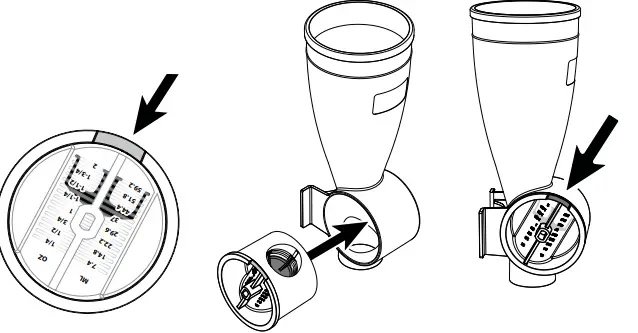
- INSERT CYLINDER INTO BODY
- Rotate cylinder so that portion markings are upside down. Turn notch on left side of cylinder rim towards one o’clock position

- Rotate cylinder so that portion markings are upside down. Turn notch on left side of cylinder rim towards one o’clock position
- INSTALL HANDLE
- onto cylinder. Handle pull-tab must be on right side. Handle must be in upward position. Slide handle over both sides of body and cylinder. Snap handle holes over tabs on each side of cylinder.

- onto cylinder. Handle pull-tab must be on right side. Handle must be in upward position. Slide handle over both sides of body and cylinder. Snap handle holes over tabs on each side of cylinder.
- ADD DISCHARGE FITTING TUBE
- to bottom opening of dispenser

- to bottom opening of dispenser
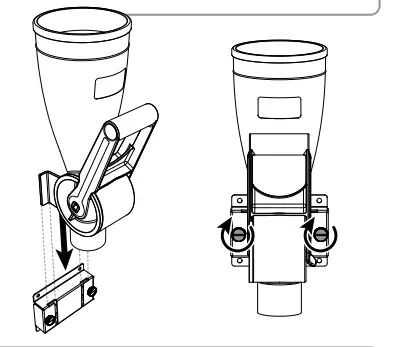
- INSTALL UNIT INTO BRACKET
- See page 3 for bracket installation.
- Slide unit flanges into top of wall bracket slots.
- Tighten thumb screws on both sides of unit to secure.

- ADD DRY INGREDIENTS
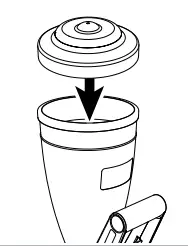
- PLACE LID ON TOP

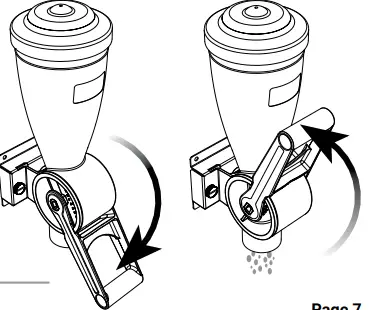
- SWING HANDLE DOWNWARD to load the portion.

- SWING HANDLE UPWARD to dispense the portion.
TROUBLESHOOTING
UNIT DISPENSES LITTLE OR NO PRODUCT
Make sure there is enough product remaining to dispense and that the product is free to move to the bottom. Make sure you are dispensing the right kind of product. The dry food dispenser is designed for freeflowing foods like candies, toppings and mix-ins. Dissimilar products and those that tend to melt or stick together are not recommended
FREE FLOW ACCESSORY (1L 86663, 2L 86625) is helpful if bridging of very fine powders occurs.
STIR PADDLE ACCESSORY (1L 86587, 2L 86596) addresses irregular pieces such as cookie crumbles. Contact our customer service team for assistance: 800.558.8722 or [email protected]
Make sure the portion plug is properly installed. Bottom tabs of portion plug line up with rib indicating portion size. Round side of portion plug faces away from handle.
DIFFICULT TO REMOVE PORTION PLUG FROM CYLINDER?
Use a blunt, food-safe kitchen utensil to push plug out.
SERVER PRODUCTS LIMITED WARRANTY
2 YEAR WARRANTY
This Server product is backed by a two-year limited warranty against defects in materials and workmanship. See Server-Products.com for details.
GENERAL SERVICE, REPAIR OR RETURNS
- Before sending any item to Server Products for service, repair, or return, contact Server Products customer service to request a Return Authorization
- Number. Merchandise must be sent to Server Products with this number. Service is extremely prompt. Typically, units are repaired and ship out within 48 hours of receipt.
- Merchandise being returned for credit must be in new and unused condition and not more than 90 days old and will be subject to a 20% restocking charge.
NEED HELP?
- Server Products Inc. 3601 Pleasant Hill Road Richfield, WI 53076 USA Chat With Us at [email protected]
- Please be prepared with your Model, P/N and Series located on the lid or base of the unit.