SHARP NEC MultiSync WD551 LCD 55 Inch Windows Collaboration Display User Guide


1. Preparation of LAN connection
Step 1: Connect LAN cable
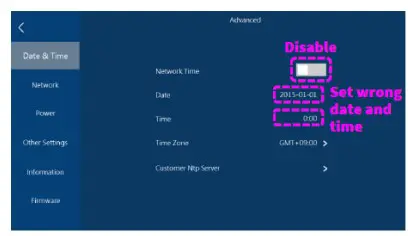
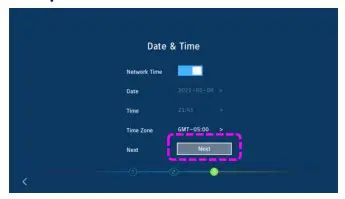
Step 2: Confirm LAN connection on “Advanced” – “Date & Time” of OSD
Step 2.1:
- Switch “Network Time” to disable
- Set wrong date and time to “Date” and “Time

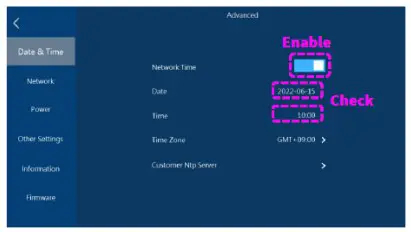
Step 2.2:
- Switch “Network Time” to enable
- Check if “Date” and “Time” is showing correct date and time

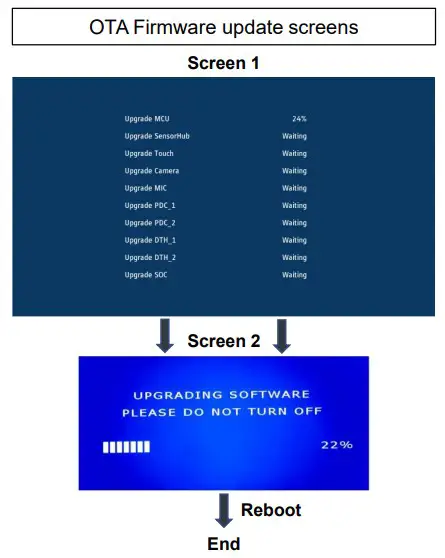
2. Update firmware
Wait until the “Update” button on “Advanced” – “Firmware” – “Firmware Update” of OSD is activated and then touch
“Update” to start the firmware process.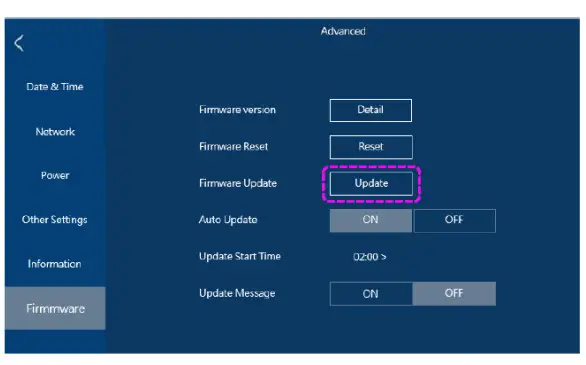
OTA Firmware update screens
3. Configure initial Setup
After the update, the “initial setup” screen is displayed
Step 1: Touch “Start”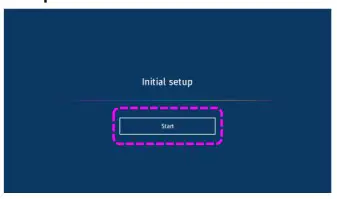
Step 3: Select “WCD Mode”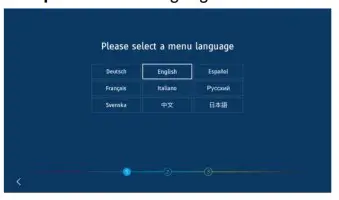
Step 2: Select a language
Step 4: Touch “Next”
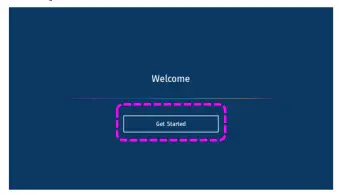
Step 5: Touch “Get started”
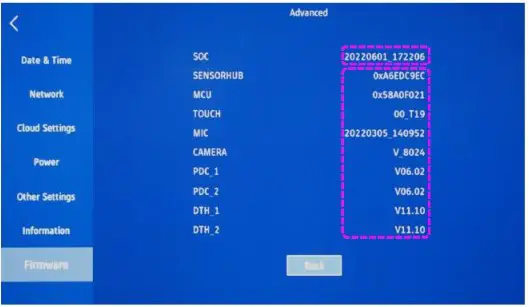
NOTE: Due to limitation of the current firmware “20220601_172206” all user settings are cleared. It is therefore required to go through the initial setup again.
2. Confirm the version of firmware
Touch “Detail” on “Advanced” – “Firmware” – “Firmware version” of OSD. Confirm the updated firmware version.
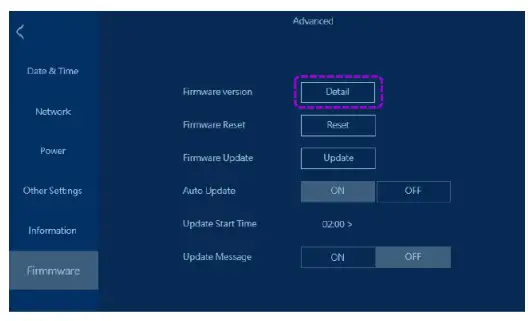
Actual screen of “Firmware version” after update