JULA 422222 Outdoor Fitting
 Jula reserves the right to make changes.
For latest version of operating instructions, see www.jula.com
SAFETY INSTRUCTIONS
Read these instructions carefully before use!
- Be careful when screwing the bulb into the lamp base. The bulb will break if handled carelessly.
- If you are not sure about the installation or encounter problems, call an authorized electrician.
- Check that the power supply is disconnected before you start the installation.
- NOTE: Do not use the fitting if the power cord and/or plug are damaged in any way. For safety reasons, the power cord must only be replaced or repaired by an authorized service center. Consult your dealer.
INSTALLATION
- Remove the backpiece from the fitting.
- Use the backpiece as a template in order to mark the drill holes on the wall where the fitting is to be mounted. Drill the holes and insert the wall plugs supplied.
- Take the lamp glass sections out of the protective packaging.
- Put the glass sections in position (figure 1). Be very careful not to pull the glass sections too hard as they will break.
- Remove the casing beneath the lamp to access the terminal block (figure 2). Push the power cord from the mains power supply through the watertight bushing underneath the backpiece.
- Screw the bulb in the lamp base.
- Fit the lamp housing on the backpiece using the screw supplied. Take care to align the lamp housing correctly before tightening the screw.
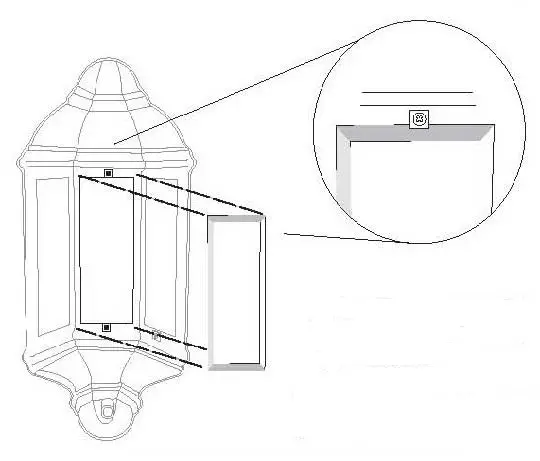
Figure 1
Routing The Wires
Colour of fitting’s mains wire
- Blue wire, connects to:
- Green/yellow wire, connects to:
- Brown wire, connects to:
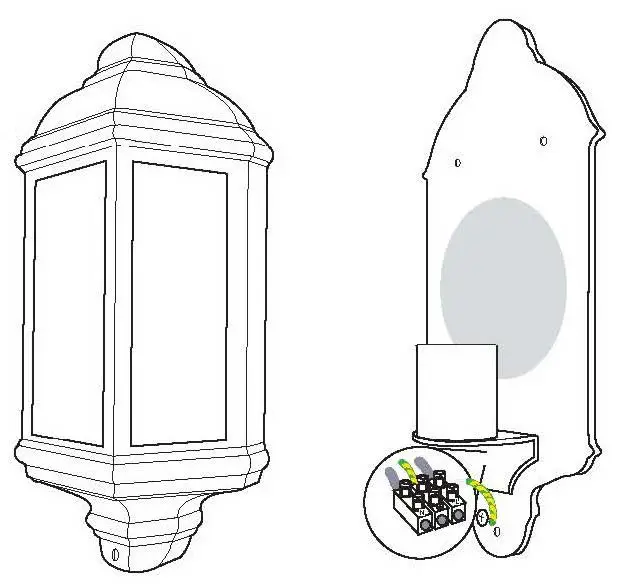
Figure 2
Colour of household’s mains wire
- Blue or black wire (neutral)
- Green/yellow wire (earth)
- Red or brown wire (live)
MAINTENANCE
Replacing the bulb
- Always disconnect from the mains power supply and leave the bulb to cool for 10 minutes before replacing the bulb.
- Replacement bulb:
Output: see base.
Type: see base.
Cleaning
Use a soft, dry cloth to clean the outside of the fitting.


