![]() E-350 Upper Cabinet
E-350 Upper Cabinet
Instruction Manual
E-350 Upper Cabinet
Thank you
for your trust and the purchase of our product. This user manual is supplied to help you use this product. The instructions should allow you to learn about your new product as quickly as possible.
Publication date: 2022-06-08
This document and its content, including written material and images, are the property of Elon Group AB. You may not copy, reproduce, modify, republish or distribute this document or any of its content without express written permission from Elon Group AB.
WARRANTY
Guarantee of quality for the consumer (does not include worn parts).
CABINET INSTALLATION INSTRUCTIONS
1.1 PRODUCT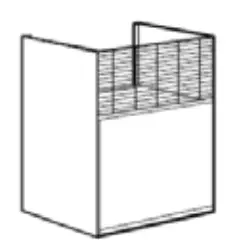 Height: 450–750 mm
Depth: 570 mm
Parts supplied
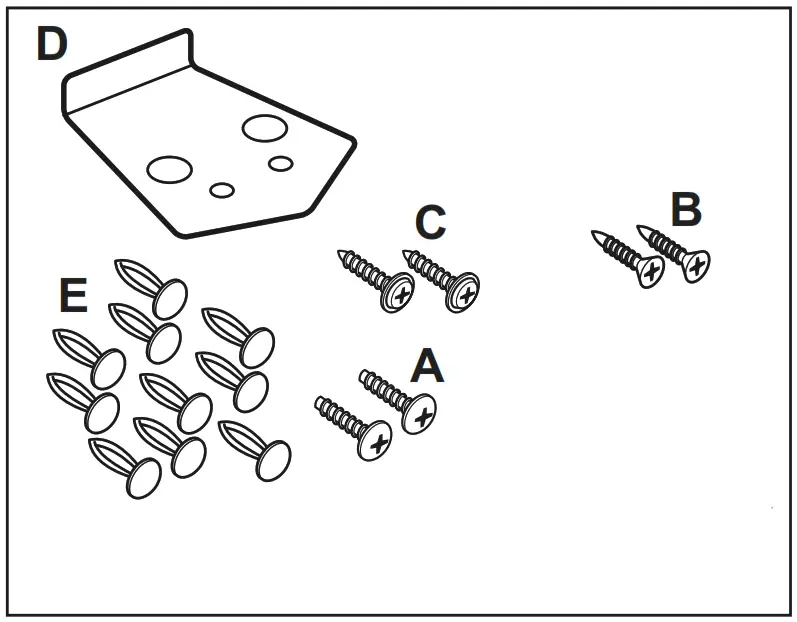 A. Screws for the handle, 4 x 15 mm (2x)
B. Guide screws, 4.2 x 13 mm (2x)
C. Locking screws, 4.2 x 14 mm (2x)
D. Handle (1x)
E. Plastic plugs (10x)
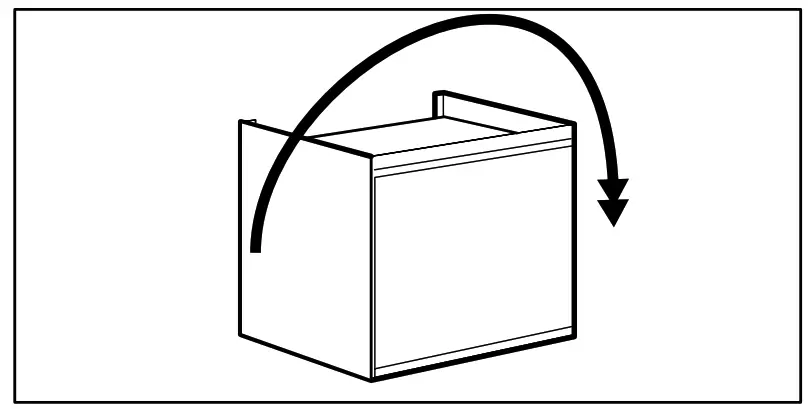
Choose which way you want the door to open by rotating the cabinet 180°.
1.2 INSTALLATION
- Mark the positions for the holes.
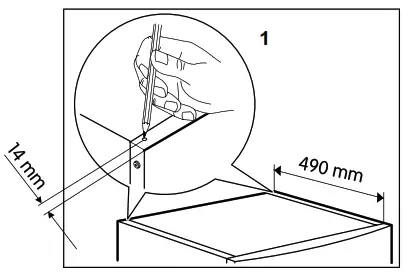
- Drill 3.5 mm holes in the rear corners of the cabinet at the marked points.
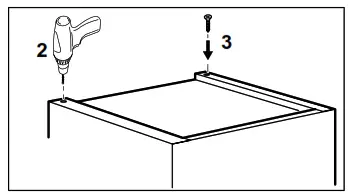
- Screw in the two guide screws (B). Do not screw them in fully.
Turn the cabinet over and place it on the appliance so that the door will open in the desired direction.
Slide the two guide screws into the slots on the underside of the cabinet.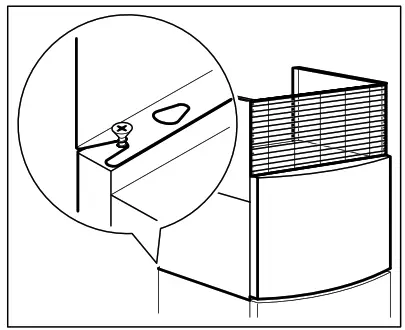 To secure the cabinet, tighten the two locking screws (C).
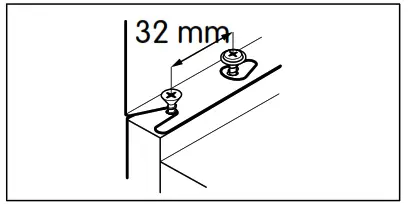
1.3 FITTING THE HANDLE
Place the handle on the underside of the door and fix it in place using the stubby screws (A).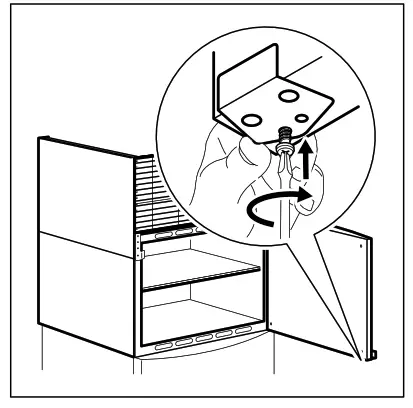 1.4 FITTING THE SHELF
Place the shelf on the four supports inside the cabinet.
Make sure the shelf is correctly positioned and secure.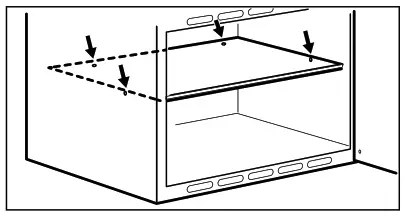
1.5 FITTING THE SLIDING WALLS
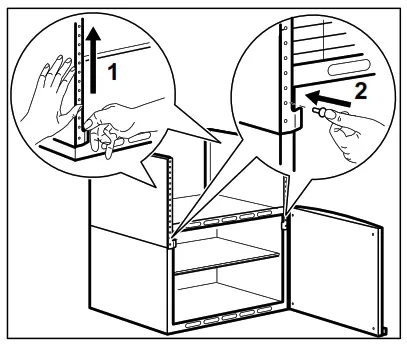
- Raise the sliding walls to the desired height.
- Fold in the lower tabs on each side and insert the plastic plugs (E).
1.6 FITTING THE SLIDING FRONT
Place the sliding front with the bent edge upwards, towards the rear of the cabinet. Adjust the height by bending the front 90° backward.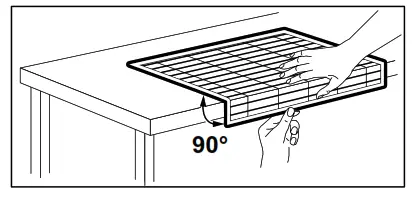
Slide the bent edge backward, underneath the top edges of the sliding walls.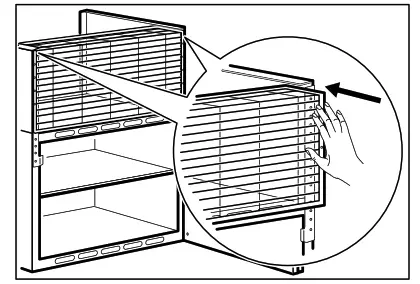 Secure the sliding front by pressing the plastic plugs into the holes in the front.
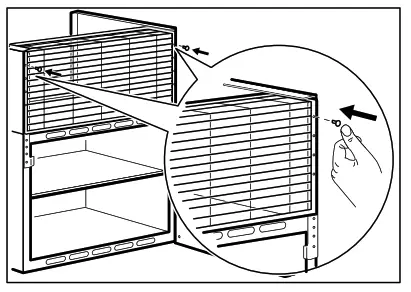
1.7 CLEANING AND CARE
![]() Clean the product with a soft, damp cloth. Only use a neutral detergent. Do not use scouring pads, metal objects, or products that contain abrasives or solvents.
Clean the product with a soft, damp cloth. Only use a neutral detergent. Do not use scouring pads, metal objects, or products that contain abrasives or solvents.
PROTECTING THE ENVIRONMENT
Recycle products that are marked with the ![]() symbol.
symbol.
Recycle packaging by placing it in the appropriate bin.
Help to protect our health and the environment by recycling waste from electrical and electronic products.
Do not dispose of products that are marked with the![]() symbol together with household waste. Take the product to the nearest recycling station or contact your municipal authority for advice.
symbol together with household waste. Take the product to the nearest recycling station or contact your municipal authority for advice.
ELON GROUP
Elvita products are distributed and marketed by Elon Group AB.
Elon Group AB Bäcklundavägen 1 | 702 03 Örebro Sweden
ELON GROUP | +46(0)10-220 40 00 | ELONGROUP.SE
Support and service: ELVITA.SE
© 2022, Elon Group AB. All rights reserved.


