
![]()
MACHINE CONTROL RECEIVER
MR360M
MACHINE CONTROL RECEIVER
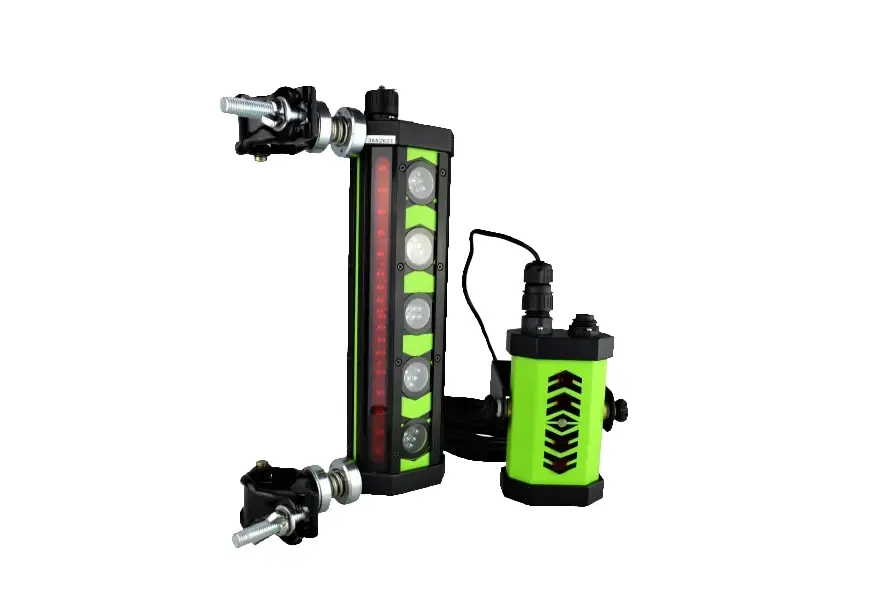
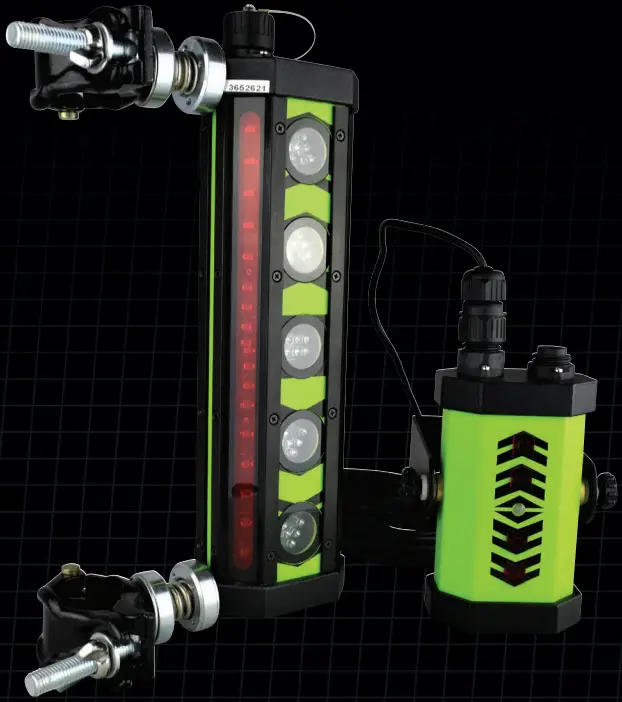
MAGNET OR CLAMP MOUNT
INSTRUCTION MANUAL.
PRODUCT OVERVIEW
MR360 Machine control receiver is an indispensable accessory of rotating laser instrument. The two must be used together. This receiver detects the position of the laser signals transmitted by the rotating laser instrument. It provides quickly and precisely the horizontal and vertical references. This product is characterized by large-scale detecting window, 360° available laser beam receiving, High-bright LED display, low power consumption, good reliability and easy manipulation. It can be used with many different types of rotating laser instrument.
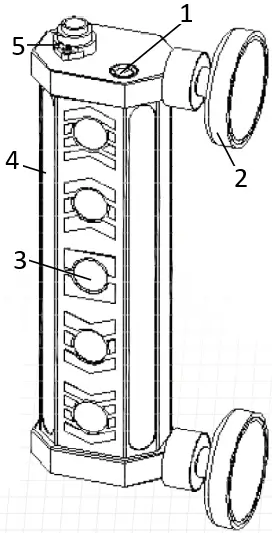
- ON/OFF
- Magnet base
- Indication window
- Receiving window
- Outer connecting socket
Charging indication LED Lighted: shows the instrument is charging
Extinguished: shows the instrument is not charging
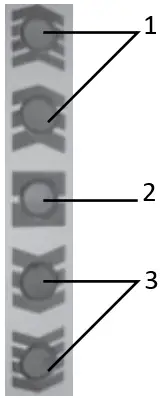
- Upper laser indication LED (red) lighted means the laser line is above the zero-line.
- Laser zero indication LED (green) lighted means the laser line is level with the zero-line.
- Lower laser indication LED (red) lighted means the laser line is below the zero-line.
![]() Power/ fine and coarse measuring switch button: turn power on/off & fine and coarse measuring switch.
Power/ fine and coarse measuring switch button: turn power on/off & fine and coarse measuring switch.
DETECTING METHOD
This product can be used to detect any types of rotating laser instrument.
Short press ![]() button, each LED will blink in turn, which indicates the instrument can start detecting.
button, each LED will blink in turn, which indicates the instrument can start detecting.
The detector is in coarse-detecting mode at the beginning of powering on.
Short press ![]() button once will enter into fine and coarse measuring switch.
button once will enter into fine and coarse measuring switch.
Long press ![]() button, the LEDs will blink in turn from the center to both sides. The instrument will be off.
button, the LEDs will blink in turn from the center to both sides. The instrument will be off.
Note: pressing the button more than 1 second is long press, less than 1 second, is short press.
While the fine and coarse measuring switch, the LEDS shows as follows:
Short press ![]() button
button 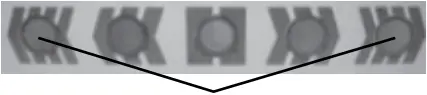
Two LEDs outside will blink three times simultaneously indicates the instrument will be in coarse measuring mode
Short press ![]() button
button
Two LEDs inside will blink three times simultaneously means the instrument will be in fine measuring mode
THE LED’S INDICATION WHEN DETECTING AS FOLLOWS
| LED’s all extinguish | The firs upper red LED blink quickly | The second upper red LED blink quickly | The green LED blink quickly | The first lower red LED blink quickly | The second lower red LED blink quickly | The signal LED blink slowly |
| No laser line can detected | The laser line is higher | The laser line is higher | The laser line coincide with the zero-line | The laser line is lower | The laser line is lower | Memorizes the last receiving position and keep display (after removing the laser line) |
Note: When at low voltage, the instrument will power off automatically. You need to charge the unit in case of this.
APPLICATION METHOD
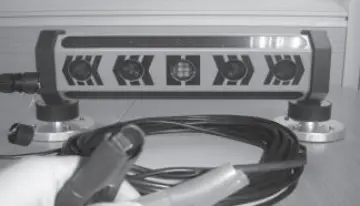
Connect the MR360 to the 12V or 24V car storage battery by the offered cable.
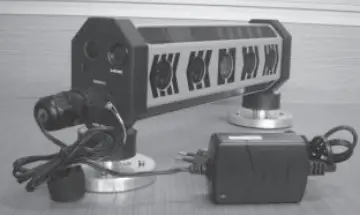
Charge the inside rechargeable battery by the special 240 V charger, the charging time is 6 hours.
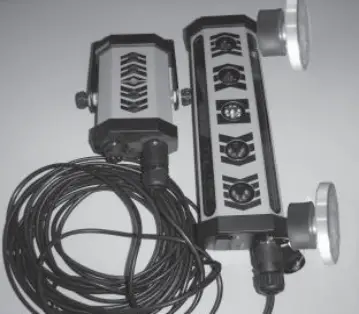
The MR360 is supplied with remote display, which can be connected to the receiver by the special cable. By installing the remote display inside the cabin this will enable you to view the indicating arrows directly rather than always focusing your eyes on the machine’s cutting edge, which makes it possible to locate the receiver higher than the cab to prevent laser beaming blocking and to ensure 360 degree reception.
MAINTENANCE
- Keep the instrument clean, particularly the detecting window. If detecting window is dusty, using a cloth gently clean.
- Avoid knocking, falling on the ground, being wet with water or heated by fire.
SPECIFICATIONS
| SPECIFICATIONS | |
| Receiving distance | 200m |
| Measuring accuracy | fine: ±3mm to ±12mm course: ±5mm to ±25mm |
| Receiving range | (25cm) receiving window |
| Receiving angle | 360°full |
| Built-in power | 7.2V, 3500mAH Ni-MH battery-pack |
| Battery life | > 40 hours (built-in battery-pack) |
| Operating voltage | 12V±10% to 24V±10% |
| Charging time | 6 hours |
| Dimension | 376x80x149mm with magnet 376x120x205mm with clamp holder |
| Weight | 3.1kg |
| Operating temperature | -20°C to +50°C |
PLAN_SET_LEVEL
Other Functions
- Memory function of the last received data and holding display.
- Outlet socket to connect with remote display
- Power off automatically at low voltage
Accessories and requirement
- Magnet bracket or clamp holder (at least 40mm circular pipe)
- Cable for connecting external power to 12V or 24V battery
- Connecting cable for LS707 remote display
- Input voltage of charger AC 90V to 240V
![]()
iM EX Lasers – part of the Position Partners Pty Ltd Group © 2022


