Walkie Talkies Ultra Long Colorful Graffiti Distance Walkie Talkie User Manual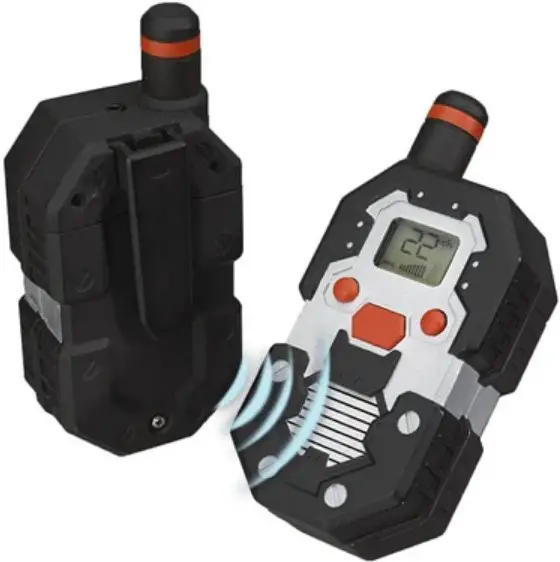
NOTE : Please read these user instructions carefully before using the equipment and retain for future consultazion.
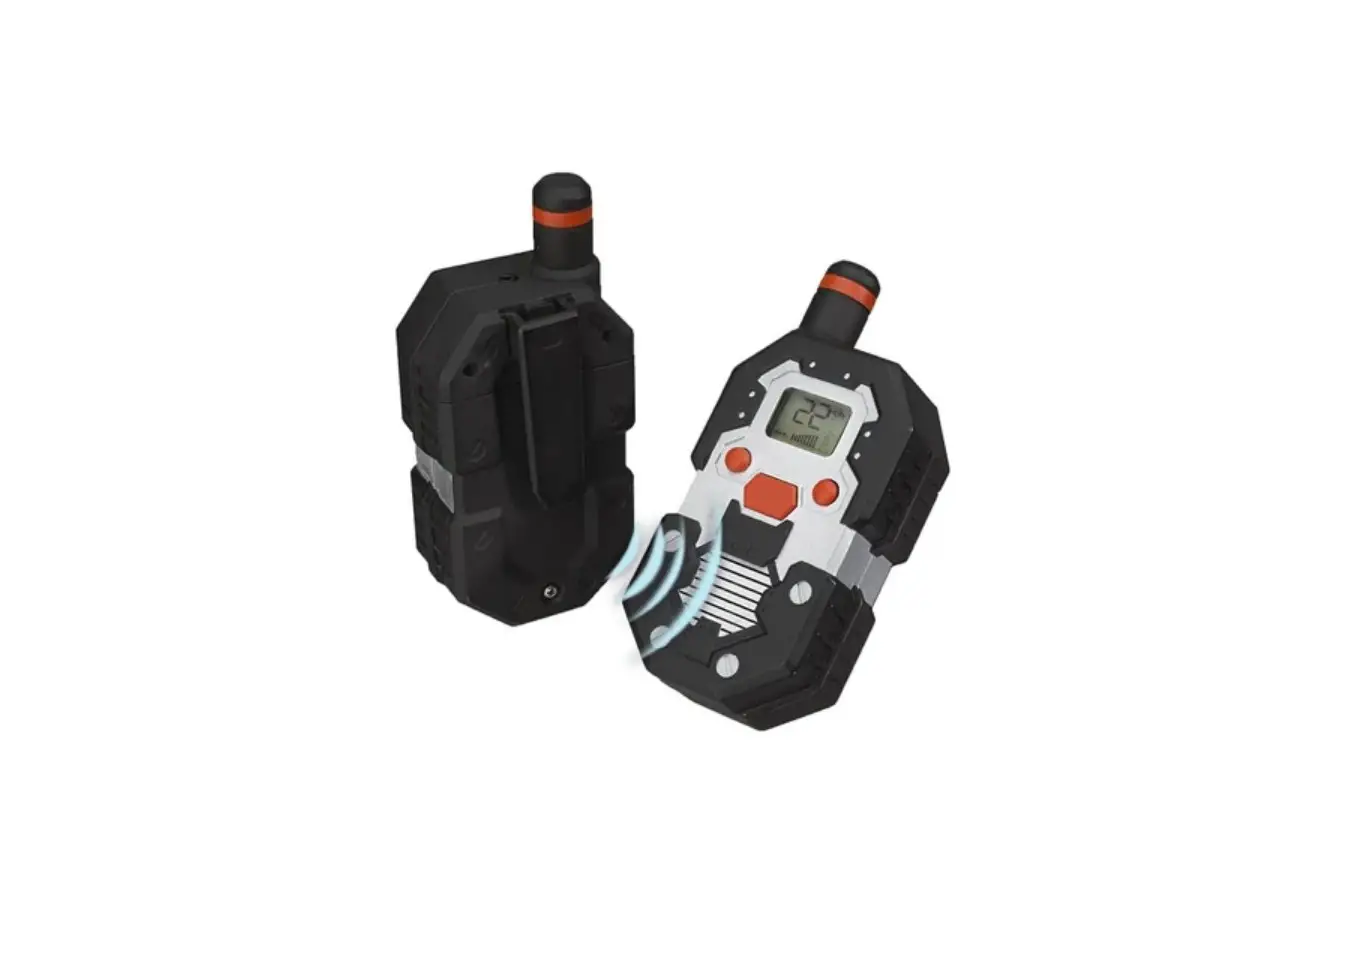
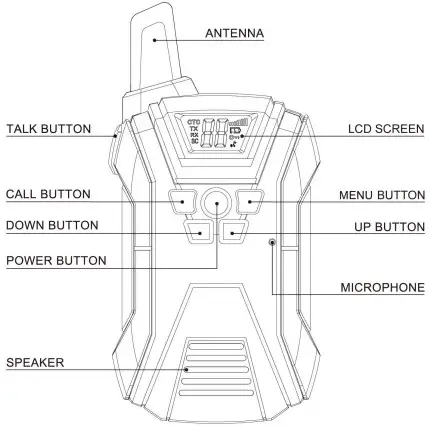
WALKIE TALKIE OVERVIEW
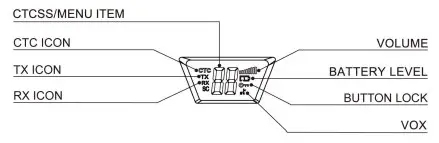
LCD SCREEN OVERVIEW
SAR WARNING
This equipment complies with FCC radiation exposure limits set forth for an uncontrolled environment. End user must follow the specific operating instructions for satisfying RF exposure compliance. This transmitter must not be co-located or operating in conjunction with any other antenna or transmitter.
The portable device is designed to meet the requirements for exposure to radio waves established by the Federal Communications Commission (USA). These requirements set a SAR limit of 1.6 W/KG averaged over one gram of tissue. The highest SAR value reported under this standard during product certification for use when properly worn on the body.and front of face with minimum distance 25mm.
BELT CLIP REMOVAL/ATTACHMENT
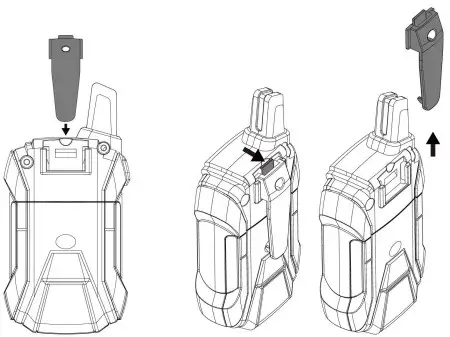
To reattach , slide clip piece down with the Push the tab out and push up the clip. clip facing inward until you hear a click.
BATTERY INSTALLATION
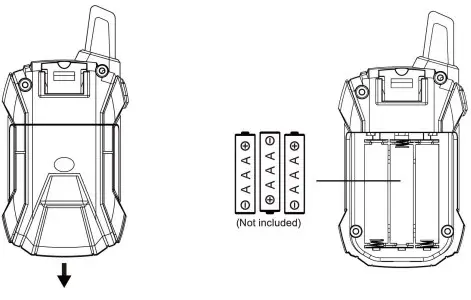
Press down on the back of panel of the unit and slide the battery cover off. (you may need to remove the belt clip for easier access).
Insert 3 x 1.5VAAA batteries(not included) as indicated . Then replace the cover.
SAFETY PRECAUTIONS
- Do not use these walkie-talkies if they are damaged in any way
- Do not use near gas pumps or fuel storage areas
- Do not turn on or use on aircraft or in hospitals
- Operating these devices near a radio may cause interference
- Remove the batteries if devices will not be used for a long period of time.
- Never mix new and used batteries
- For best results, direct the antenna upward when in use
- Clean with a damo cloth; do not use solvents or cleaning agents
- Do not modify these devices in any way
- Do not rely on these devices to contact emergency services
WALKIE-TALKIE OPERATING INSTRUCTION
 POWER (ON/OFF) BUTTON
Turn on the device : press the power button once,LCD screen will light. LCD will show channel, volume and and battery level.
Turn off the device : press and hold the power button (below the LCD screen) for 3 seconds.
 VOLUME ADJUSTMENT
Press the up and down arrows (below LCD screen) to adjust volume up or down.Volume level is displayed on the screen.
There are 1 – 8 volume levels.
BATTERY LEVEL
Look for the battery icon on the LCD screen to check your battery level.
![]() Battery Full
Battery Full![]() Battery 1/2
Battery 1/2![]() Battery Empty
Battery Empty
The icon will flash and the device will beep when the batteries need to be replaced or recharged.
HOW TO CHANGE CHANNELS

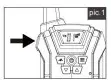
Press the MENU button once (See the attached picture), the current channel number will flash on the LCD screen.
There are 22 channels in total.

Press the up and down buttons to change the channel.
Press the TALK button to confirm and return to Standby Mode.
NOTE: If no button is pressed, the device will return to Standby Mode after 6 seconds.
RECEIVE/TRANSMIT COMMUNICATION
To transmit, press and hold the TALK button while talking into the walkie-talkie at a close range (within Scm of your face). The TX icon will be showed on LCD screen(See pic.1).
Release the button to finish talking, when the button is released, your walkie-talkie can receive transmissions .

To receive, if someone in the same channel transmit a voice signal, your walkie talkie will receive and play the voice through the speaker. The RX icon will be displayed on the LCD screen(See pic.2).
NOTE
- Walkie-talkies must be set to the same channel and CTCSS code.
- Release the Talk button when you refinished talking to receive a response.
- When walkie talkie is receiving a signal, the TALK function will not work.
CTCSS ( CONTINUOUS TONE-CODED SQUELCH SYSTEM )
These walkie-talkies have an their own channel system . It means you can always find a free channel if someone nearby is using one and you don’t want interference-or you want to share a channel.
Your devices also have subchannels called the CTC.
Using the CTC transmits one of 122 different low-frequency tones along with your voice signal for identification-purposes.

Press the menu button twice to enter the sub-channel mode of CTCSS, the current CTCSS code will flash. CTC icon will display on the LCD screen(See pic.3).

Use the up and down buttons to adiust the CTCSS code which will flash on LCD screen(See pic.4). Press TALK button to confirm. Or wait for LCD screen to finish flashing. If you want to check the sub-channel number, just simply press menu button twice.
NOTE
- This feature does not impact operation or quality. To cancel CTCSS, press menu button twice and use up or down button to select code”« “.
- Walkie talkies shall be kept on the same CTCSS code before conversation.
- If you don’t set subchannel(CTC),you may receive stranger’s channel that you don’t like. So if you need private and safe conversation, please set channel and CTC before use.
VOX SELECTION
These devices are capable of voice-activated(VOX) control. This means the walkie-talkie will transmit any sound it picks up without pressing the TALK button-as such, it is recommended that VOX Mode not be used in a noisy or windy environment.
NOTE
VOX Mode is overridden when you press the TALK button.
Enter VOX Mode
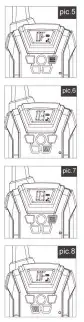
Press the Menu button 3 times and the current VOX setting will flash on the LCD screen along with the «,I’ icon (See pic.5) .
Press the up button to set VOX sensitivity between 1 and 3 — the higher the number, the more sensitive the microphone (See pic.6).
Press the TALK button to confirm.
Cancel VOX Mode
- Press the Menu button 3 times and the current VOX setting will flash on the LCD screen along with the «,I icon (See pic.7).
- Press the down button until you see”OF” to turn off VOX Mode (See pic.8).
- Press the TALK button to confirm and return to Standby Mode
CALL FUNCTION

A call function alerts others that you want to start talking.
Press the call button to call the walkie-talkie of the same channel .
BUTTON LOCK
Press and hold the MENU button for 2 seconds to activate and deactivate Button Lock Mode. This locks all buttons except for the CALL button and TALK button, and the Button Lock icon” ![]() ” will show on the LCD screen.
” will show on the LCD screen.
Cancel Lock Mode, press and hold the MENU button for 2 seconds.
NOTE
In Lock Mode, all buttons will have no function except for CALL button and TALK button.
DISPLAY BACK-LIGHT
Pressing any button will activate the LCD back-light
FREQUENCY GUIDE
| CH No. | RX Frequency (MHz) | TX Frequency (MHz) |
| 1 | 462.5625 | 462.5625 |
| 2 | 462.5875 | 462.5875 |
| 3 | 462.6125 | 462.6125 |
| 4 | 462.6375 | 462.6375 |
| 5 | 462.6625 | 462.6625 |
| 6 | 462.6875 | 462.6875 |
| 7 | 462.7125 | 462.7125 |
| 8 | 467.5625 | 462.5625 |
| 9 | 467.5875 | 462.5875 |
| 10 | 467.6125 | 462.6125 |
| 11 | 467.6375 | 462.6375 |
| 12 | 467.6625 | 462.6625 |
| 13 | 467.6875 | 462.6875 |
| 14 | 467.7125 | 462.7125 |
| 15 | 462.5500 | 462.5500 |
| 16 | 462.5750 | 462.5750 |
| 17 | 462.6000 | 462.6000 |
| 18 | 462.6250 | 462.6250 |
| 19 | 462.6500 | 462.6500 |
| 20 | 462.6750 | 462.6750 |
| 21 | 462.7000 | 462.7000 |
| 22 | 462.7250 | 462.7250 |
FCC COMPLIANCE STATEMENT
All controls, adjustments and switches that’s instructed in the manual or follow-up instruction provided by the manufacturer that may be operated or adjusted without resulting in a violation of FCC rules,-
Warning: Any adjustment that could result in a violation of FCC rules and it’s recommended that could be performed only by or under the immediate supervision and responsibility of a person certified as technically qualified to perform transmitter maintenance and repair duties in this radio service by an organization or committee representative of users of that servicei,
Changes or modifications i.e. replacing any transmitter component (crystal, semiconductor, etc) not expressly approved by the party responsible for compliance could void the user’s authority to operate the product.,
Name of manufacturer:shantoushichuanggaowanjuyouxiangongsi
Address: fengxiangjiedao fengxinerluxiehechangfangE2qu shantou guangdong


