![]()
PACKAGE CONTENTS
For 10’x20′ Model- GM1101
This carport is packed in two boxes. Please check the contents according to this list. If there’s any part missing, contact us immediately to get a replacement.
| 1# | 8pcs | 1pc | |||
| 2# | 8pcs | 2pcs | |||
| 3# | 9pcs | 2pcs | |||
| 4# | 9pcs | 24pcs | |||
| 5# | 8pcs | 8pcs | |||
| 6# | 8pcs | 56pcs | |||
| 8pcs | 8pcs | ||||
| A | 2pcs | C | 4pcs | ||
| B | 2pcs | D | 4pcs |
INSTALLATION
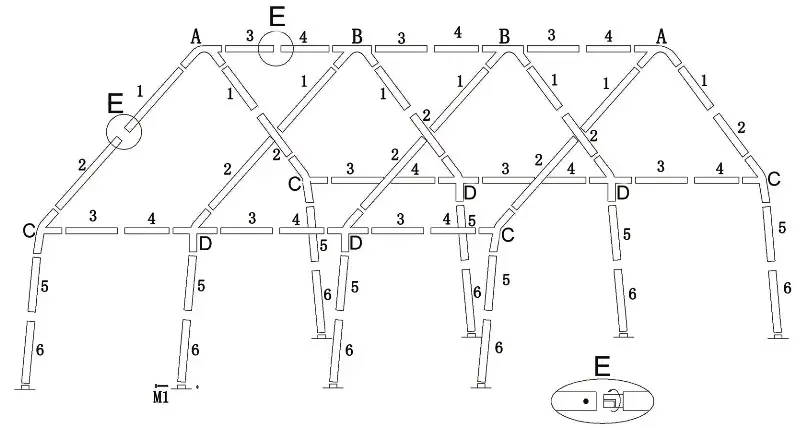
STEP 1
Assemble the upper frame using Pole #3, #4 & the Connector D, C.
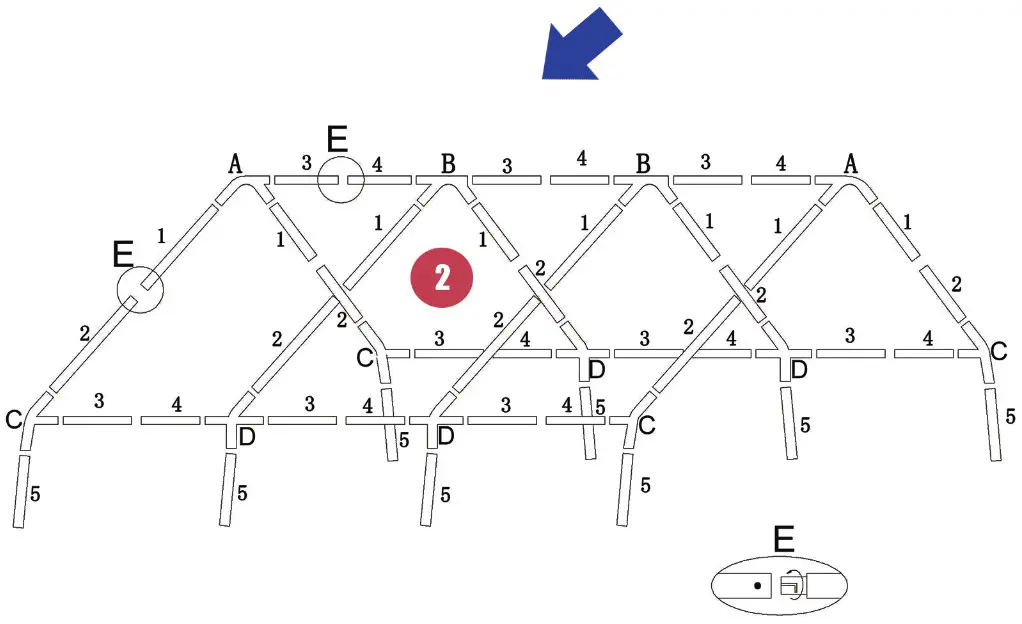
STEP 2
Attaching the roof section to the upper frame using Pole #1, #2, #3, #4 & the connector A, B. Connect the pipes together starting with the center frame(See Diagram E)
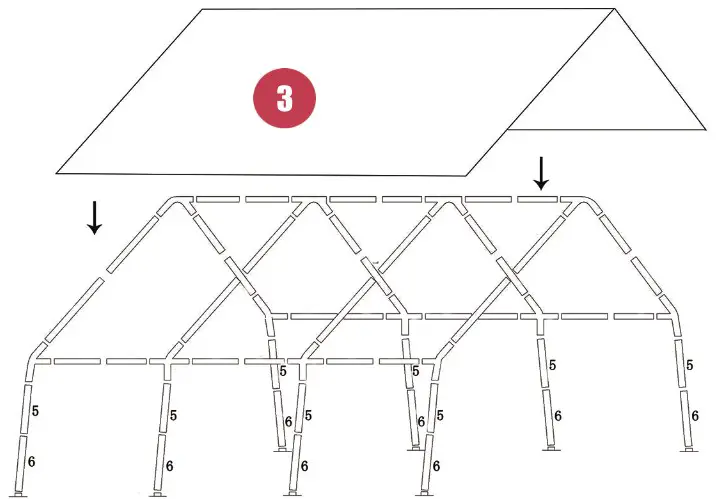
STEP 3
Place the cover tightly over the frame. And slot the remaining legs (Pole#5, #6) into the matching position, Ensure the Base Plates are at the base and be fixed by a bolt
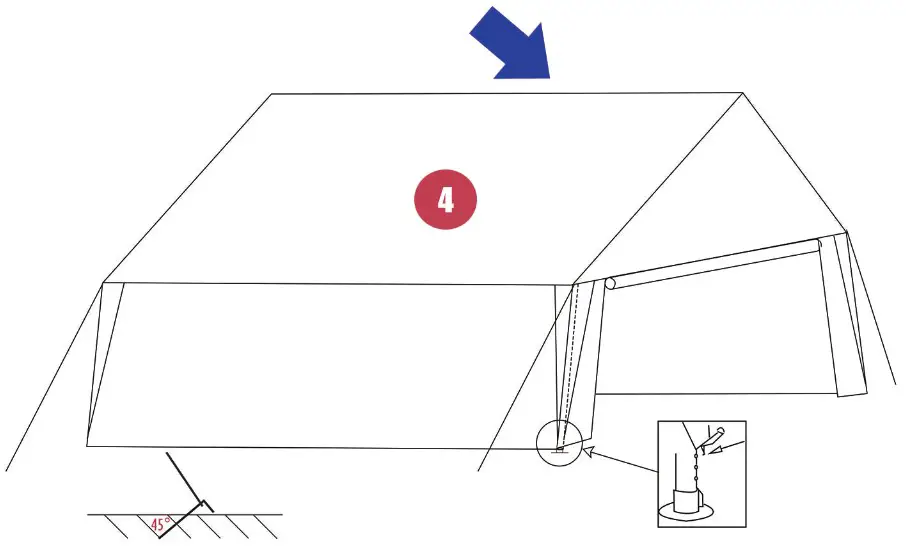
STEP 4
Hang the side panels to the holes by the Elastic Balls. All side panels can be hung or took down separately. Pull the leg cover tight by the elastic ball and attach the metal hooks into the tube holes near the feet.
If the cover becomes loose, tighten by moving the hook to a lower hole. Then secure the tent with Ropes and the Stakes. We recommend the Stakes are at a 45-degree angle in the ground facing away the tent to ensure maximum tension.
QUICTENT USER MANUAL


