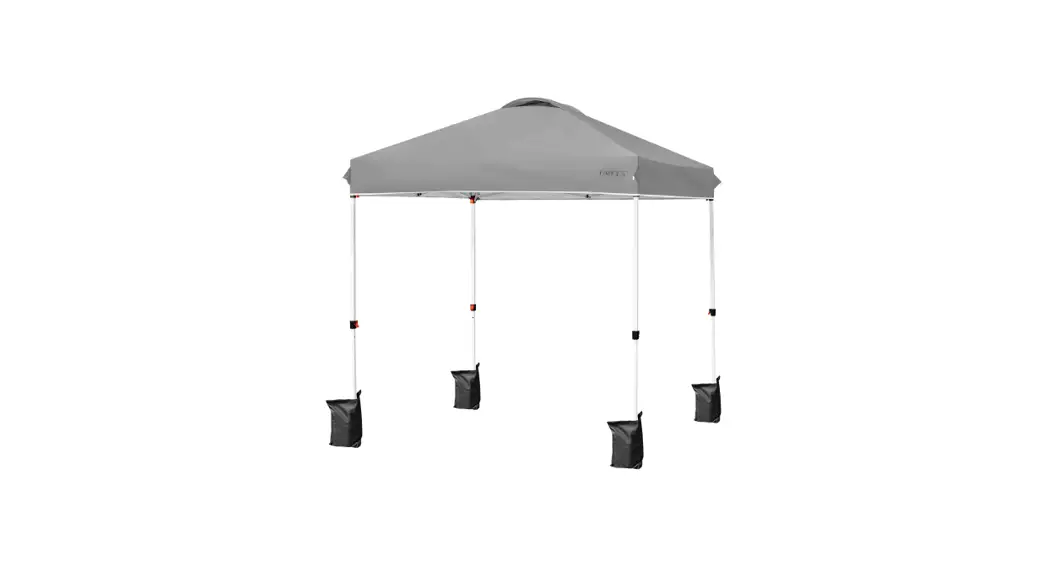
![]() OP70298 6 ft. x 6 ft. White Pop-Up Canopy Tent
OP70298 6 ft. x 6 ft. White Pop-Up Canopy Tent
User Manual
Before You Start
![]() Please read all instructions carefully.
Please read all instructions carefully.![]() Retain instructions for future reference.
Retain instructions for future reference.![]() Seperate and count all parts and hardware.
Seperate and count all parts and hardware.![]() Read through each step carefully and follow the proper order.
Read through each step carefully and follow the proper order.![]() We recommend that, where possible, all items are assembled near to the area in which they will be placed in use, to avoid moving the product unnecessarily once assembled.
We recommend that, where possible, all items are assembled near to the area in which they will be placed in use, to avoid moving the product unnecessarily once assembled.![]() Always place the product on a flat, steady and stable surface.
Always place the product on a flat, steady and stable surface.![]() Keep all small parts and packaging materials for this product away from babies and children as they potentially pose a serious choking hazard.
Keep all small parts and packaging materials for this product away from babies and children as they potentially pose a serious choking hazard.
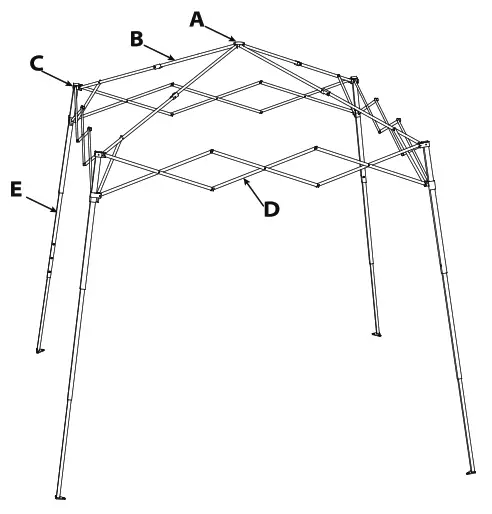
Replacement
| Part | Description |
| A | Peak Cap |
| B | Ceiling Assembly |
| C | Top Basket |
| D | Eave Assembly |
| E | Leg Assembly |
| F | Leg Assembly |
| G | Fabric Top |
| H | Backpack |
IMPORTANT: Carefully read and follow the instructions provided with this product.
WARNING: Keep all flame and heat sources away from this canopy top and sidewall fabric. This canopy top and sidewallis made with flame resistant fabric which meets CPAI-84 specification. It is NOT FIRE PROOF. The fabric willburn if left in continuous contact with any flame source. The application of any foreign substance to this fabric may render the flame resistant properties ineffective.
WARNING: Do not set-up or leave the canopy unattended in the following conditions: gusty wind, rain, hail, sleet, snow, drizzle, or any other harsh weather conditions. Doing so may cause damage to the entire canopy and will void the warranty.
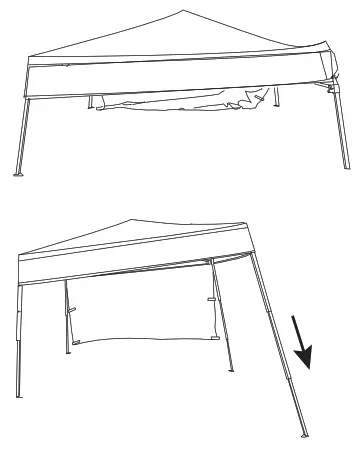
Set Up The Canopy
- Pull opposite corners away from each other to expand frame as far as possible.
- Engage the slider at each corner by pushing up the slider with one hand while holding down the top of the leg with the other hand until it locks in to place.

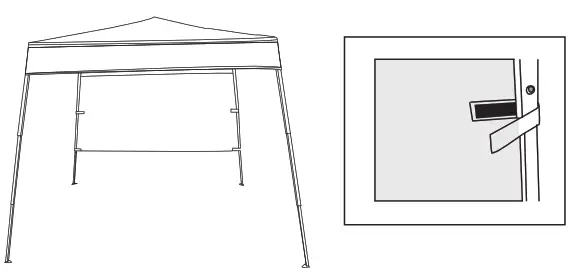
- Place the canopy over the top frame. Use the Velcro pads to secure the canopy to the frame at each corner.
- Gently pull out the telescoping legs stage by stage till the spring button pops in position. They are three stage telescoping legs. Please do not push in the spring button while pulling the legs and do not over pull each leg! You may lower the height by telescoping the legs back.

- Drop the sunblock fabric wall and attach to the legs.

Take Down The Canopy
Release the spring button lock and shorten the telescoping legs.
Remove the canopy top from the frame and fold it up nicely.Do not put it in the backpack before frame.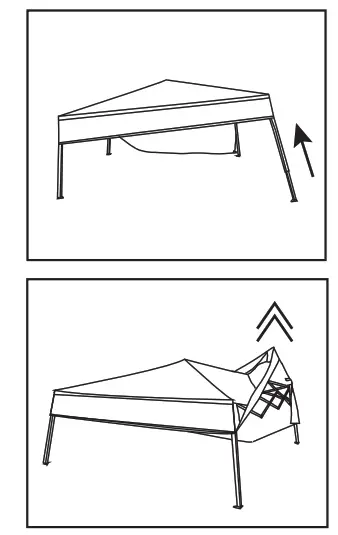 Release sliders at all four corners by pushing the red plastic button and gently push the sliders down to leave the locking position.
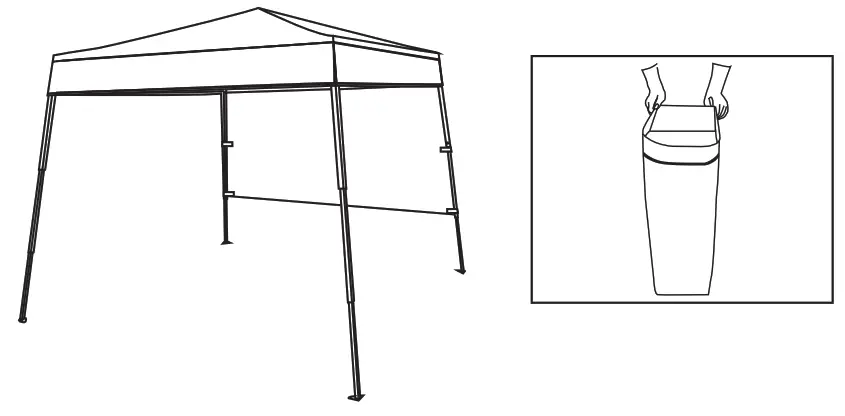
With all four pull-pin lock released, lift and walk one corner of the frame towards the opposite corner to close the frame.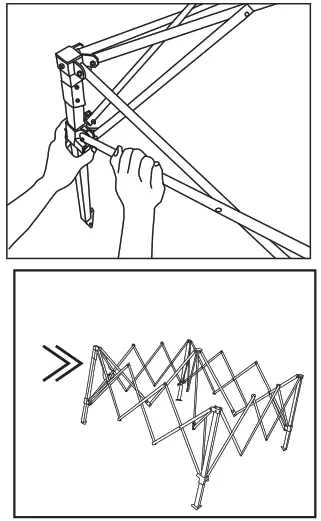 Put the compressed frame into the backpack and then slide the folded canopy into the backpack too.Zip the backpack. Be sure the shelter completely dry before storage.
![]() Contact Us!
Contact Us!
Do NOT return this item. Contact our friendly customer service department for help first.


