AMETEK m1 Digital Pressure Gauge User Guide
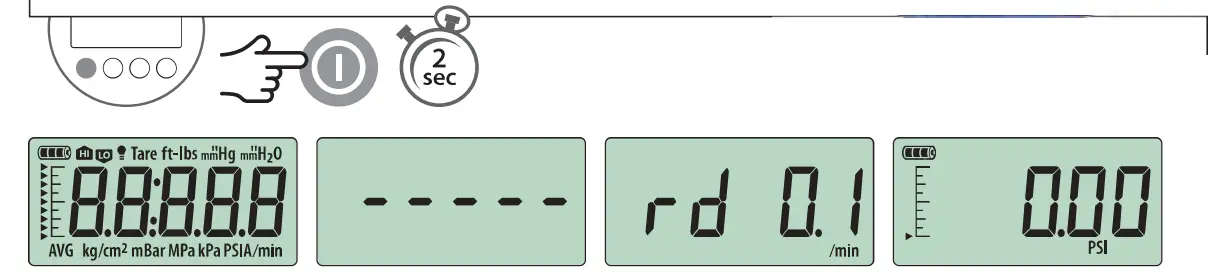
Power On
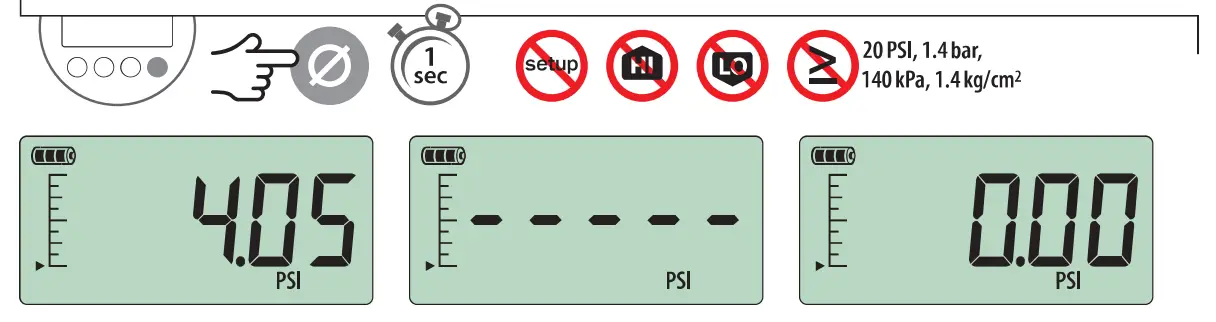
Zero
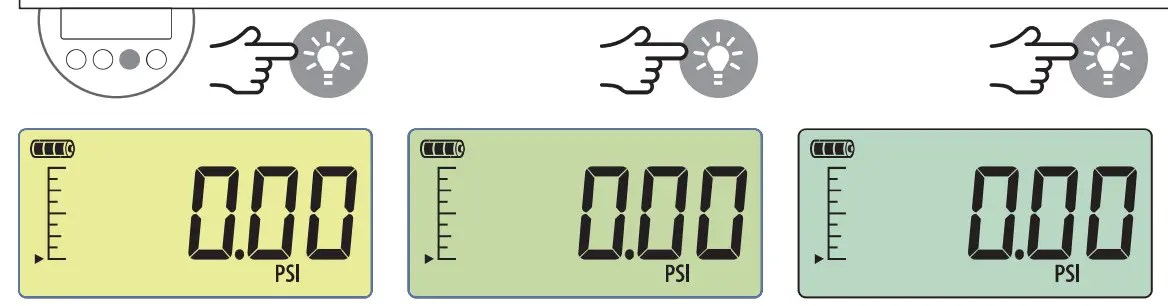
Black light
Power Off
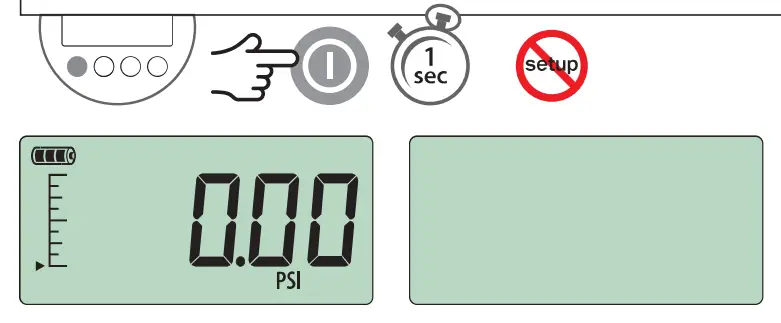
Note: Pressing the enter button always returns the gauge to operating mode. If you want to set multiple Display Functions, press the setup button to navigate from one Display Function to the next, then press the enter button when you are done.
Gauge Setup Basics
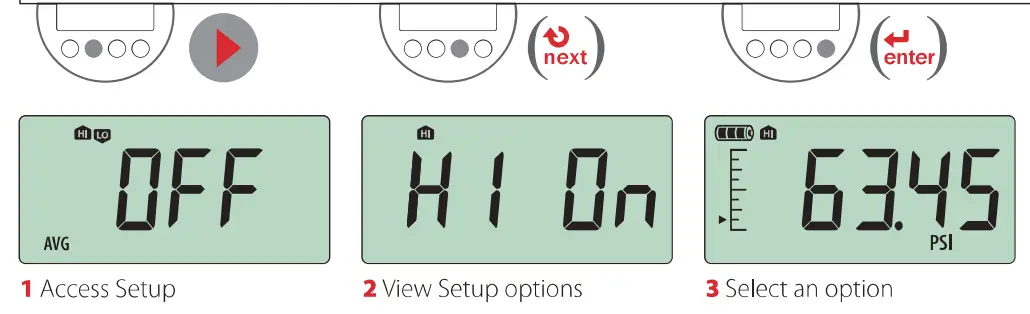
Gauge Setup Basics
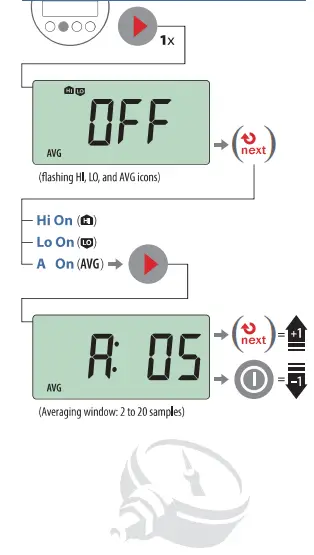
- Maximum Minimum Or Averaging

(Averaging window 2 to 20 samples - Pressure Units
- All units are not available with every pressure range.
- 1120 icons and temperature settings will only display on 1120 enabled units.
Gauge Setup Map
Black light Timer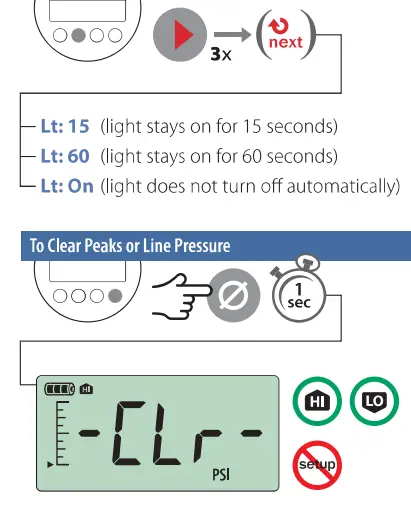
Trouble Shooting
Err 1 displayed: The MI checks the internal calibration every time it’s turned on. Contact factory for further instructions.
Err 2 displayed: The Ml has tried to display a number too large for the display due to electrical malfunction or numerical error. Contact factory for further instructions.
Err 5 or Err 6 displayed: The Ml pressure sensor is exhibiting behavior out of normal operating condition. Contact factory for sensor replacement.
Note: If there is no gauge activity for 10 seconds, the gauge MI return to operating mode. Any Setup options that you have selected will be enabled.
Power Management
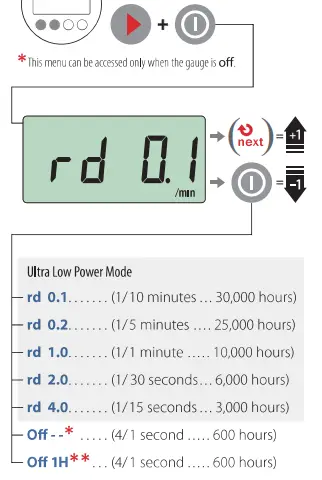
- At “Power On: this setting is displayed as No Auto off
- Al tower On: this setting is displayed as Auto off 1 H
Note: Whenever one of the rd settings is selected, the battery ion will change from ![]() to
to ![]() indicating that the M1 is in Ultra Lew Power Mode.
indicating that the M1 is in Ultra Lew Power Mode.


