manual
T1 Audio interface
Item:23964
www.nikabe.com
Box 50435
Malmo, Sweden
2021-07-01


 Nikabe®
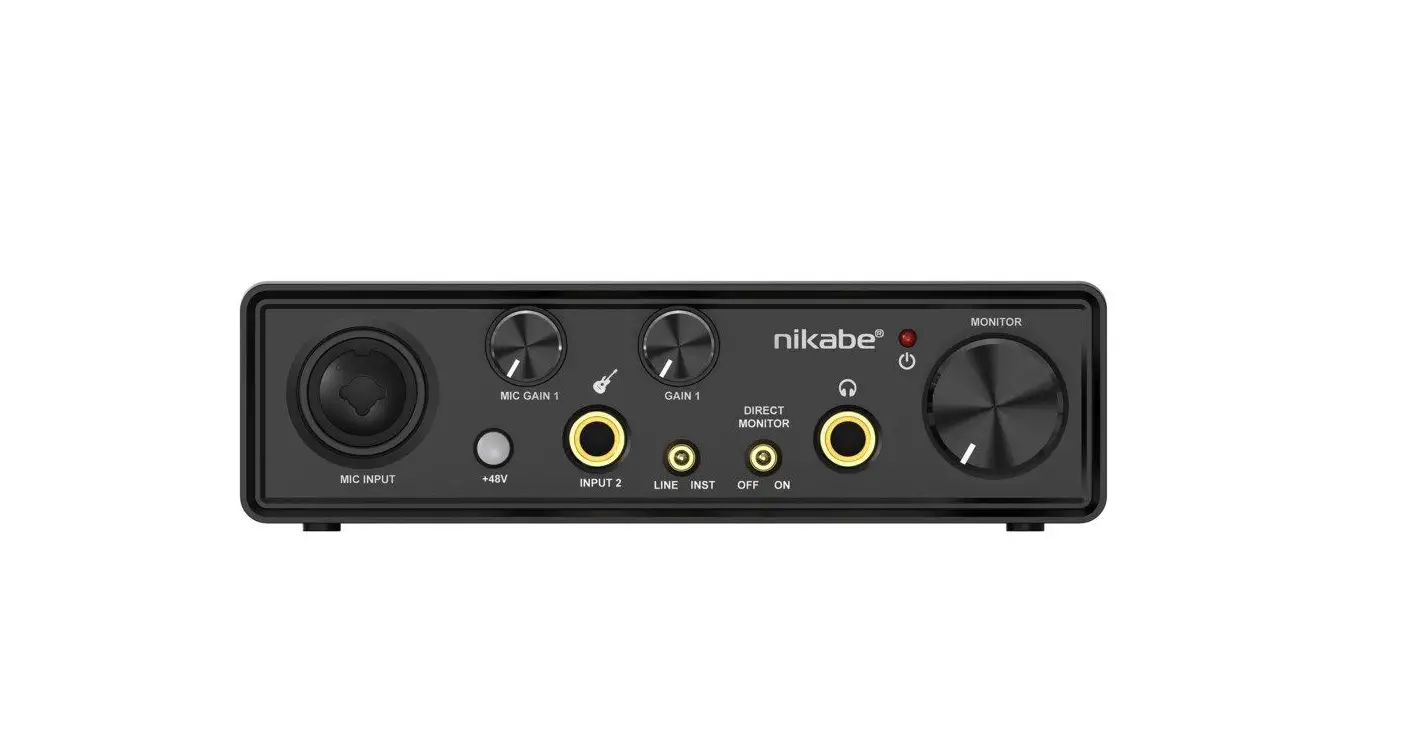
Overview
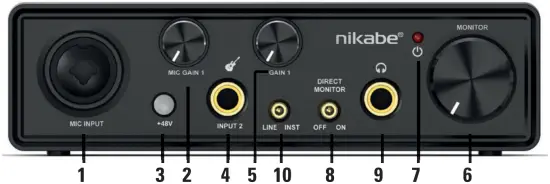
- Microphone input
- Microphone gain
- +48 V phantom power
- Instrument/line 2 input
- Instrument gain
- Monitor
- Power indicator
- Direct monitor
- 6.3 mm headphone jack
- Instrument/line switch
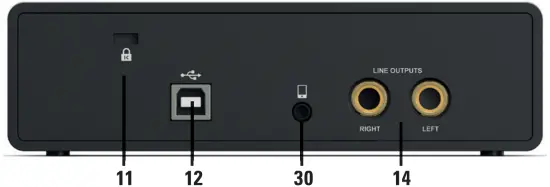
- Lock function
- USB port
- 3.5 mm port
- Line output
Note! To download drivers, firmware and software installation guide, go to kjell.com and enter the product’s article number 23964 in the search field. When available, downloadable files are found at the bottom of the page.
Specifications
| Microphone input | XLR/6.3 mm with +48 V phantom power |
| Line 2 input | 6.3 mm jack |
| Output front | 6.3 mm stereo headphones |
| Output back | 2x line out L/R, 3.5 mm live, USB-B |
| Playback | DAC 24 bit/96 kHz, THD+ noise -96 dB |
| Recording | ADC 24 bit/96 kHz |
| Power | USB powered |
| Size | 160x97x45 mm |
| Weight | 505 g |
Use
Connect the USB cable to the audio interface and your computer. The power indicator lights up.
Connect input sources
Connect a microphone to the microphone input (1). You can use either a condenser microphone or a dynamic microphone. If you are using a condenser microphone, press the +48 V button (3) to turn on the phantom power. Remember to press the button again when you are done with your recording session.
Use the microphone gain knob (2) to adjust the input volume of your microphone. If it lights up red around the knob, the input volume is too high.
Connect your instrument to the instrument/line input (4). Set the instrument switch (10) to LINE or INST, depending on your equipment. Use the instrument gain knob (5) to adjust the input volume of your instrument. If it lights up red around the knob, the input volume is too high.
Connect output sources
Connect a pair of headphones to the Headphone jack (9) or studio monitors to the Line outputs (14) to listen to what you are recording. Set the Direct monitor switch (8) to On and adjust the volume with the Monitor knob (6).
If you want to broadcast your recording via your smartphone, connect it to the 3.5 mm port of the audio interface (13).
When all is connected you can start your sound recording and store or edit it on your connected computer.


