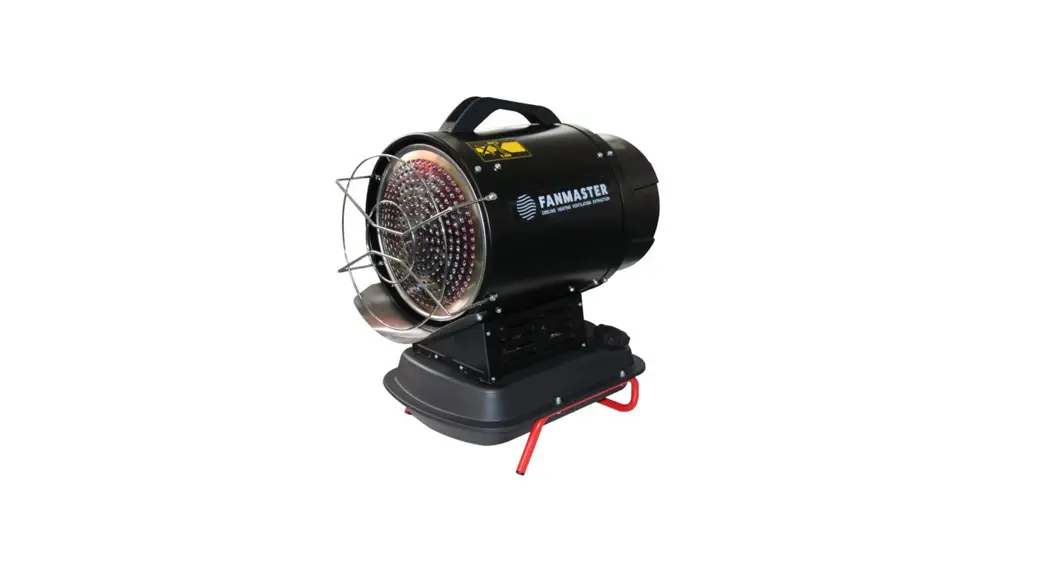
![]() DIESEL RADIANT HEATER
DIESEL RADIANT HEATER
INSTRUCTION MANUAL
Model No.: BGO1402-20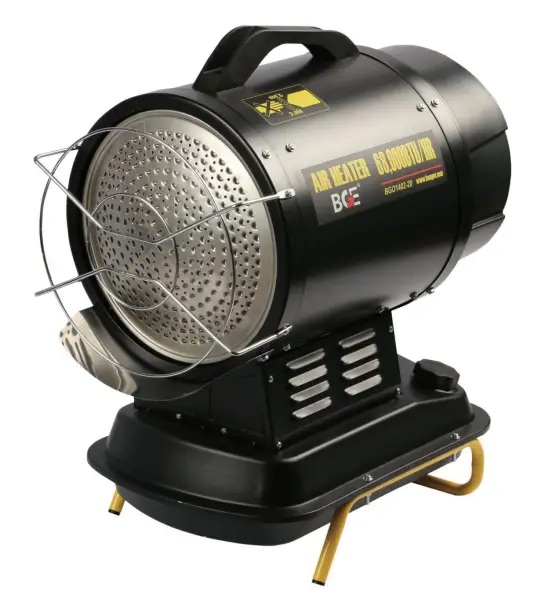 This heater is designed for outdoor use.
DANGER:GENERAL HAZARD WARNING:
READ AND UNDERSTAND ALL OF THE INSTRCUTIONS IN THIS MANUAL BEFORE ASSEMBLING, STARTING, OR SERVICING THE HEATER. Be sure to comply with the instructions and warnings provided with this heater. Failure to comply can result in fire and explosion that can cause property loss, bodily injury, or loss of life.
DANGER:
- Never use the heater where flammable vapors may be present, there is danger of explosion, fire and burning
- Always provide adequate ventilation during the use. Only use the appliance in well ventilated area, the air must be regular exchanged during the use (two times/one hour), inadequate burning caused by oxygen shortage can cause carbon monoxide poisoning
- Don’t expose the appliance to rain or snow, never use it in humidity places either. Pull out the plug before the routine maintenance and examination.
HITCHON INTERNAITONAL LTD, 32 HAMMERSMITH DRIVE, WIGRAM, CHRISTCHURCH, NEW ZEALAND
TECHNICAL
| MODEL | BGO1402-20 |
| 20 kW | |
| 1.6 kg/h | |
| AUTOMOTIVE DIESEL ONLY | |
| 10.5L | |
| 220-240V ~ 50Hz 110W | |
| 18.2 kg | |
| 0.4 GpH 60°S DANFOSS |
IMPORTANT:READ AND UNDERSTAND THIS OPERATIONAL MANUAL BEFORE PERFORMING ASSEMBLY,COMMISSIONING OR MAINTENANCE ON THIS GENERATOR.INCORRECT USE OF THE GENERATOR CAN CAUSES SERIOUS INJUIRY.
KEEP THIS MANUAL FOR FUTHER REFERENCE.
SAFETY INFORMATION(WARNINGS)
IMPORTANT NOTICE:
WARNING
- This appliance cannot be used by any persons with reduced physical, sensory or mental capabilities or lack of experience and knowledge unless they have been given supervision or instruction concerning use of the appliance in a safe way and understand the hazards involved. Children shall not play with the appliance. Cleaning and user maintenance shall not be made by children without supervision.
- WARNING: In order to avoid overheating, do not cover the heater.
- This heater is intended to be used for commercial and light industrial space heating. It is a portable stand-alone appliance to be used inside a large well-ventilated space. It is important that is it not connected to any flue or duct that might restrict the airflow within the heater.
- CAUTION-some parts of this product can become very hot and cause burns. Particular attention has to be given where children and vulnerable people are present.
Warning: Carbon monoxide poisoning can prove to be fatal.
First symptoms of carbon monoxide poisoning are similar to influenza with severe headaches, dizziness and/or nausea. Such symptoms may be caused by generation fault. UPON NOTICING THESE SYMPTOMS, IMMEDIATELY LEAVE THE ROOM AND GO OUTSIDE, next, notify the technical service center that the generator needs
to be repaired.
1.1. SUPPLY:
- 1.1.1 Personnel in charge of supply must be fully qualified, must be familiar with the manufacturer’s manual as well as the effective regulations for safe supply of generators.
- 1.1.2. Only the fuel types specifically listed on the generator’s nameplate are to be used.
- 1.1.3. Before refueling, shut down the generator and wait for it to cool down.
- 1.1.4. Fuel cisterns are to be located in separate facility.
- 1.1.5. All fuel containers are to be located within safe distance from the generator, as per the applicable regulations.
- 1.1.6. Fuel is to be stored in rooms with insulated floor, so that the fuel cannot penetrate the floor into the open flame below causing fuel combustion.
- 1.1.7. Fuel storage need to follow all the applicable regulations.
1.2. SAFETY CONSIDERATIONS:
- 1.2.1. The generator should never be used in rooms with fuel, paint thinners and other combustible fumes.
- 1.2.2. All applicable local rules and regulations need be observed while using the generator.
- 1.2.3. Generators in operation near tarpaulin, screens or other similar materials need to be located a safe distance away. The use of inflammable covers is highly encouraged.
- 1.2.4. The device is to be used in well ventilated interiors only. To ensure proper air circulation, a proper opening is required, as per the applicable regulations
- 1.2.5. For generator power feed observe closely the voltage and frequency values given in the nameplate.
- 1.2.6. Only use grounded, three-core extension cords.
- 1.2.7. Minimal safety distance between the generator and combustible materials is: front = 2,5m; side, up and back = 1,5m.
- 1.2.8. To avoid fire, hot or working generator is to be placed on a stable and leveled flooring.
- 1.2.9. Animals are to be kept at a safe distance away from the generator.
- 1.2.10. Unplug the generator at all times during downtime.
- 1.2.11. Thermostat control allows the generator to be turned on at any time.
- 1.2.12. The generator must not be used in frequently visited rooms and in bedrooms.
- 1.2.13. Do not obstruct the airflow (back of the device) and air intake (front) of the generator.
- 1.2.14. If the generator is plugged in, hot, or currently running, it must not be moved, manipulated, refueled or attempt maintenance work of any kind.
- 1.2.15. Do not channel the air flow at intake or the generator output.
- 1.2.16. Keep the safe distance between the hot parts of the generator and thermos-sensitive or combustible materials(including feeder cable).
- 1.2.17. If the supply cord is damaged, it must be replaced by the manufacturer,or similarly qualified persons in order to avoid a hazard
- 1.2.18.heater is not located immediately below a socket-outlet
- 1.2.19. Do not use the heater with a programmer, timer or any other device that switches the heater on automatically;
FUEL
▲ WARNING: The generator only runs on automotive DIESE fuel.
To avoid fire or explosion, use only automotive diesel fuel. Do not use gasoline,
naphtha, paint thinners, alcohol, kerosene or any other combustible liquids.
For low-temperature operation, use antifreeze supplements.
OPERATING PRINCIPLE
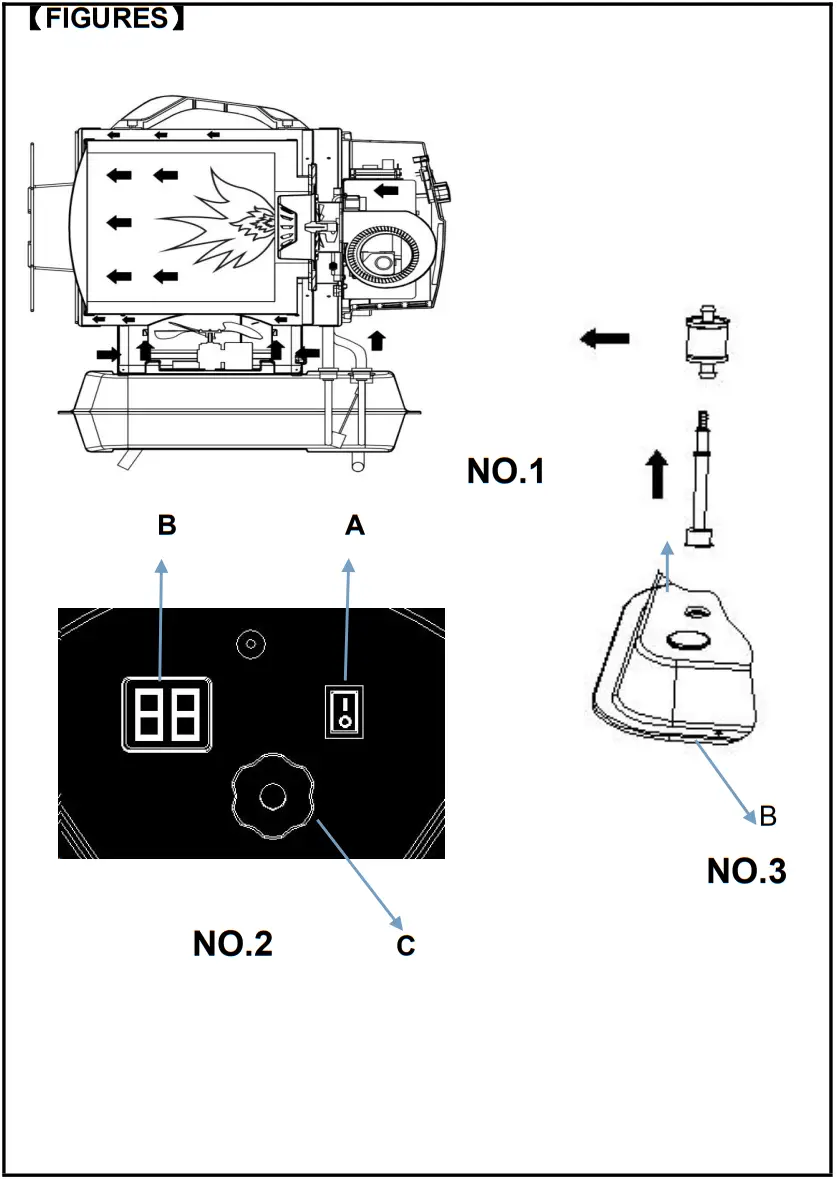
See fig.NO1
Airflow is necessary to ensure proper combustion, it is supplied by the internal burner fan. The air enters the burner funnel and gets mixed with a high-pressure fuel jet. The fuel flow is secured by an electrical pump, which sucks the fuel away from the tank and moves it to the nozzle under high pressure.
OPERATION
WARNING: Read the section “SAFETY CONSIDERATIONS” carefully before turning the generator on.
4.1 RUNNING THE GENERATOR
- 4.1.1. Observe all safety instruction at all times.
- 4.1.2. Check the fuel is present in the tank.
- 4.1.3. Close the fuel tank filler plug.
- 4.1.4. Plug the feeder cable into the socket (CHECK THE VOLTAGE IN “TECHNICAL DATA SHEET”).
- 4.1.5. Turn the “ON/OFF” Switch “ON” (|) (C Fig NO.2 ). The generator should be online in a few seconds. If it is not, please refer to the section “PROBLEM
IDENTIFICATION” (Paragraph 9). - 4.1.6. Check the position of the thermostat ( C Fig.No.3)
NOTE: IN THE EVENT OF GENERATOR BEING TURNED OFF DUE TO RUNNING OUT OF FUEL, TURN THE GENERATOR OFF, REFUEL AND TURN IT BACK ON(SEE PARA 4.1).
TURNING THE GENERATOR OFF
WARNING: DO NOT CUT THE POWER OR DISCONNECT THE REEDER CABLE BEFORE THE GENERATOR COOLS DOWN COMPLETELY (ab.5minutes).
- 4.2.1 Turn the “1/O(ON/OFF)” switch “O (off)” (A Fig.3.)
CLEANING THE FUEL FILTER
See Fig.4
DEPENDING ON THE QUALITY OF FUEL USED, IT MAY BE NECESSARY TO CLEAN THE FUEL FILTER.
- 5.1. Remove the plug on the fuel tank (Fig.No.3.)
- 5.2. Remove the filter from the tank. (A, Fig.No.3.)
- 5.3. Take out of the oil suction pipe(B, Fig.No.3
- 5.4. Cleaning the oil suction pipe with clean fuel
- 5.5. Replace with the new filter if dirty
MAINTENANCE AND TRANSPORTATION
TO ENSURE THE BEST MAINTENANCE AND/OR TRANSPORTATION PROCEDURE, PLEASE OBSERVE THE FOLLOWING PROCEDURE:
- 6.1. Empty the fuel tank.
- 6.2. If remainders are still present, pour in clean fuel and empty it again
- 6.3. Close the tank filler plug, dispose of the fuel as per the applicable regulations.
- 6.4. To ensure proper generator maintenance, keep it leveled to prevent fuel leaks, keep it in a dry place and protect from getting damaged.
DISPLAY ERRORS
See B Fig.3
| ERROR | CAUSE | SOLUTION |
| F0 | OPERATION ERROR | |
| 1. The “(| ON)/O (OFF)” switch is turned “| (ON)” when the generator is plugged | 1. After disconnecting the generator, see that the switch is in the “O(OFF)” position, plug the generator in and turn the switch “(|) ON” | |
| F1 | PHOTOCELL ERROR | |
| 1. No fuel 2. Fuel is contaminated 3. Photocell is dirty or damaged 4. Fuel filter is dirty5. Ignition error | 1. Turn the switch “( O) OFF”, refill the fuel tank 2. Turn the switch “ ( O ) OFF” empty and refill the fuel tank. Clean the filter using clean fuel, do not damage the filter(SEE PARA.5) 3. Contact the technical service center 4. SEE PARA. 6 5. Contact the technical service center | |
| F2 | TEMPERATURE CONTROL SENSOR ERROR | |
| 1. Interrupted cable 2. Sensor is damaged | 1. Contact the technical service center 2. Contact the technical service center | |
| F3 | THERMOSTAT ERROR | |
| 1. Internal generator overheating 2. Anti-tilting sensor intervent | 1. Turn the generator off, wait until it is cooled down 2. Replace the heater on a level and stable surface | |
| LO | 1. External temperature below -9℃ | 1. Normal condition |
| CH | 1. Continuous operation(55℃) | 1. Normal condition |
PREVENTIVE MAINTENANCE SCHEDULE
WARNING: BEFORE INITIATING ANY REPAIR OR MAINTENANCE PROCEDURE UNPLUG THE FEEDER CABLE AND MAKE SURE THAT THE GENERATOR IS COOLED DOWN.
| COMPONENT | MAINTENANCE FREQUENCY | MAINTENANCE PROCEDURE |
| Fuel tank | Clean every 150-200 hours of operation or when when necessary | Empty and rinse with fresh fuel |
| Nozzle | Clean or replace once per season or when necessary | Contact the technical service center |
| Photocell | Clean once per season or when necessary | Contact the technical service center |
| Fuel filter | Clean or replace twice per season or when necessary | Clean the fuel filter with clean fuel |
| Ignition device | Clean or replace every 1.000 hours of operation, or when necessary | Contact the technical service center |
| Fan blades | Clean when necessary | Contact the technical service center |
PROBLEM IDENTIFICATION
| PROBLEM | POSSIBLE CAUSE | POSSIBLE SOLUTION |
| Generator doesn’t run | 1. Generator blocked 2. The power switch is in the “(O) OFF” position 3. No power 4. Feeder cable unplugged 5. Blocked control card | 1. Restart the generator 2. Turn the switch “(|) ON” 3. )Plug the feeder cable properly into the socket 2) Check the power supply network. 4. Contact the technical service center 5. 1)Restart the generator 2)Identify the display error 3)Contact the technical service center |
| 6. Wrong thermostat setting 7. Temperature sensor override 8. Fuse damaged | 6. Calibrate the thermostat by setting it higher than ambient temperature 7. 1)Wait at least ten minutes then try to run ignition again 2)Contact the technical service center 8. Contact the technical service center | |
| Motor/Pump runs but the flame does not start | 1. No fuel 2. Ignition device is dirty 3. Fuel filter is dirty 4. Nozzle is dirty 5. Photocell is dirty, damaged or installed improperly 6. Foreign ubstances present in the tank 7. Electrodes are used up or placed at an improper distance | 1. Turn off the generator, refill the fuel tank then restart the generator 2. Contact the technical service center 3. Clean the filter using clean fuel 4. Contact the technical service center. 5. Contact the technical service center. 6. Empty and refill the fuel tank with clean fuel 7. Contact the technical service center. |
| Fan blocked or spins too slowly | 1. Engine damaged | 1. Contact the technical service center |
Installation
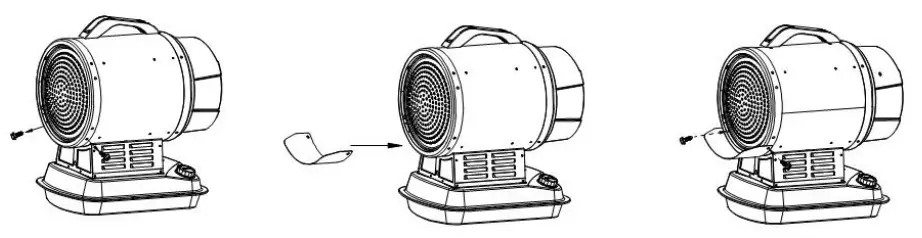
- Open the two screws on the fixed rings
- Put the protection panel on the designated spot to meet the screw holes.
- Set the screws with the protection panel
- Front grill installation
- Handle installation
- Stand installation
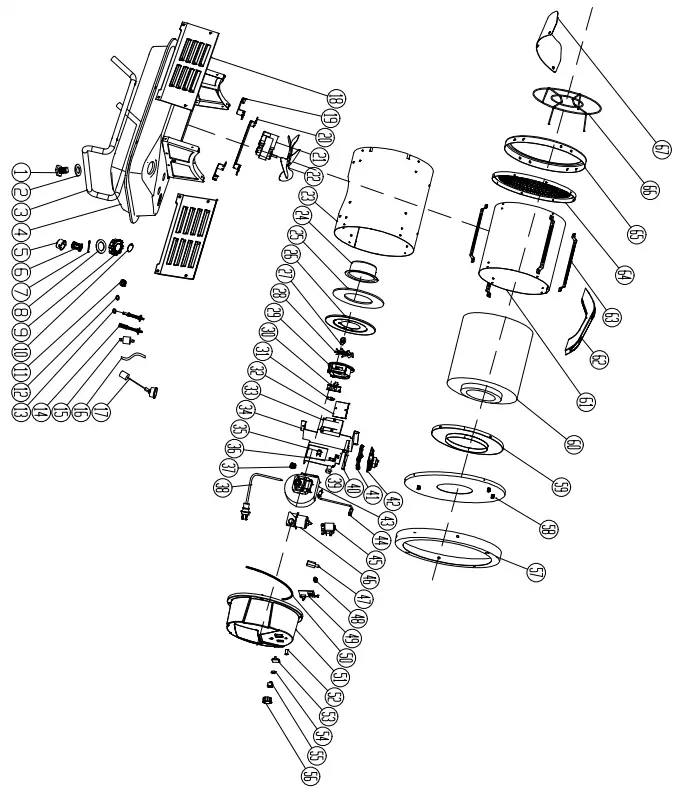
| 35 | Re-set thermostat | I |
| 34 | Support bracket | 1 |
| 33 | Ignition transformer | 1 |
| 32 | Bracket cf Ignition transformer | 1 |
| 31 | Burner head connector | I |
| 30 | Ignition needle | 1 |
| 29 | Burner head | I |
| 28 | Blade for combustion chamber | I |
| 27 | Nozzle | 1 |
| 26 | Sealing ring fixing plate | 1 |
| 25 | Sealing ring | 1 |
| 24 | Diffusion cap | 1 |
| 23 | Body shell | 1 |
| 22 | Fan | 1 |
| 21 | Motor | 1 |
| 20 | Motor fixing bracket | I |
| 19 | Motor support | 2 |
| 18 | Side plate | 2 |
| 17 | Oil leveler | |
| 16 | Oil hose | I |
| 15 | Oil filter | 1 |
| 14 | Fuel filter ass’y | 1 |
| 13 | Fuel filter | I |
| 12 | Sealing ring | 1 |
| 11 | Cable fasterner 5N-4 | 1 |
| 10 | Brealth cover | 1 |
| 9 | Fuel tank cap | 1 |
| 8 | Tank cap gasket | 1 |
| 7 | Tank cap shaft | 1 |
| 6 | Oil inlet filter | I |
| 5 | Oil inlet filter holder | 1 |
| 4 | Fuel tank | 1 |
| 3 | Feet pipe | 1 |
| 2 | Oil drain seal ring | 1 |
| 1 | Oil drain screw | 1 |
| Key No. | Description | QTY |
| 67 | Lower protection | 1 |
| 66 | Safty frame | 1 |
| 65 | Body front ring | 1 |
| 64 | Front cover | 1 |
| 63 | Chamber shield bracket | |
| 62 | Handle | 1 |
| 61 | Heat insulation casing | 1 |
| 60 | Combustion chamber | 1 |
| 59 | Chamber rear cover | 1 |
| 58 | Air flow adjustment collar | 1 |
| 57 | Body rear ring | 1 |
| 56 | Thermostat adjustment knob | 1 |
| 55 | On/off switch | 1 |
| 54 | Thermostat adjustment knob nut | 1 |
| 53 | Display window | 1 |
| 52 | Light cover | 1 |
| 51 | Rear plastic cover | 1 |
| 50 | Waterproof gasket | 1 |
| 49 | Display PCB-2 | 1 |
| 48 | Connector for fuel | 1 |
| 47 | electromagnetic pump connector | 1 |
| 46 | Fuel pump | 1 |
| 45 | Solenoid value | 1 |
| 44 | Fuel pipe ass’y | 1 |
| 43 | Rotor motor | 1 |
| 42 | Power PCB-1 | 1 |
| 41 | PCB bracket | 1 |
| 40 | Computer board fixing board | I |
| 39 | Photocell ass’y | 1 |
| 38 | Power cord | 1 |
| 37 | Cable fasterner 6N-4 | 1 |
| 36 | Photocell ass’y bracket | 1 |
| Key No. | Description | QTY |
![]()


