![]()
![]() Mid Tower
Mid Tower
User Manual
 http://www.youtube.com/watch?V=9TmFuWk4qb0
315 Product Video
Product Story
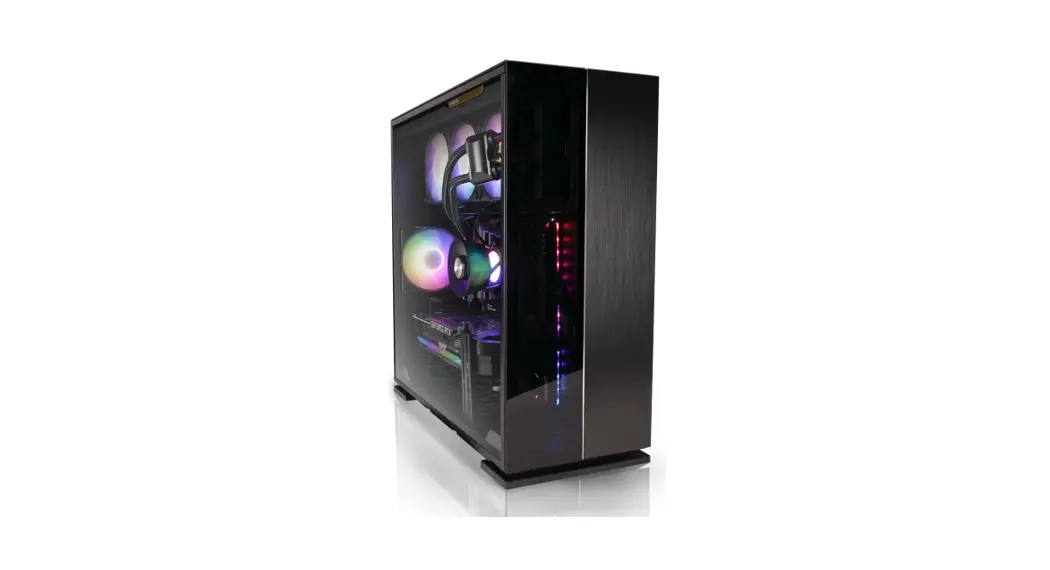
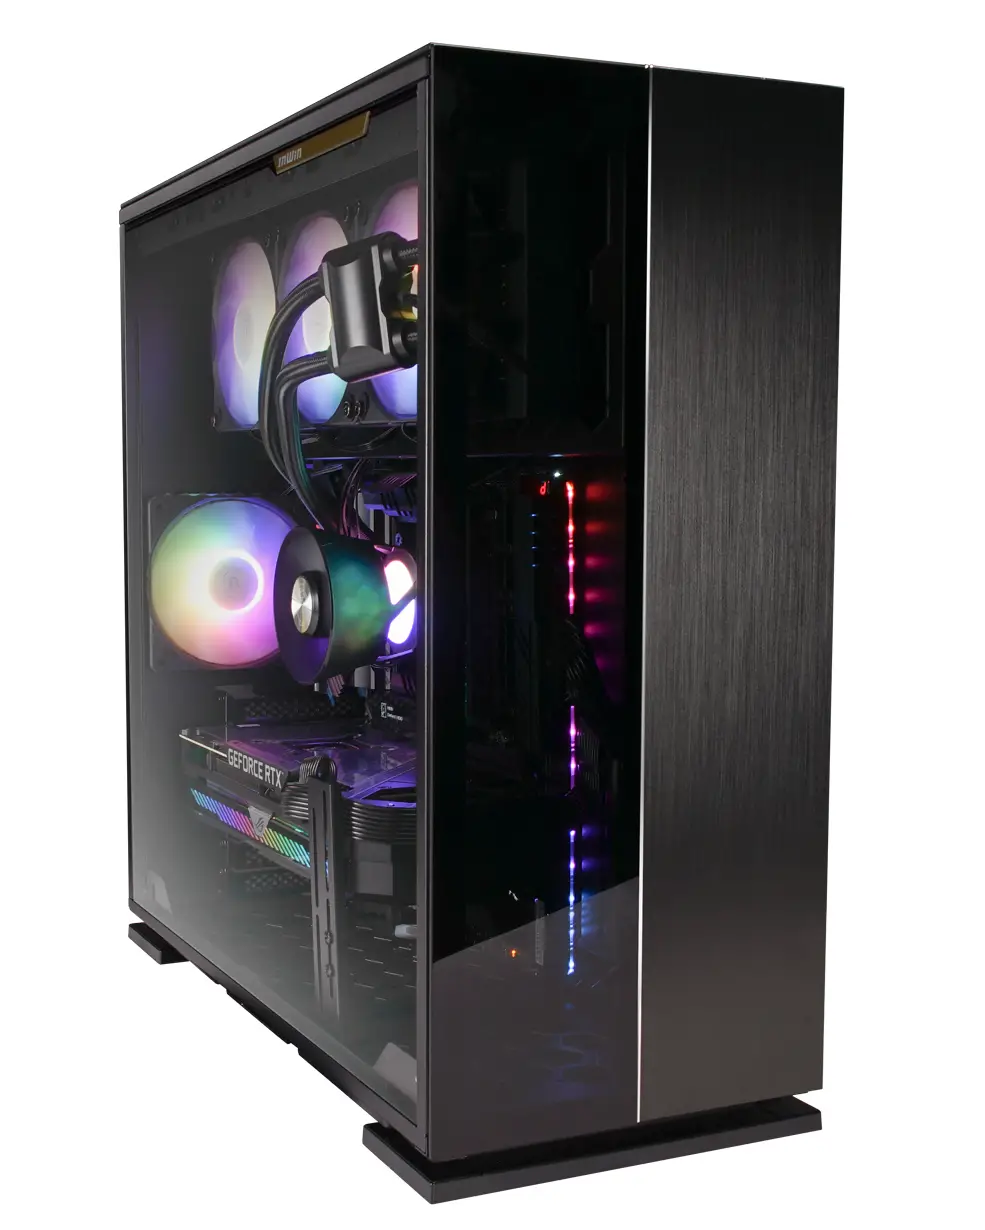
A Real Class Act
315 is a sleek and highly expandable Mid Tower chassis, characterized by a modern aesthetic design that perfectly integrates aluminium and glass. This high-class combination of style and expandability proves yet again InWin’s fine craftsmanship and relentless innovation.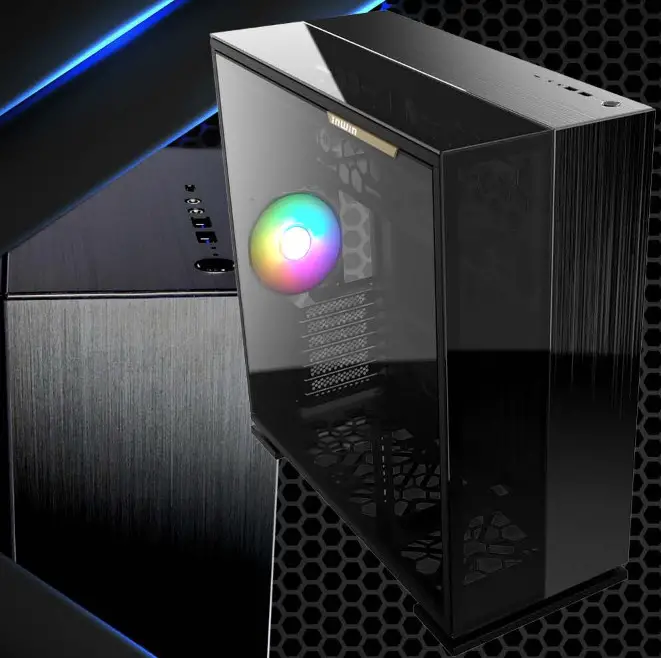
Specifications
315
| Model | 315 |
| Model Number | 1W-CS-315BLK-1A1120 |
| Colors | Black |
| Case Type | Mid Tower |
| Materials | Aluminium, SECC, Tempered Glass |
| Materials M/B Compatibility | 12″ x 13″ (305 x 330 mm) E-ATX, AIX, Micro-ATX, Mini-ITX |
| Expansion Slots | 7 x PCI-E |
| Maximum Compatibility | VGA Card Length: 350 mm |
| CPU Heatsink Height: 160 mm | |
| I/O Ports | 1 x USB 3.1 Gen 2 Type-C 2 x USB 3.0 HD Audio |
| Internal Drive Bays | 2 x 3.5″ /2.5″2 x 2.5″ |
| Thermal Solution Compatibility | Air Cooling Fans: Top: 3 x 120 mm Rear: 1 x 120 mm Bottom: 3 x 120 mm (1 InWin Luna AL120 Fan Included) Water Cooling Radiator: Top: 1 x 360 mm Rear: 1 x 120 mm Bottom: 1 x 360 mm (Slim) |
| Power Supply Compatibility | PSII: ATXI2V – Length up to 200 mm |
| Product Dimensions (LxWxH) | 494 x 225 x 505 mm |
| 19.5 x 8.8 x 18.9″ | |
| Package Dimensions (LxWxH) | 572 x 610 x 335 mm 22.5 x 24 x 13.1″ |
| Net Weight | 12.3 kg |
| Gross Weight | 14.6 kg |
* Number of fans pre-installed may vary based on different regions.
* InWin’s products comply with RoHS regulation.
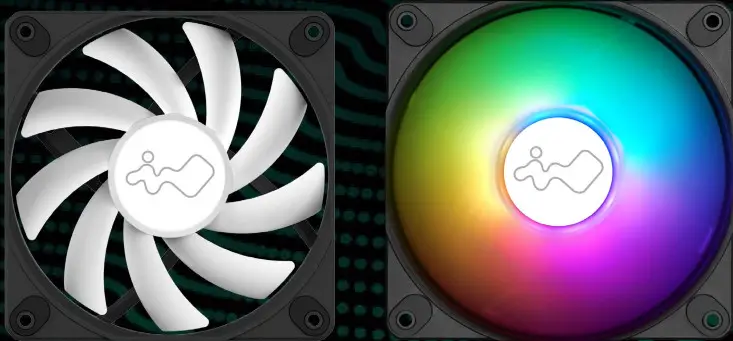
InWin Luna AL120 Fan
| Model | Luna AL120 |
| Colors | Black |
| Fan Size | 120 x 120 x 25 mm |
| Materials | PC, PBT |
| Rated Voltage | DC 12V |
| Rated Power | 3.96W |
| Rated Current | 0.33A |
| ADD RGB Rated Voltage | DC 5V |
| ADD RGB Rated Power | 1.5W |
| ADD RGB Rated Current | 0.3A |
| Speed Mode | PWM 400-1800+/-10% RPM |
| Air Flow | 82.96 CFM |
| Air Pressure | 2.31 mm / H2O |
| LED | Addressable RGB |
| Connector (Fan to Fan) | Non-Modular Cables |
| Connector to M/B | 4-Pin (PWM, 12V), 3-Pin (ARGB, 5V) |
| Noise Level | 25 dB(A) (Normal) |
| Bearing Type | Long Lifespan Sleeve Bearing |
* InWin’s products comply with RoHS regulations.
* Specifications may vary based on different regions.
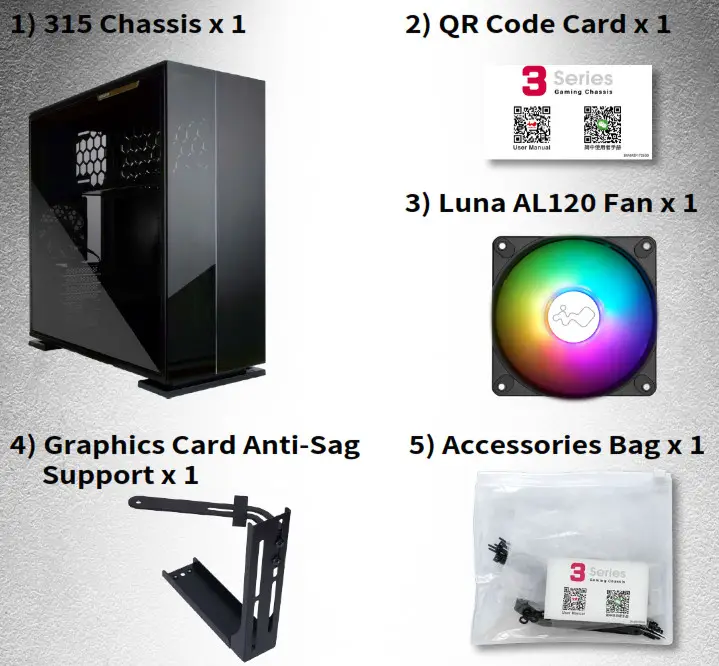
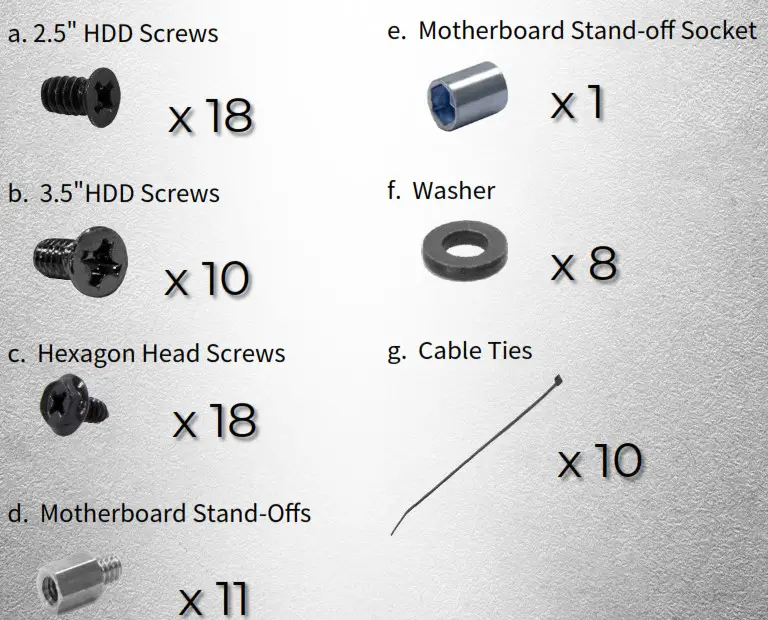
Package Contents
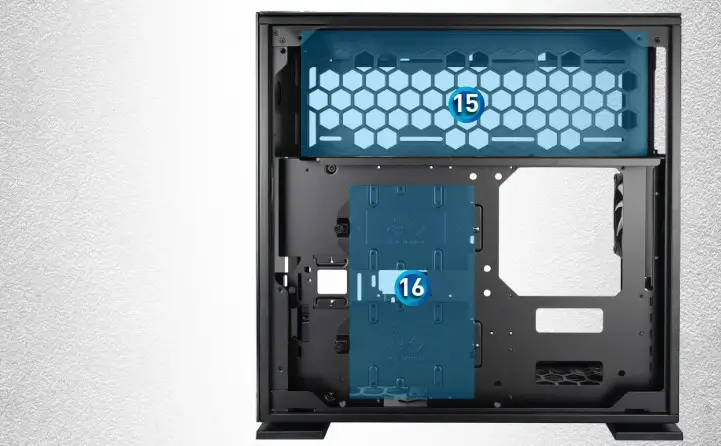
Case Structure

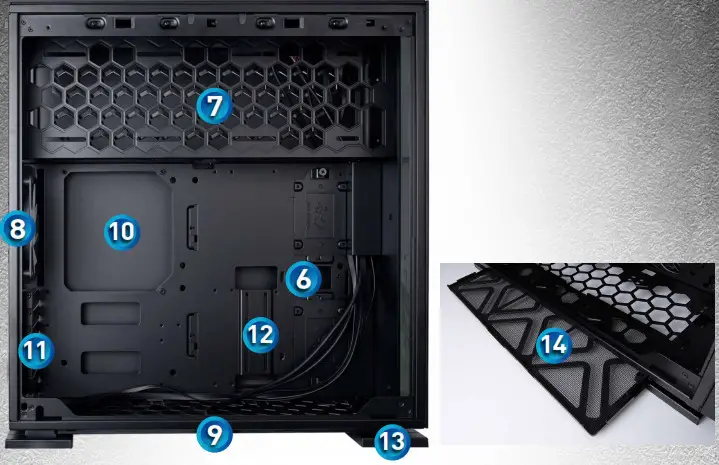
| 6. 2.5” Drive Bays | 11. PCI-E Expansion Slots |
| 7. Top Fan / Radiator Mounting Area | 12. Extra PCI-E Supporting Mounting Hole |
| 8. Rear Fan / Radiator Mounting Area (1 InWin Luna AL120 Fan PreInstalled) | 13. Shock-Proof Stands |
| 9. Bottom Fan / Radiator Mounting Area | 14. Fan Dust Filter |
| 10. Motherboard Mounting Area | 15. Power Supply Mounting Area |
| 16. 3.5″ / 2.5″ Drive Bays |
Cable Information
| Switch/LED x1 | |
| HD Audio x1 | |
| USB3.0 x1 | |
| USB3.1 Type-C x1 |
Installation Guide
* Please follow the related chapters to assemble.
* Please use original provided accessories to avoid damage to the product.
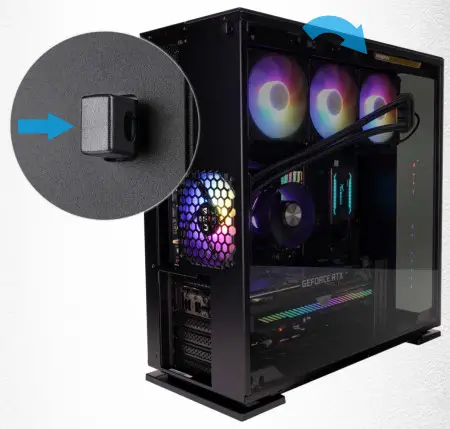
- Opening the Chassis
Press the Quick-Release Button to remove the tempered glass side panel. Caution: Be aware of possible sudden releases of the glass panel when opening it. You can also use this feature as a locker. Keep hardware safe by adding a lock.
- Power Supply Installation
Power Supply can be mounted to the top bracket.
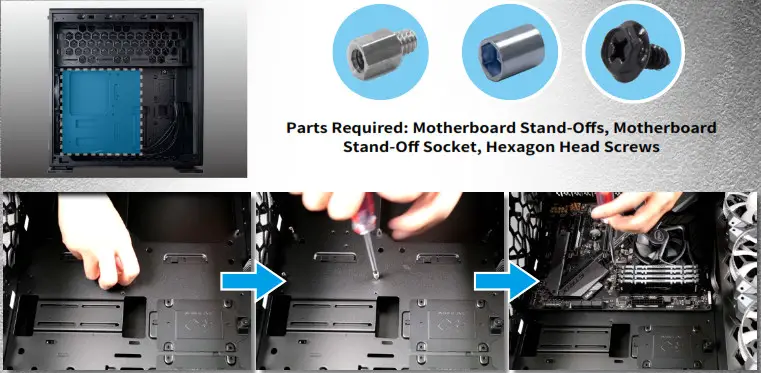
- Motherboard Installation

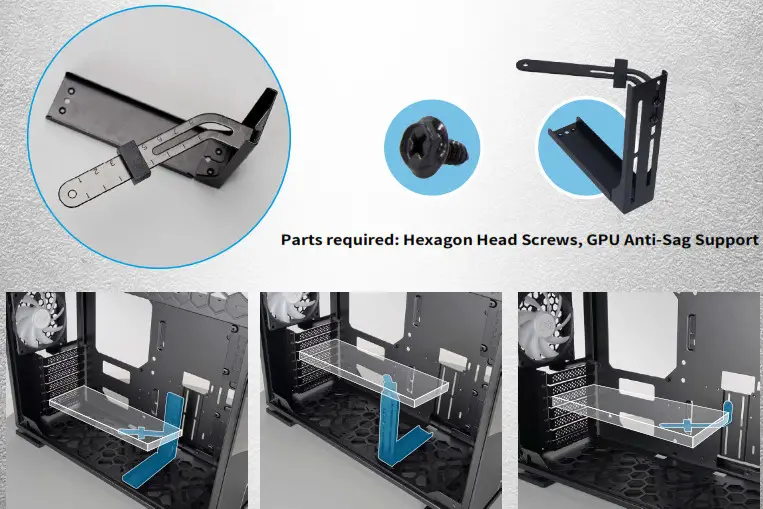
- Expansion Card Installation
* There are multiple ways to install the GPU Anti-Sag Support.
* Please consider that the installation of the bracket may affect the placement of the bottom fans/radiator and other components of your build.
* Use the adjustable GPU Anti-Sag Rubber Pad to eliminate friction between your
Expansion Card and the bracket.
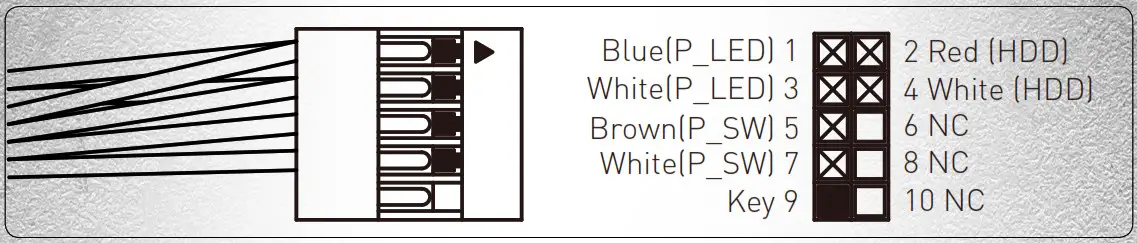
- I/O Wires Installation
Switch/LED ConnectorBlue (P_LED) 1 2 Red (HDD) White (P_LED) 3 4 White (HDD) Brown (P_SW) 5 6 NC White (P_SW) 7 8 NC Key 9 10 NC  HD Audio Header
 USB3.0 Header
 Type-C Cable
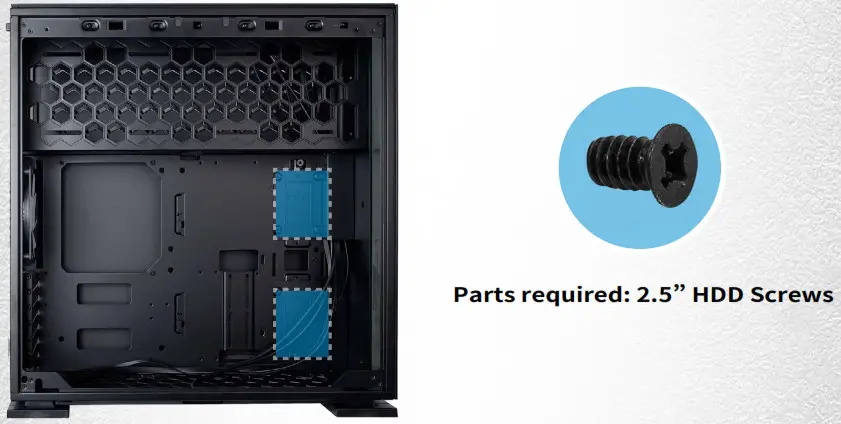
- 2.5″ Drive Bays Installation

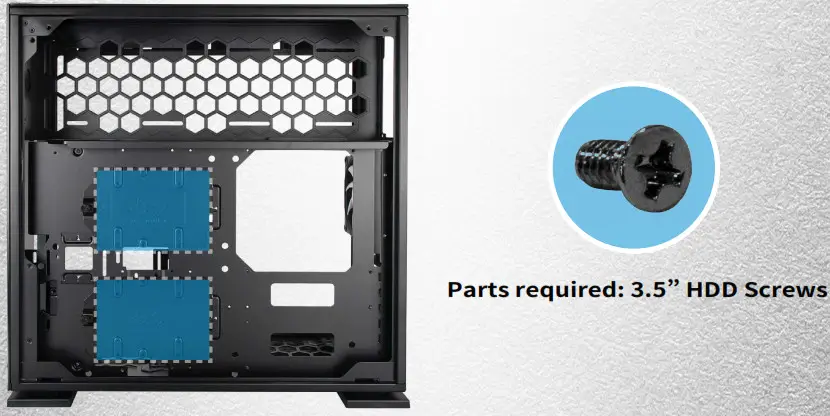
- 3.5″ Drive Bays Installation

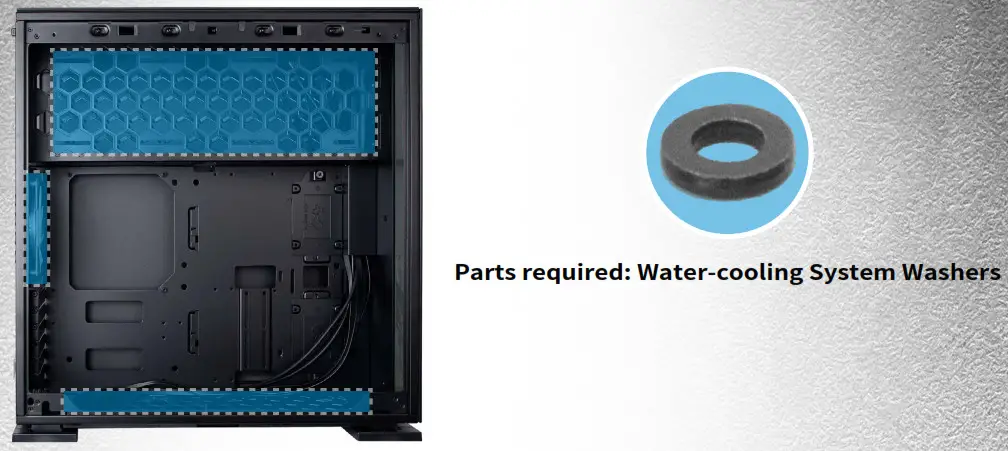
- Fan / Liquid Cooling Radiator Installation
 Optimal Airflow Setup:
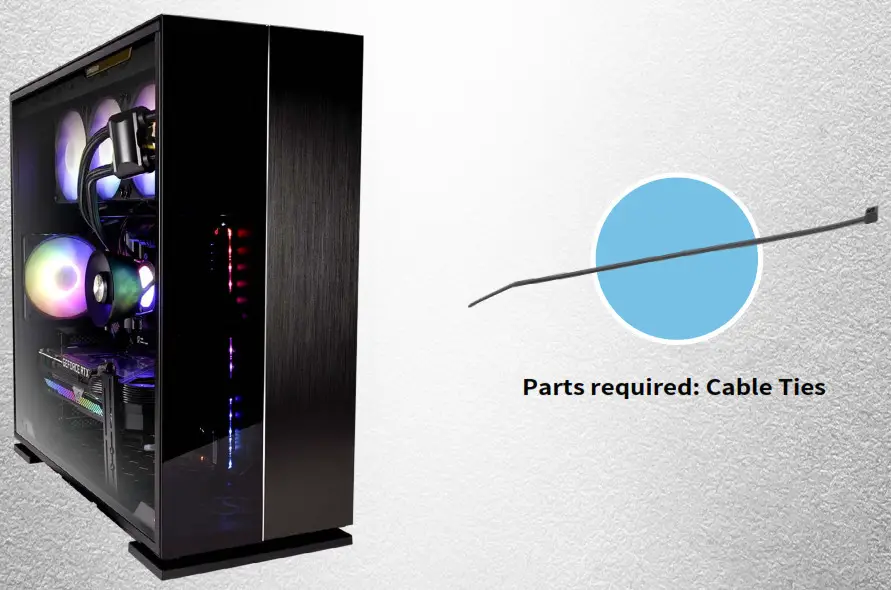
- Completing Installation


 HD Audio Header
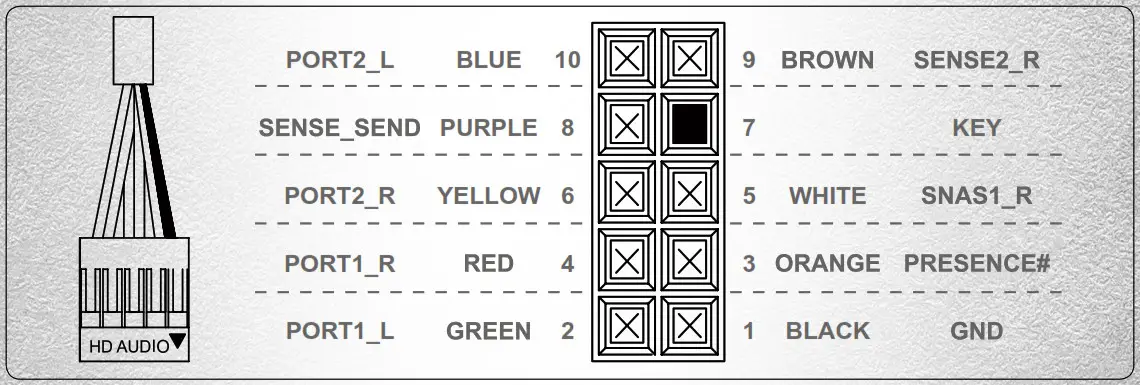 USB3.0 Header
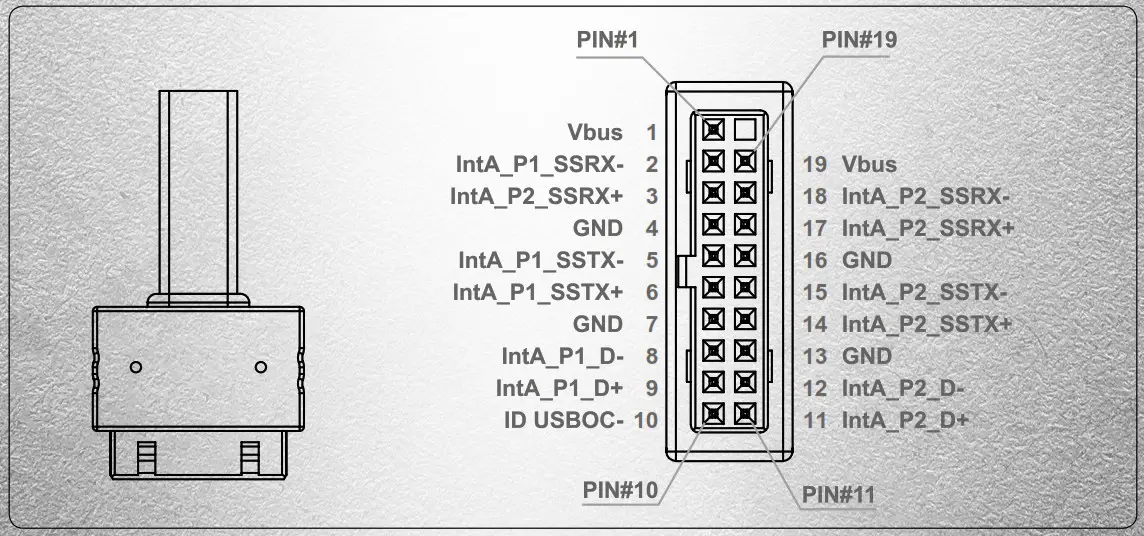 Type-C Cable
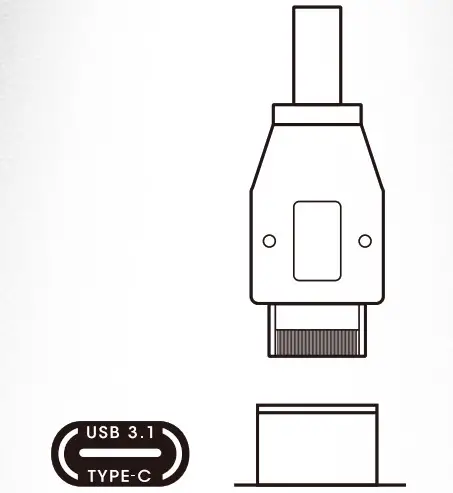
 Optimal Airflow Setup:
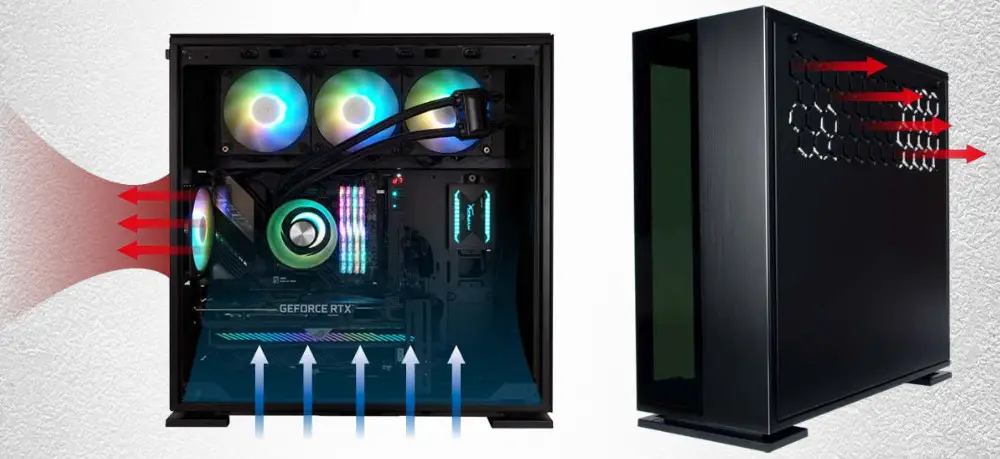
Notices and Warranty
Notices
- Install in accordance with the user manual’s instructions and safety warnings. Incorrect installation may result in burning out the motherboard and other system components.
- To avoid damaging any circuits, please make sure the power is off before assembling any internal device.
- When installing the computer components, please use the antistatic precautions to prevent ESD (electrostatic discharge) damage. This can cause injury to the installer and/or damage to the machine.
- When the side panels are opened, please do not put your hands or other objects into the fans or other parts in operation. And please make sure to keep away from children and pets.
- Please avoid unnecessary insertions and extractions to the addressable cable as it may damage the pins.
- To avoid any damages, please do not use this product for any other purpose than its intended use.
- Any modifications may damage the product.
- Please remove all internal devices before shipping or moving. (Including power supply, hard drives, motherboard, CPU, etc)
- Keep this product away from areas with high temperatures such as: heat dissipation machines, air conditioners or other machines which may generate high temperatures.
- Please use only this product’s exclusively supplied cables. Other cables may not be compatible and could cause serious damage to your system and power supply.
Warranty
- For more detailed warranty information, please visit the InWin retail website at www.in-win.com.
- The actual product is subject to change without prior notice. In Win Development Inc. reserves the right to make any final modifications.
Copyright © 2021 In Win Development Inc. All Rights Reserved.
![]() CONTEMPORARY & INNOVATIVE
CONTEMPORARY & INNOVATIVE
WWW.IN-WIN.COM


