AQUATEC ORCA, ORCA F, ORCA XL
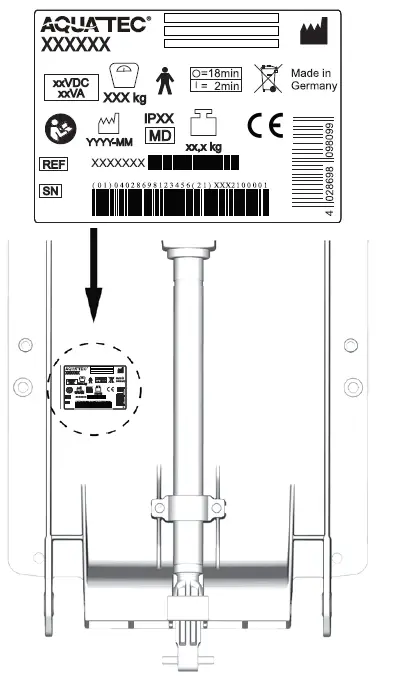
When replacing the backrest for products produced before May 2015, the seat plate will also need to be changed. For production date, see identification label on the backside of the backrest.
Safety information
WARNING Risk of injury
If the bath lift is not assembled correctly it can cause accidents and severe injuries.
Assembly and Disassembly of the bath lift should only be carried out by an authorized specialist dealer.
CAUTION Danger of crushing and pinching your hands and fingers.
Take care of your hands and fingers when working on the lifting scissors of the bath lift.
IMPORTANT Run the unloaded lift once to the top and then back to the bottom after the seat plate has been changed (function test).
Scope of delivery
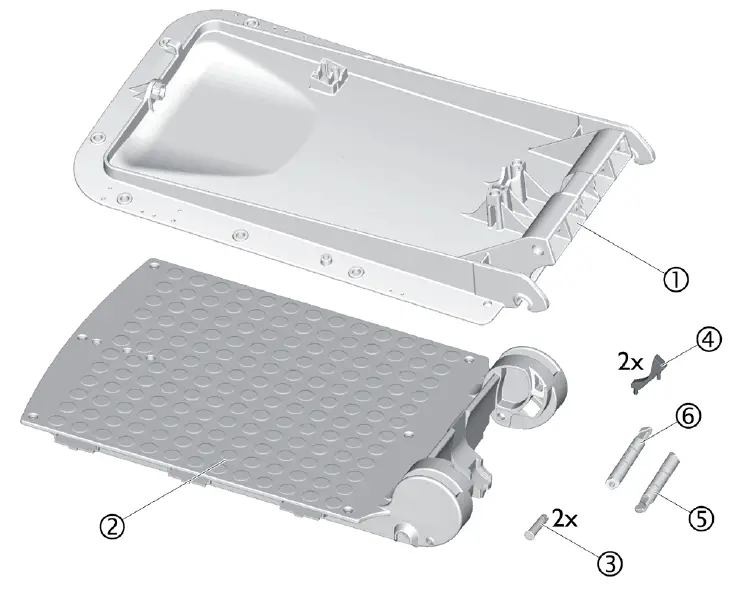
Spare parts kit (part no. 1580158) contains the following items:
| Pos. | Designation | Part number | Qty. |
| 1 | Backrest | 1563010 | 1 |
| 2 | Seat plate | 1563012 | 1 |
| 3 | Socket pin (ORCA / ORCA F) | 16679 | 2 |
| 4 | Wedge piece (ORCA F) | 1471055 | 2 |
| 5 | Bolt right (ORCA F) | 1471058 | 1 |
| 6 | Bolt left (ORCA F) | 1471059 | 1 |
Changing the seat plate
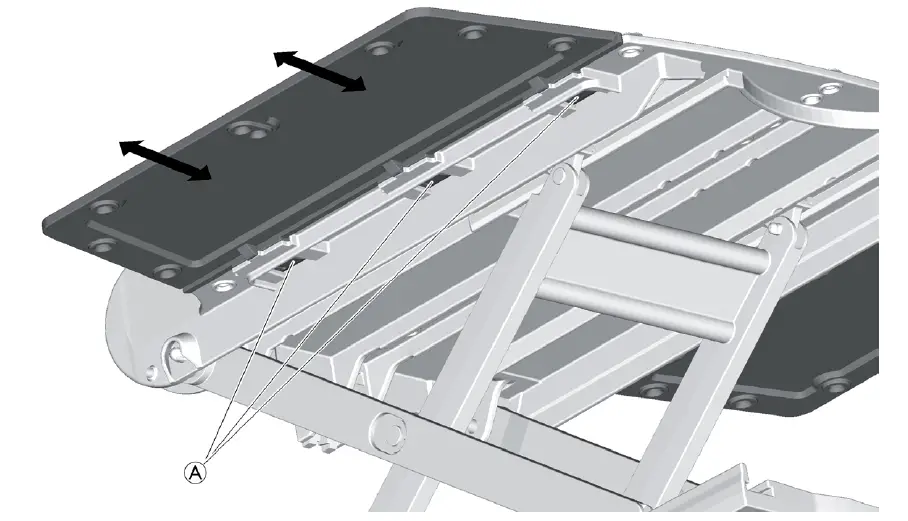
- Starting from one side press in clips A and simutanoeusly pull out the side flap slowly.
- Repeat step 1 for the opposite side flap.

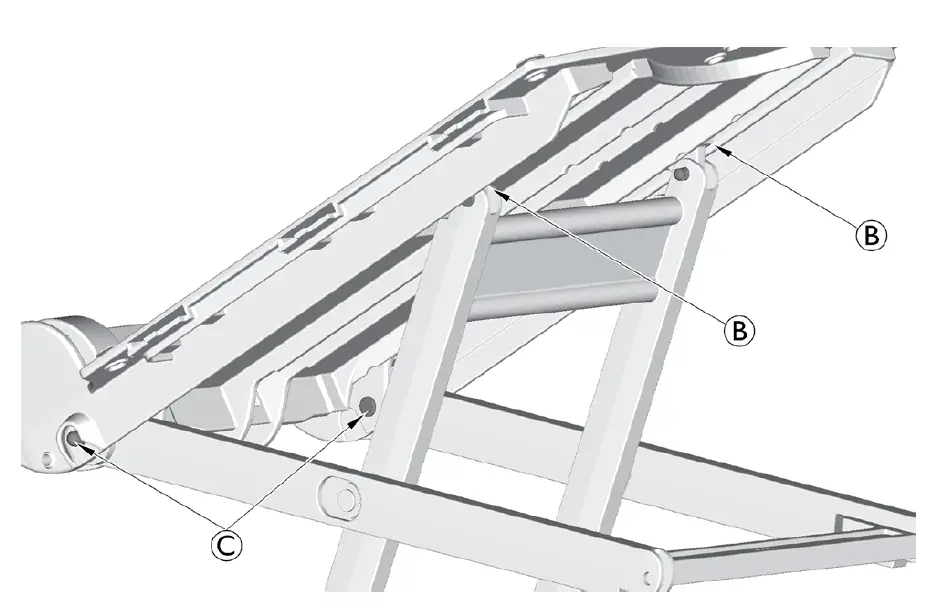
- Lift up the lifting scissors.
- Using a flat head screwdriver, remove the outer socket pins C, which connect the front part of the lifting scissors with the seat plate, push them through to the inside and remove. For the ORCA XL remove the retaining rings from the stainless steel pins, push them through to the inside and remove.
- Remove the seat plate backwards.
- Insert the gliding shoes B on the lifting scissors into the track of the new seat plate. Secure lifting scissors and seat plate through the holes with the new socket pins C from inside to outside. For the ORCA XL use the previously disassembled stainless steel pins and secure with the retaining rings.
- Reattach the side flaps by inserting them simultaneously into the slots of the seat plate until all clips are fully engaged.
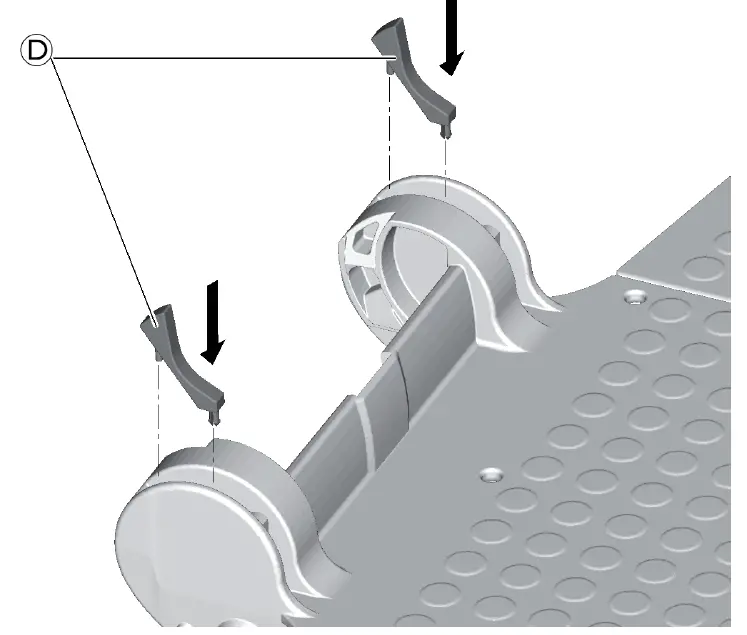
Only for ORCA F:
- Insert the wedge pieces D into the seat plate.

- Substitute old bolt right E and bolt left F with new bolt right and bolt left.
- Assemble the thrust washer clips G 180° turned.