![]()
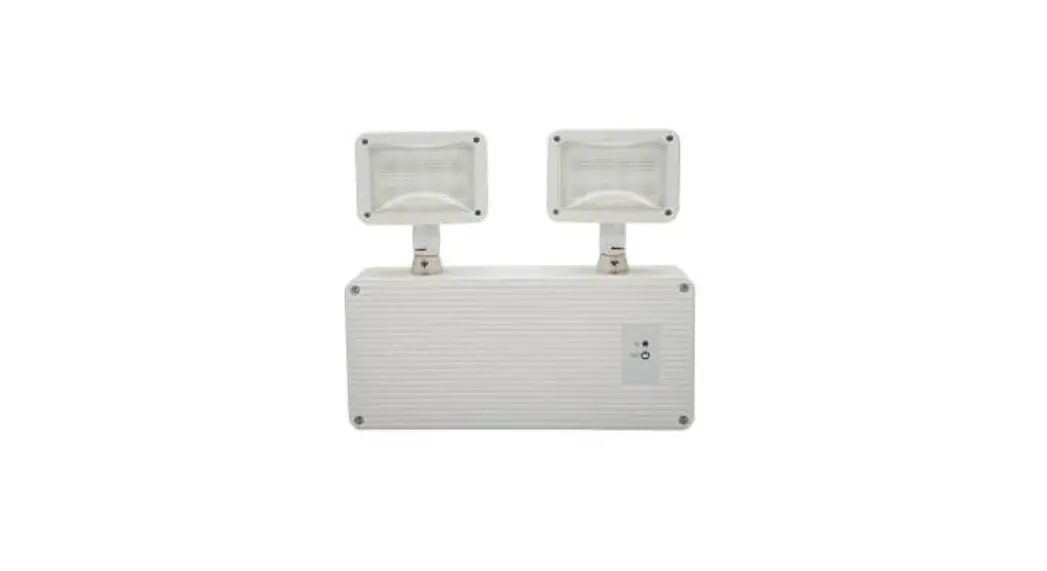
LED EM. BATTERY BACKUP · 55394
INSTALL INSTRUCTIONS
![]()
PLEASE FIND A QUALIFIED ELECTRICIAN FOR INSTALLATION.
Please read the instructions before you install and use the emergency battery backup.
WARNING – Risk of fire or electric shock. LED emergency backup installation requires knowledge of luminaire electrical systems. If not qualified, do not attempt installation. Contact a qualified electrician.
CAUTION: RISK OF INJURY
- Do not use outdoors.
- Do not mount near gas or electric heaters.
- Equipment should not be mounted in locations and at heights where it will not be subjected to tampering by unauthorized personnel.
- The use of accessory equipment is not recommended and may cause an unsafe condition.
- Do not use this equipment for other than intended use.
- For use with grounded, UL Listed, Damp location rated fixture with a grounded case.
- The equipment is intended for ordinary locations and for permanent installation into one or more Listed emergency luminaires.
- Install in accordance with the National Electrical Code and local regulations.
![]() WARNING – TURN OFF POWER SUPPLY FROM MAIN CIRCUIT BREAKER BEFORE INSTALLING OR SERVICING.
WARNING – TURN OFF POWER SUPPLY FROM MAIN CIRCUIT BREAKER BEFORE INSTALLING OR SERVICING.
INSTALLATION INSTRUCTIONS
Installation effects the whole fixture.
- Only for use with fixtures less than 300W.
- Review all instructions before installation and usage.
- This item could be used in an enclosed fixture or installed in the open area of the fixture.
- Keep away from flammable materials and in a place with good heat dissipation.
- Charge the battery consistently for more than 24 hours before usage to activate all battery cells of discharging/charging duration.
| 1. Open knock-outs with screw driver. | |
| 2. Take the wire out of the driver box. • Use needle-nose pliers to clamp the plugs and take out from the driver box. (Fig. A) • Open the outlet plate and remove the wire from the knock-out. (Fig. B) | 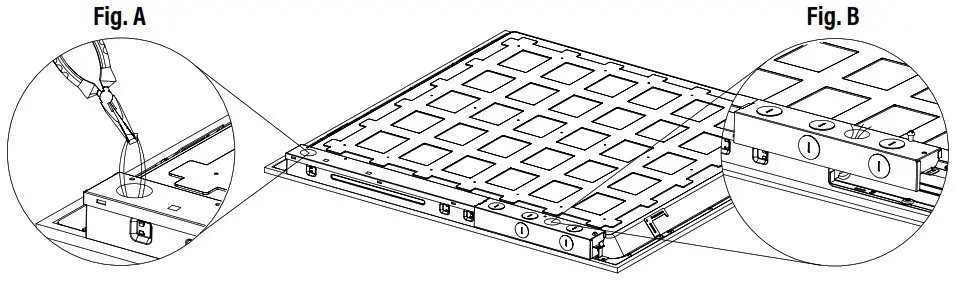 |
| 3. Cut off the plug with the four wires. | 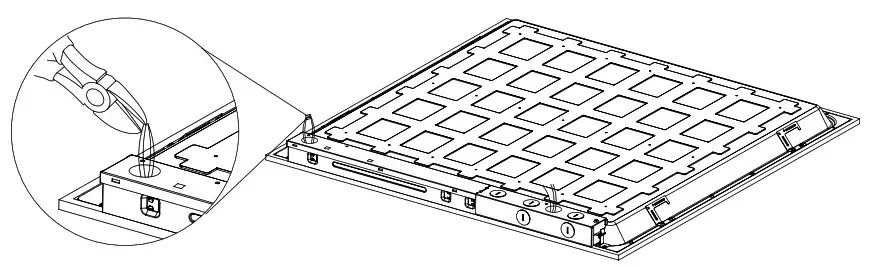 |
| 4. Install test switch before installing wire boxes. Then install mounting bracket. (Item#: 55395 or 55393 – Mounting Bracket and Wire Boxes sold separately as a kit.) | 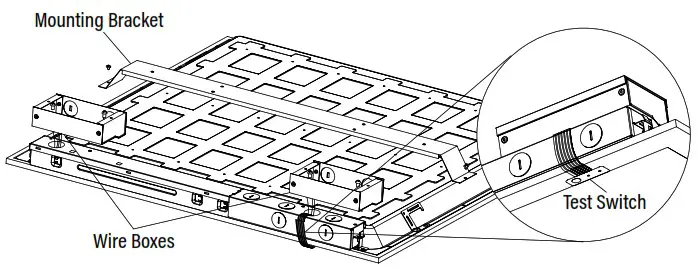 |
| 5. Open knock-outs with a screwdriver. | 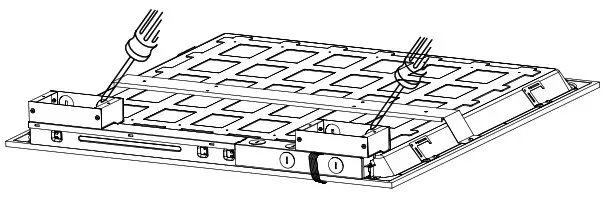 |
| 6. Install emergency battery – refer to general wiring diagram. | 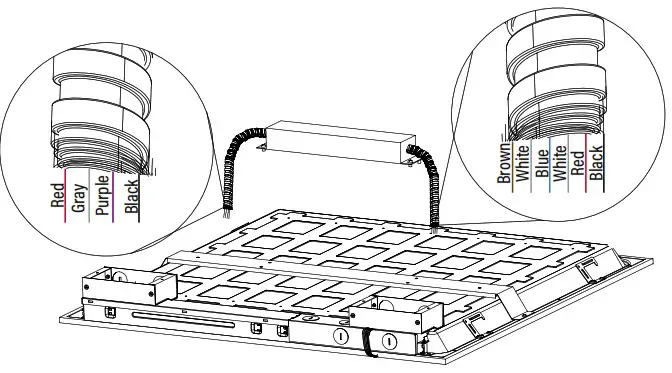 |
| 7. Insert conduit hose into the knock-out and connect wires. Then install covers on wire boxes. | 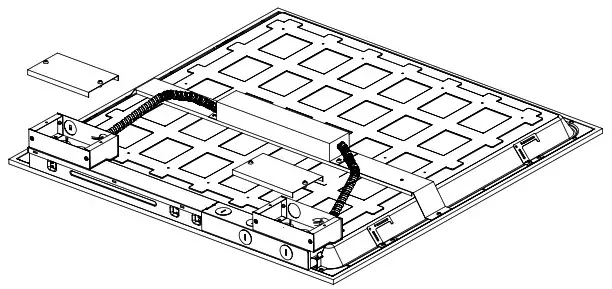 |
| 8. Installation complete. | 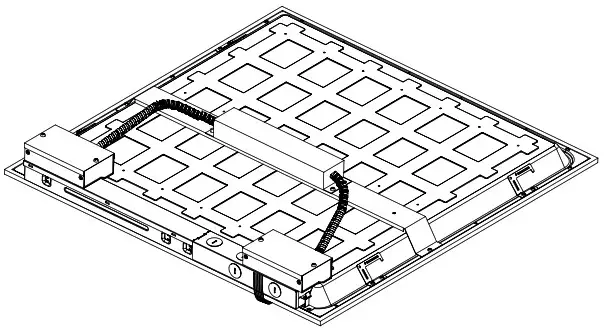 |
GENERAL WIRING DIAGRAM
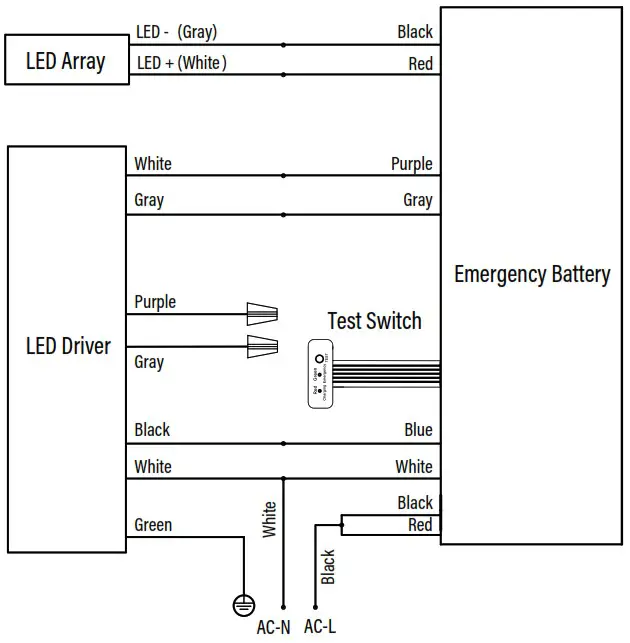
TEST SWITCH
- Emergency battery backup will go into emergency mode if test switch is pressed when main supply is on, it will remain in charging mode if test
switch is not pressed. - In emergency mode, press the test switch for 3 seconds to turn off the current emergency state.
LED INDICATOR
- Solid Red Light: charging mode or fully charged.
- Red Light Off: main power off or in discharge mode.
MAINTENANCE
- Turn off the main power every 3 months, to let the battery operate a charging/discharging cycle. This will help extend the life of the battery.
- Check the emergency function with the push test button.
PREMIUM QUALITY LIGHTING®
• www.PQLighting.com
© P.Q.L., Inc. • 2285 Ward Avenue • Simi Valley, CA 93065 • 800-323-8107
Specifications subject to change without notice.
Photos and line drawings may not be to scale and are for general reference only.


