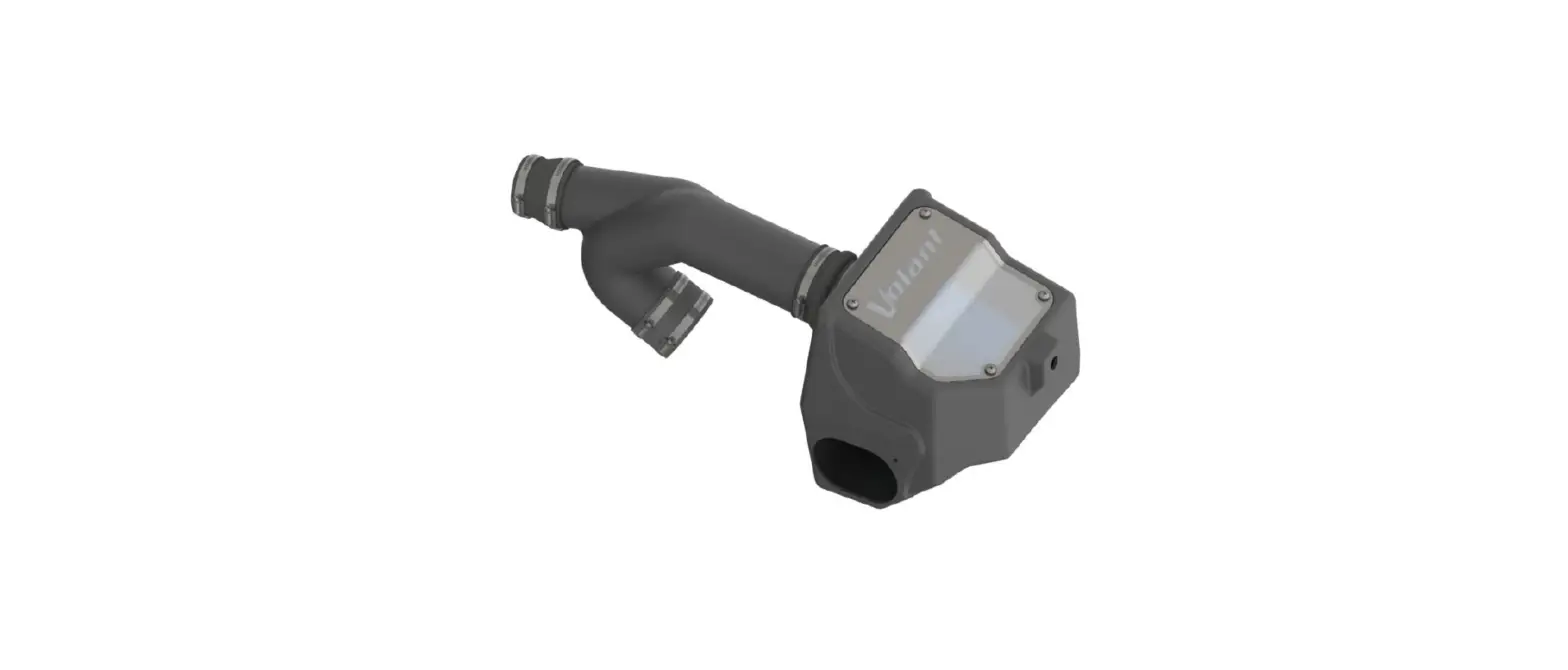
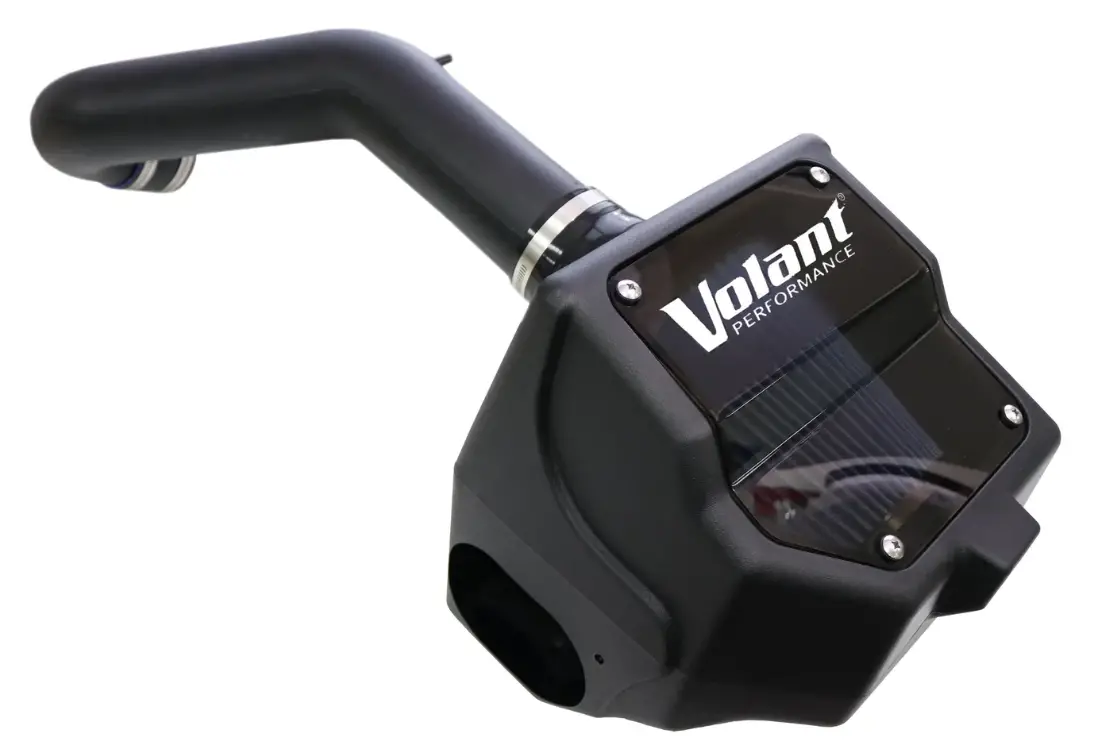
Volant 19135 Closed Box Air Intake
 IMPORTANT! WARRANTY AND INSTALLATION INSTRUCTIONS
Be sure to review the enclosed instructions prior to beginning the installation process. If you have any questions about the enclosed parts or instructions, or if you encounter a problem during installation:
CALL TECHNICAL SUPPORT: 440.891.0999 or 800.486.0999
COLOR INSTRUCTIONS ARE AVAILABLE BY PART NUMBER ON:
VOLANT.COM
RECOMMENDED TOOLS & SUPPLIES
- Flathead Screwdriver
- 7mm, 8mm,10mm, and 13mm Sockets
- Philip Screwdriver
- Ratchet
- Ratchet Extension
Please take time to read and understand these installation instructions.
Volant recommends that the installation of this system be performed by a qualified service center or professional installer who has the necessary equipment, tools, and experienced personnel. However, if you decide to perform this installation yourself, the use of an additional person may be required.
WARNING: Never work on a hot engine bay. Allow time for the vehicle to cool.
Check that this air intake complies with your Federal, State, and Local laws. We recommend saving your stock system.
This warranty does not extend to damaged or defect in the finish of a product or to any product, that in the opinion of Volant Performance, has been misused, damaged by accident or negligence, altered or modified in any way, faulty installation or installed contrary to Volant installation instructions, or repaired by an unauthorized service facility.
Full warranty available on http://www.volant.com
Please confirm that all parts are present according to the bill of materials before beginning the installation.
If something is missing call Tech Support at 440.891.099 or Toll Free: 1.800.486.0999
| PREASSEMBLED MATERIALS | |||||
| Volant Filter Box | Volant Plastic Air Duct | Volant Air Box Lid | |||
| Filter (See Chart Below) | 1 | Rubber Grommet | 1 | Lid Screws | 4 |
| Filter Adapter (4.0”) | 1 | ||||
| FILTER OPTIONS | ||
| Max Flow 5 (Oiled) Part # 5119 | DryTech 3D (Dry) Part # 5119D | PowerCore® (Dry) Part # 61513 |
| HARDWARE KIT | |||||
| #48 Clamp | 1 | Straight Sleeve (4.0”) | 3” | 6mm – 16 Bolt | 5 |
| #56 Clamp | 1 | Hump Hose (4.0”) | 1 | 6mm – 25 Bolt | 1 |
| #64 Clamp | 4 | Reducer Sleeve (3.0” x 3.5”) | 1 | Spacer (.25”) | 1 |
| 6mm Nut | 3 | Flat Washer (.25” x .75”) | 1 | Flat Washer (.25” x .625”) | 6 |
| Wiring Harness Mounting Bracket | 1 | Lock Washer (0.25”) | 3 | ||
Locate the vehicle’s battery and disconnect the negative battery cable.
This may reset the computer and clear old air flow data to help prevent CEL errors.
REMOVAL INSTRUCTIONS
- Disconnect the harness from the air temperature sensor on back side of factory air duct.

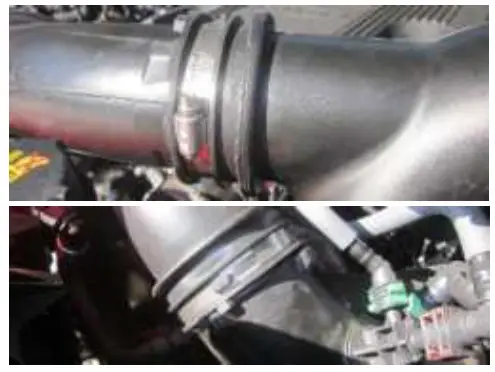
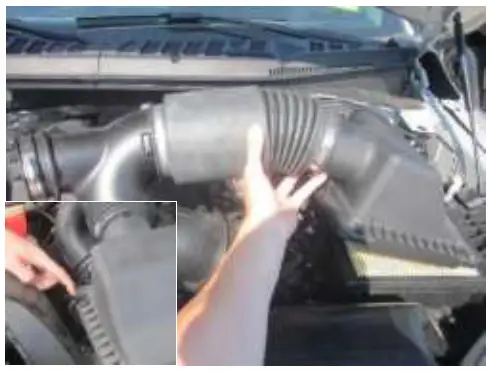
- Loosen the clamps on the top and bottom intake tubes using a ratchet and 7mm socket or flathead screwdriver.

- Unclip the air box lid and remove the factory duct and lid assembly as one piece.

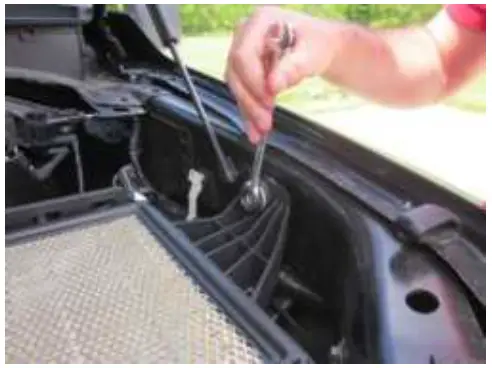
- Use a ratchet and 13mm socket or wrench to remove the bolt holding the air box to the vehicle. Save bolt for Install Step 5.

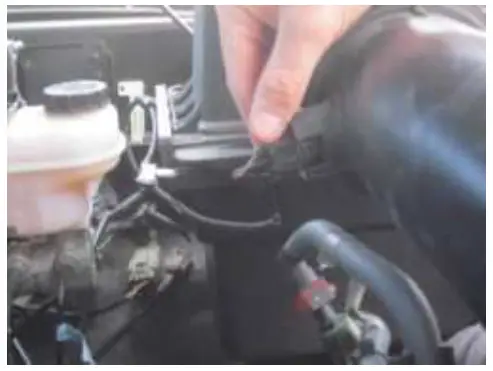
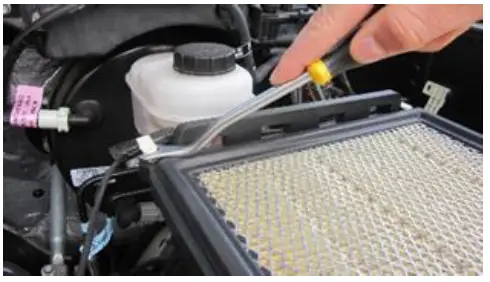
- Remove the three plastic wire retention clips from back of factory air box

- Remove the two plastic clips from the factory air scoop. Save clips for Install Step 7.

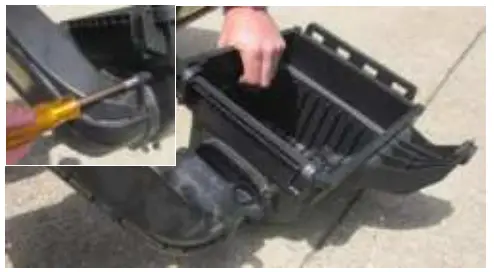
- Remove the bottom box assembly by pulling it up and out. Remove the rubber grommet and metal bushing from factory air box. Save for Install Step 2.

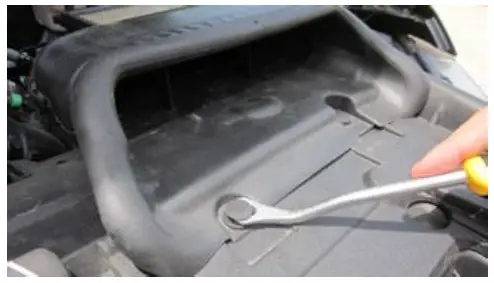
- Remove the bolt attaching the scoop to factory air box using an 8mm socket. Remove the factory air scoop from the bottom of the air box.

- Remove the air temp sensor from factory duct. Save for Install Step 17.

- Remove O-ring from the temp sensor.

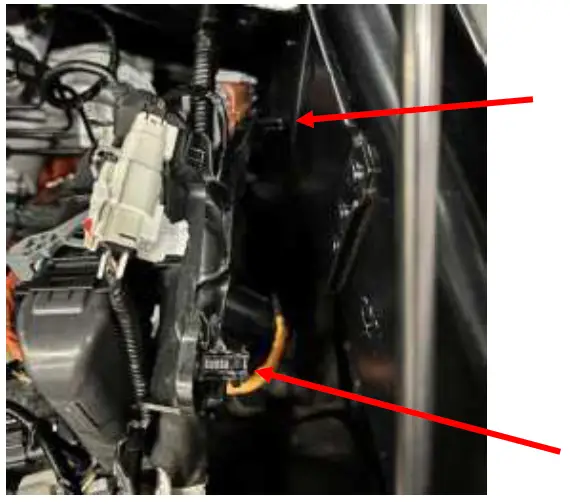
- Using a trim removal tool, carefully pull the plastic wiring harness mount from the inner fender.


INSTALLATION INSTRUCTIONS
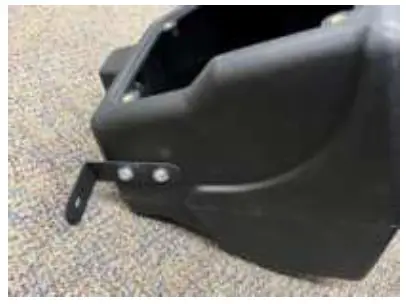
- Install wiring harness bracket to Volant air box using two 6mm x 16 bolts, two .25” x .63” flat washers, two .25” lock washers and two 6mm nuts.

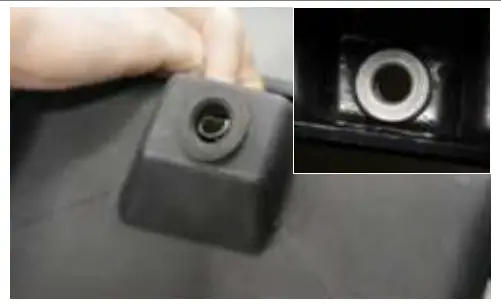
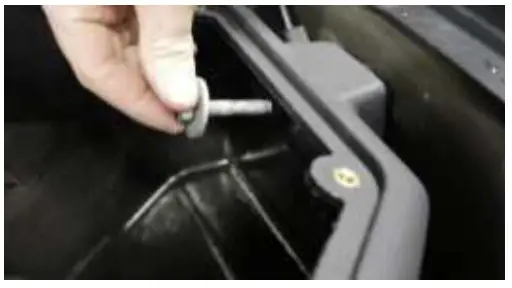
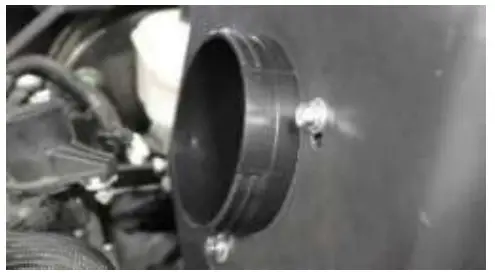
- Insert the factory grommet from Removal Step 7, then install the metal bushing into grommet from inside box as shown.

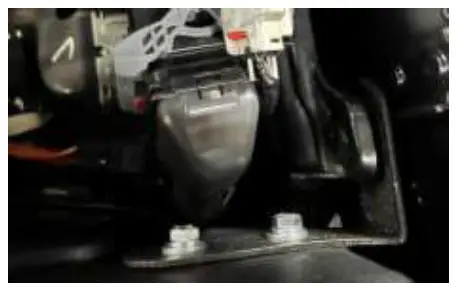
- Install factory scoop to Volant air box using provided 6mm-25 bolt with flat washers, lock washer, spacer, and nut using 10mm socket or wrench.

- Install Volant air box into the vehicle by inserting stems on bottom of Volant air box into factory grommets.

- Attach the Volant air box to the fender with the bolt from Removal Step 4 using a ratchet and 13mm socket.

- Insert push clip on factory wiring harness mount into hole on bracket.

- Reinstall factory scoop and attach with clips from Removal Step 6.

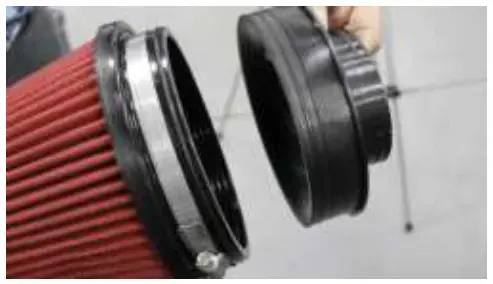
- Place the filter clamp on the filter and insert the filter adapter as shown. Do not tighten clamp.

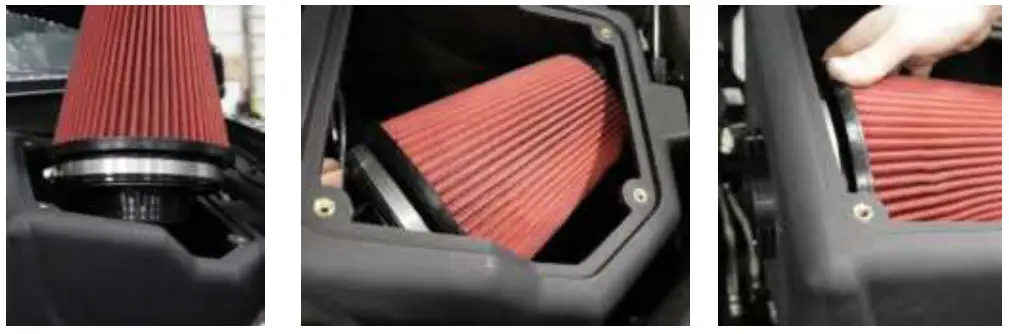
- Insert the filter into the air box with the adapter side down. Rotate the top of the filter down into the air box and rotate the filter around and push the adapter through air box.

- Locate three 6mm x 16mm bolts, three .25” x .63” flat washers, and three .25” lock washers. Attach filter adapter to air box and tighten using a ratchet and 10mm socket.

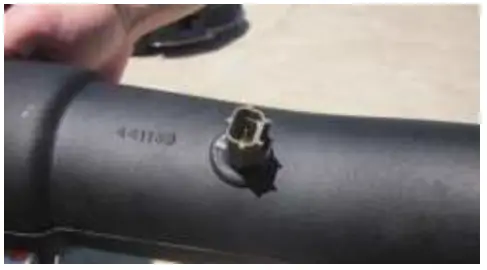
- Locate air temperature sensor from removal step 9 and Volant air duct. Install sensor into grommet with tab facing the closest end of air duct.

- Install the hump hose onto the Volant air duct along with two #64 clamps and tighten using a ratchet and 8mm socket or flat head screwdriver. Leave clamp on open end of hump hose loose.

- Install the straight sleeve onto lower factory inlet with #64 clamp. Tighten clamp using a ratchet and 8mm socket or flat head screwdriver. Leave clamp on open end of straight sleeve loose.

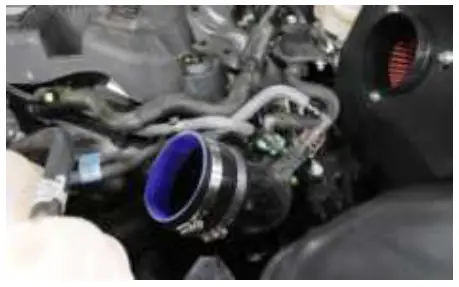
- Insert larger end of reducer onto Volant air duct using #56 clamp. Place #48 clamp on the smaller side. Tighten #56 clamp only using a ratchet and 8mm socket or flat head screwdriver.

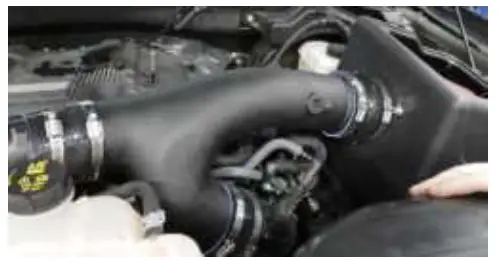
- Install Volant air duct into vehicle by placing the hump hose onto the filter adapter. Then place reducer onto the upper stock inlet. Rotate duct down and into the straight sleeve.

- Adjust air duct as necessary and tighten all clamps using a ratchet and 8mm socket or flat head screw driver.
NOTE: Make sure to tighten the filter clamp as well.
- Clip wiring harness on air temperature sensor.

- Install lid using provided 4 truss head screws with rubber washers and Philips head screwdriver.


NOTE: Check that this air intake complies with your Federal, State and Local laws. We recommend saving your stock system.
BEFORE ROAD TESTING
- Start engine, leaving the transmission in park and securing the parking brake.
- Make sure to look and listen for any unusual noises or air leaks. Repair problems if needed.
- Once completed it will be necessary to check periodically, after a few heat cycles, for realignment and tightening of all connections.
Max Flow 5 CARE AND CLEANING
Check the Max Flow 5 cotton reusable filter periodically and remove any excessive dirt build-up by tapping the filter on the ground and brushing off the loosened dirt. Clean the filter by using a two stage cleaning kit to thoroughly clean and re-oil the filter. Re-oil every 10,000 miles without cleaning to improve filtering in sand and dirt. Clean only when dirt is very excessive or 50,000 miles.
Reference for Replacement Filters:
Max Flow 5 (Oiled) Part # 5119, DryTech 3D (Dry) Part # 5119D, PowerCore® (Dry) Part # 61513


