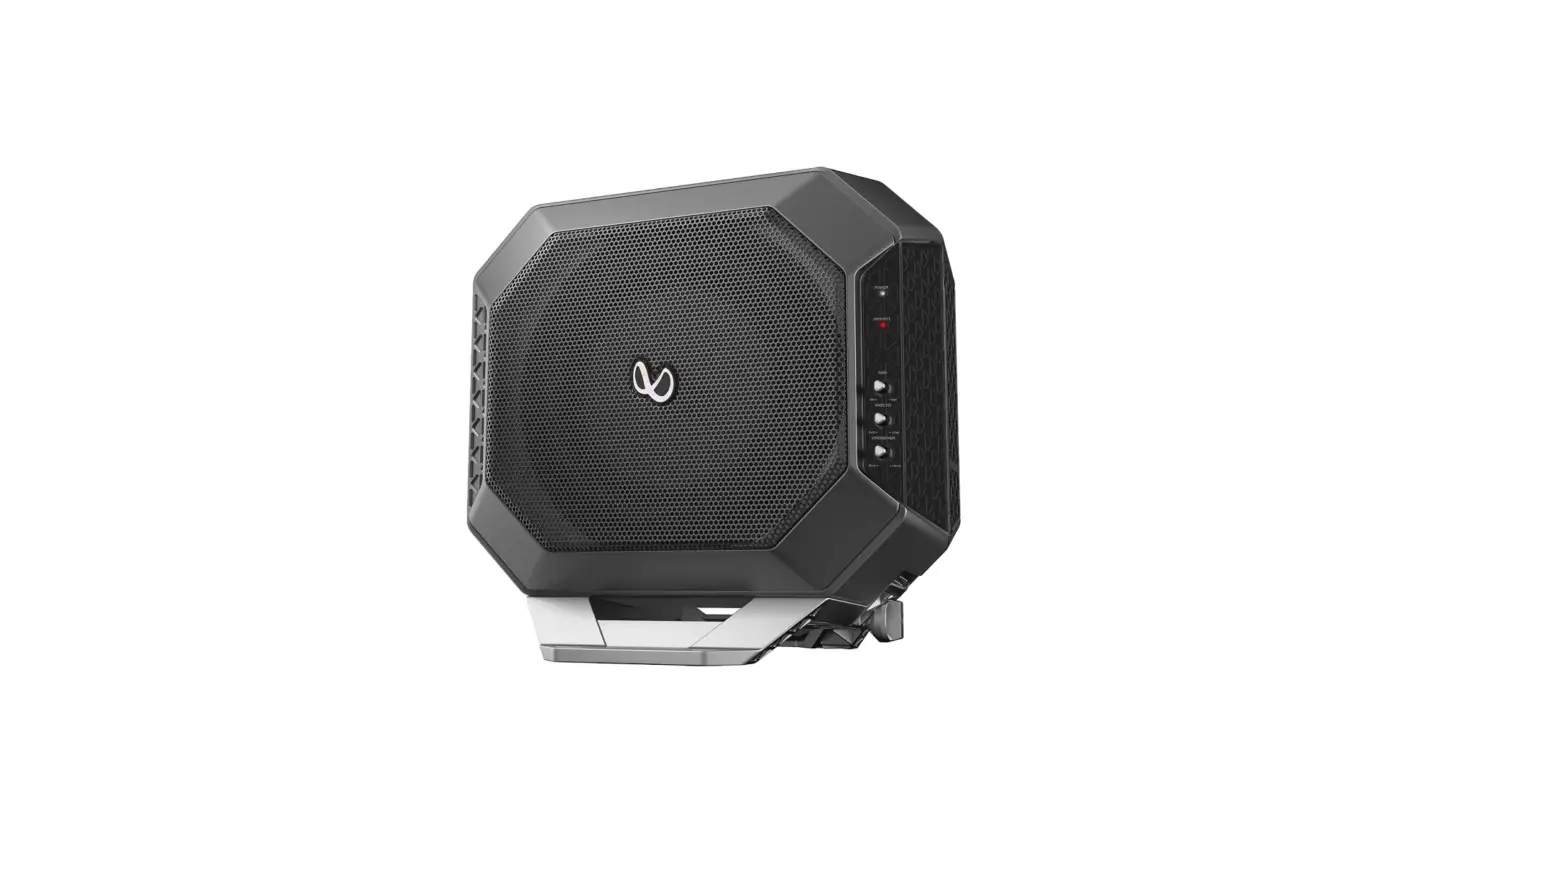

Infinity Basslink DC- 10” Compact, powered subwoofer system
Infinity Basslink DC- 10” Compact Powered Subwoofer System
Thank you for choosing the Infinity BassLink D. lo ensure maximum performance, we strongly recommend that you have it installed by a qualified professional -while these instructions offer general installation guidance, they do not show specific installation methods for your particular vehicle. If you do not have the necessary tools or hands-on experience, do not attempt the installation yourself; instead, ask your authorized Infinity car-audio dealer about professional installation options. Please refer to your owner’s manual (available at infinityspeakers.com) for more detailed instructions. (http://www.infinityspeakers.com)
INSTALLATION
IMPORTANT
Disconnect the vehicle’s negative (-) battery terminal before beginning the installation.
- Always wear protective eyewear when using tools.
- Check clearances on both sides of a planned mounting surface. Be sure that screws or wires will not puncture brake lines, fuel lines, or wiring harnesses, and that wire routing will not interfere with the safe vehicle operation.
- When making electrical connections, make sure they are secure and properly insulated.
- If you must replace the fuse, be sure to use the same type of fuse and current rating as that of the original
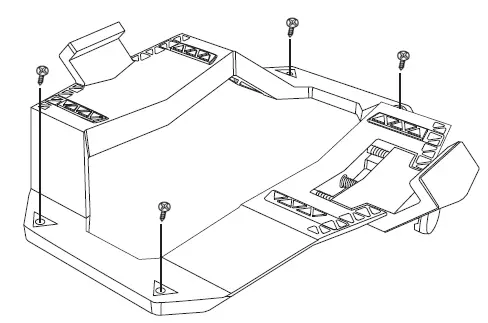
- Drill pilot holes in the mounting surface.
- Attach the BassLink DC to the mounting surface with four appropriate mounting screws.
NOTE: You may find it more convenient to make all of the connections to the amplifier before you permanently mount it
Choosing a Mounting Location
Choose a location that doesn’t prevent you from loading or unloading cargo, interfere with fold-down seats, or keep you from being able to open or close the trunk lid, or interfere with the safe operation of the vehicle.
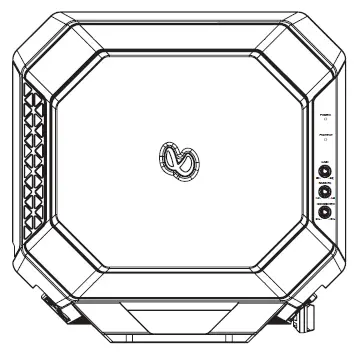
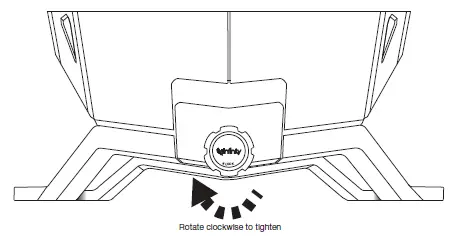
Mounting the BassLink DC
Choose a location that doesn’t prevent you from loading or unloading cargo, and doesn’t interfere with normal vehicle operation. Then, secure the mounting bracket using four sheet metal screws in the slots at each of its four corners. It may be more convenient to mount the bracket without the BassLink in place, once you have test-fitted the assembly. To attach the bracket to the BassLink DC, slide the rear arm of the bracket into the bottom rear slot of the BassLink DC, and allow the BassLink DC to rest on the bracket. To secure the spring-loaded front am of the bracket, tum the knob clockwise until the front am slides into the front slot of the BassLink DC.
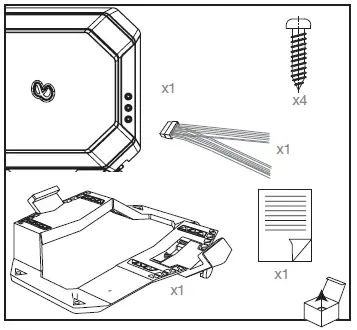
BassLink DC wiring harness
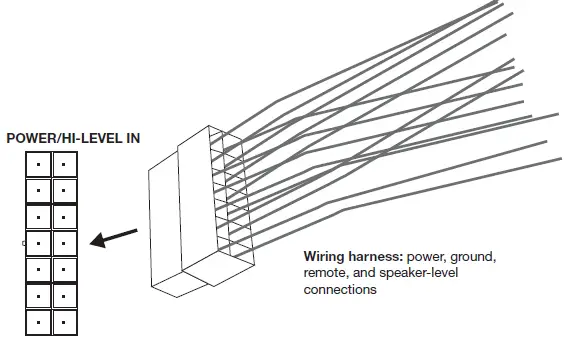
NOTE: To access the power and signal inputs on the BassLink DC, simply remove the cover on the side panel by pulling. Once all connections are made, replace the cover. The included wiring harness features power, ground, remote signal, and speaker-level input wires.
For power: Connect the 2 yellow power 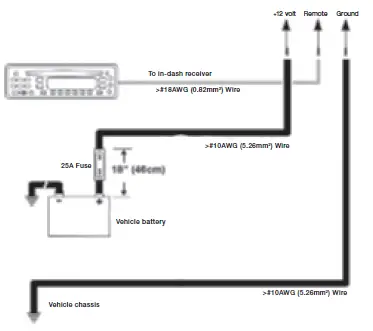 wires from the Bass Link DC harness to the vehicle’s + (positive) battery terminal. You must also install a fuse holder with a 25A fuse within 18″ of the battery.
For ground: Connect the 2 black ground wires from the BassLink DC harness directly to a solid point on the vehicle’s chassis. Use sandpaper to clear the paint from the metal surface at the chassis location. Use a star-type lock washer to secure the wire.
Remote
Connect the blue/white remote wire from the BassLink DC harness to the remote output wire on your head unit, if it has one, and you’re using the line-level inputs.
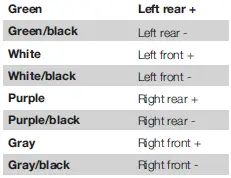
If you have a head unit with speaker-level outputs only
Use speaker wire to connect the four speaker-level outputs from the head unit to the four high-level input wires on the BassLink DC’s harness. If you have a head unit with only two outputs to either the front or rear high-level input wires. speaker-level outputs, you can connect the two Speaker wire color codes on the BassLink DC wiring harness (the colors of your vehicle’s speaker wires will vary; consult your owner’s manual, or contact a professional for help identifying them):
Plugging in the BassLink DC wiring harness: When you’ve made all the necessary power and signal connections to the BassLink DC wiring harness, plug the harness into the input marked “POWER/HIGH-LEVEL IN”.
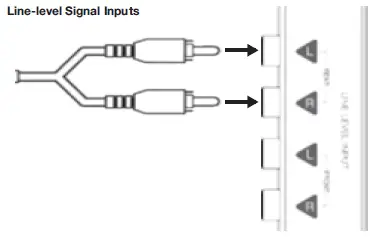
If you have a head unit with a dedicated subwoofer output (line-level): Connect the subwoofer output from the head unit to either the front or rear line-level inputs using an RCA patch cable (sold separately).
If you have a head unit with four line-level outputs: You can use RCA patch cables to connect all four line-level outputs to the four line-level inputs on BassLink DC. If you have a head unit with only two line-level outputs: You can connect the two outputs to either the front or rear line-level inputs.
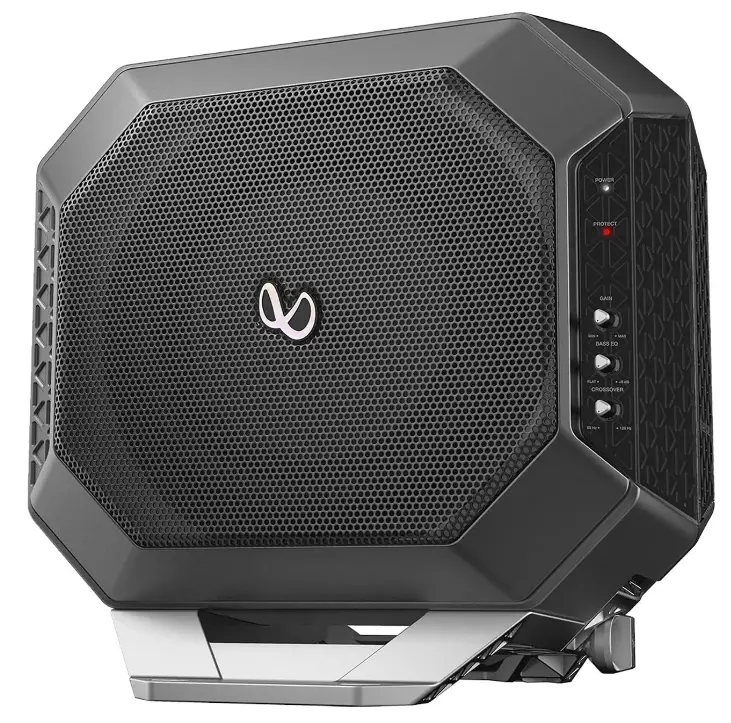
INPUT LEVEL SWITCH
If using an aftermarket radio’s RCA-level outputs, set the Input Level switch to the “LO” position. If using high-level outputs, start the control-setting process with the Input Level switch set in the “HI” or “HI2” position.
AUTO TURN ON Switch
If you did not connect the BassLink DC’s remote turn-on connection, set the Auto Tun On switch to “On”. If you did connect the BassLink DC’s remote turn-on connection, set the Auto Tum On switch to “Off”.
- Setting the Gain
Adjusting the gain lets you match the input sensitivity of BassLink DC with the output of your receiver, and match the relative volume to the rest of the speakers in your vehicle.
- Start with gain control set to minimum, and the crossover control and bass control rotated midway.
- Choose music with substantial bass content and turn the volume control on your receiver to 4 of its total output.
- Adjust the gain control clockwise, listening carefully to the bass output. If you hear distortion, tum the gain control counterclockwise to decrease the gain.
- Switch the phase back and forth to determine which setting provides the cleanest bass output.
- Adjust the crossover control until the BassLink DC plays only low-frequency information-you should not hear elements such as vocals coming from the woofer. 6. Adjust the bass-boost control clockwise or counterclockwise to suit your taste.
SPECIFICATIONS
- Driver Complement: 10” (250mm) Woofer and 10″(250mm) Passive Radiator
- Amplifier Power: 200W RMS
- Frequency Response: 20Hz- 120Hz
- Fuse: 25A
- Maximum Current Draw: 22.6A
- Quiescent Current Draw: <450mA
- Input Sensitivity: 0.05 V-2.0 V Low-Level Input; 0.5 V-20V High-Level Input
- Crossover Frequency: 50Hz-120Hz
- Crossover Slope: 12dB/octave
- Bass Boost: 0dB to +9dB @ 55Hz
- Dimensions (Lx W x H): 14-1/2″x 11-1/4″ x 14-3/8″ (367.5mm x 284.8mm x 364.9mm)
What’s in the Box
- BassLink DC QSG
FREQUENTLY ASKED QUESTIONS
What size subwoofer is best for deep bass?
The more powerful a subwoofer can create depends on its internal amplification, but generally speaking, the bigger the speaker, the better. You should search for a sub with a driver that is at least 10 inches long, however you may want to consider a 12 inch or even larger woofer.
What DB is best for bass?
According to the study, “the range of preferred bass levels among individual listeners is 17dB, from -3dB (listener 346) to 14.1dB (listener 400).” This finding surprised me not only because of how much difference there was, at a difference of 17dB, but also because someone out there preferred a bass cut of -3dB.
Can I put this in a 2020 Jeep Gladiator’s seat well?
The Infinity Basslink DC measures as follows:
8-1/2 inches tall, Size (in) 14-1/2″, Width (12-1/2 inches)
The amount of room behind the seat of your 2020 Jeep Gladiator will determine how this works.
Can it fit behind the back seat of an 18 F150 because it is small enough?
It’s true, it can fit behind the back seat.
Is a crossover required for this unit?
No. It has a built-in adjustable crossover.
Is this for the automobile or the house?
Our Infinity Basslink is intended for installation in automobiles.
Will my 2018 Toyota Tundra Crew Max be able to accommodate this installation?
Your 2018 Toyota Tundra Crew Max could accommodate our Infinity Basslink DC.
Is an amp required to pair with this? What is the best advice, if any?
An amp is not required. It has “powered” in the name, and 200 watts are stated in the specs and description.
Is it possible to buy a remote volume control for this device?
The head unit controls the volume (radio). The older ones had the option of using a telephone cable to control the amount of base added, but the newer ones do not. Only the sub itself can be adjusted to control them.
What is a subwoofer used for?
Since standard two-channel or surround sound setups can’t produce lower frequencies between 20 and 200 Hz on their own, a subwoofer is an essential part of a full audio system. In actuality, subwoofers are to blame for. 1 is required in a 7.1 sound setup to reproduce all low-frequency
Are subwoofers better than speakers?
All frequencies of the audio have enhanced overall quality. Because the subwoofer puts less strain on your speakers, you can increase the volume without experiencing distortion. The audio is crisper and clearer than with full-range speakers because the subwoofer concentrates on a different frequency band.
Is subwoofer only for bass?
An audio loudspeaker called a subwoofer (or sub) is made to reproduce low-pitched audio frequencies called bass and sub-bass that are lower in frequency than those that can be (optimally) produced by a woofer.
Does subwoofer improve bass?
Subwoofers boost the bass response to bring forth music sounds that your speakers can’t replicate on their own. Most automobile radio speakers begin to lose volume at about 50Hz. However, a good subwoofer can reproduce low frequencies.


