![]()
– Installation Manual –
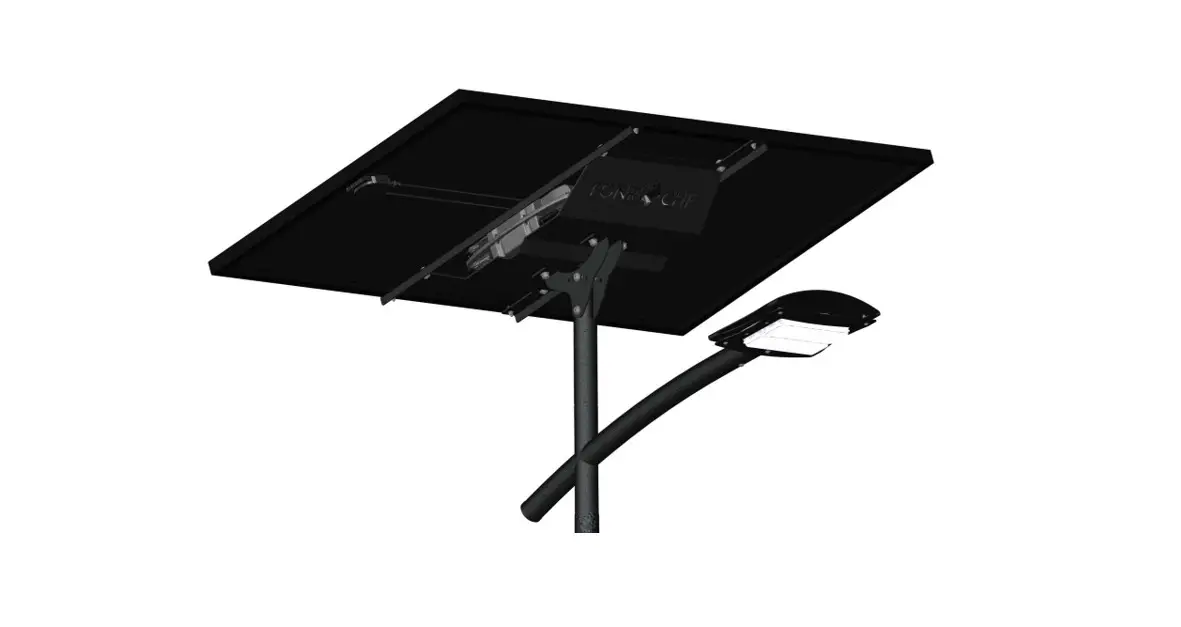
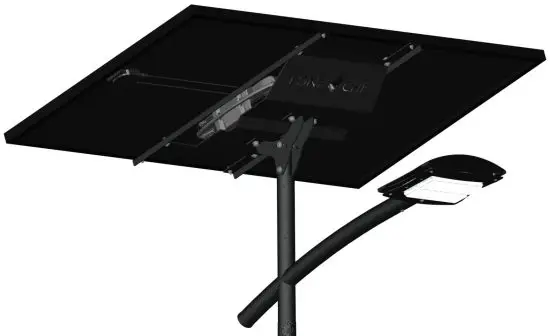
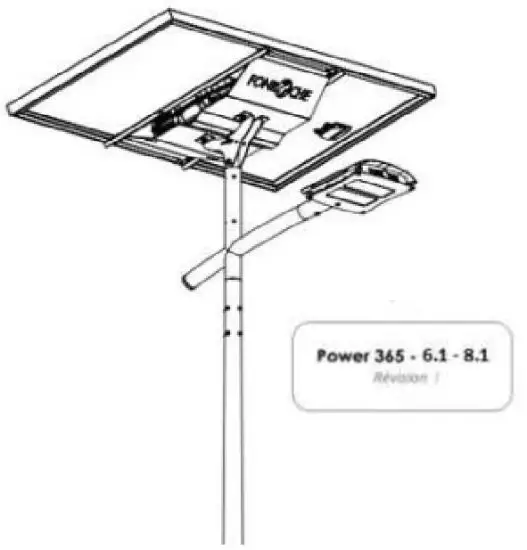
Simple bracket solar street light 6.1 / 8.1

How does it work ?
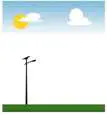 The battery gets loaded during daytime with the electricity produced by the solar panel (PV).
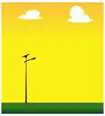 Nighttime is detected by measuring the voltage of the solar panel :
– daytime ![]() PV voltage > 30V
PV voltage > 30V
– nighttime![]() PV voltage = 0V
PV voltage = 0V 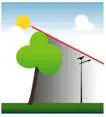 Avoid any shadow on the solar panel (trees, houses, traffic signs…). Shadows will considerably impact electricity production of the panel and hence reduce recharging of the battery.
 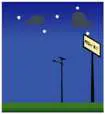 Avoid artificial light on the solar panel during nighttime. This could hinder correct detection of sun fall by the panel and can, worst case, completely disable switching on of the light.
Transport
Do not depalletise the solar panels before arriving at the construction site. FONROCHE guarantee is voided if the modules are handled before. All mechanical parts are collected together on a separate pallet. Do not disassemble the packages before arriving at construction site.
Reception
The delivery must be checked for completeness and possible transit damage immediately at receipt:
- Control if the parts have not been harmed during transport, otherwise please claim damage to the shipper within 48h after receipt (and inform FONROCHE Lighting). –
- Likewise, control the right fit bracket/pole, if any operating problem is found, claim damage to FONROCHE Lighting.
Installation must comply with the installation manual;all items provided must be installed otherwise the guarantee is voided.
Long-term storage
Power365 system:
Batteries must be stored within their original packing in a dry location.![]() The installation of batteries should happen before the date indicated on the packing. Contact FONROCHE Lighting in case you need to store them longer.
The installation of batteries should happen before the date indicated on the packing. Contact FONROCHE Lighting in case you need to store them longer.
Mechanical parts:
Mechanical parts must not be stored directly on the ground or near a storage place of powdery products. The storage area should be sufficiently ventilated to avoid any deterioration.
Poles strapping should be removed for storage periods longer than 3 weeks.
Maintenance – swap
The client is responsible for returning any defective part to FONROCHE Lighting for expertise. After receipt of the defective parts, FONROCHE Lighting will determine the guarantee validity. Depending on the result of the expertise, the defective spare part may be charged to the client if the guarantee period has expired or if the default is the result of an event out of FONROCHE Lighting responsibility (bumps, falls, unadapted handling…).
FCC Regulatory notices
Modification statement
“Fonroche Lighting” has not approved any changes or modifications to this device by the user. Any changes or modifications could void the user’s authority to operate the equipment.
Interference statement
This device complies with Part 15 of the FCC Rules. Operation is subject to the following two conditions: (1) this device may not cause interference, and (2) this device must accept any interference, including interference that may cause undesired operation of the device.
Wireless notice
This equipment complies with FCC radiation exposure limits set forth for an uncontrolled environment. The antenna should be installed and operated with minimum distance of 20 cm between the radiator and your body. This transmitter must not be co-located or operating in conjunction with any other antenna or transmitter.
FCC Class B digital device notice
This equipment has been tested and found to comply with the limits for a Class B digital device, pursuant to part 15 of the FCC Rules. These limits are designed to provide reasonable protection against harmful interference in a residential installation. This equipment generates, uses and can radiate radio frequency energy and, if not installed and used in accordance with the instructions, may cause harmful interference to radio communications. However, there is no guarantee that interference will not occur in a particular installation. If this equipment does cause harmful interference to radio or television reception, which can be determined by turning the equipment off and on, the user is encouraged to try to correct the interference by one or more of the following measures:
Reorient or relocate the receiving antenna.
Increase the separation between the equipment and receiver.
Connect the equipment into an outlet on a circuit different from that to which the receiver is connected. Consult the dealer or an experienced radio/TV technician for help.
Part list
| N° screw | Thread type | Tightening torque (Nm) |
| 11 | M6 | > 10 |
| 10 | M8 | > 24 |
| 3, 8, setscrews | M10 | > 47,7 |
| M10 Setscrews | 16 |
N° | Ref. Ar | Designation | Quantite |
1 | 1100001 | Universal tool disconnect MC4 | 1 |
2 | 1108025 | Washer M08 Stainless steel A2-70-M | 4 |
3 | 1108044 | Screw TBCH M 10 x 70 Stainless steel A2-70 | 2 |
4 | 1108046 | Washer M10 – M – Stainless steel A2-70 | 20 |
5 | 1108047 | Grower Washer M10 – M – Stainless steel A2-70 | 10 |
6 | 1108048 | Nut M10 Stainless steel A2-70 | 10 |
7 | 1108058 | Grower Washer MO8 – Stainless steel A2-70 | 2 |
8 | 1108063 | Screw TBHC M10 x 25 Stainless steel A2 -70 | 8 |
9 | 1108066 | Nut M08 Stainless steel A2-70 | 2 |
10 | 1108068 | Screw TBHC M08 x 80 Stainless steel A2 -70 | 2 |
11 | 1108070 | Black screw Hexa Head notched base HM06 x 20 – DIN 6921 – Stainless steel A2-70 | 4 |
| 12 | 1108384 | Locknut M6 – DIN 6926 – Stainless steel A4-80 | 4 |
13 | 1999013 | PV Module – 60 cells – 38mm – 3,2mm – Black | 1 |
14 | 2301201 | Plate Width=4 – battery support | 1 |
| 15 | 2301203 | Binding – POWER 365 | 2 |
16 | 2301209 | Orientation flask Left | 1 |
| 17 | 2301210 | Orientation flask Right | 1 |
18 | 2301212 | High tube | 1 |
| 19 | 2301250-2301251 | Simple bracket D60 – with setscrews M10 and plastic plug | 1 |
20 | Pole with M10 setscrews | 1 | |
| 21 | Box energy – Power 365 | 1 | |
22 | 2309203-6-2309205 | Led lantern – with cap | 1 |
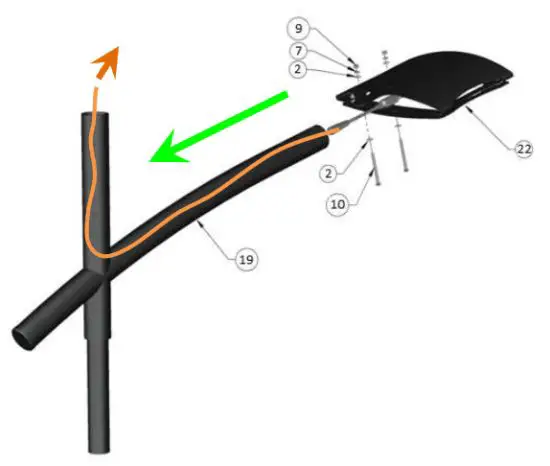
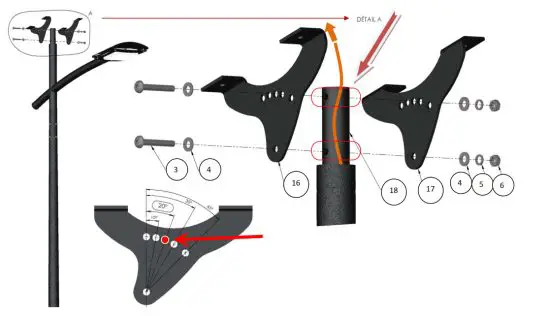
- Assemble the luminary on the bracket
Use a draw wire (fish-tape) to draw the connector cable of the lantern through the bracket to the top.
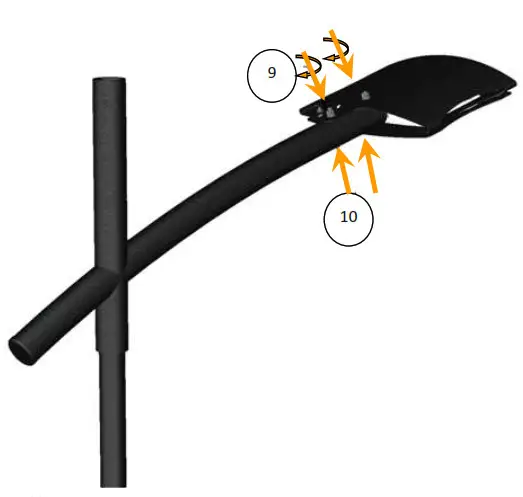
- Set the luminary
 For all the setup, every screw/nut system must be tightened to the torque advocated by FONROCHE*
 Be careful setting the nuts on the top side of the luminary
*See table on page 4 - Assemble the bracket on the pole and orientation
Orient the luminary, fasten slightly each setscrew, and then tighten them all.
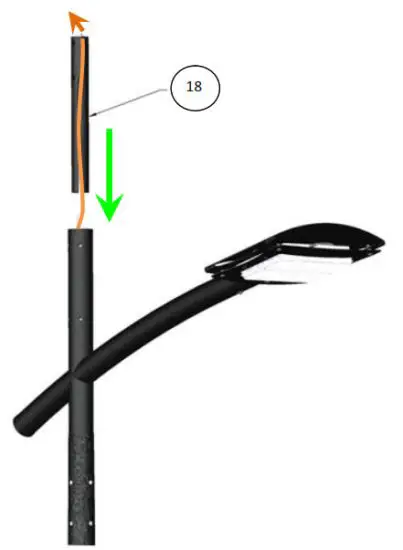
- Insert the tube into the bracket
Insert the cable into the tube.
- Assemble the base support
Set to 20° (unless otherwise stated).
IMPORTANT
Be so attentive to the lantern cable inside the tube when passing the screws N ° 3.
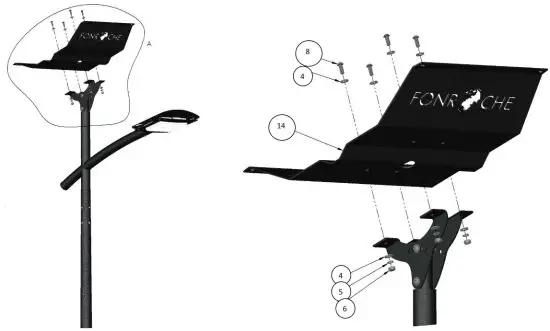
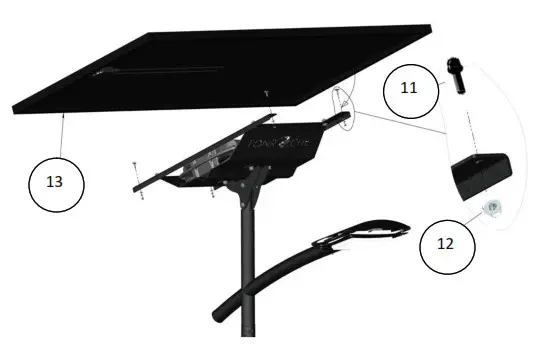
- Assemble the support for PV modules
 Be careful to set the screws n°8 in the same way as illustrated in the scheme to avoid any problem when installing the battery.
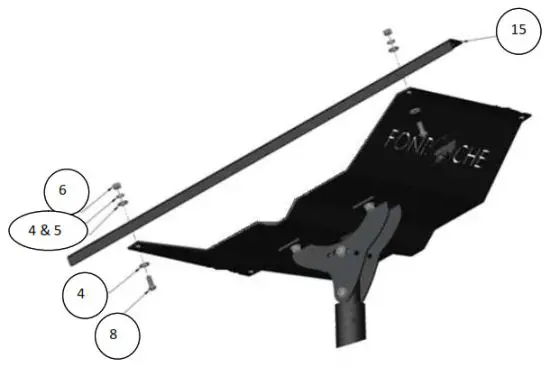
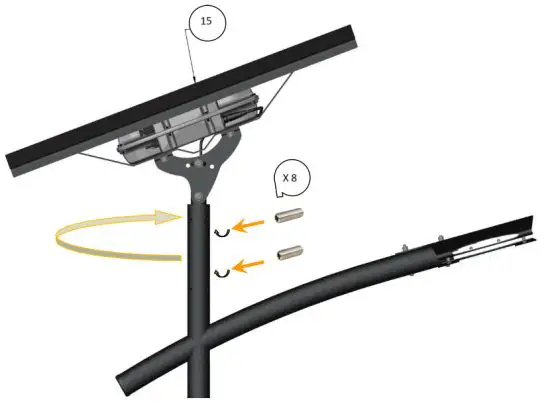
 - Install the first PV binding, on the ground
Install only one PV binding n°15 before erecting the pole
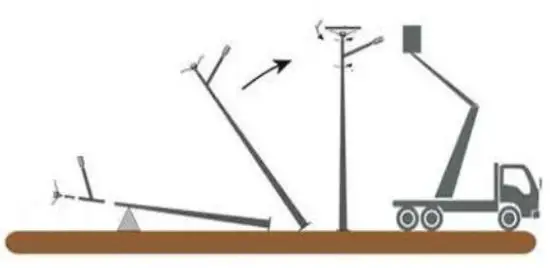
- Erect the street light
 Once the street light erected, go to step 9.
 - Install the second binding, the battery and connect the luminary
 ♦ Same steps as step 7.
♦ Pass the cable under the battery.
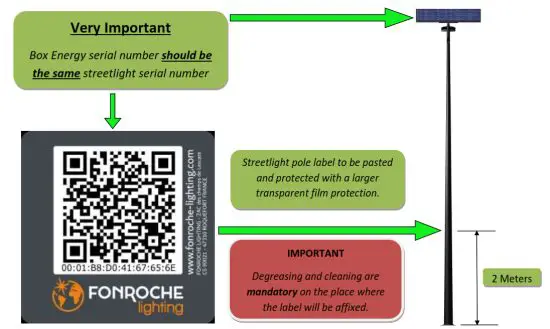
♦ Energy Box label should be positioned always to upside (direction to PV).
Do not leave the cable hanging under the support.
- Assemble the PV

- Orient the PV to the south
 ♦ Orient the PV towards the equator,
♦ Tighten the 8 setscrews,
♦ Position the luminaries straight in order to optimize the lighting. - Connect the PV to the battery

- Initialize the battery

- Validate your installation
 Detach one connector of each PV with the « Universal tool disconnect » n°1.
 - Streetlight Labeling

 Be careful setting the nuts on the top side of the luminary
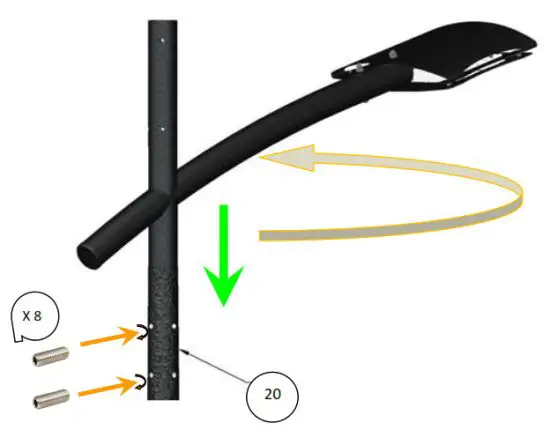
 Once the street light erected, go to step 9.
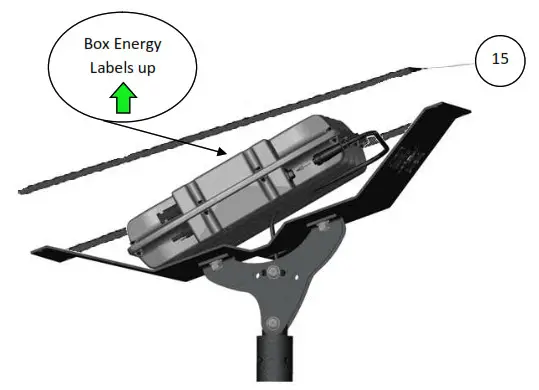 ♦ Same steps as step 7.
 ♦ Orient the PV towards the equator,
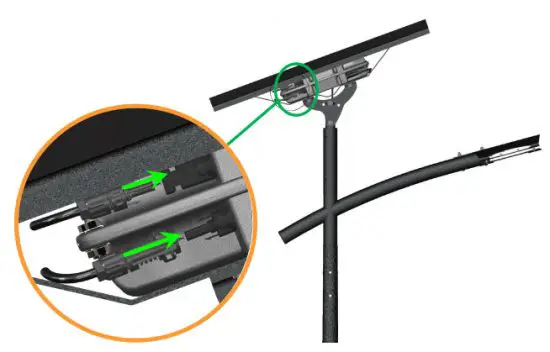

 Detach one connector of each PV with the « Universal tool disconnect » n°1.
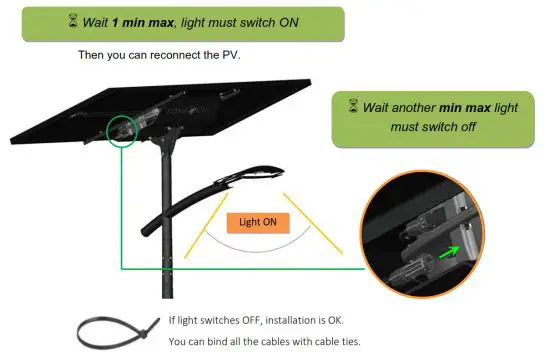
Last step of installation – Check-list
| Checkpoints | Installer check (write OK or no) |
| Are lanterns straight positioned to optimize the lighting? | |
| Are the 16 pressure screws installed and correctly tightened? | |
| Is the PV oriented to the south? If several solar street lights are installed, are the PVs oriented towards the same direction? | |
| Is the PV set to 20° tilt (unless otherwise stated)? | |
| Are all the cable ties installed (so that the cables will not hang anywhere)? | |
| Are all the parts installed on the solar streetlight? If parts remain, please check on this manual to find out what has been forgotten and please be careful to install everything. | |
| Have the nut-screws systems been correctly tightened according to the tightening torques recommended at page 4? |
Trouble shooting
| Problems | Causes | Solutions |
| The light remains switched on during the day | Wrong connection of the PV | · Check that the solar module is correctly connected to the Power 365 battery system unit. |
| Defect of the solar module | · Verify open circuit voltage on the cable towards the module. You should measure a voltage between 30 and 40 V. If not, the module is damaged. | |
| The light doesn’t work | Open circuit voltage during the night is higher than detection threshold for day/night detection | · Check that the solar module doesn’t catch stray light from the surrounding. |
| The light doesn’t work during installation test | Bad cables connection | · Check that all connectors are connected and correctly locked onto the Power 365 battery system unit. |
| If the installation happens too late in the evening, the system unit doesn’t detect the solar module and the system stays in low-power transport mode. | · Wait until next day so that the output voltage of the solar module is high enough. | |
| he light doesn’t work after it has been working for several days | Batteries are discharged | · Check the connections of the solar module. · Check that there is no shadow on the solar module. · Check tilt angle and orientation of the solar module. · Wait some days if it is winter, if not call FONROCHE Lighting for further actions. |
For any other problem, please contact FONROCHE Lighting:
[email protected]
+33 (0) 5 53 77 97 41


