
![]() 071029
071029
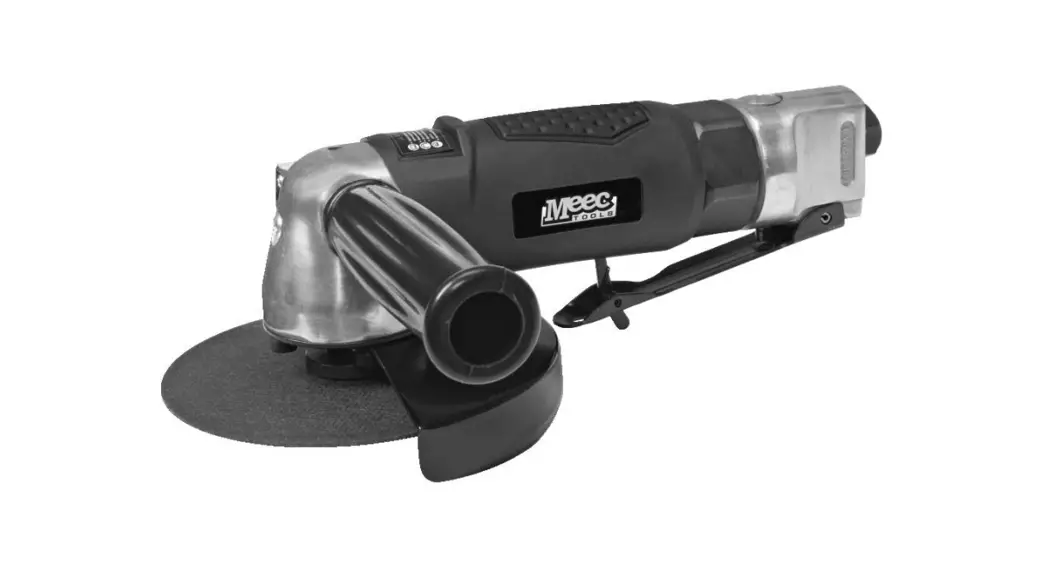
Operating Instructions for Angle Grinder
Translation of the original instructions 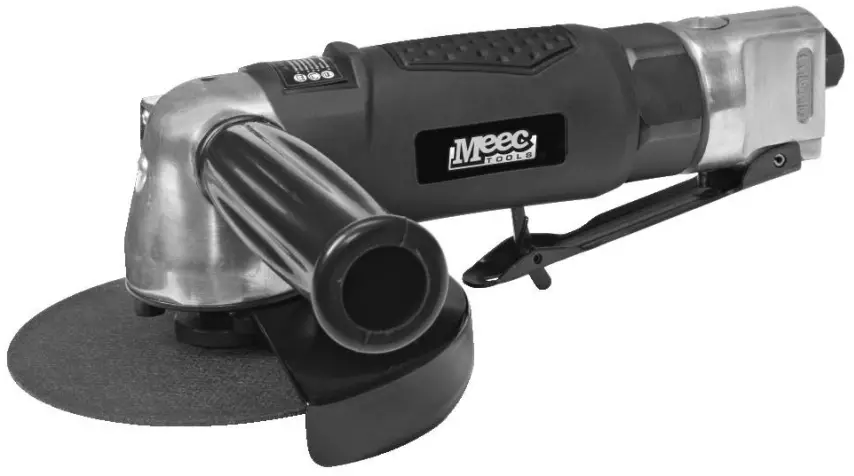
Care for the environment!![]() Recycle discarded products in accordance with local regulations.
Recycle discarded products in accordance with local regulations.
Jula reserves the right to make changes.
For the latest version of operating instructions, see www.jula.com
SAFETY INSTRUCTIONS
Read these instructions carefully before use!
Contact your dealer if you have any questions concerning the product.
Improper use and lack of maintenance can result in serious injury and/or damage to property. Read all warnings and instructions carefully before use. Always take basic safety precautions when using compressed air tools to safeguard against the risk of personal injury.
- Replace any warning stickers that have become illegible or lost.
- Only use the tool for its intended purpose.
- Excessive air pressure or excessively long operation without a load shortens tool life and can entail a risk of personal injury or damage to property.
- Check the air hose for wear and protect it from heat and sharp edges. Do not carry the tool by the air hose.
- Falling is a common cause of injury and death. Look out for hose bends in your area of movement and in the work area. Also, look out for the part of the hose that is permanently connected to the tool.
- Continuous use and unsuitable working conditions can cause hand injury. Stop using the tool if your hands become numb or start to hurt. Do not resume work until your hands feel normal again. Seek immediate medical assistance if the problem persists.
- Keep other people at a safe distance from the work area.
Risk of the eye or head injury
| Risk | Precautions |
|
|
|
|
|
|
Fire or explosion hazard
| Risk | Precautions |
|
|
|
|
Risk of hearing damage
| Risk | Precautions |
|
|
Risk when inhaling
| Risk | Precautions |
|
|
|
|
Electrical safety
| Risk | Precautions |
|
|
|
|
|
|
Risk of becoming caught
| Risk | Precautions |
|
|
Risk of cuts/burns
| Risk | Precautions |
|
|
Risk of injury
| Risk | Precautions |
|
|
|
|
|
|
|
|
|
|
|
|
|
|
|
|
|
|
|
|
|
|
TECHNICAL DATA
| Sanding disc | 125 mm |
| Speed (no load) | 11,000 rpm |
| Average air consumption | 170 l/min |
| Operating air pressure | 6.2 bar |
| Air intake | 1/4″ |
| Air hose | 3/8” inner diameter |
| Total length | 230 mm |
| Net weight | 1671 kg |
| Sound power level, LwA | 98 dB(A), K= 3 m/s² |
| Sound pressure level, LpA | 87 dB (A), K= 3 m/s² |
| Vibration level | 2,43 m/s2, K= 1,5 m/s² |
Always wear ear protection.
The declared vibration and noise value, which has been measured by a standardized test method, can be used to compare different tools with each other and for a preliminary assessment of exposure. The measurement values have been determined in accordance with EN ISO 11148-7-2012.
WARNING! The actual vibration and noise level when using power tools may differ from the specified maximum value, depending on how the tool is used and what kind of workpiece is processed. It is, therefore, necessary to determine which safety precautions are required to protect the user, based on an estimate of exposure in actual operating conditions (taking into account all stages of the work cycle, e.g. the time when the tool is switched off and when it is idling, in addition to the start-up time).
DESCRIPTION

| 1. Pneumatic tool 2. Air hose, inner diameter 3/8’’ 3. Lubricating device 4. Pressure regulator 5. Filter | 6. Shut-off valve 7. Anti-vibration hose 8. Quick-release coupling 9. Empty daily 10. Pipe and connection, min. 1/2” | 11. Air drier 12. Pipe and connection, min. 1” 13. Compressor 14. Automatic drainage 15. Empty daily |
OPERATION
Compressed air supply
- Check that the relevant compressor provides sufficient airflow.
- The tool must always be turned off when it is connected to the compressed air supply.
- 6.2 bar is the normal operating air pressure for the tool. Excessively high pressure and contaminated air cause the tool to wear unreasonably quickly, and can also entail a risk of personal injury or damage to property.
- Every day, drain off any water from the compressor’s air container and empty the air hoses of any condensate that has accumulated. Otherwise, water from the air hoses can penetrate the tool and damage it.
- Clean the air intake filter cartridge each week. The chart below shows the recommended connection.
- If hoses are very long (normally longer than 8 meters), the line pressure must be increased to compensate for the pressure drop. The minimum inner diameter of the hose is 1/4”. Couplings must have the same inner diameter. An air hose with an inner diameter of 3/8” is normally recommended for optimum tool performance.
- Use appropriate hoses and couplings. We do not recommend connecting quick-release couplings directly to the tool, as they can cause malfunction as a result of vibration. Instead, connect a hose to the tool and install a quick-release coupling between the air hose from the compressor and the anti-vibration hose that is attached to the tool.
- Inspect each hose for wear before use. Make sure that all connections are secure.
Use
- Lubricate the tool before use as instructed in the section on care and maintenance.
- Fit the handle in the threaded hole on the tool.

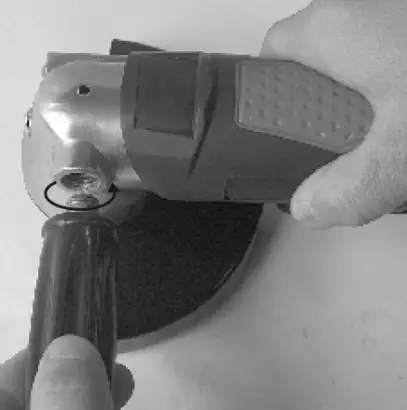
- Lubricate the gears by unscrewing the screw with a screwdriver (not included) and applying grease in the screw hole with a grease gun (not included). The gears must be lubricated every working day.

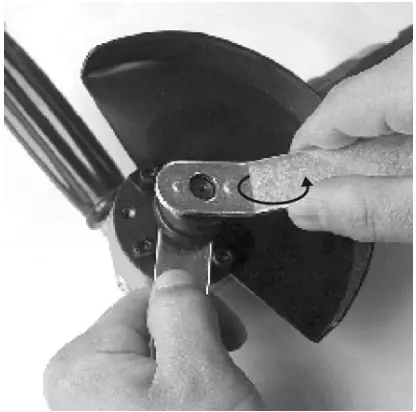
- The blade guard can be turned to the position required.
Loosen the screws using a spanner and move the guard.
Refit and tighten all four screws before using the tool. - Remove the flange nut and place a 5″ grinding disc (not included) on the spindle. Tighten the flange nut on the spindle using an adjustable spanner, while holding the spindle with the other spanner.
NOTE! Only use discs with at least the same permitted speed as that of the tool.
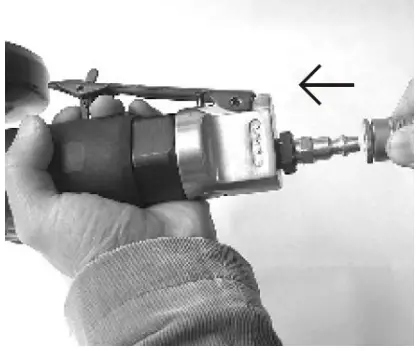
- Remove the cover from the air intake and connect the air hose to the tool. Set the air pressure to 6.2 bar.

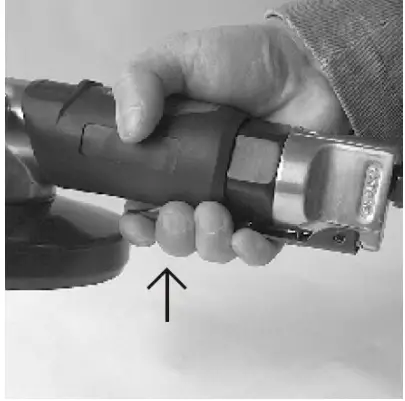
- Push the trigger catch forwards and squeeze the trigger.
The speed of the tool increases the longer the trigger is squeezed. The tool begins to rotate.

MAINTENANCE
Lubricate the tool with pneumatic oil (not supplied) every day or before each use.
Compressed air oil is available from well-stocked hardware stores. SAE 10 oil, sewing machine oil, or similar, with moisture absorber, corrosion inhibitors, metal wetting agent, and EP additives can be used.
Do not use flushing oil.
During continuous operation, the tool must be lubricated every hour or two. The tool can be lubricated with a line-mounted lubricating device or manually. Follow the instructions below for manual lubrication.
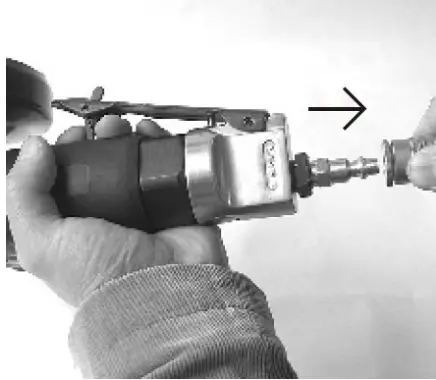
- Disconnect the compressed air supply.

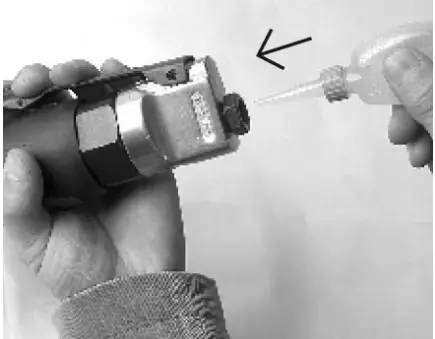
- Apply a few drops of pneumatic oil to the tool’s air intake. Do not use oil with a high viscosity. This can impair tool performance.

- Connect the tool to the compressed air supply. Operate the tool with no load for a few seconds to distribute the oil. Any surplus oil may be thrown out from the chuck. Aim the tool in a safe direction.
- Before putting the tool away after use, disconnect the air hose and apply 4 or 5 drops of pneumatic oil to the air intake. Reconnect the air hose and operate the tool for approx. 30 seconds to distribute the oil evenly. This will ensure the tool lasts longer.
- Do not store in a damp location. This can result in corrosion damage to the mechanism. Always lubricate the tool before storage.
- When a product has come to the end of its useful life it must be recycled in compliance with regulations in force. The tool must not be incinerated.
TROUBLESHOOTING
| Problem | Possible cause | Action |
| The tool operates slowly or not at all. | 1. The tool is clogged. 2. No oil in the tool. 3. Low air pressure. 4. Air hose leaking. 5. Pressure drop. 6. Worn rotor blades. 7. Water is emerging through the tool’s air outlet. | 1. Clean the tool with pneumatic oil or solvent. 2. Lubricate the tool according to the lubrication instructions. 3. a. Set the regulator on the tool to max. b. Set the regulator on the compressor to the maximum permitted operating pressure for the tool (6.2 bar). 4. Tighten and seal any leaking connections. Use sealing tape. 5. a. Use a hose with the correct dimensions. A long hose or a tool that has a high air consumption may require a hose with an inner diameter of 1/2” or larger, depending on the total hose length. b. Do not use several hoses linked together with quick-release couplings. This will cause a pressure drop and cause the tool to work less efficiently. Connect the hoses directly. 6. Replace the rotor blades. 7. Drain out the water from the air container (see the compressor manual). Lubricate the tool and operate until no water can be seen. Lubricate the tool again and operate for 1–2 seconds. |
| Abnormal vibrations and/or heat in the tool. | Inadequate lubrication. | Follow the lubrication instructions. |
NOTE! Contact your dealer if you detect a problem that is not included in this troubleshooting guide.
Jula AB, Box 363, SE-532 24 SKARA
2022-04-13
© Jula AB


