![]()
![]()
Let’s get started!
WHAT’S IN THE BOX
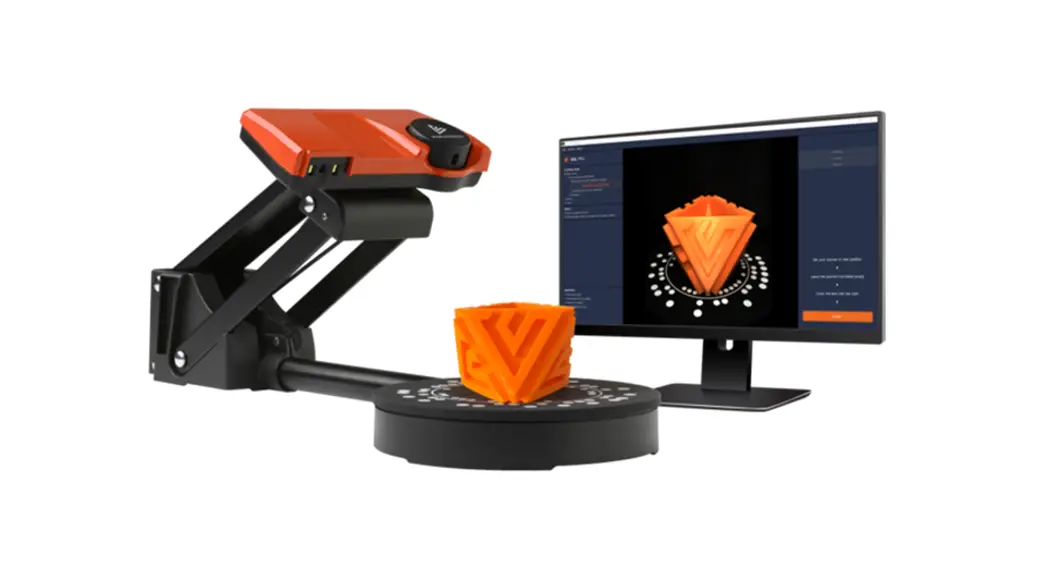
A Scanner
B Turntable
C Scanner stand
D USB 3.0 cable A
E USB 3.0 cable B
F Black-out tent
G Test scan object (duck)
SYSTEM REQUIREMENTS

3 TIPS
FOR A SUCCESSFUL SOL 3D SCANNING
- Always power your computer
- Use USB 3.0 ports (if the USB hub is used, this must be powered)
- Place the scanner inside the tent and cover it with the cloth
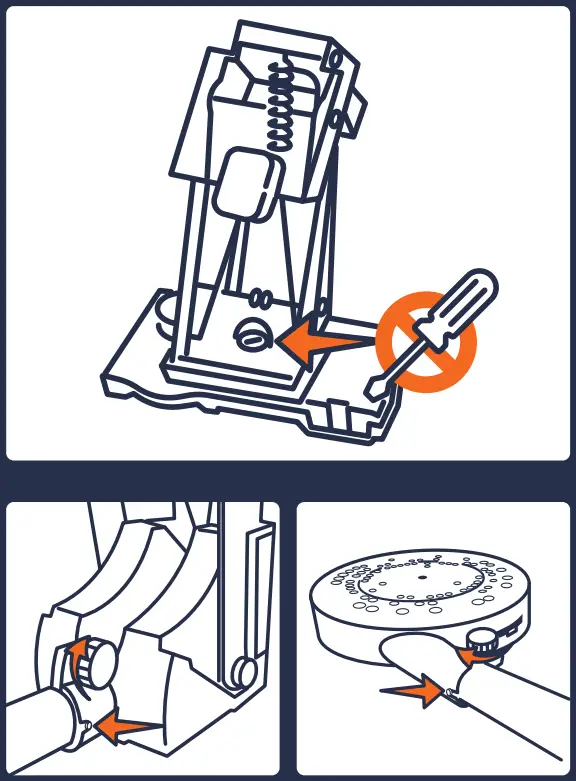
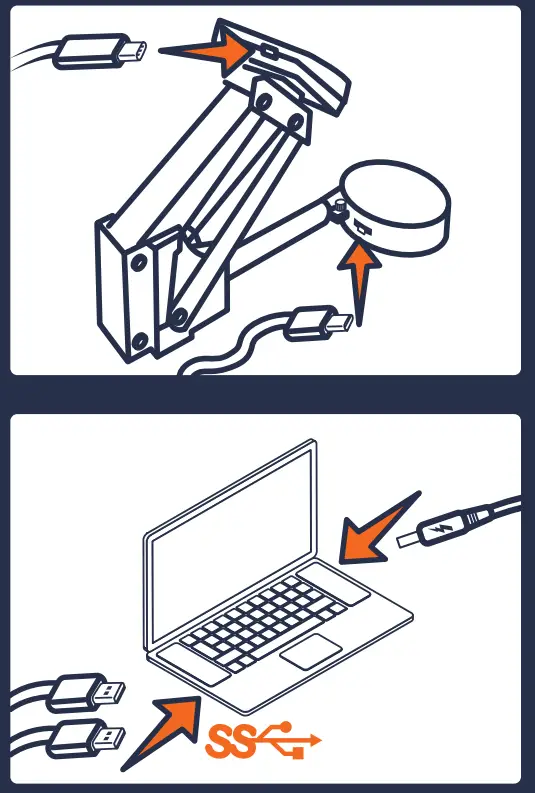
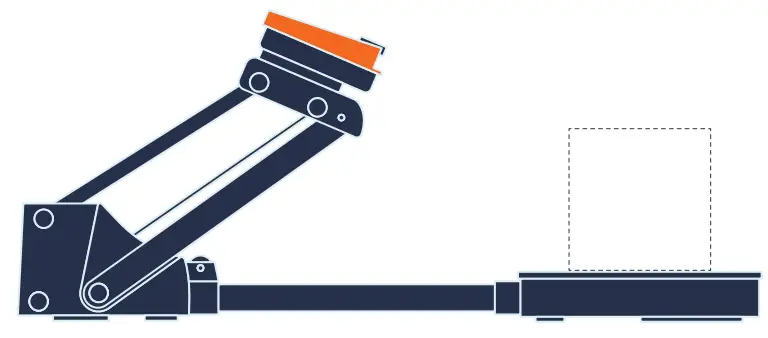
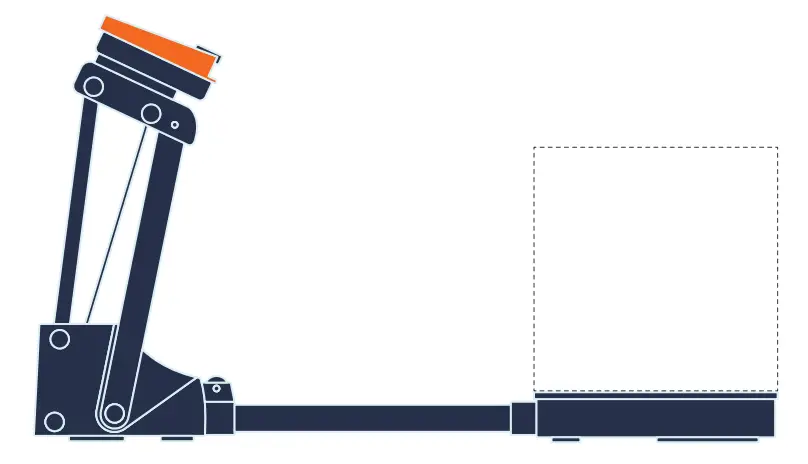
HARDWARE ASSEMBLY
 |  |
SOFTWARE INSTALLATION
Download the SOL Creator and SOL Viewer software: scandimension.com/softwareinstaller
Run the installer and follow the instructions on the screen.
Register your scanner and receive future updates for free.
LET’S GET STARTED
- Make sure that the hardware is properly assembled and connected to power and USB 3.0 ports and has access to the Internet
- Place the scanner inside the tent and cover it with the cloth
- Open SOL Creator and follow the instructions on the screen
For a more detailed software description, go to: scandimension.com/getting-started
SOL CREATOR
In short, this is what happens:
- CALIBRATE
- SCAN
- MESH DONE
Calibration makes sure your scanner and turntable are working properly together.
Scanning in up to five passes with your object scanned in different orientations optimizes the texture.
Meshing is where the different information from the scanning passes is combined into a 3D file.
SOL VIEWER
After meshing, your new 3D file opens in SOL Viewer. Here you have access to more advanced viewing options.
SOL Viewer lets you save and share your 3D scans.
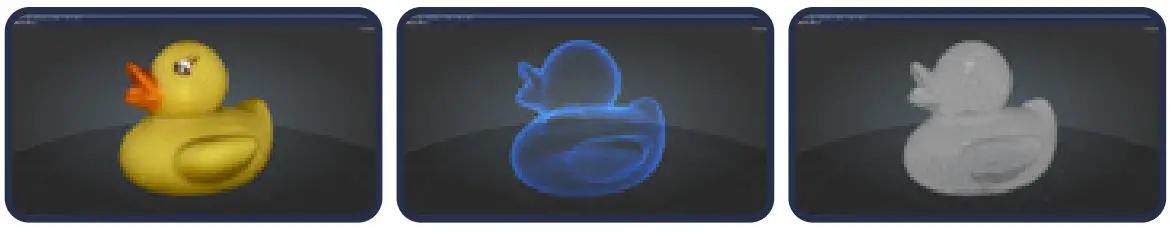
TEST SCAN
We recommend that your first scan is of the duck test object.
After one scanning pass, it should look like the image to the right.
If not, something in the process has gone wrong.
Check if you have followed the guidelines from the “3 tips for a successful SOL 3D scanning”, and try again.
If you still experience problems, please contact us: scandimension.com/support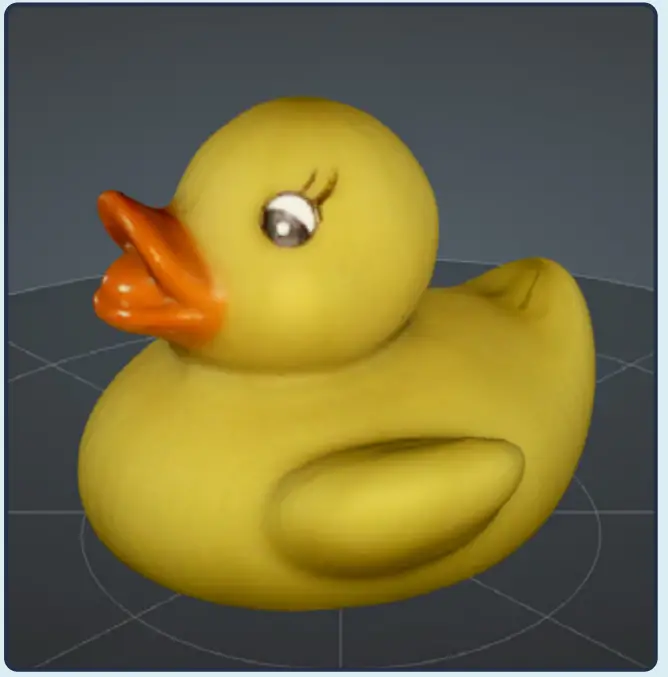
WILL IT SCAN?
Best objects to scan:
- Matte
- Opaque
- Asymmetrical, with abundant scan alignment features
- Light in color
Problematic objects to scan:
- Dark*
- Shiny or reflective*
- Translucent or transparent*
- Too small or too large**
- Symmetrical
* Spray dark, shiny, or transparent objects with developer spray before scanning. You may also just try with a fine layer of talcum or baby powder.
** See ‘Object sizes’ Visit Scan Dimension’s Knowledge Base for more answers and problem-solving: kb.scandimension.com
OBJECT SIZES
Max scannable weight on the turntable is 2 kg (4.4 lbs or 70.5 ounces).
Be sure to use the correct scanner position, depending on the size of your object.
Scanner position near:
Objects 25-100 mm in diameter and 30-100 mm tall (1-4 inches in diameter, 1.2-4 inches tall).
Scanner position far*:
Objects 70-170 mm in diameter and 80-170 mm tall (2.75-6.7 inches in diameter, 3.2-6.7 inches tall).
*Scanning in far position may lower the accuracy.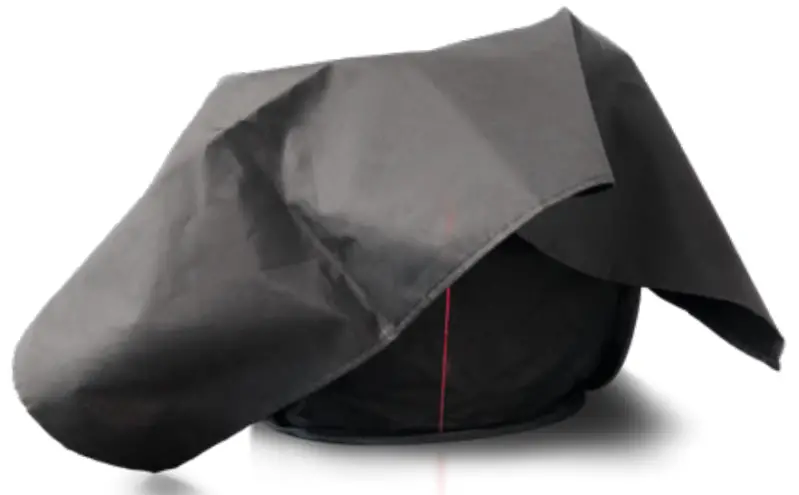
ENJOY YOUR SOL 3D SCANNER![]()
WWW.SCANDIMENSION.COM
WWW.SCANDIMENSION.EU
References
 Knowledge Base
 SOL 3D scanner Quick Start Guide – SOL by Scan Dimension
-
SOL 3D scanner software install | Download here – SOL by Scan Dimension
-
SOL 3D scanner software install | Download here – SOL by Scan Dimension
-
Contact Us | Scan Dimension – SOL by Scan Dimension
 Scan Dimension - 3D scanners – SOL by Scan Dimension
 Scan Dimension 3D scanners


