![]()
20200326 Stainless Steel Counter Refrigerators and Freezer
Instruction Manual
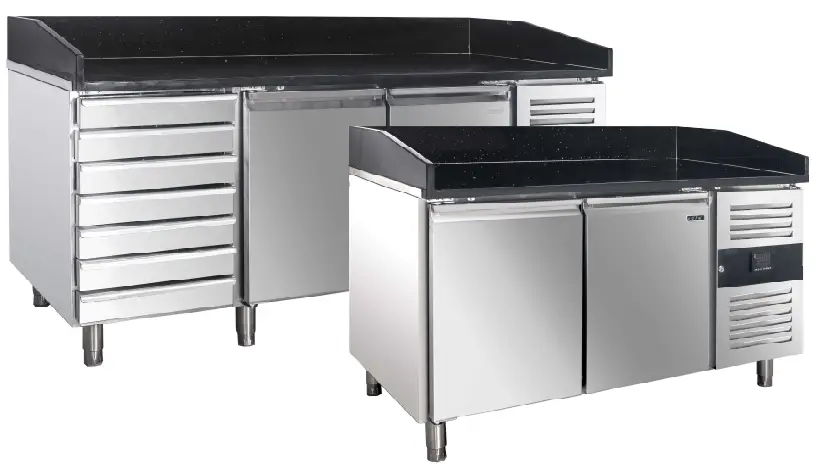
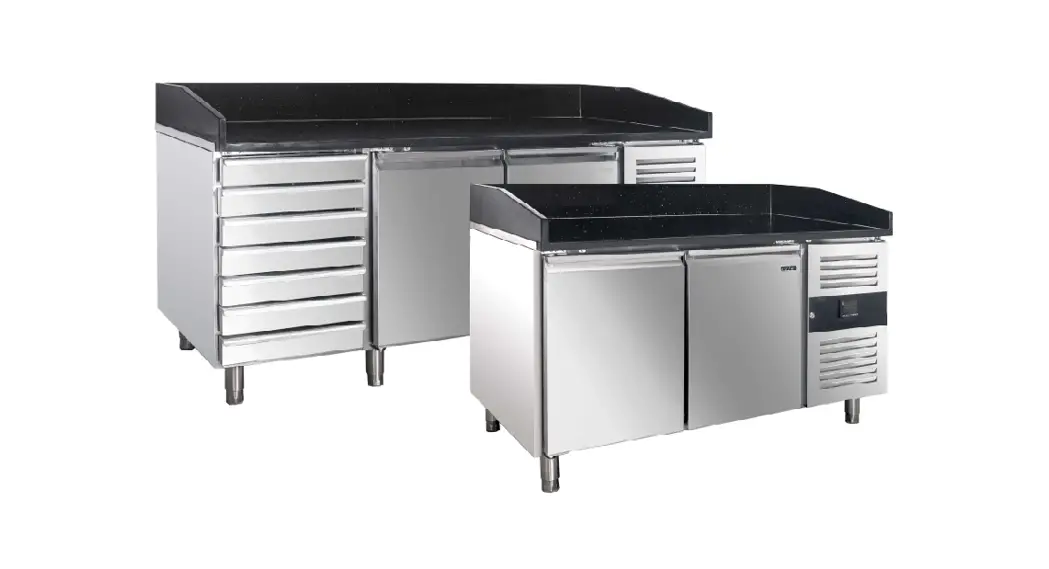
Stainless Steel Counter Refrigerators and Freezer
Stainless Steel Counter
SET2 DRAWER ASSEMI3Y GUIDE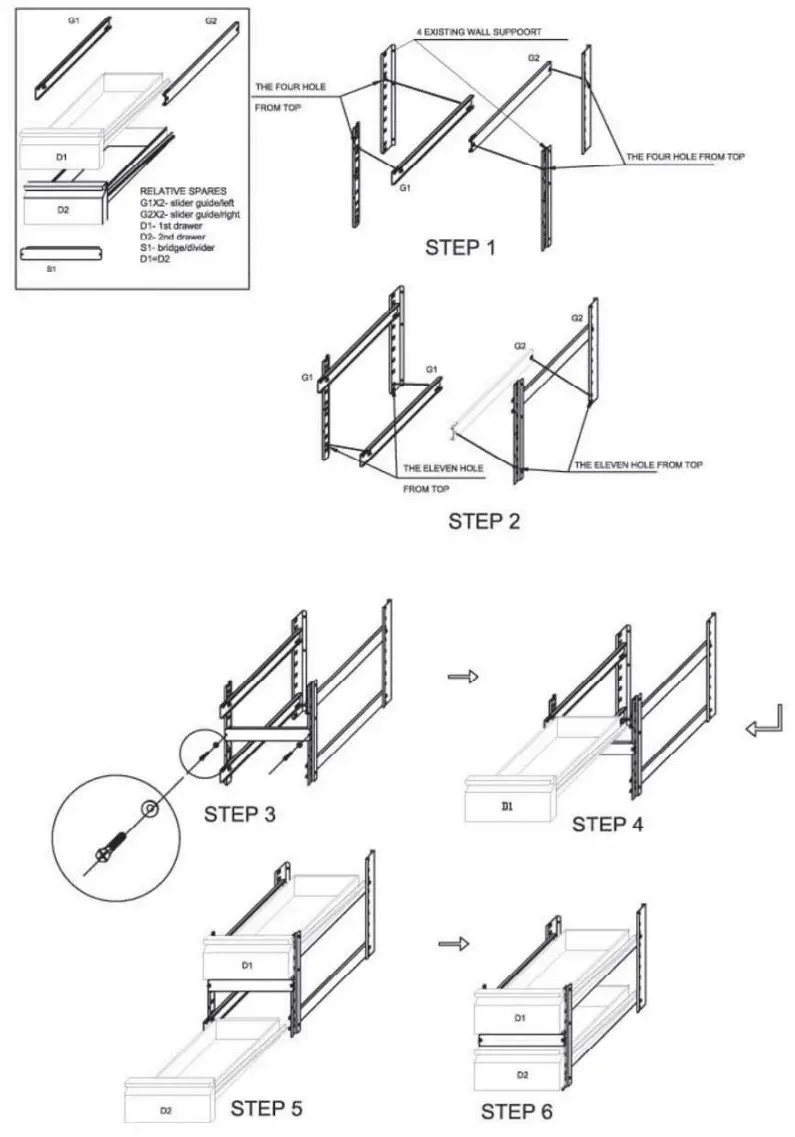
SET 3 DRAWER ASSEMBLY GUIDE 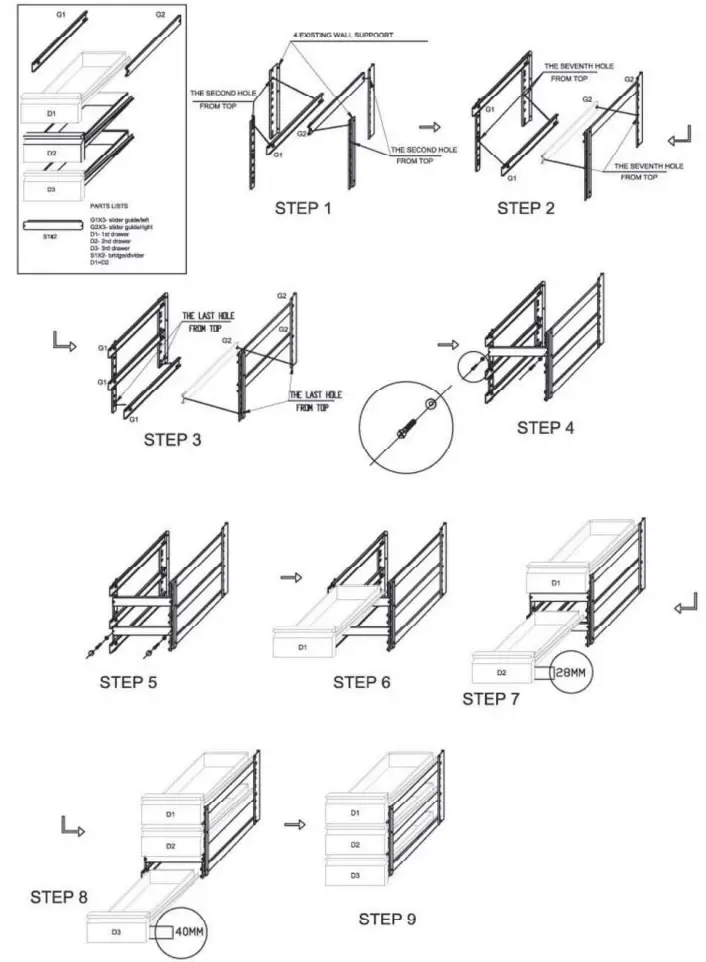
Safety Tips
- Position on a flat. stable surface.
- A service agent/qualified technician should carry out installation and any repairs if required.
- Do not remove any components or service panels on this product.
- Consult Local and National Standards to comply with the following:
- Health and Safety at Work Legislation
- BS EN Codes of Practice
- Fire Precautions
- IEE Wiring Regulations
- Building Regulations
- DO NOT use pressure washers to clean the appliance.
- DO NOT use the appliance outside.
- DO NOT use this appliance to store medical supplies.
- DO NOT use electrical appliances inside the appliance (e.g. heaters, ice-cream makers etc.)
- DO NOT stand or support yourself on the base. drawers or doors.
- DO NOT allow oil or fat to come into contact with the plastic components or door seal. Clean immediately if contact occurs.
- Bottles that contain a high percentage of alcohol must be sealed and placed vertically in the refrigerator.
- Always carry. store and handle the appliance in a vertical position and move by holding the base of the appliance.
- Always switch off and disconnect the power supply to the unit before cleaning.
- Keep all packaging away from children. Dispose of the packaging in accordance with the regulations of local authorities.
- If the power cord is damaged, it must be replaced by an agent or a recommended qualified technician in order to avoid a hazard.
Introduction
Please take a few moments to carefully read through lti,•• manual. Correct maintenance and operation of this machine will provide the best possible performance Iron your product.
Pack Contents
The following is included:
- Refrigerator or Freezer
- Shelf guides (2 per door)
- Shelves (1 per door)
- Instruction manual
We pride ourselves on quality and service, ensuring that at the time of packaging the contents are supplied fully functional and free of damage.
Should you find any damage as a result of transit, please contact your dealer immediately
Installation
![]() Note: If the unit has not been stored or moved in an upright position, let it stand upright for approximately 12 hours before the operation. If In doubt allow standing.
Note: If the unit has not been stored or moved in an upright position, let it stand upright for approximately 12 hours before the operation. If In doubt allow standing.
- Remove the appliance from the packaging. Make sure that all protective plastic film and coatings are thoroughly removed from all surfaces.
- Maintain a distance of 20cm (7 inches) between the unit and walls or other objects for ventilation. Increase this distance if the obstacle is a heat source.
 Note: Before using the appliance for the first time, clean the shelves and interior with soapy water.
 - Set the brakes on the castors to keep the appliance in position OR Level the appliance by adjusting the screw feet.
Fitting the Shelves
- Place one set of shelf guides on either side of the cabinet at the desired height.
- Slide the shelf into place_ Repeat for the remaining shelves.
- The number of shelves-depend on how many you want. Note: This is vital for ensuring correct drainage of condensation.
Operation
- Storing Food To get the best results from your appliance. follow these instructions.
- Only store foodstuffs in the appliance when it has reached the correct operating temperature.
- Do not place uncovered hot food or liquid inside the appliance.
- Wrap or cover food where possible.
- Do not obstruct the fans inside the appliance.
- Avoid opening the doors for prolonged periods of time.
Cleaning, Care & Maintenance
- Switch off and disconnect from the power supply before cleaning.
- Clean the interior of the appliance as often as possible.
- Do not use abrasive cleaning agents. These can leave harmful residues.
- Clean the door seal with water only.
- Always wipe dry after cleaning.
- Do not allow water used in cleaning to run through the drain hole into the evaporation pan.
- Take care when cleaning the rear of the appliance. Sharp edges can be cut.
- An agent or qualified technician must carry out repairs if required.
Cleaning the Condenser
Periodically cleaning the condenser can extend the life of the appliance We commercial that your agent or qualified technician clean the condenser
Troubleshooting
If your appliance develops a fault, please check the following table before making a call to your retailer.
| Fault | Probable Cause | Action |
| The appliance is not working | The unit is not switched on | Check the unit is plugged in correctly and switched on |
| Plug and lead are damaged | Call your agent or qualified Technician | |
| The fuse in the plug has blown | Replace the fuse | |
| Power supply | Check power supply | |
| Internal wiring fault | Call your agent or qualified Technician | |
| The appliance turns on, but the temperature is too high/low | Too much ice on the evaporator | Defrost the appliance |
| Condenser blocked with dust | Call your agent or qualified Technician | |
| Doors are not shut properly | Check doors are shut and seals are not damaged | |
| The appliance is located near a heat source or airflow to the condenser is being interrupted | Move the refrigerator to a more suitable location | |
| The ambient temperature is too high | Increase ventilation or move the appliance to a cooler position | |
| Unsuitable foodstuffs are being stored in the appliance | Remove any excessive hot foodstuffs or blockages to the fan | |
| Appliance is overloaded | Reduce the amount of food stored in the appliance | |
| The appliance is leaking water | The appliance is not properly leveled | Adjust the screw feet to level the appliance (if applicable) |
| The discharge outlet is blocked | Clear the discharge outlet | |
| The movement of water to the drain is obstructed | Clear the floor of the appliance (if applicable) | |
| The water container is damaged | Call your agent or qualified Technician | |
| The drip tray is overflowing | Empty the drip tray (if applicable) | |
| The appliance is unusually loud | Loose nuUscrow | Check and tighten all nuts and screws |
| The appliance has not been installed in a level or stable position | Check installation position and change if necessary |
Electrical Wiring
Appliances are supplied with a 3-pin. molded, BS1363 plug and lead, with a 13 amp fuse as standard. The plug is to be connected to a suitable mains socket. Appliances are wired as follows:
- Live wire (colored brown) to the terminal marked L
- Neutral wire (colored blue) to the terminal marked N
- Earth wire (colored green/yellow) to terminal marked E
All appliances must be earthed, using a dedicated earthing circuit. If in doubt consult a qualified electrician. Electrical isolation points must be kept clear of any obstructions. In the event of any emergency disconnection being required, they must be readily accessible.
Disposal
EU regulations require refrigeration products to be disposed of by specialist companies who remove or recycle all gasses, metal, and plastic components. Consult your local waste collection authority regarding the disposal of your appliance. Local authorities are not obliged to dispose of commercial refrigeration equipment but may be able to offer advice on how to dispose of the equipment locally.
Compliance
Parts have undergone strict product testing in order to comply with regulatory standards and specifications set by international, independent, and federal authorities. Products have been approved to carry the following symbol:![]() The R600a and R290 refrigerant used by this refrigerator
The R600a and R290 refrigerant used by this refrigerator![]() WARNING:
WARNING:
Keep ventilation openings, in the appliance enclosure or in the built-in structure, clear of obstruction. Do not use mechanical devices or other means to accelerate the defrosting process, other than those recommended by the manufacturer. Do not damage the refrigerant circuit. Do not use electrical appliances inside the food storage compartments of the appliance, unless they are of the type recommended by the manufacturer.![]() IN CASE THE SUPPLY CABLE IS DAMAGED. THE MANUFACTURER OR THE AFTER-SALES SERVICE OR QUALIFIED TECHNICIAN SHALL REPLACE IT IN ORDER TO PREVENT ANY POSSIBLE RISK.
IN CASE THE SUPPLY CABLE IS DAMAGED. THE MANUFACTURER OR THE AFTER-SALES SERVICE OR QUALIFIED TECHNICIAN SHALL REPLACE IT IN ORDER TO PREVENT ANY POSSIBLE RISK.![]() THE LAMP REPAIR AND REPLACEMENT SHALL BE CARRIED OUT BY QUALIFIED TECHNICIANS. WITH POWER SUPPLY DLSCONNEC itU. REPLACE WITH IDENTICAL LAMPS.
THE LAMP REPAIR AND REPLACEMENT SHALL BE CARRIED OUT BY QUALIFIED TECHNICIANS. WITH POWER SUPPLY DLSCONNEC itU. REPLACE WITH IDENTICAL LAMPS.![]() ONLY QUALIFIED TECHNICIANS SHALL CARRY OUT THE EXTRAORDINARY MAINTENANCE INTERVENTIONS.
ONLY QUALIFIED TECHNICIANS SHALL CARRY OUT THE EXTRAORDINARY MAINTENANCE INTERVENTIONS. Disposal of packaging
MI packaging materials should be disposed of h an environmental trends; way. The cardboard may be used as scrap paper. The protective foil and the foam oishiors are CFC – free. Do not allow children to play with the packaging and destroy plastic bags safely. You can break or cut the cardboard into smaller pieces and give it to a waste paper disposal service. Environmental protection
 Discarded electric appliances are recyclable and should not be discarded in domestic waste! Please actively support us in conserving resources and protecting the environment by returning this appliance to the collection centers (if available).


