 Hive Heating and Cooling Smart Thermostat Pack
Installation order
To remotely control your heating and cooling with Hive Active Thermostat, the thermostat needs to be installed and paired to a Hive Hub.
For quick and efficient set up, install Hive Active Thermostat in the order shown below.
Hot tip: If you already have a Hive Hub you can start from step 2!
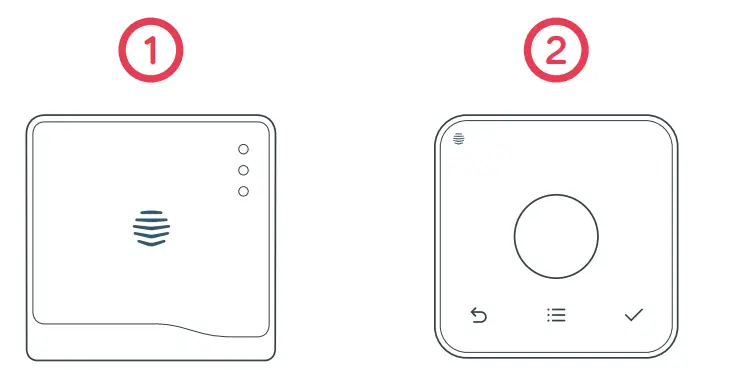
- Install hub
Wait until the hub flashes yellow
- Install the thermostat
It will show ‘Search’ and then connect - Pair
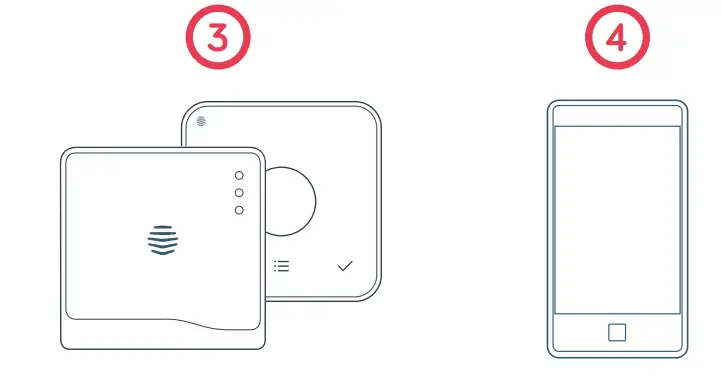
Pair the thermostat and hub
- Complete online setup
On the Hive website or mobile app
Check your system is compatible with Hive Active Thermostat at hivehome.com
Installing your hub
If you have already installed your hub, please skip this section.
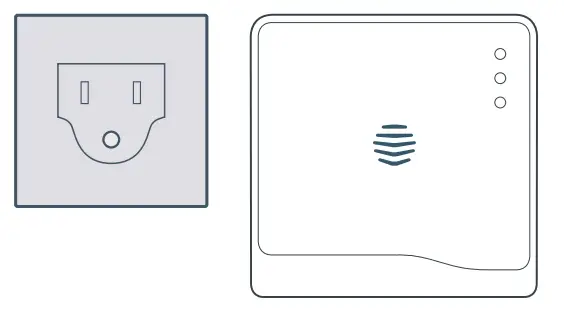
To install the hub you will need an Internet connection a spare Ethernet port on your router and an electrical outlet nearby.
Install the hub as follows:
- Connect the hub to your Internet router using the Ethernet cable provided. Hot tip: Position your hub on a shelf or table rather than on the floor to help it talk to your other Hive devices.

- Fit the power cable into the hub and plug it into a power outlet.

- During start-up the green light will flash. When the hub is ready to pair the green light will be solid and the middle light will flash amber. This usually takes 5-10 minutes.

If no lights are displayed immediately after installing the hub check all cables are connected, the power outlet is working, and that you have an internet connection.
If the problem still persists please contact Hive Technical Support on +1-866-470-9133 or visit hivehome.com/support

Installing your thermostat
- Switch off the power
Before installing, switch the power off to the heating and/or cooling system at your electrical breaker box. Confirm it is powered off and secured in the OFF position for the duration of the installation. You can test your fan to see if the system will turn on, if not the power is off. Remember to always follow appropriate safe electrical isolation procedures and test to confirm that the supply is off before touching any electrical connections.
Hot tip: If your existing thermostat is battery powered it may remain on once the power is turned off. - Remove your existing thermostat from the wall and take a picture of the wires for reference
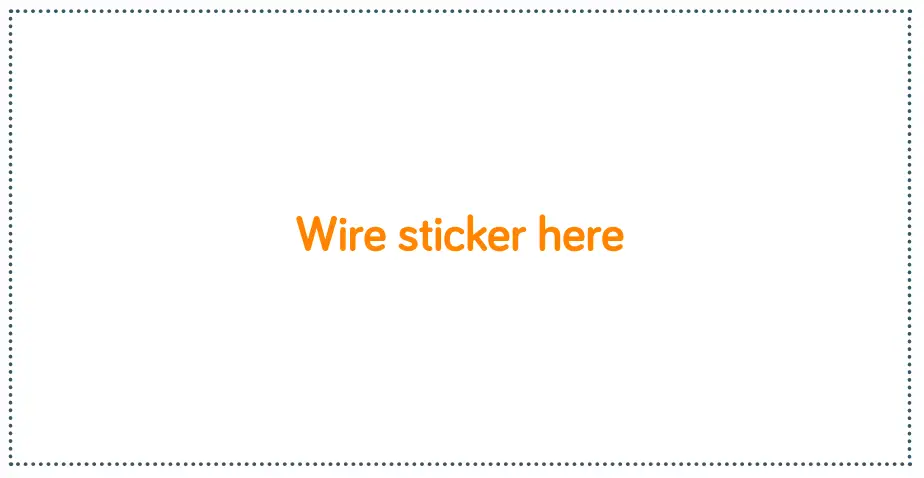
Your Hive thermostat needs a permanent connection to the ‘C’ or ‘Common’ terminal. If there is no wire connected to the C terminal on your existing thermostat you should request a professional install. Label the wires to your existing thermostat using the stickers below.
Caution: Hive Active Thermostat is designed for systems of 24VAC with 1A maximum current, and should not be used on high voltage systems.
- Disconnect the wires from the old thermostat backplate and remove it from the wall.
Optional decoration plate
If there are holes and marks that will not be covered by your new
Hive thermostat, use the optional decoration plate provided.
Fix the decoration plate to the wall then attach the thermostat backplate using the small screws provided.
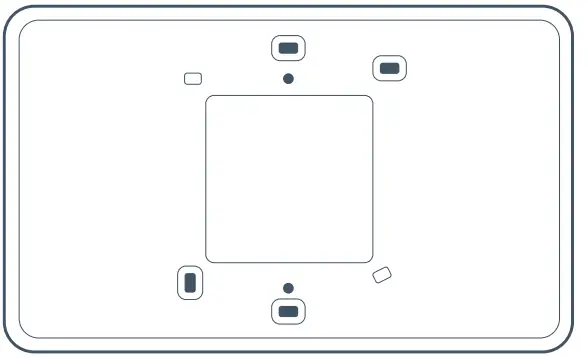
- Removing the terminal protectors
Remove the terminal protectors by pressing down the terminal release tabs and pulling the plastic out of the terminals. - Screw on the Hive thermostat backplate using the screws (and wall anchors) provided
Hot tip: Use the level on the backplate to help get your thermostat straight on the wall.
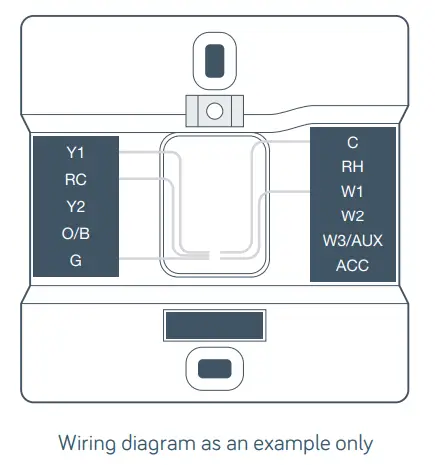
- Connect the wires to the Hive thermostat backplate
Hive is compatible with wire thicknesses AWG 16-22. If your existing thermostat had a jumper between the RC and RH terminals this is no longer required. An R wire can go into either RC or RH.
Terminal descriptions- G – Fan
- C – Common wire
- W – 1st, 2nd and 3rd stage heating for conventional systems.
- W3/AUX is used for auxiliary or emergency heat for heat pump systems.
- Y – 1st and 2nd stage cooling or 1st and 2nd stage of heat pump compressor
- RC – Cool transformer
- RH – Heat transformerO/B – Heat pump reversing valve
- ACC – Accessory terminal for dehumidifiers or humidifiers (also sometimes called DHUM or HUM)
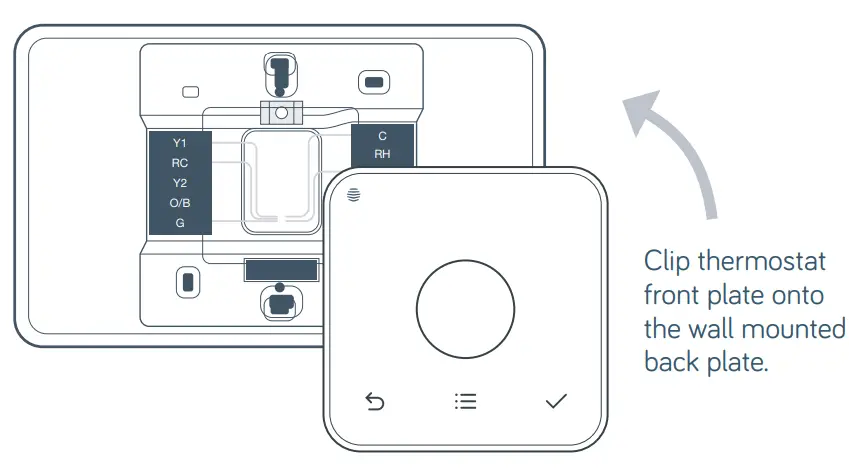
- Attach the thermostat body to the thermostat backplate

Pairing your hub and thermostat
If you already have other Hive devices connected, you can follow the ‘install devices’ section of your app or online dashboard to pair the hub and thermostat. If not, follow the steps below.
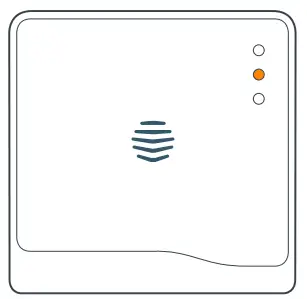
- Check the hub is flashing amber –this means it’s ready to connect
If the hub is showing a solid amber light, unplug the power and reconnect it. The hub will begin to reboot, this may take a few minutes. When the hub is ready to pair, the top light will be solid green and the middle light will flash amber. - Turn the power back on to your heating and/or cooling system
The thermostat display will show ‘Search’ – meaning it’s searching for the hub. A timer will show how long the thermostat has been searching.
If this lasts for longer than ten minutes, contact Hive Technical Support and they will diagnose any problems.
- Once paired your thermostat will take you through guided set-up

The first time you connect your Hive thermostat, it will walk you through the set-up process.- Firstly, you’ll need to confirm the wires shown in green are the ones you want to connect. The Hive thermostat will automatically detect when a wire is connected to a terminal.
- You’ll then need to tell us whether your system is a gas furnace or an electric air handler. Don’t worry if you’re not sure, we’ve got that covered too.
- If you have connected wires to other terminals, like O/B and ACC, we’ll ask you a couple more questions.
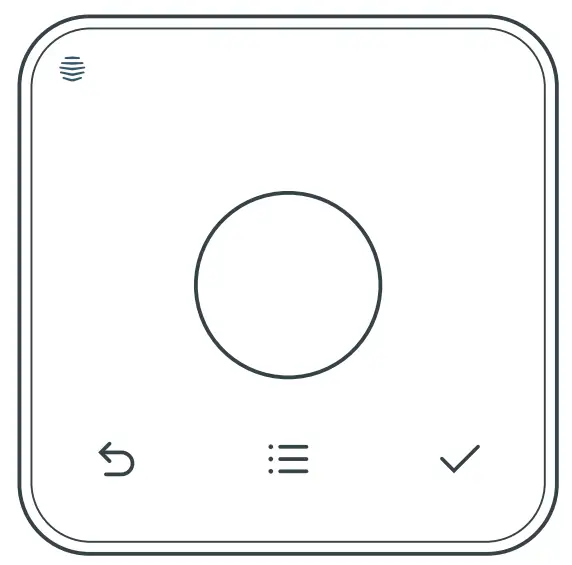
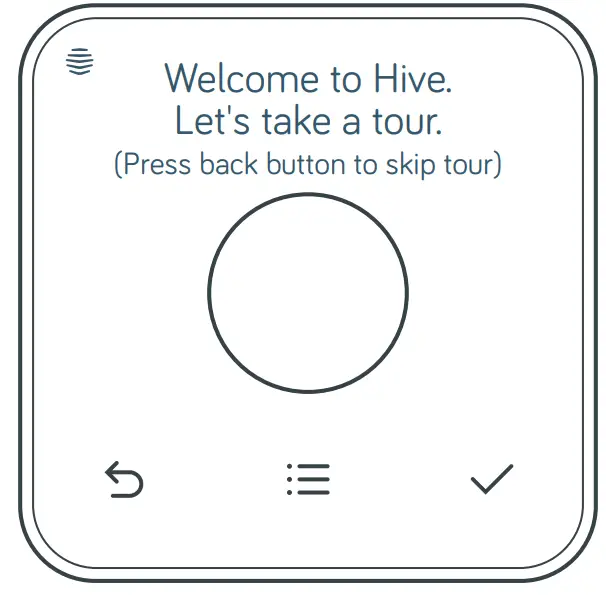
- You’ll then see a quick welcome tour where you’ll learn the common interactions on the thermostat itself.
Once we know these things about your system, you can continue to set up your schedules on the thermostat or switch to the app or website to do this.
Hot tip: If you need to rewire at this point make sure the power is off at the electrical breaker box.
Controlling your thermostat remotely
Hive Active Thermostat is now installed, there is one final step to link your thermostat to your Hive account.
- Download the Hive app
- Login using the email address and password you registered with OR If you haven’t already got a Hive account, tap ‘Create Account’ on the app Login screen or create one at hivehome.com/register. Once you’ve created your account then you’ll need to log in.
- Enter the hub ID – this is the ABC-123 formatted number on the underside of the hub
- Once the hub ID has been entered, setup is complete and you’ll land on your Hive dashboard
- Tap on your thermostat to control it remotely
Hot tip: You can also control your thermostat and other Hive devices through our website, just go to hivehome.com
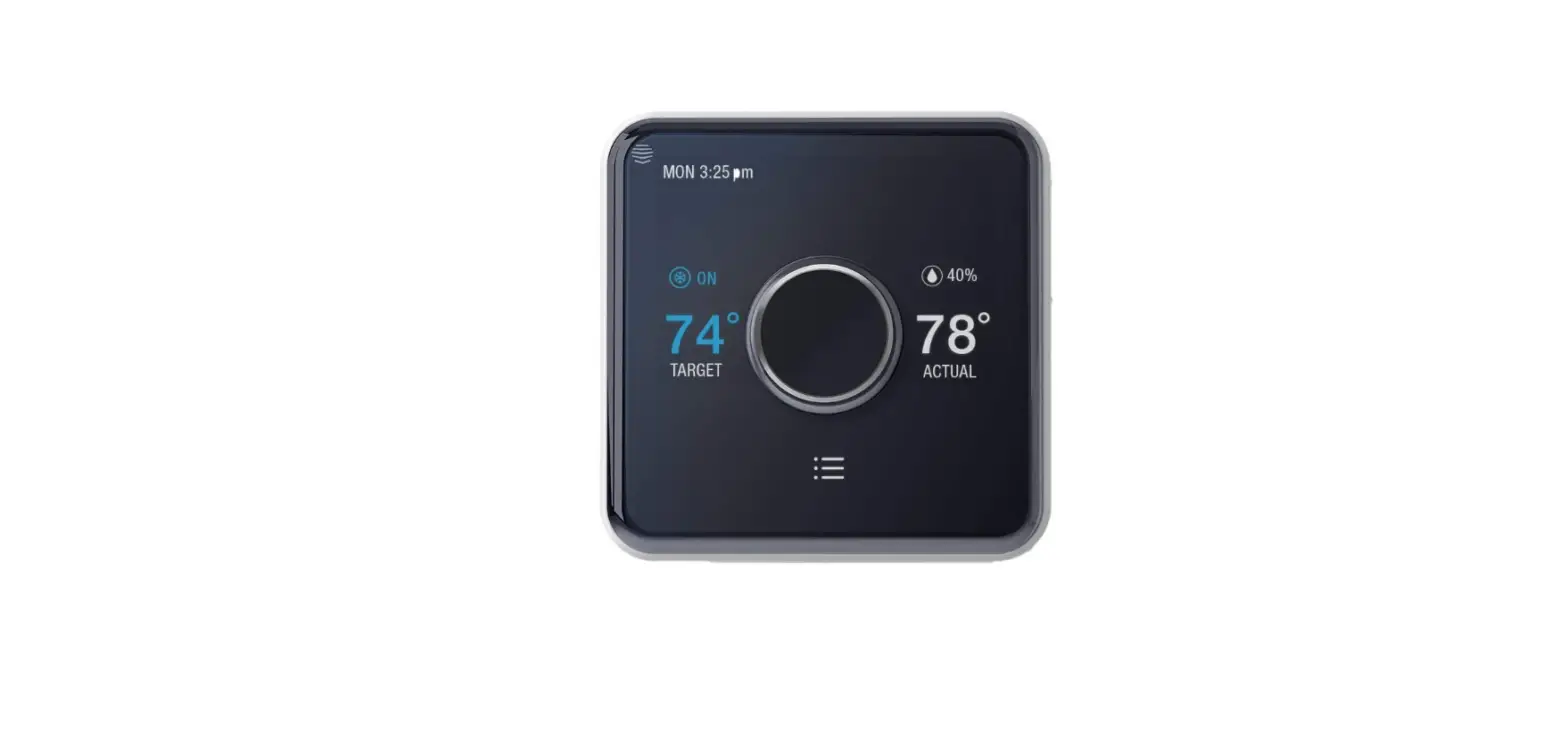
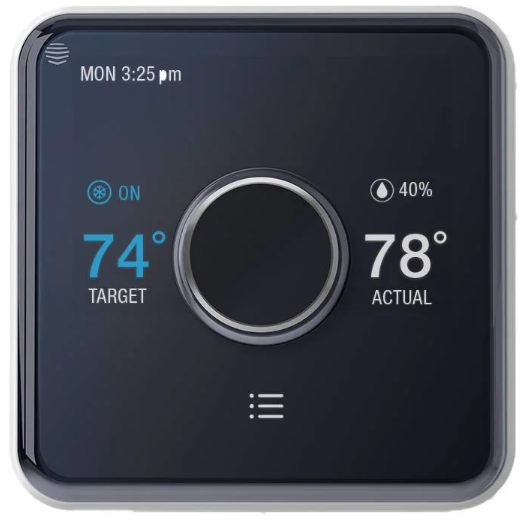
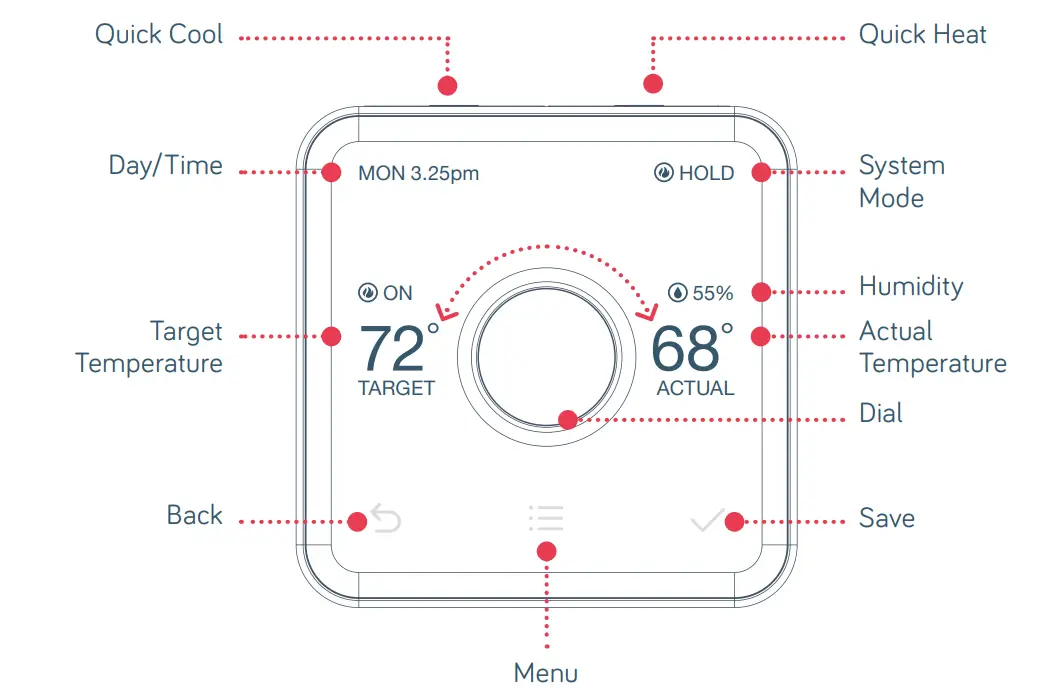
Meet your new Hive thermostat
Multizone installation
Hive Multizone can support up to five zones for heating and/or cooling.
Hot tip: We recommend that you install the thermostat closest to the hub first and then install each additional thermostat one at a time.
- When installing each thermostat, repeat steps 1-6 from the Installing your thermostat sections on pages 5-9.
- Log in online at hivehome.com or through your Hive app.
- If using your app, select menu and ‘Install Devices’ and follow the on-screen instructions in the app.
- If you are logged in via the web, select settings and ‘Install devices’ and follow the onscreen instructions.
- If you have more zones to install, repeat the steps until all thermostats have been connected.
Troubleshooting
To remotely control your heating and/or cooling with Hive, both the thermostat and hub need to be connected. When this service isn’t available, the thermostat can also be installed without a hub. This is known as ‘stand-alone’ mode. In ‘stand-alone’ mode the thermostat acts as a standard programmable thermostat without the remote control features and functionality of Hive.
Using stand-alone mode
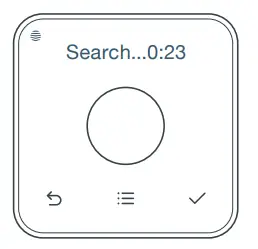
- Upon powering up the thermostat for the first time, the thermostat display will show ‘Search’.
- Push and hold the back and check buttons until the 10 second timer runs down.
- To switch back to ‘connected’ mode:
Remove thermostat from the backplate, wait 5 seconds and then connect the thermostat to the backplate. It will power back up and display ‘Search’ while looking for your hub.
FCC Compliance Notice
This device complies with Part 15 of the FCC Rules, operation is subject to the following two conditions:
- This device may not cause interference.
- This device must accept any interference received, including interference that may cause undesired operation.
This Class B digital apparatus complies with Canadian ICES-003. CAN ICES-3(B)/ NMB- 3(B). This equipment has been tested and found to comply with the limits for a Class B digital device, pursuant to Part 15 of the FCC Rules. These limits are designed to provide reasonable protection against harmful interference in a residential installation.
This equipment generates uses and can radiate radio frequency energy and, if not installed and used in accordance with the instructions, may cause harmful interference to radio communications. However, there is no guarantee that interference will not occur in a particular installation. If this equipment does cause harmful interference to radio or television reception, which can be determined by turning the equipment off and on, the user is encouraged to try to correct the interference by one or more of the following measures:
- Reorient or relocate the receiving antenna.
- Increase the separation between the equipment and receiver.
- Connect the equipment into an outlet on a circuit different from, that to which the receiver is connected.
- Consult the dealer or an experienced radio/TV technician for help.
FCC Radiation Exposure Statement
This equipment complies with FCC and IC RF radiation exposure limits set forth for an uncontrolled environment. This equipment must be installed to provide a separation distance of at least 20cm from all persons. Changes or modifications not expressly approved by the party responsible for compliance could void the user’s authority to operate the equipment.
FAQS
Will this thermostat work with heat pumps?
The Hive Thermostat is compatible with Heat Pump Systems, as long as the wiring on your current Thermostat is compatible with the Hive Thermostat
Do i need 2 hubs for 2 thermostat ?
No you would only need one hub to two thermostats.
Does the heating& cooling thermostat include a humidifier connection?
The Hive Active Thermostat included in the Heating & Cooling Pack does include a terminal for humidifier and dehumidifier connections. You would use the ACC terminal.
Does Hive have batteries which must be periodically replaced?
Hive is not battery powered, it uses continuous power from the C-wire. The C wire is a requirement for Hive.
can you conect to both Alexa and Google Home and use either bone to control the temp?
Yes both Alexa and Google Home are compatible with Hive so you can use either or both to control the system.
Does this work through your phone when your out of town?
Yes you can control your devices from your phone when you are out of town as long as you have your devices connected to your Hive Hub and you have internet on your phone to access the app.
What is c wire?
The C wire is the common wire for the thermostat, this is needed to give power to our thermostat. If you don’t currently have a C wire you can get a technician to install one or Hive Active Thermostat is compatible with most C wire replacement solutions. If you have to use one of these, we recommend you request a professional installation.
We have tested the following C wire replacement solutions:
- Venstar Add-a-wire kit
- Fast Stat 1000
Does this have Energy Star approval yet?
We achieved Energy Star Certification on the Thermostat in December 2018, customers may be eligible for rebates through utilities or efficiency programs in their area when they purchase a Hive Thermostat. www.energystar.gov/rebatefinder
Is this compatible with High voltage homes. I tried Nest but is not compatible with high-voltage homes.
The Hive Active Thermostat is a low-voltage thermostat compatible with most HVAC systems (conventional or heat pumps) and not suitable for High Voltage systems Im afraid.
Will thiswork with a Heat Pump system?
Hive is fully compatible with a Heat Pump System, so as long as the wires on your existing Thermostat are compatible you will be able to replace your existing Thermostat with a Hive Thermostat
Does it work with 220v power?
Thank you for your question the Hive thermostat works on a 24V Common Wire 16-22 Gauge Copper or Stranded Wires. Minimum Wire Requirements: Rc or Rh, C, Y1 or W1.


