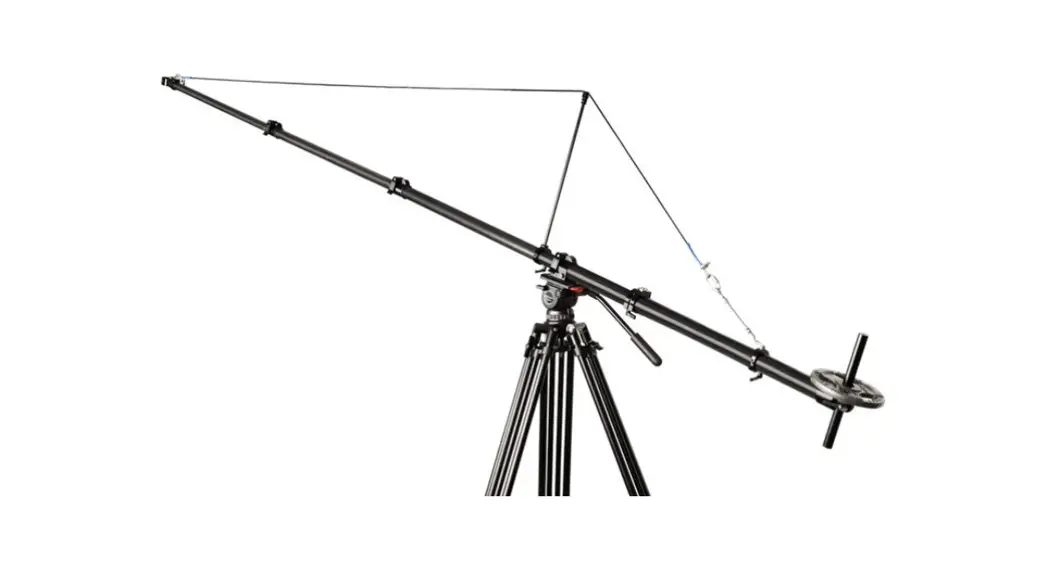
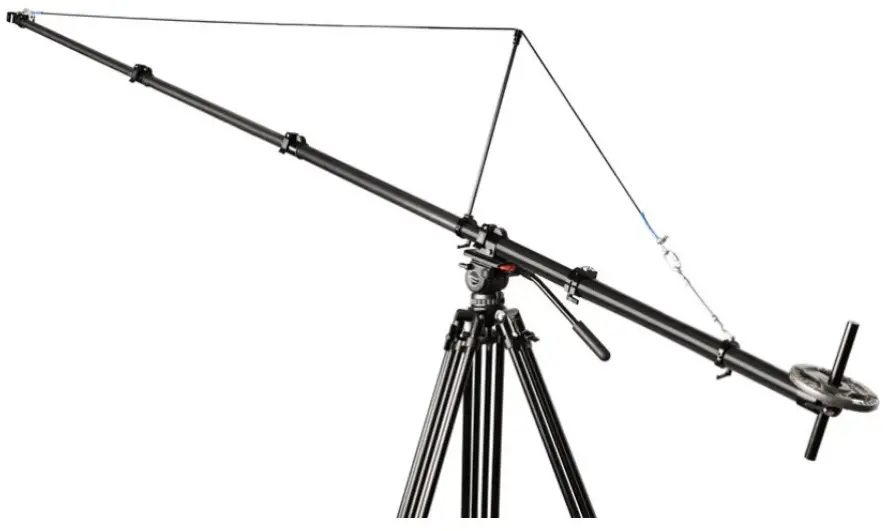
![]() JB-FLMS-01 Fly-master 13ft Telescopic Carbon Fiber Jib Crane
JB-FLMS-01 Fly-master 13ft Telescopic Carbon Fiber Jib Crane
Instruction Manual
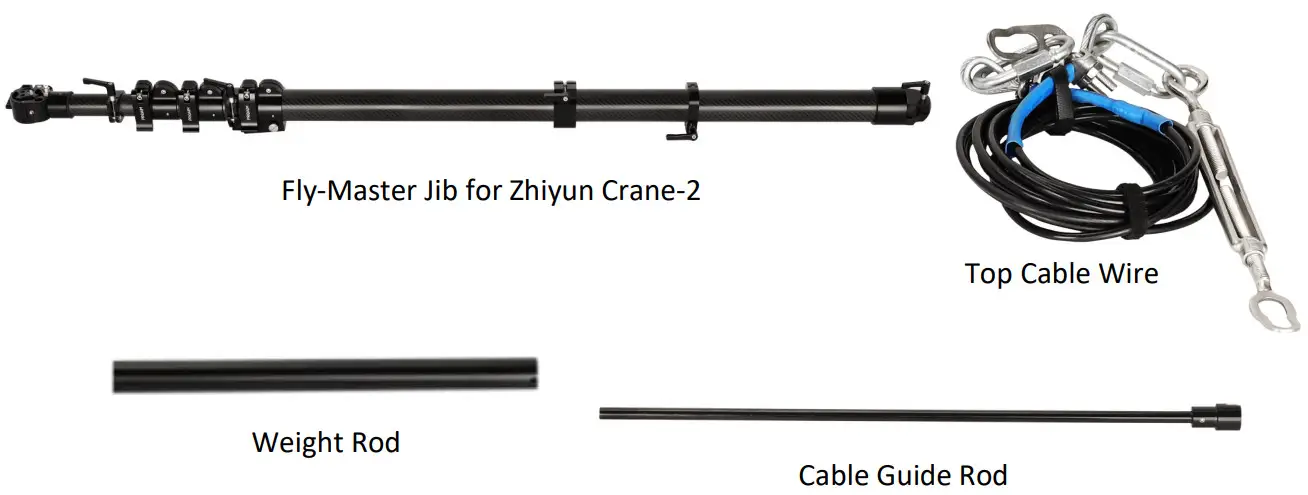
What’s In The Box
Please inspect the contents of your shipped package to ensure you have received everything that is listed below.
Fly Master Jib Setup
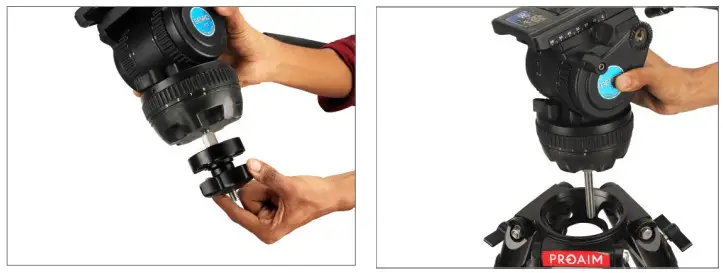
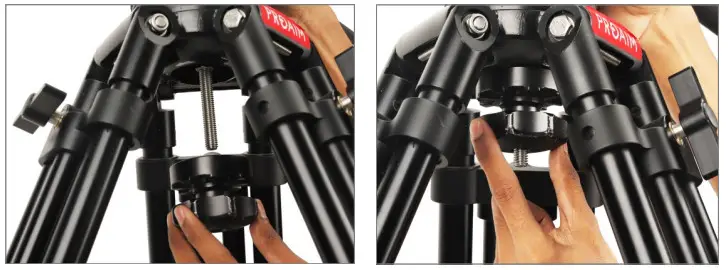
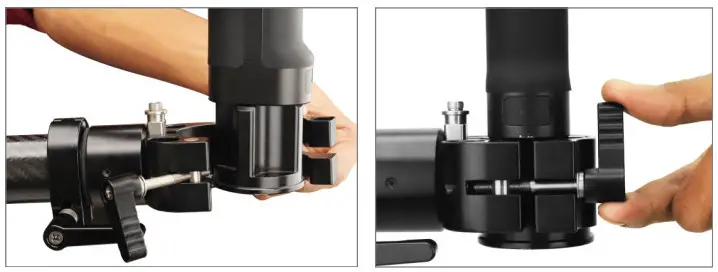
- Loosen the bottom clamp of the fluid head (Not Included) and mount it on the stand.

- Then properly tighten the bottom clamp on the 100mm bowl stand (Not Included), as shown in the image.
NOTE: It comes with a tripod mount with 1/4″ -20 and 3/8″-16 threads on the bottom to mount it on the fluid head.
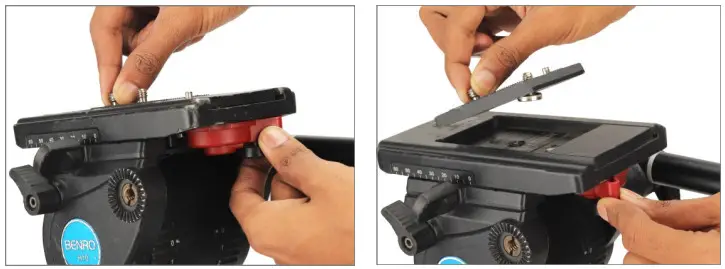
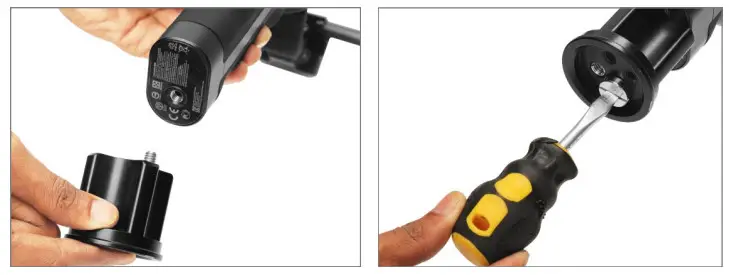
- Now remove the fluid head plate by pressing the lock lever.

- Attach the plate to the Fly-master Jib and securely tighten it, matching the threads, with the help of a screwdriver.

- Now mount the Fly-master Jib on top of the fluid head and properly tighten it with the locking lever.
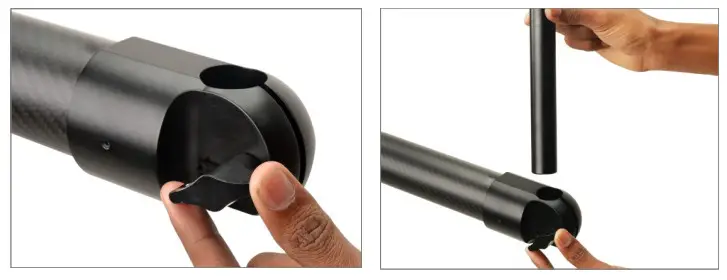
 NOTE: It is extended when not in use at congested shoot sites. Just slide in or out when required.
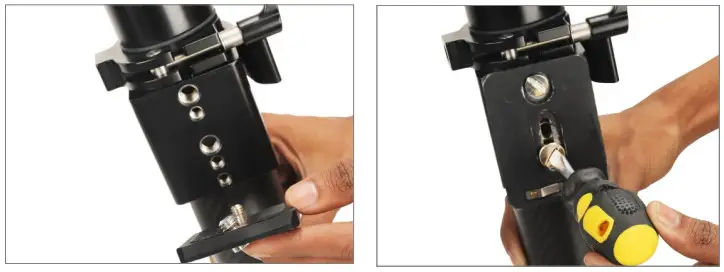
- Loosen the knob and increase the height of the jib as shown in the image.
 NOTE: You can increase the lengths of jib as per requirement.
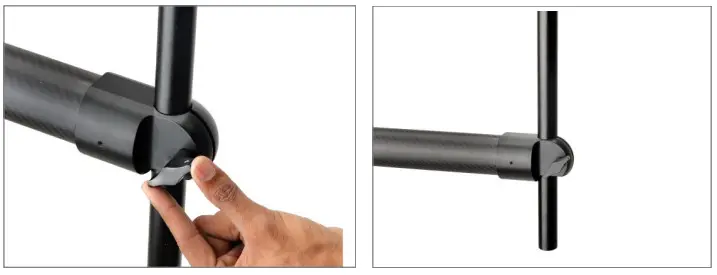
 NOTE: It is extended when not in use at congested shoot sites. Just slide in or out when required.
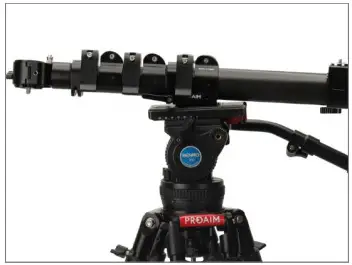
 NOTE: You can increase the lengths of jib as per requirement.
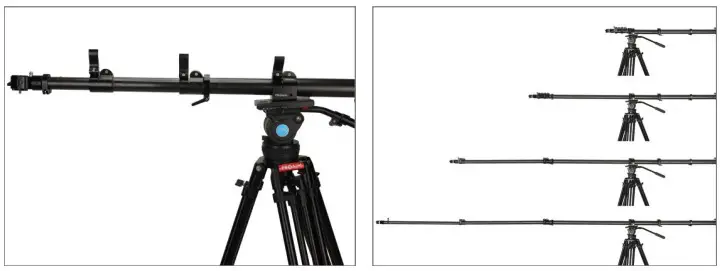
Gimbal Setup
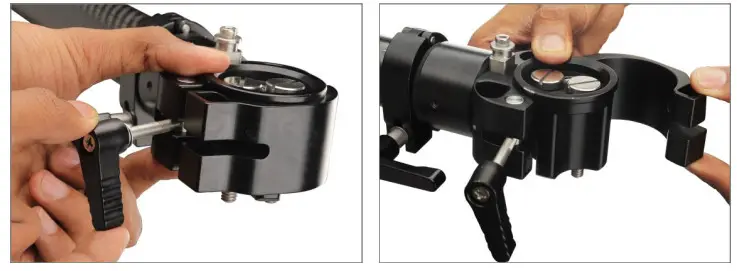
- Loosen the ratchet knob and open the clamp.

- Then remove the Gimbal mounting adapter, as shown in the image.
- Attach the Gimbal mounting adapter to the Gimbal (Not Included) and properly tighten using a screwdriver.
NOTE: Any other gimbal with a handle, featuring a 1/4″-20 or 3/8″ -16 threaded hole at its bottom, can be attached.
- Attach the Gimbal (Not Included) to the clamp and properly tighten it via the knob.
 NOTE: It’s compatible with Zhiyun Crane-2 & other hand-held gimbals with 1/4” or 3/8” Mounting threads.

 NOTE: It’s compatible with Zhiyun Crane-2 & other hand-held gimbals with 1/4” or 3/8” Mounting threads.
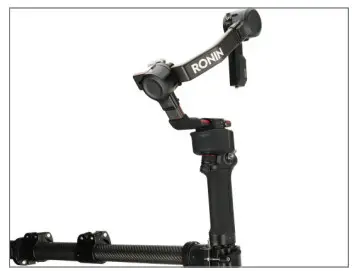
Inserting weight rod in Fly master jib
- Loosen the knob and insert the weight rod.

- Properly tighten the knob.
NOTE: Provided highly robust weight rod supports universal weight plates with a 25mm hole diameter.
- Insert weight (Not Included) according to your requirement.

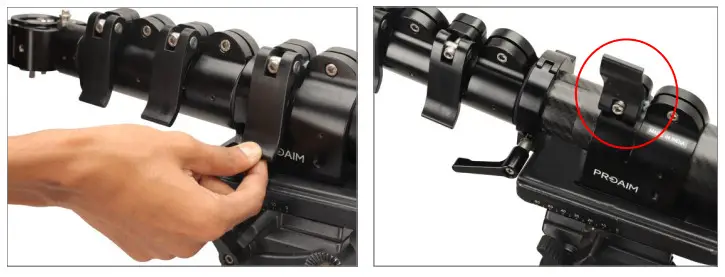
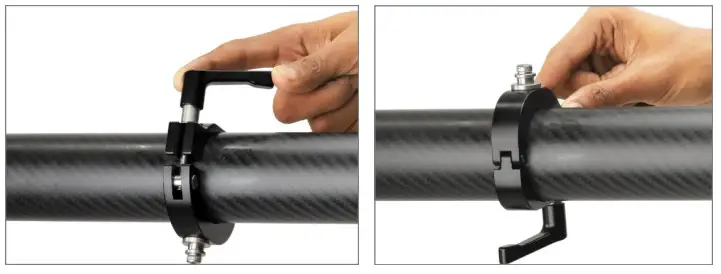
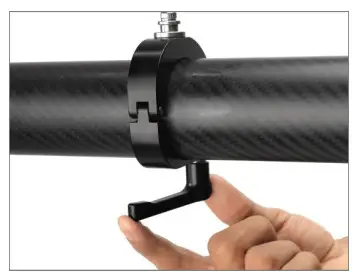
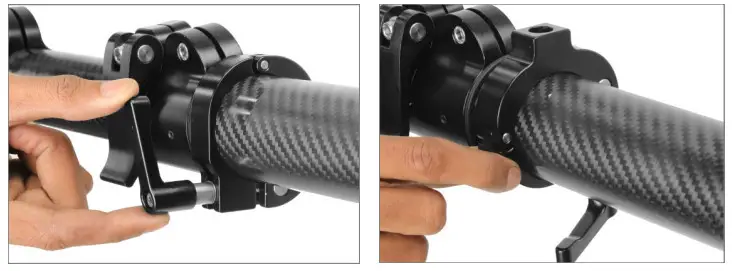
- Loosen the clamp’s knob and rotate the clamp.

- Then properly tighten the knob.
NOTE: High-grade Aluminum constructed clamps at each section’s end promise a strong clamping force.

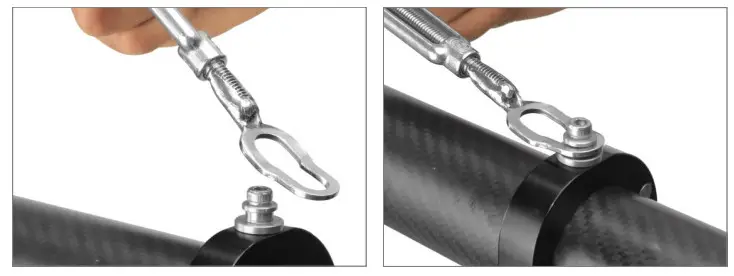
Attaching Top cable wire
- Properly attach the first end of the top cable wire to the clamp.

- Similarly, insert the second end of the wire into the clamp, as shown in the image
 NOTE: It facilitates convenient underslung & over-slung operations for various shot requirements.
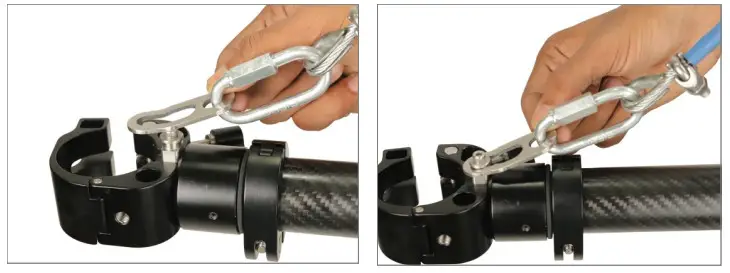
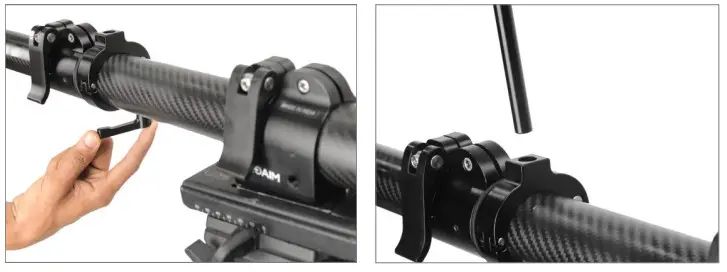
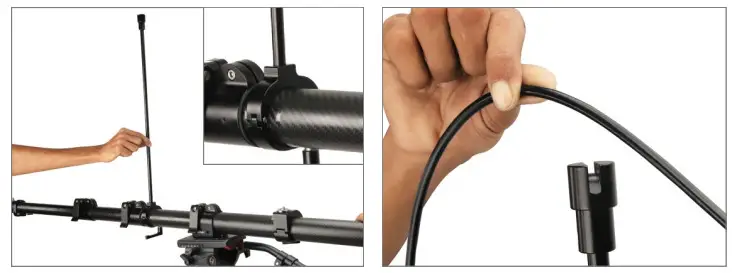
- Now loosen the clamp’s knob and rotate the clamp.

- Now, properly tighten the knob and insert the cable guide rod.

- Then insert the top cable wire into the rod, as shown in the image.
NOTE: Set the Cable Guide rods’ position according to your requirement.
 NOTE: It facilitates convenient underslung & over-slung operations for various shot requirements.
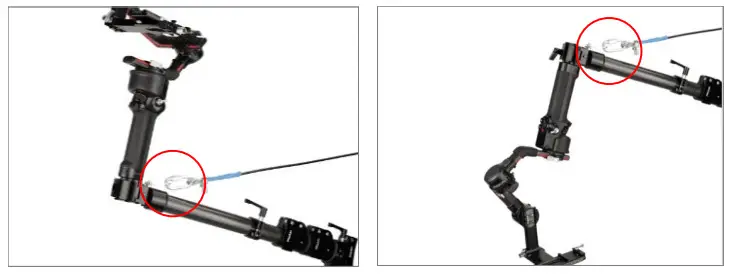
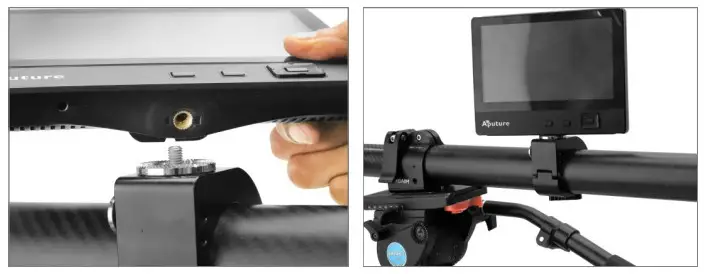
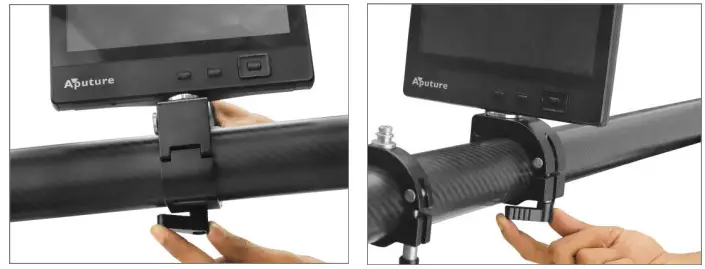
LCD Monitor Setup
- Properly match the threads of the LCD (Not Included) and mount the LCD, as shown in the image.

- Then properly tighten with the help of the knob.
NOTE: Tripod mount also has a total of three 1/4″-20 threaded holes on the sides to attach monitors & other accessories. NOTE: Compatible gimbals- Zhiyun-Tech Crane-2 Gimbal (Direct) Single Handle Gimbals with 1/4″-20 & 3/8″-16 Mounting Threads.
 NOTE: Compatible gimbals- Zhiyun-Tech Crane-2 Gimbal (Direct) Single Handle Gimbals with 1/4″-20 & 3/8″-16 Mounting Threads.
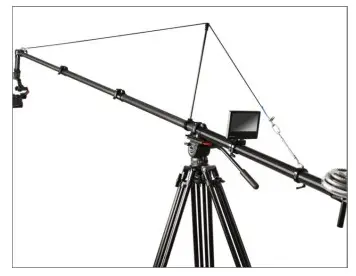
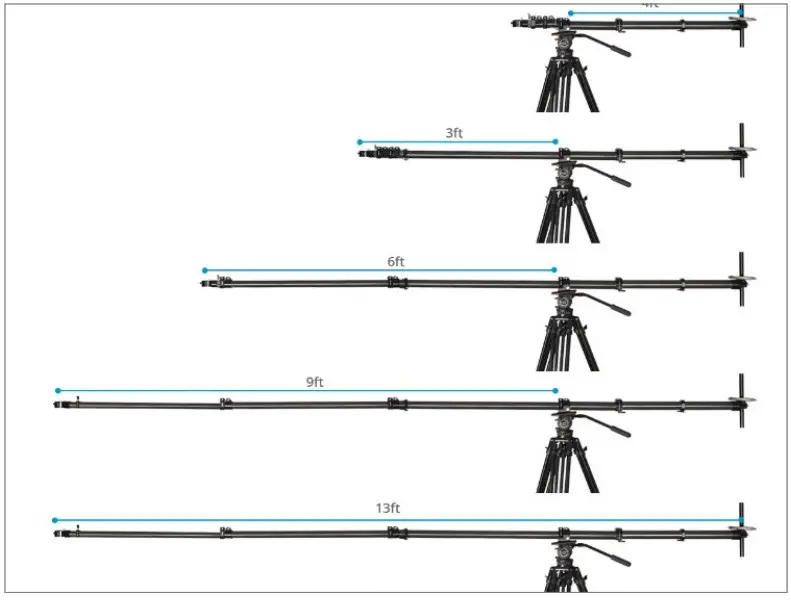
Maximum Extendable Length of Fly Master Jib
NOTE: Fully extended length=13ft. & Length of 1st 3 each section =3ft. & length of last section=4ft.
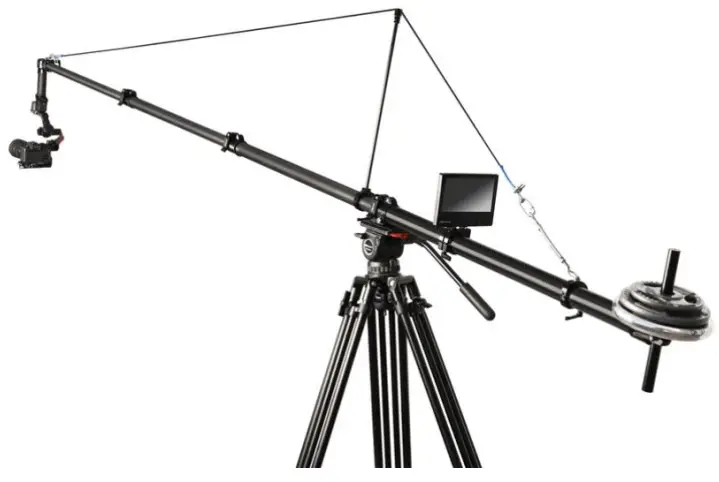
YOUR PROAIM FLY-MASTER TELESCOPIC CARBON FIBER JIB CRANE ALL DRESSED UP AND READY TO GO!
Warranty: We offer one year warranty for our products from the date of purchase. Within this period of time, we will repair it without charge for labor or parts. The warranty doesn’t cover transportation costs nor does it cover a product subjected to misuse or accidental damage. Warranty repairs are subjected to inspection and evaluation by us.
Liability: We are not liable for damage caused by products that we do not supply or from mishandling in transit, accident, misuse, neglect, or lack of care of the product, or service by anyone other than our company.
Contact Us: In case of any kind of dissatisfaction, please Contact us immediately and we promise our utmost support and care until you use our product.
![]()


