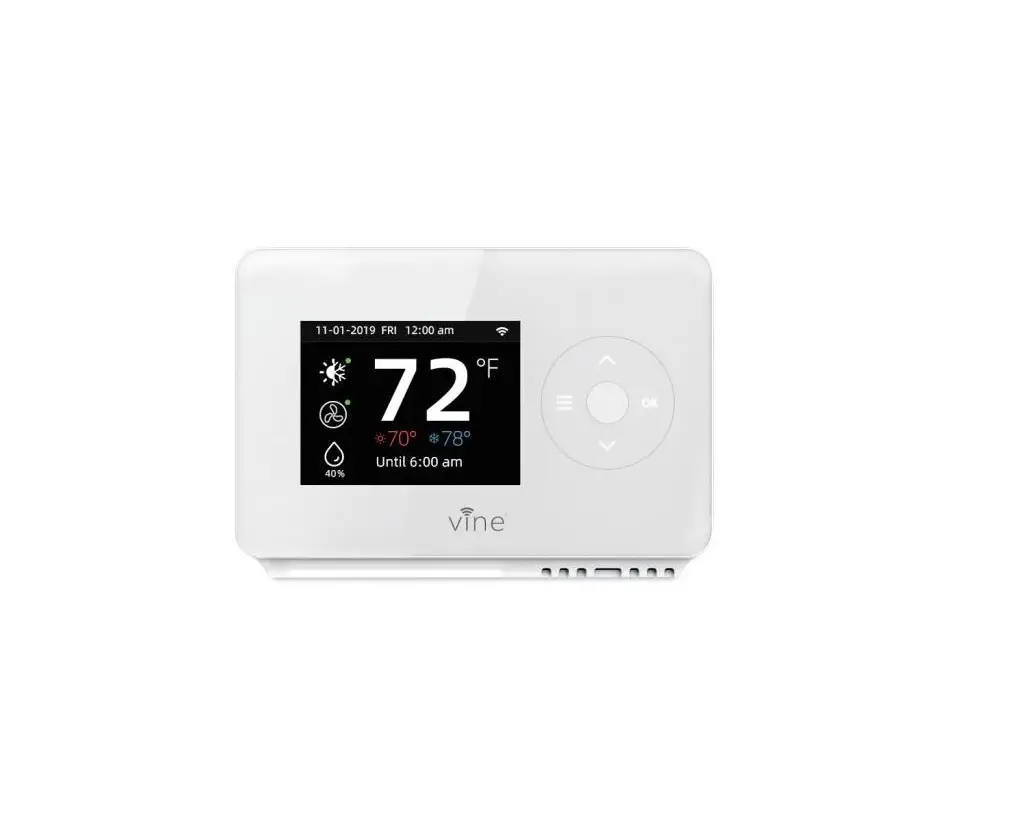
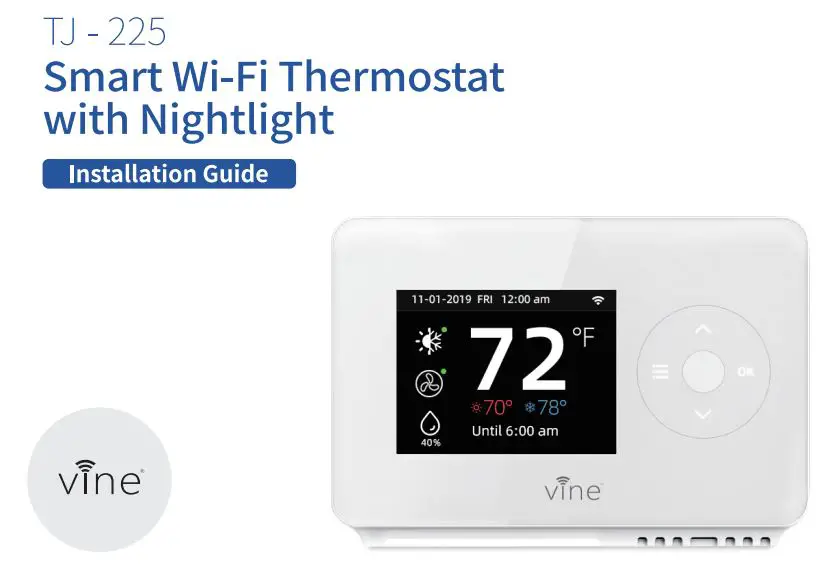
Vine Smart Wi-Fi Thermostat with Nightlight
TJ-225 User Guide
Getting Started
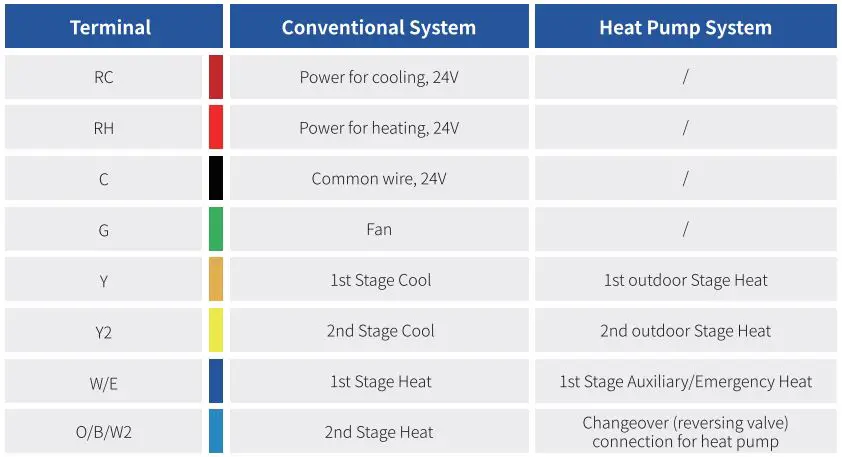
This TJ-225 thermostat is designed to work on most 24V-AC low voltage heating and cooling systems such as gas and oil furnaces, heat pumps, and single or dual-stage systems.
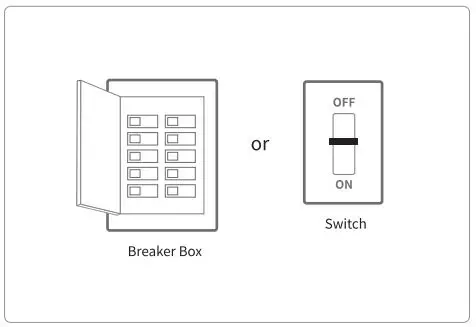
Step 1 Switch off power
This protects you and avoids blowing a fuse in your equipment. To make sure the power is off, change the temperature with your current thermostat and wait at least five minutes to be sure that your system doesn’t turn on.
Step2 Check that your system is off
Confirm your system is off by turning on your heat ( during winter) or your AC ( during summer). Wait a few minutes-you should not feel air coming from your vents .
NOTE: If you have a digital thermostat that has a blank display, skip this step.
Step3 Remove your old thermostat from the wall plate
Most thermostats allow you to remove the main unit and provide access to a wall plate which holds the wiring terminals, you can take off the thermostat by grasping and gently pulling. Some thermostats may have screws, buttons, or clasps.
NOTE: Do not remove any wires from your thermostat at this time!
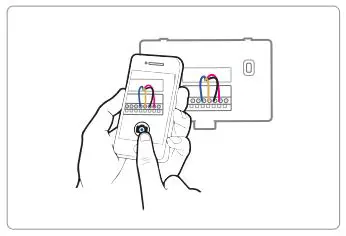
Step 4 Take a picture of the wires
Take a picture of your existing wall plate’s wiring and save it for reference. Make sure you can read the wire terminal labels.
Step 5 Label the wires
Use the wire label provided with your new thermostat to label each wire on your old wall plate.
NOTE: If you have an Re or Rh wire, put the R label on it.
Step 6 Disconnect the wires and remove the old wall plate
Disconnect the wires from the old thermostat one by one, you may need a screwdriver to release wires from terminals.
NOTE: Wrap the wires around a pen or pencil so they don’t fall back into the hole in the wall.
Step 7 Mount the New Wall Plate
Use the enclosed screws and anchors to mount the new wall plate. In most cases, you can utilize the same mounting position of your old thermostat. Be sure to check the alignment of your wall plate pre and post installation of the thermostat unit.
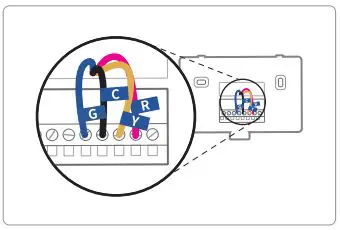
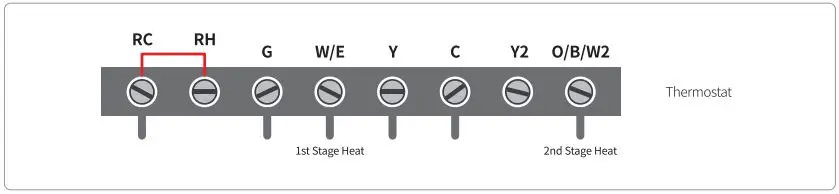
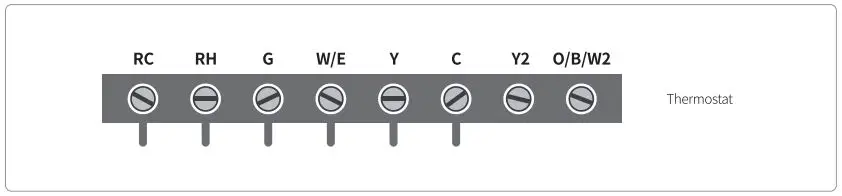
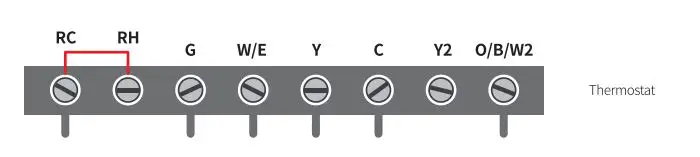
Look at the thermostat wiring photo you took. The following are wiring diagrams for common systems, please confirm you have a C connected to your old thermostat.
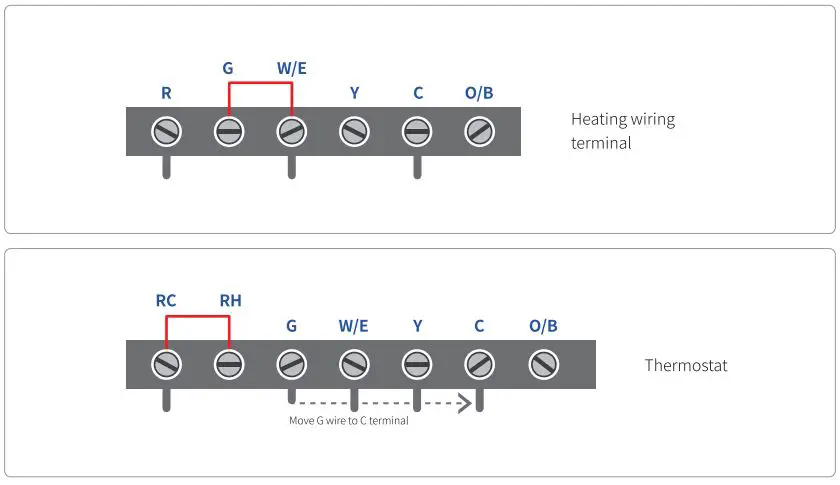
Single Stage Heat/ Two Stage Heat- Furnace/ Boiler with C wire
Combined Single Stage Heat and Single Cool Stage with C wire
( Remove Pre-installed Jumper)
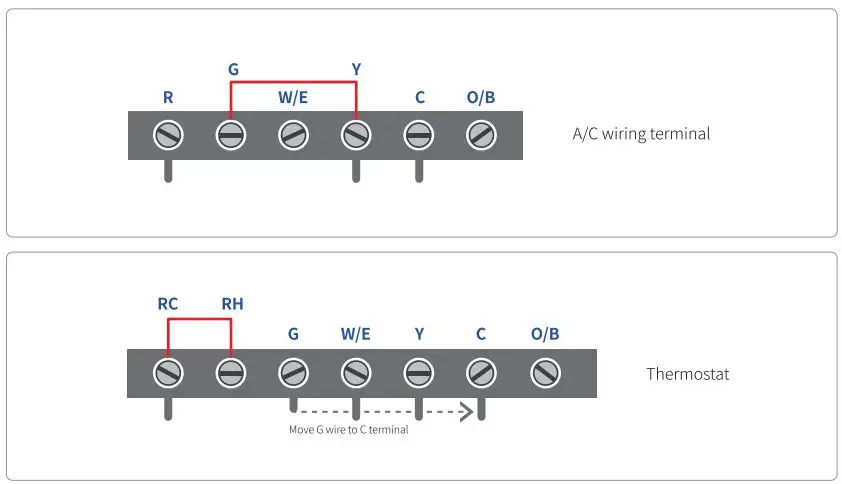
Cool Furnace and Air Conditioner
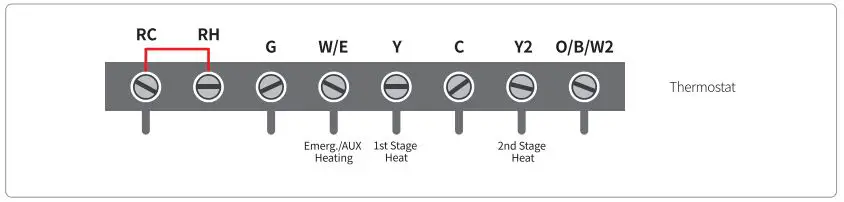
Single Stage/ Two Stage Heat Pump with Emergency Heat and Auxiliary Heat with C wire
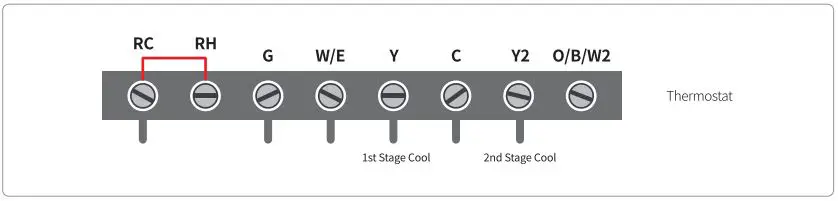
Single Stage Cool/ Two Stage Cool-Air conditioner
Dual Fuel System-Combined Single Stage Heat Pump and Single Stage Furnace with C wire
If you do not have a C-wire connected to your old thermostat, please check below wiring diagram.
Do you have a spare wire? Yes.
- Check for spare wire behind your wall plate or old thermostat, if you have a spare wire, connect it to the C terminal on the new wall plate.
- Remove cover from furnace or heating system, open the heating and cooling system’s cover to find the control board. You should see the same terminal labels that are on your thermostat.
- Find the other end of the unused wire, locate the bundle of wire that are the same as the ones at your thermostat.
- Connect the unused wire to the C-terminal.
- Close the cover to the furnace or heating system.
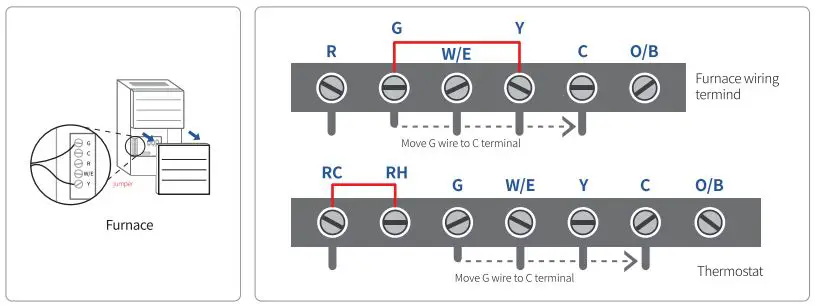
Conventional system without the C wire ( also commonly called a 4-wire system)
- Remove cover from furnace or heating system, open the heating and cooling system’s cover to find the control board. You should see the same terminal labels that are on your thermostat, move the G wire to the C terminal, then use the included jumper wire to connect G with Y.
- At the thermostat, connect C with the G wire;
- With this configuration the thermostat will have no fan control.
NOTE: You may need to unscrew the cover. The control board may be at the top or bottom.
Heat only 3-Wire system
Cool only 3-Wire system
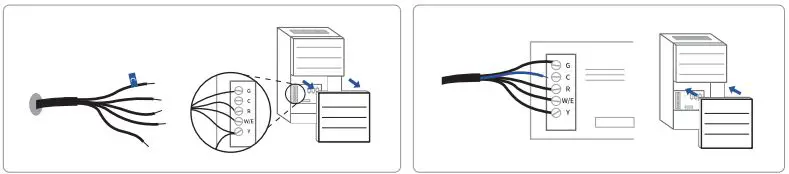
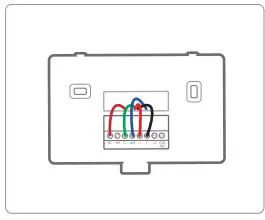
Step 8 Connect the wires to the new wall plate
Refer to the above wiring diagram, insert all wires vertically from the open socket into the proper terminal. Ensure each wire is inserted into the matching terminal (refer to the photo taken previously if needed). Pull wires gently to ensure wires are securely fastened. When all wire connections have been completed, place any excess wire back inside the wall.
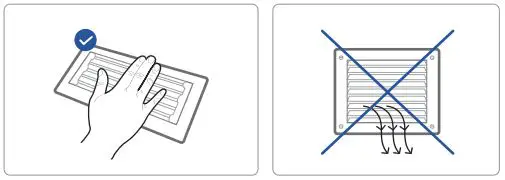
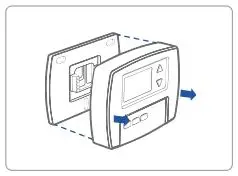
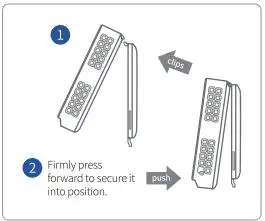
Step 9 Attach Thermostat to the Wall
First align the two clips on the back of the TJ-225 into the corresponding slots on the top of the wall plate.
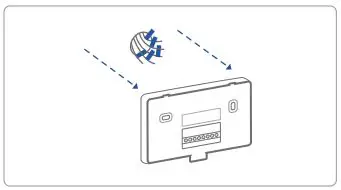
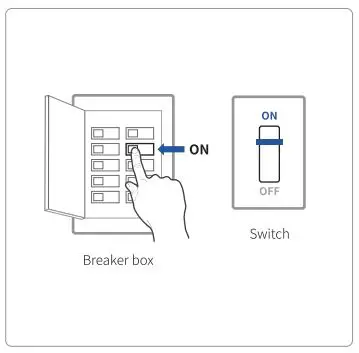
Step 10 Power on and Enjoy
Turn on the switch that controls your heating and cooling system, the thermostat will power on and prompt you to start the setup. If you are having trouble, please refer to our help guide.
We are here to help.
WEBSITE: www.VINECONNECTED.com (online)
EMAIL: [email protected]


