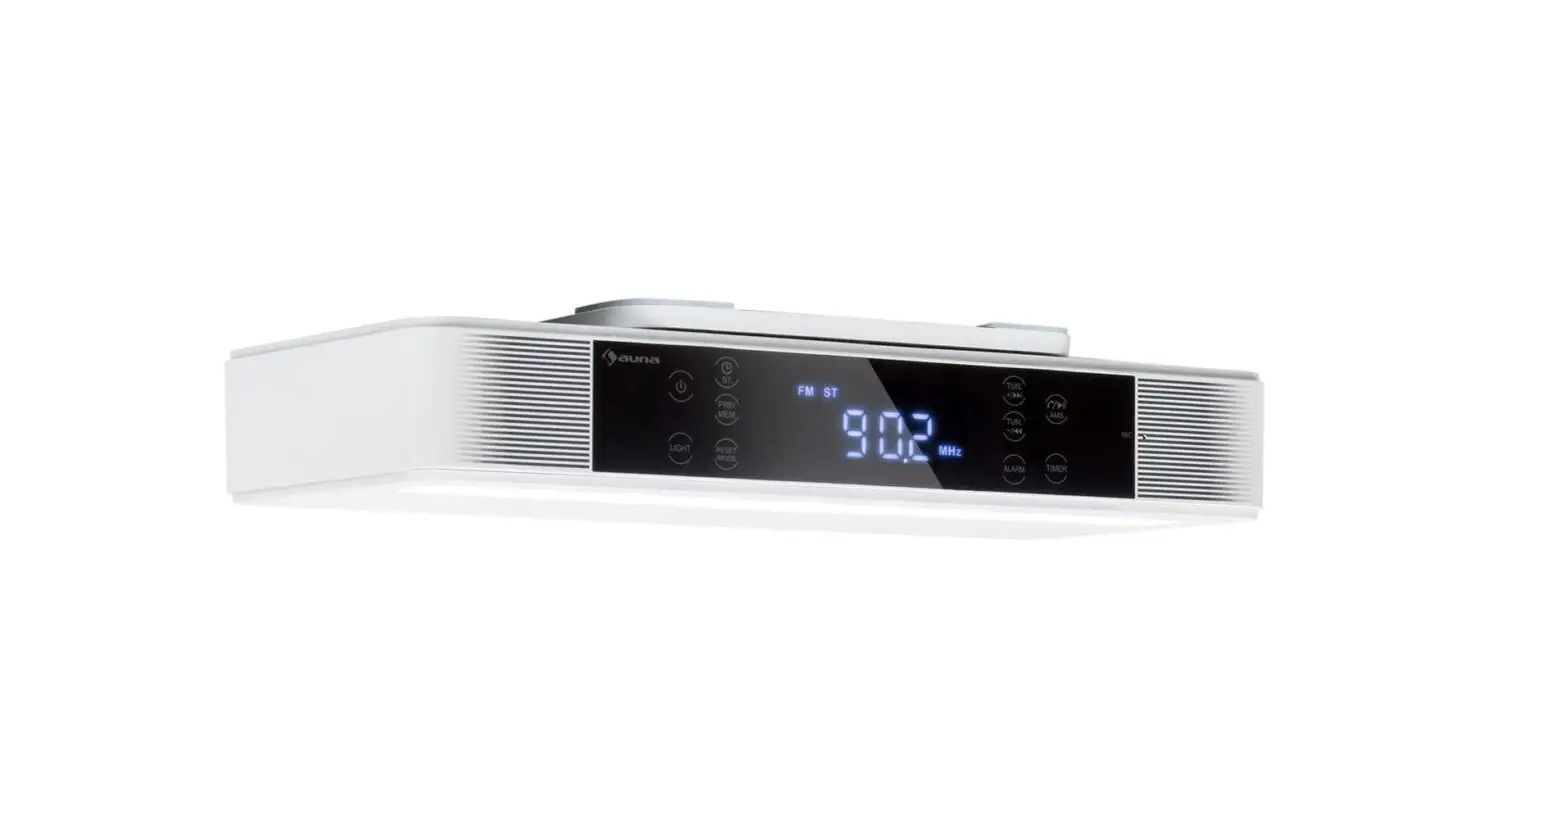
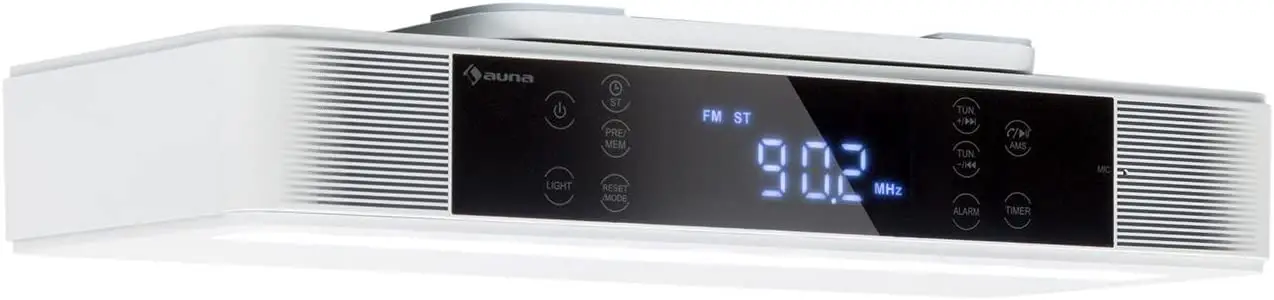
auna KR-140 Kitchen Radio
TECHNICAL DATA
| Item number | 10032851, 10032852 |
| Power input net adaptor | |
| Input Output | 220-240 V ~ 50/60 Hz
5.9 V / 1.5 A |
| Audio | |
| Output power Frequency response | 3 W RMS x 2 (4 Ohm)
80 Hz – 18.000 Hz |
| FM Radio | |
| Tuning range | 87.5 MHz – 108 MHz |
| Preset memory | 40 stations |
| BT | |
| Specification | V 4.2 |
| Profiles | A2DP, AVRCP, HSP |
| Connection distance | 10 meters (open area) |
| Power class | Class II |
| BT frequency | 2402-2480 MHz |
| BT radio-frequency power (max.) | 5 dBm |
| DAB | |
| Frequency range (DAB/DAB+) | 174.928 MHz – 239.2 MHz |
SAFETY INSTRUCTIONS
- Observe all notes listed in the operating
- Do not use the unit near water or in a humid
- Make sure that no liquid is spilled over the unit and that the unit
- Move the unit carefully to avoid damaging
- Do not block the device
- Do not place the unit near heat sources (e.g. heating). Do not expose the device to direct
- Plug the power plug of the unit into the power outlet in the manner
- The device is equipped with overload Should this need to be replaced, contact customer service or a similarly qualified person.
- Unplug the unit from the wall outlet if it will not be used for a long period of time.
- Do not attempt to service or repair the unit In this case, the warranty expires.
- The mains plug is used to disconnect the device from the mains after it has been switched Make sure that the mains plug is always freely accessible.
- Do not expose the device to splash water or place objects filled with liquid, such as vases, on the device.
- Do not expose the batteries to extreme heat such as sunlight or
- Do not obstruct the ventilation of the unit by blocking the ventilation openings with objects such as newspapers, tablecloths, curtains, etc..
- Ensure that a minimum distance of 5 mm to all sides of the unit is
- Do not place sources of open flame ignition, such as lit candles, on the unit.
- Dispose of used batteries in an environmentally friendly
- Use the device only in a temperate climate, not in tropical climates.
WARNING
Risk of injury! To reduce the risk of electric shock, do not open either the cover or the back of the unit. The device does not contain any parts that could be serviced by the customer. Please contact customer service or similarly qualified personnel for maintenance and repair.
PRODUCT OVERVIEW
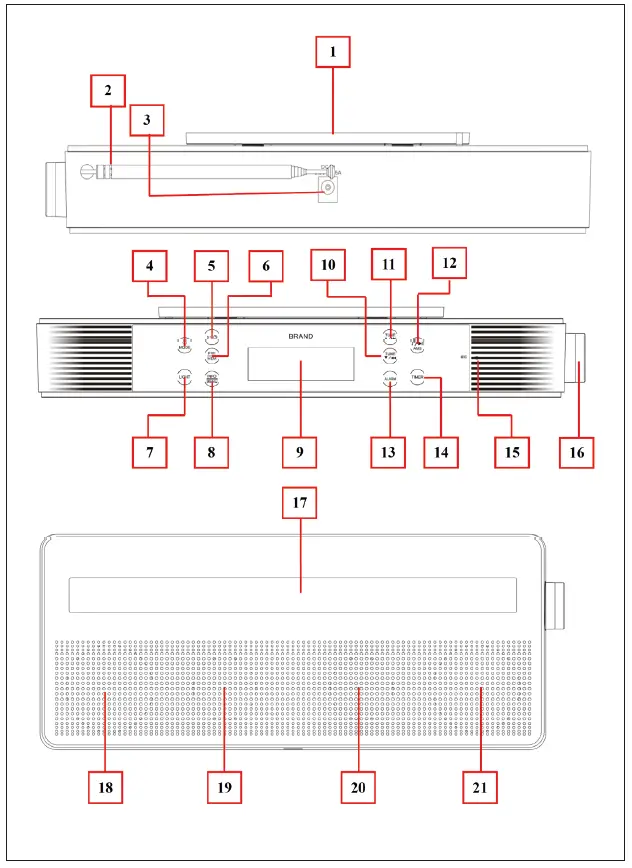
| 1 | Bracket Mounting Slot (for Slide Unit Into Under Kitchen Bracket) |
| 2 | Telescope Antenna (for DAB/FM) |
| 3 | DC INPUT Socket (DC 5.9 V / 1.5 A Power Input) |
| 4 | Power / MODE Button (Power ON and OFF / Mode Switch) |
| 5 | ST Button (FM Stereo On, Off / Clock Set) |
| 6 | PRE / MEM Button (Preset Station / Memory Station) |
| 7 | LIGHT Button (Light On/Off) |
| 8 | INFO / MENU Button (Information select / Call MENU, Previous menu/item) |
| 9 | LCD Display (dots matrix with Backlight) |
| 10 | TUN |
| 11 | TUN |
| 12 |
(Play/Pause, Pick up/Hang up call/Last dialed, Auto Memory Stations / Enter) |
| 13 | ALARM Button (Set for Alarm 1/2) |
| 14 | TIMER Button (Set for Clocking Timer) |
| 15 | MIC Position (for hand-free) |
| 16 | Adjustment Button ( +/- , Enter/Snooze) |
| 17 | LED Light Bar (White LED x 9) |
| 18 | Left Loud Speaker |
| 19 | Left Bass Radiator |
| 20 | Right Bass Radiator |
| 21 | Right Loud Speaker |
GETTING STARTED
Aligning the telescopic antenna
The number and quality of broadcast stations depend on the reception conditions at the location of the device, as well as the telescopic with stand location where placed. Excellent reception can be achieved with the telescopic antenna.
- Align the telescopic antenna location and extend it to its full length.
- Precise alignment of the telescopic antenna is important, especially in the fringe areas of the DAB/DAB+/FM reception. Check the position of the nearest radio mast in your region could need.
- Start the first scan at the window facing the radio mast.
- Radio reception may be restricted in bad weather.
- Do not touch the telescopic antenna when receiving a station. This can be impeded reception and lead to sound dropout.
Plug the 5.5 mm DC plug of provided AC to DC power adapter into “DC INPUT Socket (3)” which is located on the back of the BT Kitchen clock device. The “Welcome to Digital Radio” appears for a few seconds on the LCD display. The device switches to FM mode and stays at frequency 87.5MHz as default waiting for action.
- Choose the desired mode (FM / DAB / BT ) to set up and/or pre-settings the device by short pressing the „MODE (4)” button.
- Long press the “MODE (4)” button to power Off the device.
- Long press the “MODE (4)” button again to power On.
Note: For energy saving, the LCD display’s backlight may turn off/dark after some seconds, if no key button activity. It’s depending on factory default, as well as user settings. Short pressing any one of the buttons can turn the backlight on from off/dark.
SYSTEM SETTINGS
- In the device’s power On mode, short press any one of the buttons to turn On the display’s backlight if it is in dark mode.
- Long press the “INFO / MENU” button to call the menu, and one of the below shows menus will appear to use; (depending on the last mode where used)

- In the “FM/DAB/BT” menu screen, rotate the “Adjustment (16)” button to [+] or [-] to get the “System” menu if it is not in the position.
- Short press the “Adjustment (16)” button to enter the system menu.

In “System” menu, you will find “Set sleep time / Time / Backlight / Language / Factory Reset / SW version” items can be set. Choose one of them, by rotating the “Adjustment (16)” button to [+] or [-] and short press the “Adjustment (16)” button to enter the desired item for the set.
Note: In any submenu or item screen, short press the “INFO / MENU” button will back to the previous one if you need it;
Set sleep time
Choose “Set sleep time” > choose “Sleep off / 15 / 30 / 45 / 60 / 90 (minutes)” which one as desired to use.
Setting the time
Clock time can sync by FM-RDS and/or DAB station, however, you can set it if you want to.
- Choose “Time” > then you will find “Set Time/Date, Auto update, Set 12/24 hours, Set date format” items can be set;
- Choose “Set Time/Date” to manual settings the time and date to the current values of your region.
- Choose “Auto update” > Choose “Update from any / Update from DAB /Update from FM / No update” as you desired.
Note: The clock time sync function will be disabled if “No update” is chosen. To set the clock manually, proceed as follows:
- Choose “Set 12 / 24 hour” > choose “Set 12 hour / Set 24 Hour” as your desired display format.
- Choose “Set date format” > choose “DD-MM-YYYY” or “MM-DD-YYYY” as your desired display format.
Backlight
- Choose “Time out” > choose “On / 10 / 20 / 30 / 45 / 60 / 90 / 120 seconds” as your desired.
Note: the backlight of the LCD display will not turn off/dark if “On” is chosen.
- Choose “On the level” > choose “Low / Medium / High” the brightness level as your desired (for the backlight level of the LCD display).
Language
Choose “Language” > choose “English / French / Deutsch / Italian” as the desired.
Factory Reset
- Choose “Factory Reset” > choose “Yes” to reset the device and all changed settings back to factory default. Choose “No” to abort.
- The device will reset and restart when “Yes” is chosen and confirmed.
Software Version
Choose “SW version” to view the information of the software/firmware version when you need it.
RADIO MODE
Note: This device has a design that supports the FM-RDS function, it supports PI, RT, PS, PTY, and CT of RDS, then the Clock’s time and date can be synced and adjusted automatically in the background when the FM station has RDS-CT signal transmitting.
Start FM mode
- In power On mode short press the “MODE” button to switch to FM mode if it is not in position.
- The “FM Mode” will show in the display for a few seconds, and then switch to the now receiving interface screen for use.
Adjust volume level
Rotates the “Adjustment (16)” button to [+] or [-] for decreases or increases the volume. When rotating the button, a progress bar of volume appearing for in the LCD display.
FM mute
- Short press the “AMS (12)” button, and the sound will mute and the “Mute” word will display, for 3 seconds as identified, in the LCD display.
- Short press the “AMS (12)” button to resume and the “Mute Off” word will display, for 3 seconds as identified, on the LCD display.
Manual tune station
In now receiving interface screen:
- Short press the “TUN (10)” or “TUN (11)” button for steps frequency down or up to receive the next station, each press will step down or up the frequency by 0.05 MHz.
- Short press the “TUN (10)” or “TUN (11)” button quickly until your desired radio frequency of the radio station.
- Long press the “TUN (10)” or “TUN (11)” button to enter into manual searching mode. This mode allows keeping tuning down / up and being stopped until the next radio station frequency is received.
Save manually tuned frequency into preset
After the above-mentioned manual tune station, the tuned/current station’s frequency can be stored by the following steps:
- Long press the “PRE/MEM (6)” button to enter the “Preset Store” menu, and a “<01: (Empty)>” item will show for use, you can change its number up/down, from 01 to 30, by “TUN (10) / TUN (11)” button which is you desired.
- Then, short press the “AMS (12)” button to confirm, a “Preset 01 Stored” message is displayed and the screen will switch back to the now receiving interface.
- The device allows for storage of up to 30 stations in the preset list.
Auto Memory Stations (AMS)
In now receiving interface screen:
- Long press the “AMS (12)” button to enter the auto memory stations function;
- The FM radio will turn into AMS mode and scan up, from 87.50 MHz to 108.0 MHz, a circle of the FM frequency range. Those receivable FM station frequencies will be programmed and saved into the preset list (PRE) automatically.
Note: All previous preset radio frequencies (if have) will be overwritten when every time you use the AMS function.
Preset Recall and Change Station
In now receiving interface screen:
- Short press the “PRE/MEM (6)” button to enter the preset recall menu, and the current station’s preset number and frequency will be recalled and shown for a few seconds on the LCD display.
- Then, short press the “TUN (10) / TUN (11)” button to choose your desired preset number (01 – 30) for listening.
- Then, short press the “AMS (12)” button to confirm.
- The LCD display will switch back to now receiving interface.
- Choose another desired preset number at any time you want by the above-mentioned steps.
FM Stereo Off and On
In some cases; the receiving FM radio station may have FM stereo switching noise due to poor reception or strong interferences. Turning off the FM stereo function may improve this issue when it happens. To do this:
- Short press the “ST (5)” button can turn the stereo to Off and On;
- The word “Mono / Stereo” will show in the LCD display as identified and switch back to now receiving interface.
View station information
In now receiving interface screen, short press the “INFO / MENU (8)” button repeatedly to view information transmitted by the current station:
PI/RT > signal strength > PTY > PS > stereo/mono > CT time > CT date
FM settings
In FM mode, the “Scan settings”, “Audio setting” and “System” items can be set in the FM menu. To do this:
- In FM mode, short press any one of the buttons to turn On the display’s backlight if it is in dark mode.
- Long press the “INFO / MENU” button to call the FM menu (see below picture):

- Chose “Scan setting / Audio setting / System” the desired item by using rotates the “Adjustment (16)” button to [+] or [-] and short pressing the
“Adjustment (16)” button to enter the desired item.
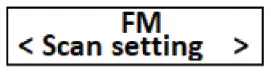
Scan Setting
Choose “Scan setting” > choose “Strong stations only / All stations” as you desired:
- Strong station: scan should only stop at stations with a strong signal.
- All stations: scan at all found stations, including ones with weak signals.
Audio Setting
Choose “Audio setting” > choose “Stereo Allowed/ Forced mono” as you desired:
- Stereo Allowed: enter to play in stereo even in the event of weak FM reception. (stereo switching noise issue may happen)
- Forced mono: forced to play in mono if in the event of weak FM reception.
System
See the chapter „System Settings“.
DAB/DAB+ MODE
What is DAB/DAB+?
DAB is a new digital format that delivers crystal-clear sound with no background noise. In contrast to traditional analog radio stations, DAB+ can be used to broadcast multiple stations one and the same frequency (channel). These are called ensembles or multiplexes. An ensemble consists of the radio station and several service components or data services that are broadcast by the radio stations.
Start DAB Mode
- In Power On mode, short press the “MODE (4)” button to switch to DAB mode if it is not in position.
- In first-time use, the device will switch to DAB scanning mode automatically.
- [Scanning…] appears on the LCD display.
- During the scanning, a progress bar and the found number of stations are displayed.
- When the scan has finished, the first station in alphanumeric order will be played for listening.
Adjust volume level
Rotates the “Adjustment (16)” button to [+] or [-] for decreases or increases the volume. When rotating the button, a progress bar of volume appearing for in the LCD display.
DAB mute
- Short press the “AMS (12)” button, and the sound will mute and the “Mute” word will display, for 3 seconds as identified, on the LCD display.
- Short press the “AMS (12)” button to resume and the “Mute Off” word will display, for 3 seconds as identified, on the LCD display.
Change station Up / Down
In now receiving interface screen:
- Short press the “TUNE (10) / TUNE (11)” button, and a “Station list” item with the station name will show for use.
- Then, Short press the “TUNE (10) / TUNE (11)” button to change the station to your desired.
- Then, short press the “AMS (12)” button to confirm.
To store station into Preset
- Select the desired DAB station by short pressing the “TUNE (10) / TUNE (11)” button.
- Then, long press the “PRE/MEM (6)” button to enter the “Preset Store” menu, and a “<1: (Empty)>” item will show for use, you can change its number up/down, from 1 to 30, by “TUNE (10) / TUNE (11)” button which is you desire.
- Then, short press the “AMS (12)” button to confirm, a “Preset 01 Stored” message is displayed and the screen will switch back to the now receiving interface.
- Repeat the above steps to preset the other DAB stations into the remaining space of the Preset Store.
- The device allows for storage of up to 30 stations in the list.
Select a preset station (Preset Recall)
In now receiving interface screen:
- Short press the “PRE/MEM (6)” button to enter the “Preset Recall” menu, and a “<1: station name>” item will show for use, you can change its number up/down, from 1 to 30, by “TUNE (10) / TUNE (11)” button which is you desire.
- Then, short press the “AMS (12)” button to confirm, that the station will switch to Core at the same time.
View DAB Station Information:
In now receiving interface screen, short press the “INFO / MENU (8)” button repeatedly to view information transmitted by the current station:
- Signal strength bar > Program type > Multiplexer name > Frequency > Signal Information > Bit rate > Time > Date > Information
Use AMS (for Full Scan)
In DAB mode, long press the “AMS (12)” button to enter the full scan function at any time you. In some circumstances, such as region/location change, you may need to do so. AMS function can easily search those available DAB stations by using this button.
DAB settings
In DAB mode, the “Full scan”, “Manual tune”, “DRC”, “Prune” and “System” items can be set in the DAB menu. To do this:
- Short press any one of the buttons to turn On the display’s backlight if it is in dark mode.
- Select DAB mode.
- Then, long press the “INFO / MENU (8)” button to call the DAB menu (see below picture):

- Chose “Full scan”, “Manual scan”, “DRC”, “Prune” and “System” the desired item by using rotates the “Adjustment (16)” button to [+] or [-] and short press the “Adjustment (16)” button to enter the desired item.
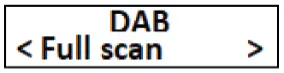
Full Scan
- Choose “Full scan” to scan all DAB/DAB+ Band III channels and thus finds every station being broadcast in the reception range;
- The [Scanning…] appears on the LCD display.
- During the scanning, a progress bar and the found number of stations are displayed.
- When the scan has finished, the first station in alphanumeric order will be played for listening.
Manual tune
The manual tune item is used for checking the channel and can be used for aligning the aerial.
- Chose “Manual tune” to select a channel (5A to 13F), toggle through the frequencies, by rotating the “Adjustment (16)” button to [+] or [-], and short press the “Adjustment (16)” button to enter the desired channel.
- The selected channel, its signal strength will then be shown on the LCD display.
- If a DAB station is received on this channel, the station’s ensemble name is displayed. The telescoping antenna can then be aligned for maximum signal strength.
Important: Stations with it signal strength below the necessary minimum signal strength is not broadcasting a sufficiently strong signal. Align the telescopic antenna is necessary.
DRC (Dynamic Range Contol)
The DRC is used to set the compression rate which equalizes dynamic fluctuation and associated volume variations. Choose “DRC” > choose “DRC off / DRC low / DRC high” as you desired.
- DRC off: Compression deactivated
- DRC low: Low compression
- DRC high: High compression
Prune
This item is used for removing old stations that can no longer be received from the list of stations. Remove all unavailable DAB stations. Choose “Prune” > choose “Yes” to confirm. Choose “No” to abort.
System
See the chapter „System Settings“.
BT MODE
Start BT Mode
- In power On mode, short press the “ / MODE” button to switch to BT mode if it is not in the position.
- The screen will switch to BT mode and the BT Searching appears.
- The device is in pairing mode.
BT device Pairing

- In BT Searching mode, activate the BT function in your BT device (such as Mobile Phone or Personal Computer); the device will enter BT searching mode automatically, if not, taps the related selection to manually enter searching mode. (refer to your device’s manual when necessary)
- Your mobile device should show “KR-140-BT” in the BT list, and then select it for pairing. Wait for some seconds and will see the connected message as shown on your mobile device. (For some BT devices. You may need to input “0000” as a pairing password)
- If pairing is successful, a series of tones will sound, the “BT Connected” appearing in the LCD display
- Now, you can start to music play from the mobile device with its music player program.
BT Music Playing Controls
On your Mobile Device
- Switch to the music player menu and choose music to start the play from the playlist.
- Adjust the volume level by using the device’s volume control.
On BT Kitchen Stereo Speaker
- In playing music, press the “AMS (12)” button to pause the playing music. To resume the music, press it again.
- Rotates the “Adjustment (16)” button to [+] or [-] for decreases or increases the volume.
- When rotating the button, a progress bar of volume appearing for in the LCD display.
Hand Free Function
When there is an incoming call during BT music playing mode. The ringing sound will up and the playing music will pause automatically.
- Long press the “AMS (12)” button to reject the call if you want OR short press the “AMS (12)” button to pick up the call.
- Now you are in hand-free function with the BT Kitchen Clock Speaker.
- Short press the “AMS (12)” button again to hang up the call when finished. And the paused music will resume automatically.
Note: speak to the “MIC (15)” hole direct with a distance of 30 ~ 60cm to get the best speakerphone performance when necessary.
Reject incoming call
To reject the incoming call, long press the “AMS (12)” button, and the incoming call has been rejected, and back to BT music playing in seconds.
Redial Last Call Function
Make sure that your mobile phone has had the last dial call used, if not, the redial for the last call function cannot be activated.
- To redial for last called number even it is in BT music playing mode. Short press the “AMS (12)” button twice to enter into the redial function, and the playing music will pause and switch to hand free function for redial.
- Short press the “AMS (12)” button to hang up the calling.
Disconnect from the paired device
- Long press the “AMS (12)” button to disconnect directly OR you can choose “Disconnect” from BT paired device list on your mobile device.
- In this case the BT Kitchen Clock Speaker will switch back into BT searching mode, a series of tones will sound and the device switch back to “BT Searching” mode from “BT Connected” showing up on the LCD display.
- Now, you can BT pair with other mobile devices.
Re-connect from a paired device
- Every time you switch the device to BT mode, it will firstly search for the mobile device which has been paired previously and is still in the record.
- The device will reconnect this mobile device as a priority if it is in BT searching device mode and in connection range.
- If no device is found in some seconds, the device will automatically turn into pairing mode in the background.
- In this case, you can process for new mobile device pair.
Switch to new pairing from connected mode
- In “BT connected” mode, you can switch the Device into BT searching for the paring function at any time you desired.
- Long press the “AMS (12)” button to disconnect with the paired device directly; a series of tones will sound and the device switch back to “BT Searching” mode from “BT Connected” which shows up on the LCD display.
- Now you can process for new mobile device pair.
MANUAL SET CLOCK TIME AND DATE
The device will automatically sync the clock time and date from the DAB and /or FM station once the radio tuning has been performed by manual tune or AMS tune. It may take several minutes for the first sync. However, you can set the clock time and date manually by the following methods:
- Long press the “ST (5)” button to enter the “Set date” menu, the day value blinking waiting for input. (DD-MM-YYYY)
- Rotates the “Adjustment (16)” button to [+] or [-] for selecting the value to the current date.
- Short press the “Adjustment (16)” button to confirm the day set and jump to the month value set.
- Rotates the “Adjustment (16)” button to [+] or [-] for selects a value for the current month.
- Short press the “Adjustment (16)” button to confirm the month set and jump to the year value set.
- Rotates the “Adjustment (16)” button to [+] or [-] for selects a value for the current year.
- Short press the “Adjustment (16)” button to confirm the year set.
- The menu will switch to “Set time” and the hour value blinks waiting for input. (HH-MM)
- Rotates the “Adjustment (16)” button to [+] or [-] for selects the value for the current hour.
- Short press the “Adjustment (16)” button to confirm the hour set and jump to the minute set.
- Rotates the “Adjustment (16)” button to [+] or [-] for selects the value for the current minute.
- Short press the “Adjustment (16)” button to confirm the minute set, a “Time/Date Saved” message will show once the value of the minute is confirmed.
- The clock time and date set have finished.
SET ALARM AND WAKE-UP FUNCTION
Alarm time set
- Short press the “ALARM (13)” button can enter and select the “Alarm 1 setup /Alarm 2 setup” interface screen.
- Short press the “Adjustment (16)” button to enter the Alarm 1 Wizard /Alarm 2 Wizard menu, the hour value of On-time blinking waiting for input. (On time HH: MM)
- Rotates the “Adjustment (16)” button to [+] or [-] for selects the value to the desired hour for alarm.
- Short press the “Adjustment (16)” button to confirm the hour set and jump to the minute set.
- Rotates the “Adjustment (16)” button to [+] or [-] for selects the value to the desired minute for alarm.
- Short press the “Adjustment (16)” button to confirm the minute set and jump to the next item set.
Use the same steps of button control to the completes the remaining item’s set in below:
- Duration: „15 / 30/ 45 / 60 / 90“ minutes
- Source: “Buzzer / DAB / FM” (by buzzer / last listened)
- Schedule: “DAILY / WEEKDAYS / ONCE”
- Level: “bar level adjustment” (For Buzzer/Radio)
- Alarm: “Off/On” (Off=deactivate; On=activate)
Those settings of Alarm 1 and/or Alarm 2 will be saved in memory for recall if you choose “Alarm Off” in the last election and confirmation. Choose “Alarm On” to activate the alarm function. The alarm symbol with 1 and/or 2 will appears in the right-up corner of the LCD display as identified.
Deactivate the Alarm 1 / Alarm 2 function
- short press the “ALARM (13)” button can enter and select the “Alarm 1 setup /Alarm 2 setup” interface screen.
- Long press the “ALARM (13)” button, then you will see the alarm symbol with 1 and/or 2 will disappears in the LCD display as identified.
Use Snooze
- At the time of wake-up beeps/radio station in sound, you can short press the “Adjustment (16)” button for approximately 9 minutes extra for sleep if you want.
- The snooze interface screen comes up and then the snooze time in count-down show on the LCD display.
- And this snooze function can repeat N times if you use it.
Note: When turning on the device by button will disable the snooze function if it is still in use.
USE COOKING TIMER
- Short press the “Timer (14)” button to enter the timer interface, the “Timer 000 minutes” appears for the set.
- Then rotates the “Adjustment (16)” button to [+] or [-] to set your desired time for the cooking timer (120 for example). (001 ~ 300 minutes can be set)
- Short press the “Timer (14)” or “Adjustment (16)” button to confirm and the display will switch back to the previous current mode screen. The Timer symbol with the remaining count-downed time appears in right up corner as identified.
- The Cooking Timer is activated.
Timer Alarm
The timer alarm will sound when the set timer time comes on time. Short press the “Timer (14)” button to cancel the timer alarm if you want it.
To disable the Timer function
Long press the “Timer (14)” button to disable the function, a “Timer Off” message appears as identified and the timer symbol will disappear on the LED screen. The timer function is disabled.
Kitchen Light ON/OFF
- In the device’s power On mode;
- Short press the “Light (7)” button to turn on the kitchen light bar when necessary.
- Short press the “Light (7)” button again to turn off the kitchen light bar.
Note: The Kitchen light function cannot be used if the device is powered Off mode.
RESET THE DEVICE
In some circumstances, the device’s function may hang and need to be reset. To reset the device:
- Unplug the 5.5mm DC plug of the AC to DC power adapter from the “DC INPUT Socket (3)” of the device. Wait for a few seconds.
- Then re-plug the 5.5mm DC plug back to “DC INPUT Socket (3)” to start up the device again.
- The device should be working again normally, the power reset is done.
INSTALL THE UNDER-KITCHEN MOUNTING BRACKET
Please use the provided mounting screws (4 pcs in the bag) and install the Bracket and Main Unit as the following picture illustration.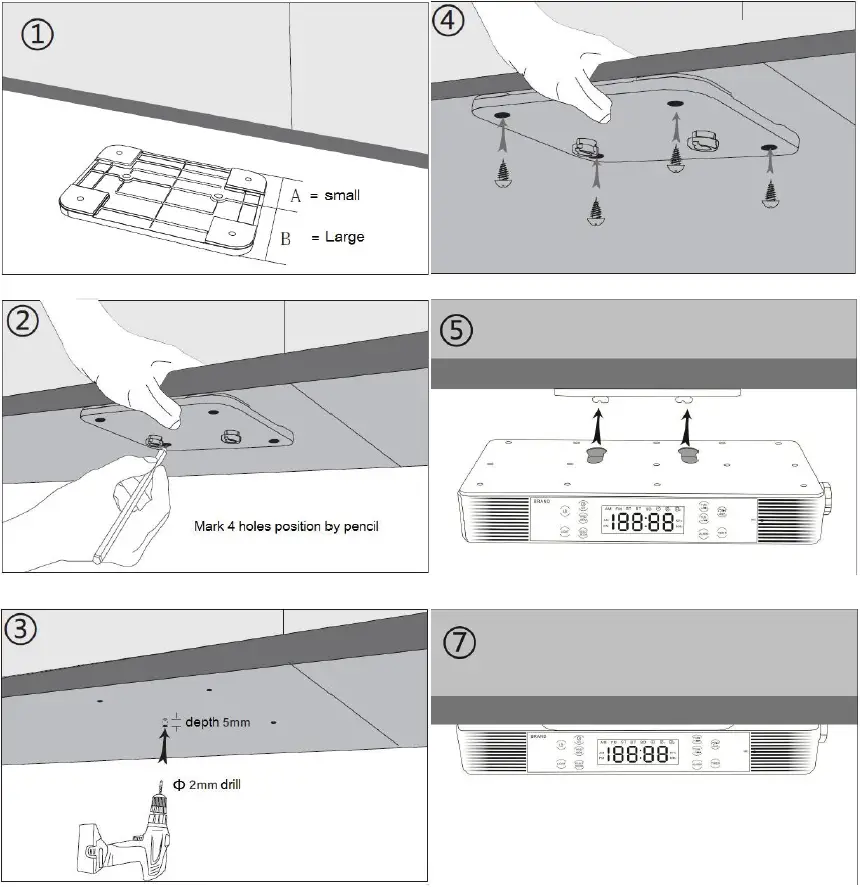
TROUBLESHOOTING
| No power | • Check whether DC plug of AC to DC adaptor is
it firmly plugged into DC jack of main unit. • Check whether the AC to DC power adaptor is it firmly plugged into AC outlet. |
| No sound | • Check whether volume level is in lower position on your main unit or and mobile device.
• Check if you have selected the correct mode source. • Make sure that your BT device is within the effective operation range. • Check whether the BT device is paired to your mobile device. • Check whether the BT device show connected to your mobile device. |
| No radio station | • Check whether the FM stations are tuned at an incorrect frequency and programmed. |
| No response from the speaker | • Restart the speaker by power Off and On. |
DISPOSAL CONSIDERATIONS
If there is a legal regulation for the disposal of electrical and electronic devices in your country, this symbol on the product or on the packaging indicates that this product must not be disposed of with household waste. Instead, it must be taken to a collection point for the recycling of electrical and electronic equipment. By disposing of it in accordance with the rules, you are protecting the environment and the health of your fellow human beings from negative consequences. For information about the recycling and disposal of this product, please contact your local authority or your household waste disposal service.
This product contains batteries. If there is a legal regulation for the disposal of batteries in your country, the batteries must not be disposed of with household waste. Find out about local regulations for disposing of batteries. By disposing of them in accordance with the rules, you are protecting the environment and the health of your fellow human beings from negative consequences.
DECLARATION OF CONFORMITY
Manufacturer
Chal-Tec GmbH, Wallstrasse 16, 10179 Berlin, Germany.
Importer for Great Britain
- Berlin Brands Group UK Ltd
- PO Box 1145
- Oxford, OX1 9UW
- United Kingdom
Hereby, Chal-Tec GmbH declares that the radio equipment type KR-140 is in compliance with Directive 2014/53/EU. The full text of the EU declaration of conformity is available at the following internet address: use.berlin/10032851
For Great Britain
Hereby, Chal-Tec GmbH declares that the radio equipment type KR-140 is in compliance with the relevant statutory requirements. The full text of the declaration of conformity is available at the following internet address: use. berlin/10032851
FAQ’s
We can attest that it has speakers already installed.
We can confirm that the remote control is present.
It plugs into a wall outlet; it does not need batteries. I mounted the radio to the mounting piece after screwing the mounting piece into the base of my cabinet. I can’t say that I would advise utilizing command strips because I don’t know if they would hold this up.
Yes. through the Bluetooth capabilities of your phone
The size is confirmed to be 11 x 2 x 6 inches (DxHxW)
It’s roughly 16 to 20 inches under the radio and is fairly bright. The auna kr-200 model is mentioned in certain inquiries and reviews. I initially assumed they were for the kr-140 model.
While FM provides a small number of stations across several frequencies, DAB can deliver more than twice as many stations. When you switch on the radio, you will have additional options
The major radio switch-off has been DELAYED once more; AM and FM stations will continue to be accessible on outdated equipment until 2032.


