 BK Technologies BKR 5000 G1 SCBA Radio
BKR 5000 Configuration Settings
| Step 1. | Download, install, and open the latest version of RES (Radio Editor Software) (BKR0733). Contact your radio dealer for instructions and Serial Key |  |
| Step 2. | Connect the programming cable to the BKR 5000 Radio and the computer. | |
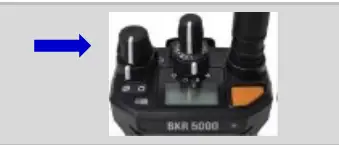
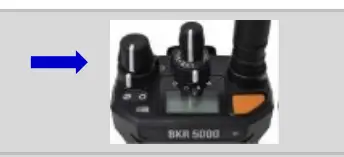
| Step 3. | Turn on the BKR 5000 Radio using the volume knob. | 
|
| Step 4. | Wait RES sees the Radio: “Read Radio” will become available under the “Read / Write” section, then click the “Read Radio” button. |  |
| Step 5. | Under the “Utilities” section, click the “Feature Editing Software” button. |  |
| Step 6. | Verify the BKR 5000 is equipped with the Bluetooth Option (BKR0560). (A) Under the “Hardware Options” section, there should be a check next to “Bluetooth Enabled”. (B) If the radio does not have the Bluetooth Option available, contact your radio dealer to upgrade the radio. | 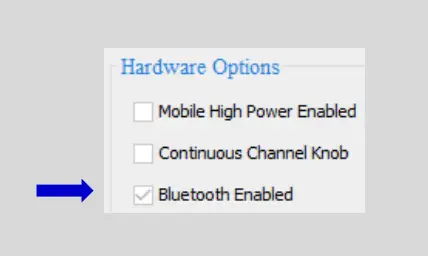
|
| Step 7. | Under the “Config” section, click the “Menus” button. |  |
| Step 8. | Under “Menu Items”, highlight “Bluetooth”. | 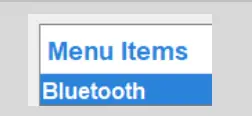 |
| Step 9. | Under the “Read / Write” section, click the “Write Radio” button. The Radio is now able to control Bluetooth from the menu. |  |
| Step 10. | Turn the radio off, then back on using the volume knob. | 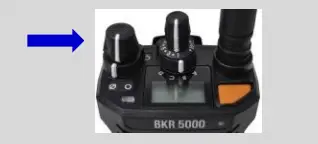
|
| Step 11. | Click the “Menu” button | 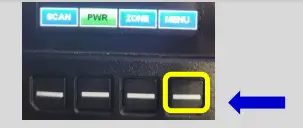
|
| Step 12. | Select “Bluetooth” from the menu. | 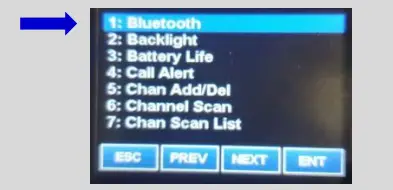
|
| Step 13. | If “Bluetooth” is set to “OFF”, set it to “ON”. |  |
Creating a G1 SCBA Configuration Tag (for Bluetooth Pair Save Preferences)
The purpose of this section is to:
- enable the Bluetooth radio on the G1 SCBA
- to set Bluetooth Pair Save behavior based on the department’s preference.
| Step 1. | Launch the MSA A2 Software. |  |
| Step 2. | Select the “G1 Tags” Tile on the A2 Dashboard (Under the “G1 Devices” column). | 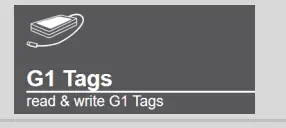 |
| Step 3. | Select tag type: “G1 Configurations” |  |
| Step 4. | Select the Add (+) icon (top-right hand side of A2 application) to create the configuration template, which will be used to change these 2 settings. |  |
| Note: | Tag can be written without saving the template, but the template can be saved for future use if given a name: The Save Icon (top-right) is enabled when the Name is filled in. | 
|
| Step 5. | Enabling the G1 SCBA’s Bluetooth Radio: (A) Expand the “Bluetooth Settings” section. (B) Change “Bluetooth Disabled/Enabled” setting to “Enabled”. | 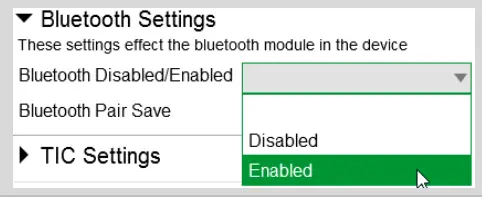 |
| Step 6. | Preference Choice: “Bluetooth Pair Save” setting options: (Generally, a department’s operating procedures will determine its preference) (A) To apply a Radio Pairing Tag every time SCBA is turned on, choose “Disabled” (B) To retain the Radio Pairing on the SCBA until it’s cleared *, choose “Enabled” * – See “Clearing Radio Pairing Info from the G1 SCBA” page. | 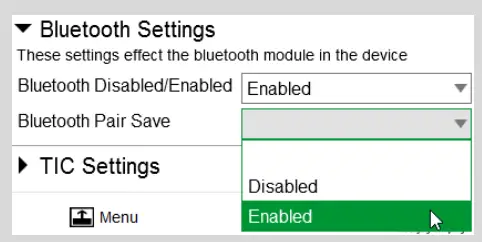 |
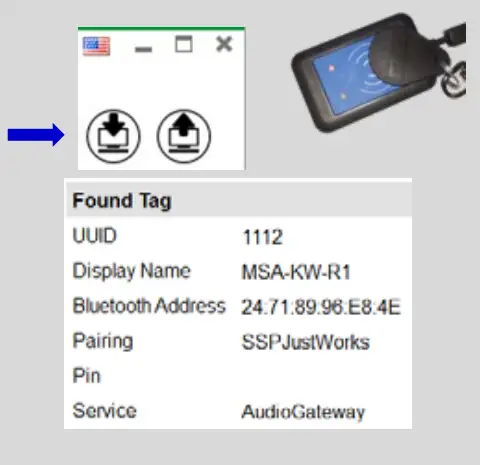
| Step 7. | Writing the G1 Configuration Tag: (A) Place RFID Tag on the RFID Reader / Writer (B) Select the Write G1 Tag icon (top-right hand side of A2 application) | 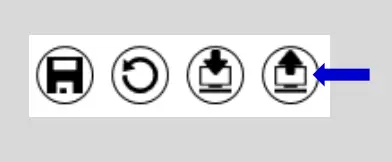 |
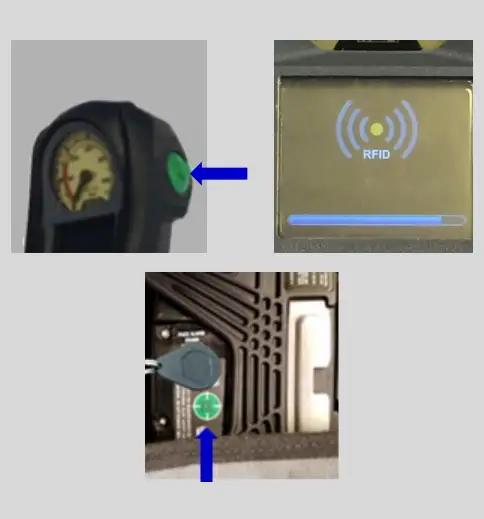
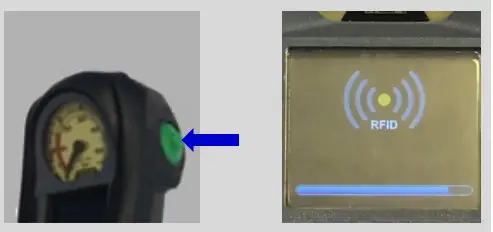
| Step 8. | Applying the G1 Configuration Tag to the G1 SCBA(s): (A) Power on the G1 SCBA (B) Press & hold either of the green Control Module buttons to activate the RFID mode. For iTIC Control modules: Press & Hold Both Green Buttons. (C) Place Bluetooth Pairing Save Tag over G1 Power Module RFID Target.
The G1 SCBA is now configured with the settings: – G1 Bluetooth is now enabled – G1 Bluetooth Pair Save (as chosen). The G1 SCBA is now ready to accept a Radio Pairing tag. Repeat this “Step 8” for each SCBA to apply these 2 settings. |
|
Creating a BKR 5000 Radio Pairing Tag
To pair the radio to the G1 SCBA, a “Bluetooth Audio Pairing Tag” needs created in the A2 Software. Once the Pairing Tag is created, it can be applied to the SCBA, which “programs” the SCBA to connect to that specific radio.
| Step 1. | Launch the MSA A2 Software | |
| Step 2. | Select the “G1 Tags” Tile on the A2 Dashboard (Under the “G1 Devices” column) |  |
| Step 3. | Select tag type: “Bluetooth Audio Pairing Tags” |  |
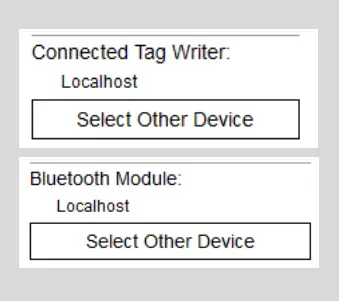
| Step 4. | Ensure that your PC’s Bluetooth adapter is on, and selected for use in A2, and that your RFID Reader/Writer is connected and ready. · Both modules appear in lower left of A2 display. Generally they will appear as the computer’s name, or as “localhost”. · If either is not visible there or under “Select Other device”: disconnect and reconnect the hardware; · Restart the A2 service if necessary. |
|
| Step 5. | Turn on the BKR 5000 Radio using the volume knob. |
|
| Step 6. | Ensure Bluetooth is “ON” : A white Bluetooth icon will appear with no slash “/” and no connection dots “…”. If not visible, enable the radio’s Bluetooth OR reconfigure radio. |
|
| Step 7. | Discovering the Radio in A2: (A) Click “Discover Devices” You may have to scan twice if the Friendly name doesn’t appear. (B) Select the tile for the discovered Radio in A2 to select it. The discovered device info will load on the screen. | 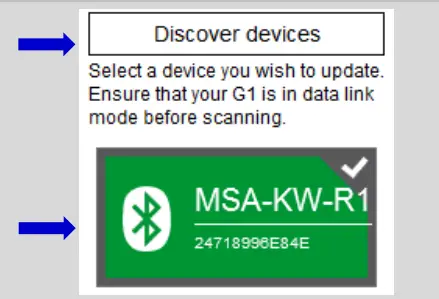 |
| Step 8. | Writing the Bluetooth Audio Pairing Tag: (A) Place RFID Tag on the RFID Reader / Writer (B) Select the Write G1 Tag icon (top-right hand side of A2 application) (C) Click “OK” on the “Tag was successfully written” dialog. |
Note: Hovering over the icons will also show “Write Tag” or “Read Tag”. |
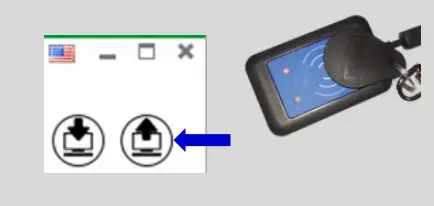
| Step 9. | Verifying the Information Written to the Tag: (A) Place RFID Tag on the RFID Reader / Writer (B) Select the Read G1 Tag icon (top-right hand side of A2 application) (C) The “Found Tag” screen will appear. (D) Confirm the tag’s Bluetooth Address matches the Radio. The Radio Pairing tag is now created & can be used to pair this radio with a G1 SCBA. |
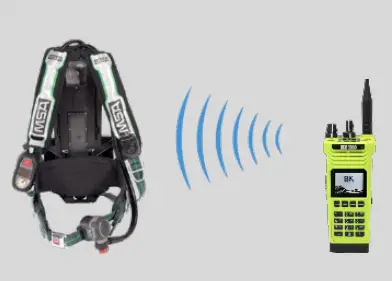
Pairing a G1 SCBA and BKR 5000 Radio
Ensure the BKR 5000 Radio is programmed correctly to connect with the G1 SCBA. Necessary and recommended settings are listed in the “BKR 5000 Configuration Settings” page. Consult with your Radio Technician.
| Step 1. Turn on the BKR 5000 Radio using the volume knob. |
|
| Step 2. Ensure Bluetooth is “ON” : A white Bluetooth icon will appear with no slash “/” and no connection dots “…”. If not visible, enable the radio’s Bluetooth OR reconfigure radio. |
|
| Step 3. Power on the G1 SCBA. | |
| Step 4. Press & hold either of the green Control Module buttons to activate the RFID mode.
For iTic Control modules: Press & Hold Both Green Buttons. |
|
| Step 5. Register the Radio to the SCBA: Place the Radio Pairing Tag over the G1 Power Module RFID Target. After the pairing tag is successfully read, the SCBA should chirp, and the BT will disconnect. | 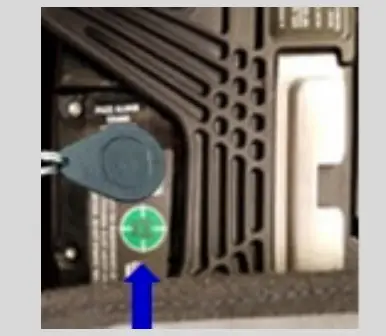 |
| The G1 SCBA & BKR 5000 Radio is now paired and ready for use. · After a successful pairing, if the regulator is shut off, the G1 SCBA will not remain connected to the radio, and the radio is available for non-Bluetooth use. · The G1 SCBA will automatically re-connect to the radio when the end user turns on the G1 regulator & breathes. |
|

If you encouter difficulty pairing the radio:
- Clear the pair information stored on the radio, as described in the “Clearing SCBA Pairing Info from the BKR 5000 Radio” section in the pages hereafter.
- For good measure clear the pairing information on the SCBA, as described in the “Clearing Radio Pair Info from the G1 SCBA” section in the pages hereafter.
- Repeat the “Pairing a G1 SCBA and BKR 5000 Radio” procedure above.\
Using the G1 SCBA and BKR 5000 Radio
Confirm that the G1 SCBA, and Radio, are paired together: Radio Tag has been applied (or applied previously and pair is saved)
| Step 1. | Turn on the BKR 5000 Radio using volume knob. |
|
| Step 2. | Don the G1 SCBA and G1 Facepiece. |  |
| Step 3. | Turn on the G1 SCBA via pressurization. · The G1 SCBA will try to establish a Bluetooth connection to the currently paired radio for up to 8 minutes. · When found, it will quickly connect and disconnect, (and is now ready to automatically activate when breathing.) If the connection is not established, the pairing process described in the previous section should be repeated. |  |
| Step 4. | Begin breathing (with the regulator attached) and the radio and SCBA will connect automatically (approx. 20 seconds). |  |
All SCBA voice communication will now go from the SCBA through the portable radio.
Use Notes & Tips:
- Turn on the radio prior to the G1 SCBA.
- If the regulator is shut off, the G1 SCBA will not remain connected to the radio, and the radio is available for non-Bluetooth use. The G1 SCBA will automatically re-connect to the radio when breathing on the G1 regulator.
- Verify both the incoming and outgoing audio functionality after the Bluetooth wireless connection is established.
Clearing Radio Pair Info from the G1 SCBA
There are 3 methods for removing stored Radio pairing information from the G1 SCBA.
- All three methods are effective on G1 SCBAs configured with “Bluetooth Pair Save” being “Disabled”
- The “Battery Removal Method” is a popular method, however, note that this method is NOT effective when the G1 SCBA is configured with the “Bluetooth Pair Save” setting set to “Enabled”.
G1 Pairing Removal Method 1 – Battery Removal (Only effective when the G1 “Bluetooth Pair Save” setting is “Disabled”)
- Step 1. Remove G1 SCBA Battery Tag,
G1 Pairing Removal Method 2 – Pair New Radio
- Step 1. Pair a different Bluetooth BKR 5000 Radio with the G1 SCBA using the new radio’s Bluetooth Audio Pairing Tag, as described in the “Pairing a G1 SCBA and BKR 5000 Radio” section. Bluetooth audio pair info on the G1 SCBA is changed to the pair info for the new radio. Next Clearing SCBA Pairing Info from the BKR 5000 Radio” section, hereafter.
G1 Pairing Removal Method 3 – Use a “Reset Bluetooth Pairing” Tag
If not yet created, create a “Reset Bluetooth Pairing” Tag in the A2 software, under “G1 Tags” tile “Special G1 Tags” expand “Reset Tags” list Select “Reset Bluetooth Pairing”
- Step 1. Press & hold either of the green Control Module buttons to access the RFID mode display.
- Step 2. Place the “Reset Bluetooth Pairing” Tag over the G1 Power Module RFID Target. Bluetooth audio pair info is cleared from the G1 SCBA.
Next “Clearing SCBA Pairing Info from the BKR 5000 Radio” section, hereafter.
Clearing SCBA Pairing Info from the BKR 5000 Radio
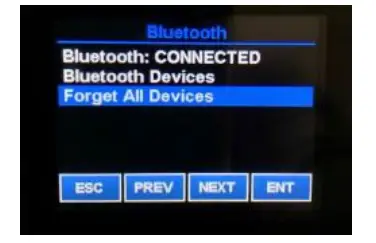
- Step 1. On the BKR5000 Radio, select “Menu” -> “Bluetooth”.
- Step 2. Select “Forget All Devices” and press “ENT”. Bluetooth audio pair info is cleared from the BKR 5000 Radio.
If not done already: Clear the pairing info from the previously connected G1 SCBA’s pair history using the process described in the “Clearing Radio Pair Info from the G1 SCBA” section, above.


