
SALUS HTRP-RF Wireless Digital Programmable Thermometer

Introduction
HTRP – RF (50) is a stylish and accurate programmable room thermostat. You can now simply adjust your home temperature as desired in order to create a comfortable home environment.
Product Compliance
This product complies with the essential requirements and other relevant provisions of Directives 2014/53/EU (RED) and 2011/65/EU. 2405-2480MHz; <14dBm The full text of the EU Declaration of Conformity is available at the following internet address: www.saluslegal.com
Safety Information
Use in accordance with the regulations. Indoor use only. Keep your device completely dry. Disconnect your device before cleaning it with a dry cloth.
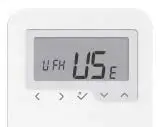
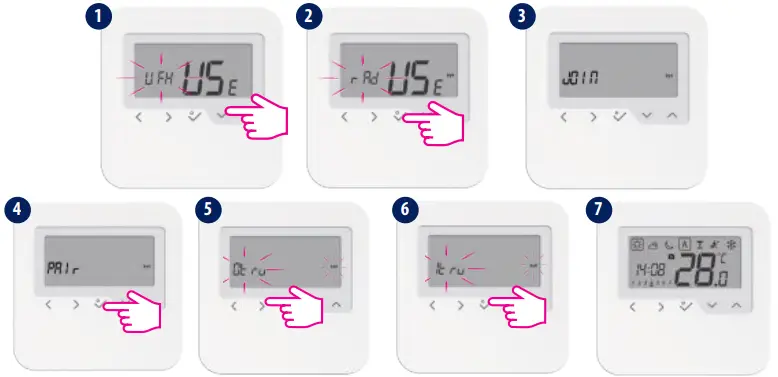
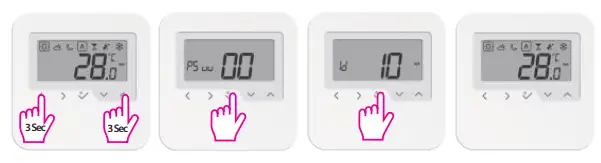
Mode selection
- Long press to return home without saving. Short press to return to the previous screen.
- Decrease or increase Setpoint Temperature. Increase or decrease Day, Clock.
- OK, key. Short press to confirm the selection. Long press to save and return home. Long press to enter Program/Clock/Offset
Note:
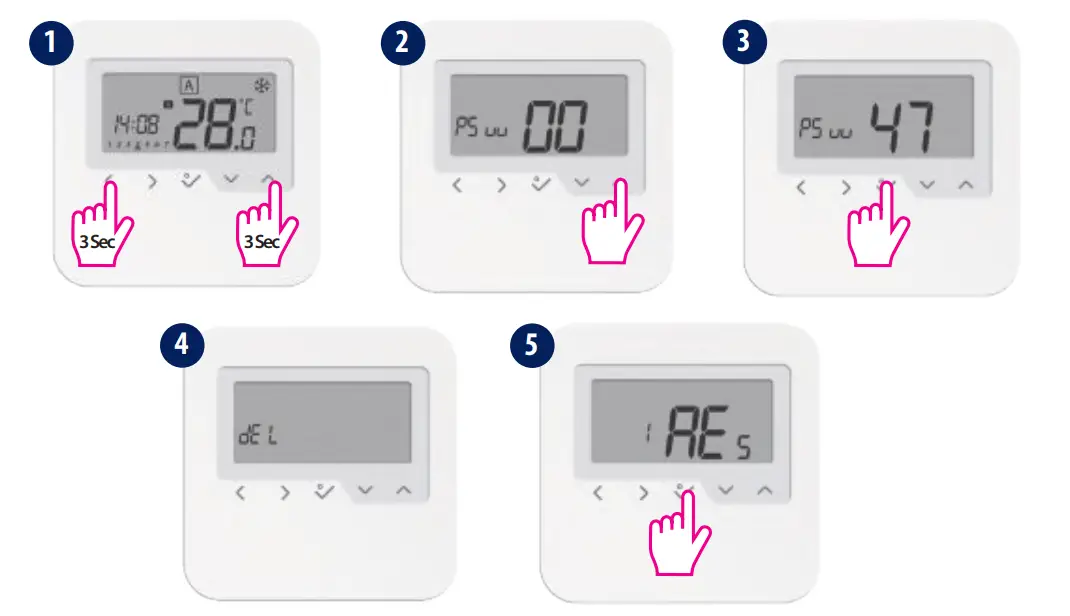
- You cannot add two thermostats to the same zone. If you are trying to do this, the following error will be displayed.

- Make sure your TRV is in pairing mode. Please check the TRV manual for the full process. Max 6TRVs!
- When pairing the thermostats with the Wiring Center you can assign a group to a programmable thermostat. This will allow control of up to 11 group thermostats. There can be a maximum of 2 groups per Wiring Center. You can also add a KL04RFto the KL08RF, having a total of 12 zones.
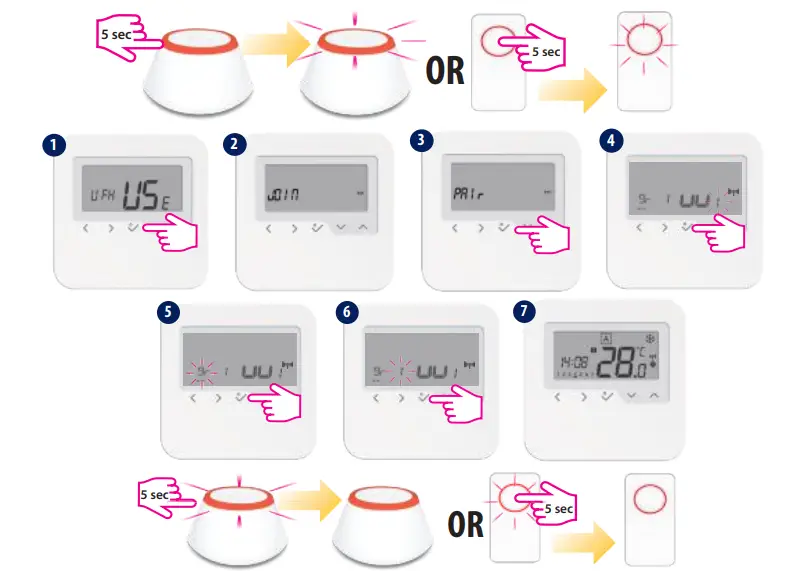
- Make sure your receiver is in pairing mode. Please check the receiver manual for the full process.
- For pairing with RX2, set the internal switch of the receiver to RX2 and choose at step 4. After that, follow the same procedure as described above.
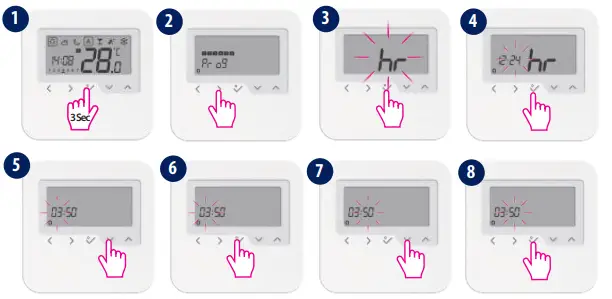
- Use the right and left keys to select the day of the programs.
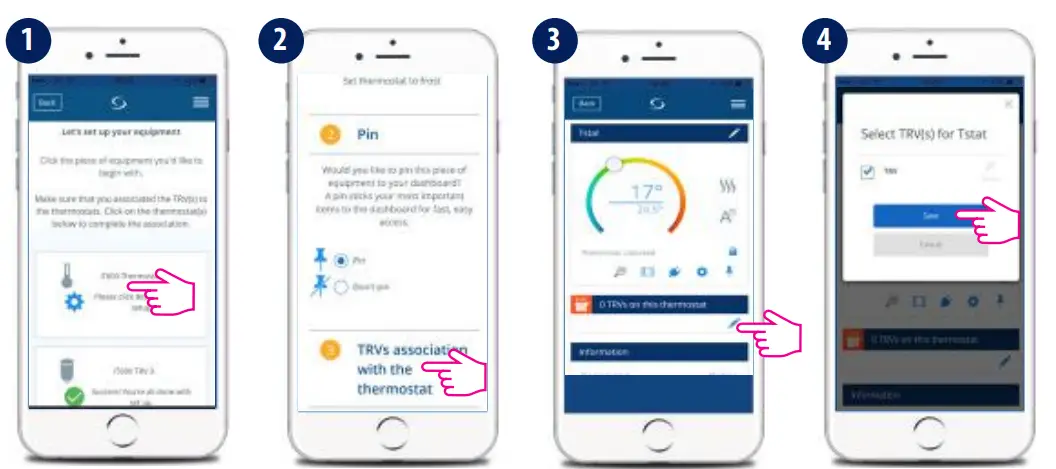
- Tap Scan for equipment to add your thermostat.
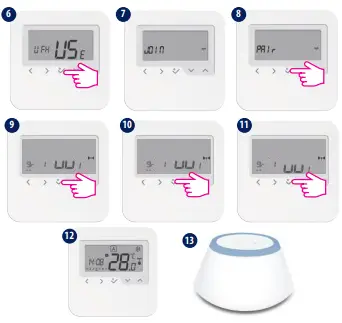
- When pairing the thermostats with the Wiring Center you can assign a group to a programmable thermostat. This will allow control of up to 11 group thermostats. There can be a maximum of 2 groups per Wiring Center. You can also add a KL04RFto the KL08RF, having a total of 12 zones. Please follow the on-screen instruction in order to complete the pairing process.
- Make sure the TRV is in pairing mode
- Please follow the on-screen instruction in order to complete the pairing process. After that continue by associating the TRV(s) to the thermostat(s) (mandatory). Max 6TRVs!
- Tap Scan for equipment to add your thermostat.
- Make sure your receiver is in pairing mode.
- Please check the receiver manual for the full process.
- For pairing with RX2, set the internal switch of the receiver to RX2 and choose that, following the same procedure as described above.
- To identify your devices, tap the icon on the app screen. The LED (or screen) on the enquired device will flash.
- Once connected to the App, the time and date will update automatically. Select the desired programming mode (5/2 days, 7 days, or 24h) and create your own schedule.
 Wireless Digital Thermostat User Manual")

 Wireless Digital Thermostat User Manual")

 Wireless Digital Thermostat User Manual")


 Wireless Room Thermostat User Guide")


 Thermostat User Guide")


