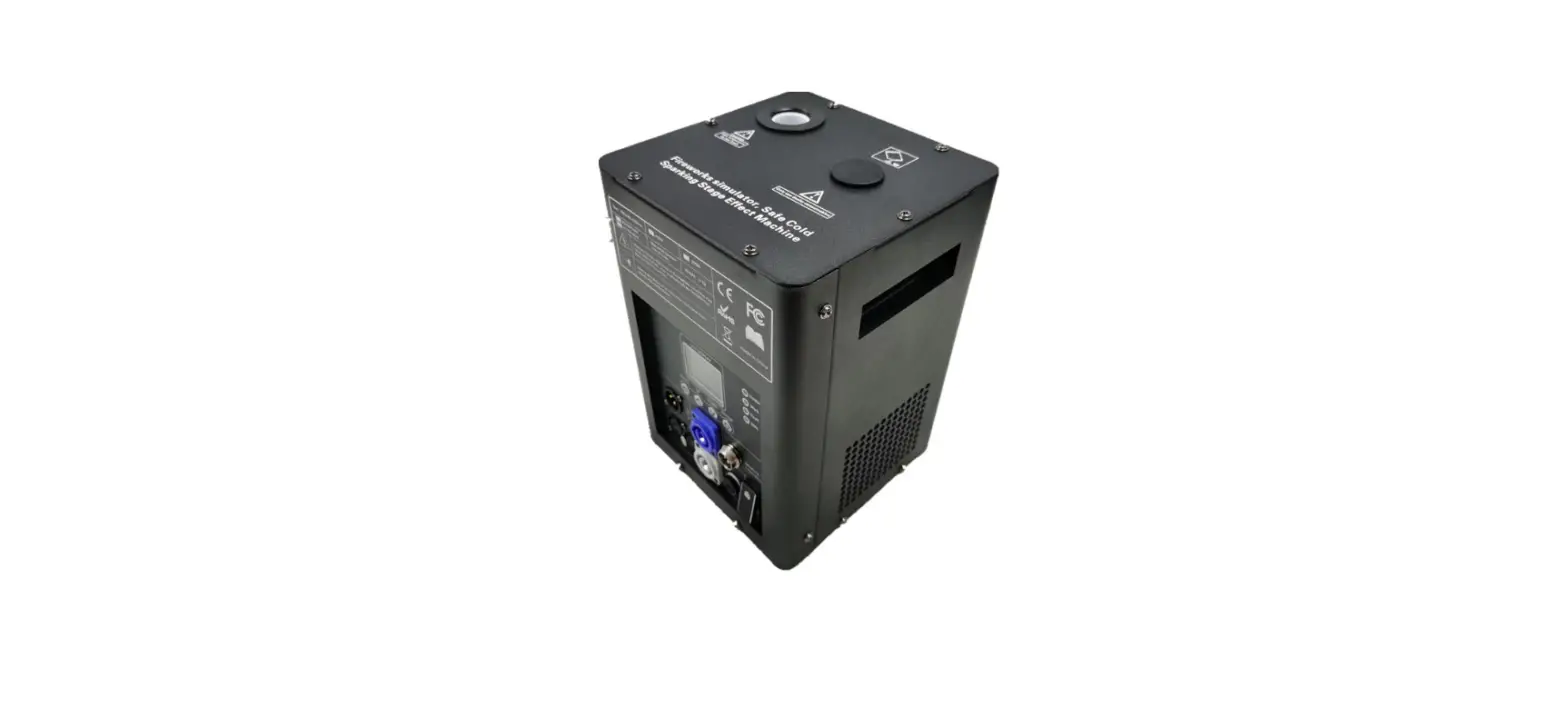
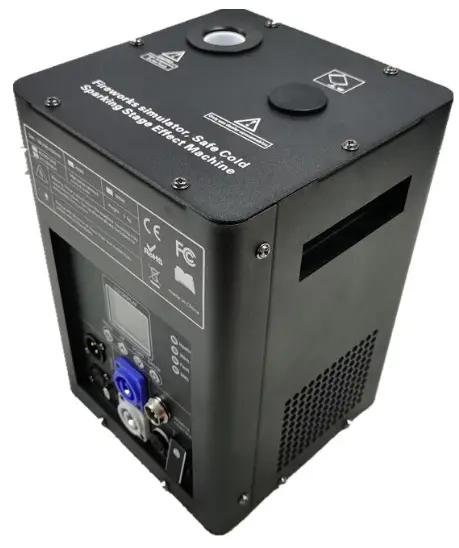
AUDIBAX Spark 600 Spark Machine
Please read the manual before using the product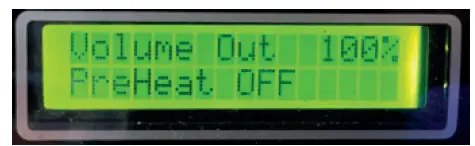
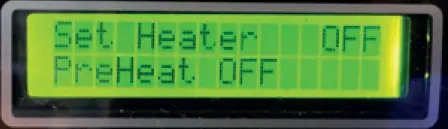
- Press to select the volume output (between 0 to 100%)

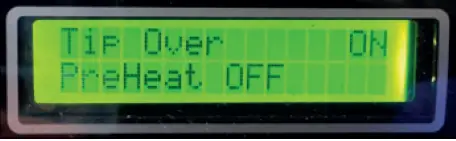
- In the ON position (default and recommended), the device stop working if it is roll over

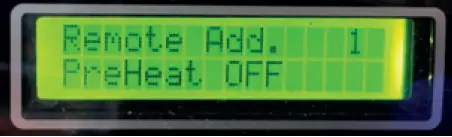
- Select the wireless remote as control. You can assign o group several units under the same address and control this group from the selected button.

- Select this function to initialize the heater. When the temperature reaches the correct value, the device is prepared to operate.

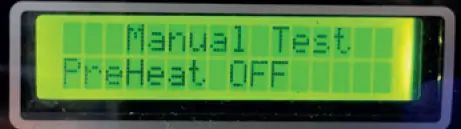
- Press it to make a manual test.

Warning
- The spark machine must be placed at least 100 cm away from inflammable materials such as curtains, books, etc. Make sure that the housing cannot be touched by accident.
- Outdoor use is recommended. Can be used indoors respected all security measures.
- During installation, nobody should stand beneath the mounting area.
- Prior to the first use, have the unit checked by a qualified person.
- The unit contains voltage carrying parts. DO NOT open the spark machine
- Never plug or unplug the unit with wet hands.
- If the plug and/or mains lead are damaged, they need to be repaired by a qualified technician.
- If the unit is damaged to an extent that you can see internal parts, do not plug the unit into a mains outlet. It needs to be repaired by a qualified technician.
- Only connect this unit to an earthed mains outlet of 220-240Vac/50Hz.
- Always unplug the unit during a thunderstorm or when it is not in use.
- If the unit has not been used for a longer period of time, condensation can occur inside the housing. Please let the unit reach room temperature prior to use.
- When you unplug the unit from the mains always pull the plug, never the lead.
- In order to prevent dropping of the unit, a safety fastening needs to be installed. This can be a solid chain, a steel cable, etc. which has to be fastened separately from the mounting bracket.
- The supplied bracket is the main fixing and must be used to solidly mount the light effect.
- In order to avoid accidents in public premises, the local legal requirements and safety regulations/warnings must be fulfilled.
- Keep out of the reach of children.
- It is recommended to use Audibax consumables, other consumables may be larger and may block the system.
Technical data
| Power supply | 220-240V 50/60Hz |
| Power | 500W |
| Fountain height | 2 m to 5 m |
| Tank capacity | 200g |
| Max. continuous duration | 20 s (100% output) |
| Control modes | Wireless controller, DMX, manual |
| DMX channels | 2 channels |
| Dimensions (WxHxD) | 200x270x200 mm |
| Weight | 5Kg |
INSTALLTION AND USE
Electrical connections
Connect the fixture to the mains with the enclosed power cable and plug. The earth must be connected.
DMX connection
Make sure that you use shielded cable and XLR 3 pin connectors.
DMX channel
| Channel | Value | Function |
| 1 | 0 | No sparks |
| 1-255 | Out volume from minimum to maximum | |
| 2 | 0-249 | Stop heating |
| 250-255 | Start heating |
Control button area:
The display shows the different options in the menu, use the downside buttons to navigate through the different options:
- (MENU): Short press it to switch the setting interfaces
- (UP): Increase value.
- (DOWN): Reduce value
- (ENTER): Confirm and save values. The LEDs placed in the upper side of the display show the state:
- DMX: It lights when DMX signal is present
- READY: It lights when the heater reaches the operating temperature
- UPDATE: It lights during update process
- HEAT: This LED lights during the heating process The USB port is use for internal firmware update functions.
Wireless remote controller mode:
The unite can be controlled by both DMX and remote controller. If a DMX is applied, wireless remote controller will not work.
| Value | Function | Value | Function |
| ON | Turn ON | Addr 2 | Address 2 for remote |
| OFF | Turn OFF | Addr 3 | Address 3 for remote |
| 5s | Output during 5s | High | Maximum output |
| 10s | Output during 10s | Mid | Medium output |
| 20s | Output during 20s | Clear | Clear the remain powder |
| Addr 1 | Address 1 for remote | STOP | Stop output |
OPERATION
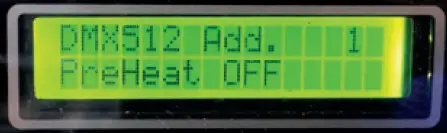
- Press MENU to select the DMX mode and set the DMX start channel under this mode, the remote control does not work.
- Press to select the volume output (between 0 to 100%)
- In the ON position (default and recommended), the device stop working if it is roll over
- Select the wireless remote as control. You can assign o group several units under the same address and control this group from the selected button.
- Select this function to initialize the heater. When the temperature reaches the correct value, the device is prepared to operate.
- Press it to make a manual test.


