Contents hide
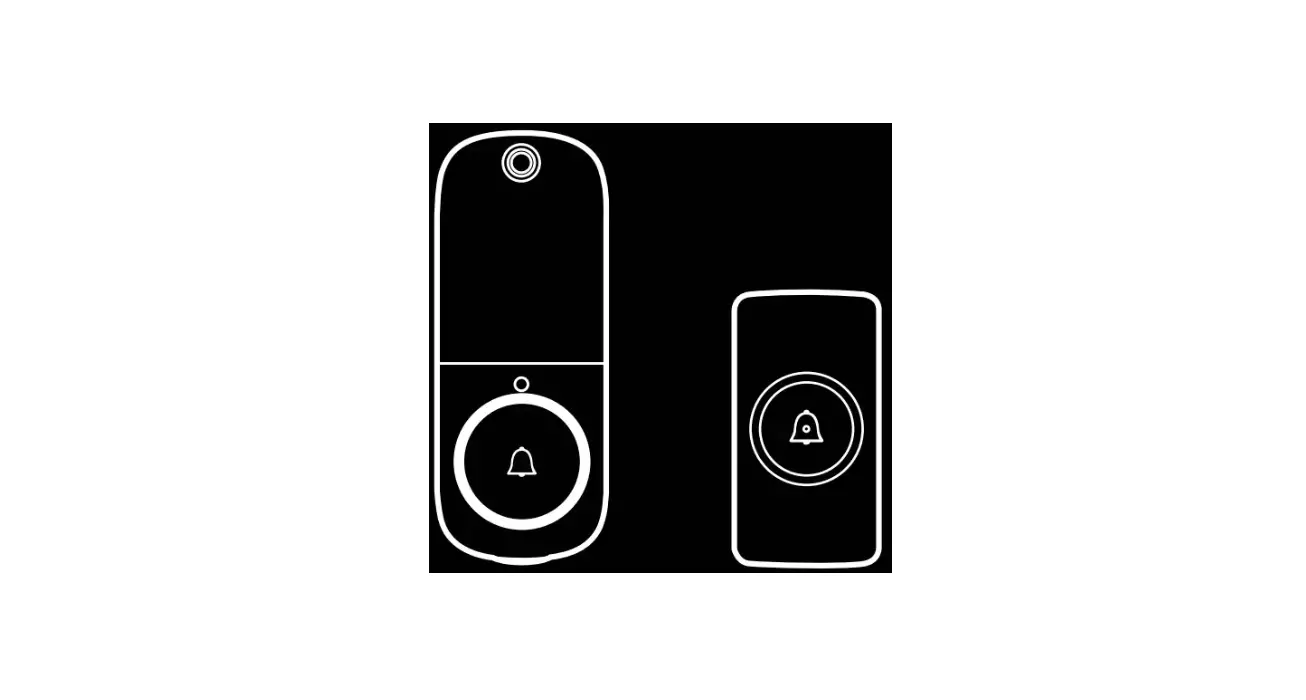
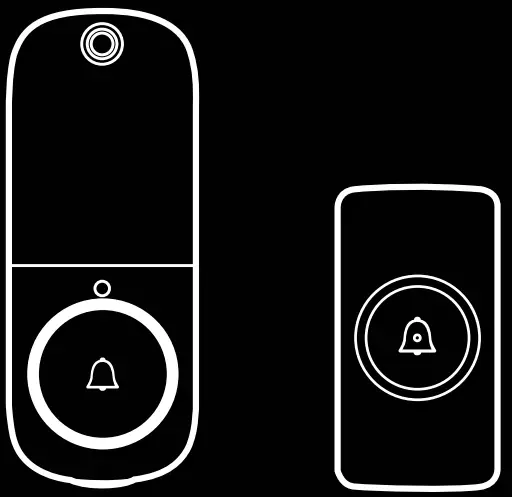
DiOBELL-B11 Doorbell
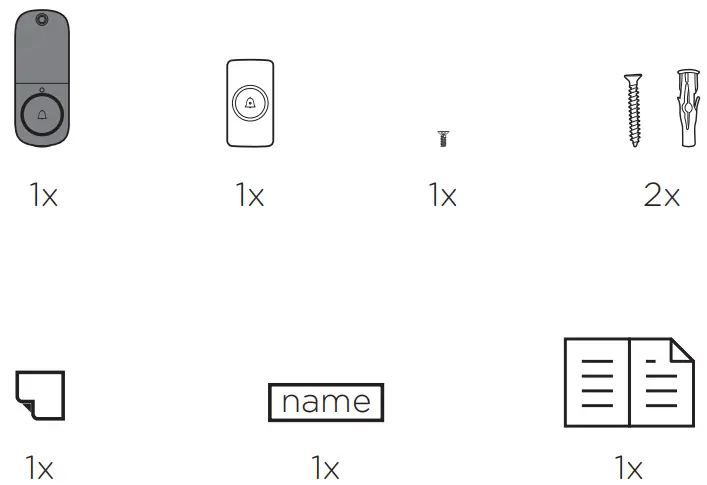
Package contents
Introduction
Thank you for using this product.
- Please read all instructions carefully before using the product.
- Do not attempt to disassemble or repair the product yourself, otherwise the product will be out of warranty.
- This doorbell sends you a notification when the button is pressed. The chime also rings to let you know that someone is at the door. This is the most affordable doorbell in smart home security.
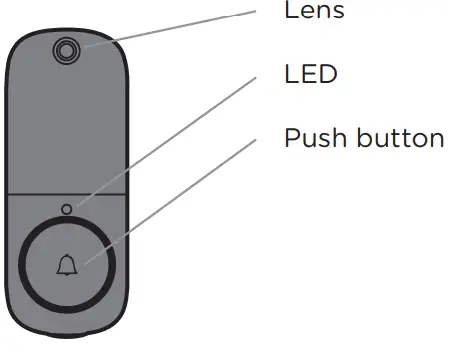
Description of the product
Doorbell
DiOBELL-B11
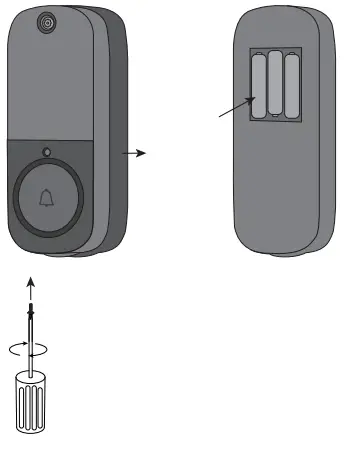
Installation of the outdoor unit battery
- Remove the insulating tab before use.
- Remove the screw with a crosshead screwdriver to access the battery compartment.
- Insert the batteries, making sure that the polarity is correct (+/-)
- Close the compartment with the screw.

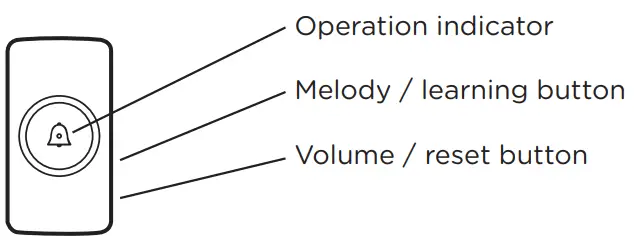
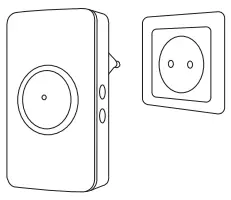
Indoor unit
Plug the chime into a suitable socket with a power rating of 110~240V
Using the product
After plugging the indoor unit into your wall socket, there are only a few steps left to get your new chime operational.
- Press and hold the
 button on the side of the chime for approximately 3 seconds, the chime will emit a «Ding-Dong» sound to indicate that it has entered pairing mode.
 - Now press the button on the doorbell camera, the chime will sound to indicate that the pairing has worked.
- Choose the volume and music of your choice and press the push button again to save your choice.
Note: You can associate up to 20 bells per chime.
Configuring the doorbell
Adding the doorbell in the app
- Step 1 Connect your smartphone to the WiFi network
- Step 2 Download the DiO One app from the Apple Store or the Android Play Store, depending on your device.
- Step 3 Open the DiO One app and register when you use it for the first time.
- Step 4 Follow the steps described in the app to add your doorbell.


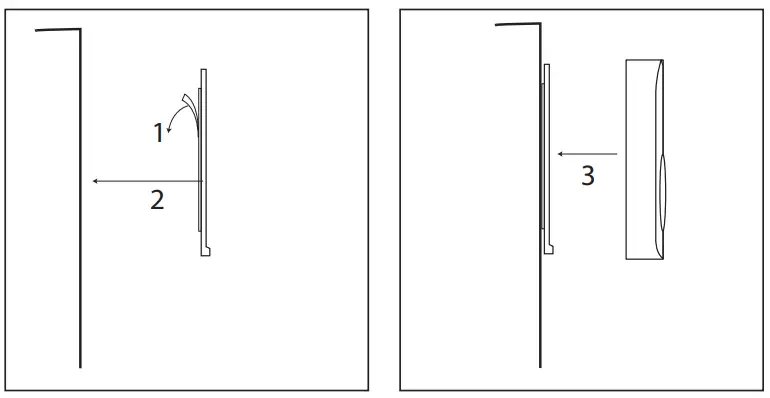
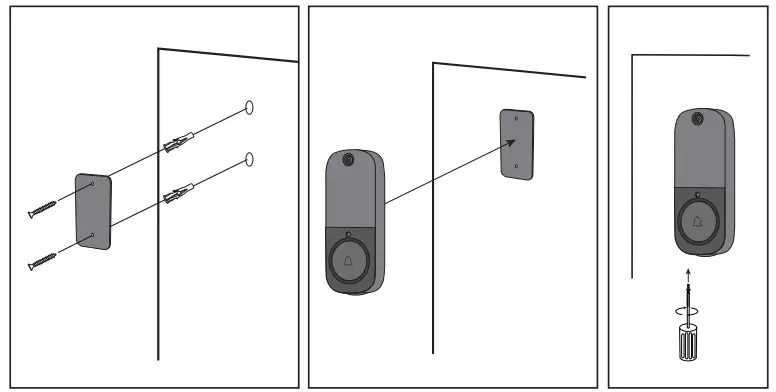
Wall installation of the outdoor unit
- Method 1: Push hard for 30s to fix the adhesive

- Method 2: Fix the back plate of the doorbell to your wall with the screws, then add the other part to the plate, which you close with the screw on the bottom of the doorbell.
Note: Install the outdoor doorbell at a height of 1.15m – 1.4m to get the best pictures.
Reset
Resetting the chime
Press and hold the ![]() button for approximately 5 seconds, a tone will sound to indicate that the code deletion is successful.
button for approximately 5 seconds, a tone will sound to indicate that the code deletion is successful.
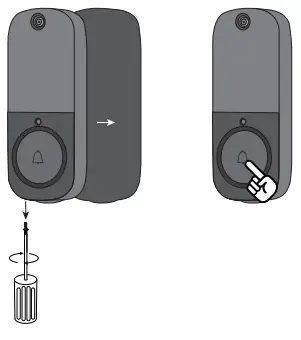
Resetting the doorbell
Using a screwdriver, open the back panel of the doorbell and hold down the push button (front) for 15 seconds.
Explanation of the LED intensity on the doorbell
| Slow flashing | Waiting for pairing (see point 4.). |
| Fast flashing | The doorbell receives the pairing information and starts to connect to the router |
| LED off | Standby mode. |
| Dimming of the LED | Firmware update. |
Troubleshooting
- You press the push button, but its indicator light does not respond… What should I do?
- Check if the batteries have been installed.
- Check if the batteries are completely worn out. If so, replace them as soon as possible.
NOTE: Do not mix new and used batteries. Replace all batteries at once.
- I can’t pair my unit to my DiO application… What should I do?
- Check if your WiFi network is working properly.
- Restart the doorbell by reinstalling the batteries or reset the unit (see point 6.)
- FAQ : https://chacon.com/faq
Safety advice
- Do not mix new and used batteries.
- Please use only the type of batteries indicated in the manual.
- Do not leave used batteries lying around in the unit, as this may damage the unit.
- The indoor unit is not waterproof. Do not expose it to rain or immerse it in water.
- Do not attempt to disassemble or repair the product yourself.
- Please keep these instructions carefully.
- Incorrect use of the battery may damage nearby objects and risk fire or serious injury.
- Please keep batteries away from children.
- Recycle used batteries in accordance with environmental protection practices
Technical specifications
| Outdoor bell | |
| Battery | DC 4.5V AA/LR6*3 |
| Standby current | 45µA |
| Wireless frequency | 2.4GHz+433MHz |
| Wireless distance | 80m (free field) |
| Viewing angle of camera | 60 |
| Pixels | 0.3 MP |
| Optical distance | 2S |
| Autofocus | 10 PCS |
| Waterproof | IP44 |
| Operating temperature | -10°C~50°C |
| Relative humidity | <90% at 40°C |
| Dimension (W*H*D) | 50.7*126.1*19.5 mm |
| Indoor chime | |
| Power supply | AC 100V~240V 50Hz~60Hz |
| Standby power consumption | 0.5Wh |
| Power consumption in operation | 1.5Wh |
| Volume (30cm): Low | 60-70dB / Medium: 70-80dB / High: 80-90dB |
| Melody | 38 |
| Demodulation | OOK |
| Wireless frequency | 433.92MHz±250KHz |
| Wireless distance | 80m (free field) |
| Operating temperature | -10~50°C |
Support
SAFETY INSTRUCTION
- For indoor use only
- Don’t throw batteries or out of order products with the household waste (garbage). The dangerous substances that they are likely to include may harm health or the environment. Make your retailer take back these products or use the selective collect of garbage proposed by your city.
- Hereby, Chacon, declares that the radio equipment type ‘DiOBELL-B11’ is in compliance with the Directive 2014/53/EU.
- The full test of the EU declaration of conformity is available at the following Internet address: http://chacon.com/conformity
ABOUT COMPANY
- www.chacon.com
- Chacon S.A.
- Avenue mercator 2
- 1300 Wavre


