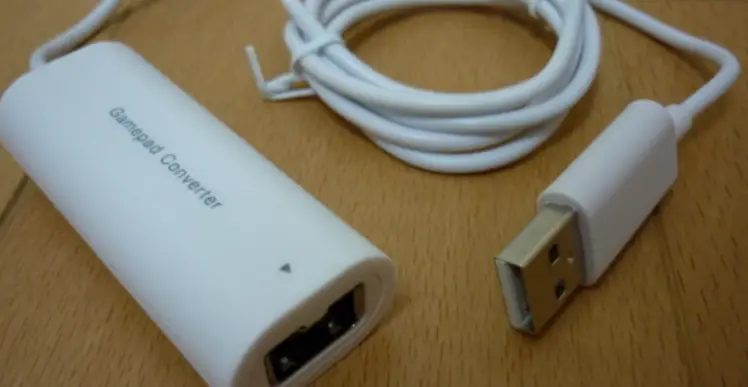
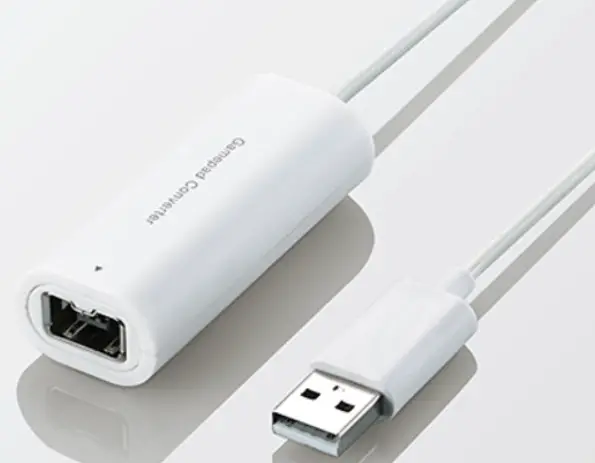
ELECOM JC-W01U Gamepad Converter
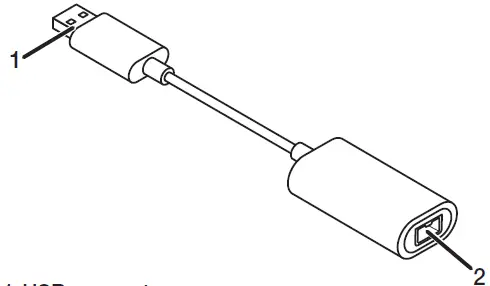
Name and function of each part
- USB connector
- Controller port

The table shows the button mapping when the Classic Controller / Classic Controller Pro is attached.
| Controller button | Button on the PC |
| y button | 1 button |
| x button | 2 button |
| b button | 3 button |
| a button | 4 button |
| L button | 5 button |
| R button | 6 button |
| ZL button | 7 button |
| ZR button | 8 button |
| – button | 9 button |
| + button | 10 button |
| HOME button | Turbo ON/OFF button |
Connecting
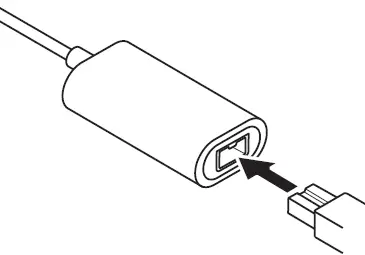
Connecting the controller to this product
- Connect the controller’s connector to this product’s controller port.
Connecting this product to a PC
- Insert the USB connector of this product into the USB port of the PC.
The product will be automatically recognized by the PC. Ensure that it is connected to a port that supplies 500mA power.
You can insert or remove the USB even when the PC is switched on.
Please ensure that the USB connector is the right side up and connected correctly. - The Windows standard driver will be installed automatically.
The connection between this product and the PC is completed.
 Ensure that it is connected to a port that supplies 500mA power.
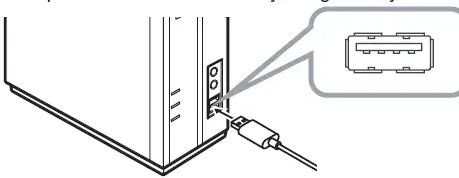
Checking the operation
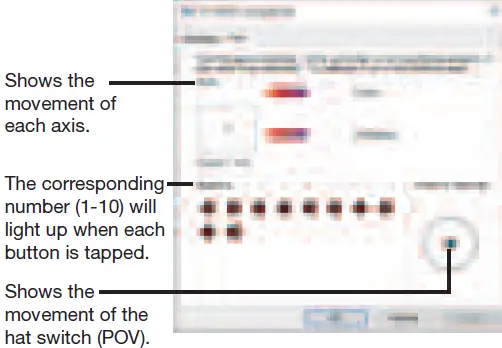
Check the operation from the “Game Controller” screen of the control panel.
Follow the steps below to open the “Game Controller” screen.
The messages may differ across OS. Please check against your OS.
- For Windows® 10
From the start menu, click (Settings), select “Devices” “Bluetooth and other devices”, then click “Devices and printers” under “Related settings”. Right click
“JC-W01U” and select “Game Controller settings”. - For Windows® 8.1
Right-click the Start button in the bottom left-hand corner of the screen and select “Control Panel”
“Devices and Printers” “Hardware and Sound”. Right click “JC-W01U” and select “Game Controller settings”. - For Windows® 7
Select “Start” menu “Devices and Printers”. Right click “USB Gamepad” and select “Game Controller settings”. - For Windows Vista®
Select “Start” menu “Control Panel”. Click “Hardware and Sound”, then click “Game Controller”. - For Windows® XP
Select “Start” menu “Control Panel”. Click “Printer and other Hardware”, then click “Game Controller”.
- Select “JC-W01U” from the game controllers and click the “Properties” button.

- Check the function of each button under the “Test” tab.

- Click on the “OK” button.
Close the “JC-W01U properties” screen. - Click on the “OK” button.
Close the “Game Controllers” window.
If the movement of each button is correct, the controller is recognized correctly.

How to use the continuous fire function
The continuous fire function can be set for each button (1 to 10) on the controller. You can choose to enable continuous fire function only for certain buttons or for all buttons.
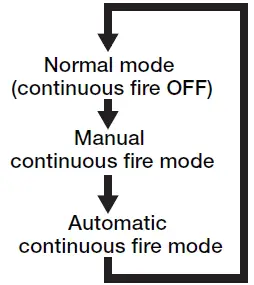
- The continuous fire function has two modes: manual continuous fire mode, in which continuous fire only occurs while the button is pressed, and automatic continuous fire mode, in which continuous fire continues when the button is released.
- Continuous fire speed cannot be changed.
To enable continuous fire
- Press the button for which you want to activate continuous fire while holding down the HOME button.
- Press once to enter manual continuous fire mode.
- Press again to enter automatic continuous fire mode.
- Press again to return to normal mode (continuous fire OFF).
- Disable continuous fire for all buttons
- Double press the HOME button quickly. All buttons will return to normal mode (continuous fire OFF).

Specifications
| Compatible models | PC/AT compatible machines running Windows 10, 8.1, 7 (up to SP1), Vista (up to SP2), XP (SP3) equipped with a USB port. (Updating the OS or installing a service pack may be necessary.) |
| Functions during operation | 4 axes, 10 buttons, D-pad (POV) |
| Compatible controllers | Classic Controller (RVL-005) Classic Controller PRO (RVL-005 (-02)) |
| Dimensions | Width 62.0 mm x Depth 26.0 mm x Height 17.0 mm * excludes cable (Width 2.45 in x Depth 1.03 in x Height 0.7 in * excludes cable) |
| Interface | USB |
| Main unit weight | Approximately 32 g (approximately 1.13 oz) |
| Cable length | Approximately 1.0 m (approximately 3.3 ft) |
| Operating temperature/ humidity | 5 °C to 40 °C / 90 % RH or less (without condensation) (41 °F to 104 °F/ 90 % RH or less (without condensation)) |
| Storage temperature/ humidity | -10 °C to 60 °C / 90 % RH or less (without condensation) (14 °F to 140 °F/ 90 % RH or less (without condensation)) |
Safety Precautions
Be sure to observe the following precautions in order to ensure safe use.
WARNING
Ignoring these precautions may lead to inappropriate handling that may cause death or serious injuries.
CAUTION
Ignoring these precautions may lead to inappropriate handling that may cause serious injuries or damage.
- Prohibited action
- Mandatory action
- Situation that needs attention
- WARNING
If a foreign object (water, pieces of metal) enters this product, stop using immediately and remove it from your PC. Continuing to use the product as it is may cause a fire or electric shock. - If the product is functioning abnormally, such as heating up, generating smoke, or giving off a strange smell, stop using it immediately and shut down your PC. After checking that the product is not generating heat that can cause burns, remove it from your PC. Afterwards, please contact your dealer. Continuing to use the product may cause a fire or electric shock.
- Please do not drop or hit this product.
- If this product is damaged, stop using it immediately and remove it from your PC. Afterwards, please contact your dealer. Fires or electric shocks may occur if this product is used when damaged.
- Do not attempt to disassemble, modify or repair this product. Doing so may cause a fire, electric shock, or product damage. Malfunctions are not covered under the warranty.
- Do not put this product in a fire, as the product may burst, resulting in a fire or injury.
Please do not insert or pull out the receiver unit with wet hands. In addition, do not modify or forcibly bend the product. It will cause a fire or electric shock. - CAUTION
Do not place this product in any of the following environments:- In cars under the sun, in direct sunlight, or around heaters and other places where high temperatures occur.
- In a moist place or a place where condensation may occur. In an uneven place or a place exposed to vibration.
- In a place where a magnetic field is generated (such as near a magnet.)
- In a dusty place.
- This product does not have a waterproof structure. Use or store in a place not exposed to liquids such as water.
- Any liquid, such as rain, water spray, juice, coffee, or sweat, as well as steam, may cause a breakdown in this product.
- When you wish to dispose of this product, be sure to do so in accordance with the local ordinances and laws of your area.
Limitation of Liability
- In no event will ELECOM Co., Ltd be liable for any lost pro ts or special, consequential, indirect, punitive damages arising out of the use of this product.
- ELECOM Co., Ltd will have no liability for any loss of data, damages, or any other problems that may occur to any devices connected to this product.


