![]() N301182-4
N301182-4
65101-11920-D
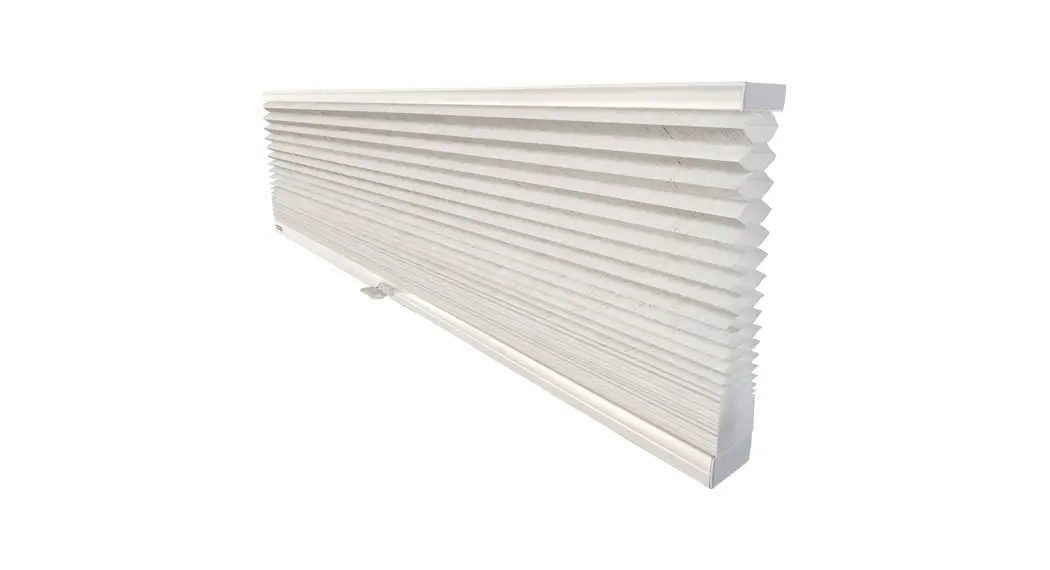
Honeycomb Shades
Cordless & Cordless TDBU for Woven Colors
Installation Instructions 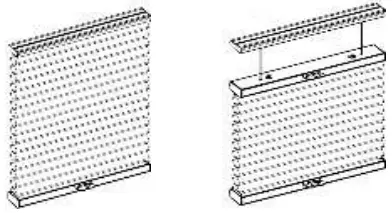
Getting Started
Remove shade from package. Save packaging until shade is installed and working to your satisfaction.
Tools: 
- Level
- Measuring Tape
- Pencil
- Power drill (¼” hex driver and drill bit)
- Screwdriver
You will need to use the following fasteners for your particular mounting surface.
| Surface | Fastener |
| Wood | #8 1 1/4” Screws (Provided) #6 3/4” screws  |
| Drywall/Plaster | Wall Anchors, Expansion Bolts (Not Provided)  |
| Metal | Sheet Metal Screws (Not Provided) 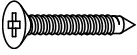 |
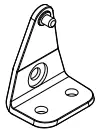
Check Components/Hardware:
 | 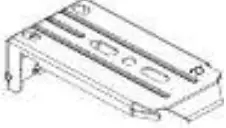 |
| Installation Bracket (3/4” Single) | Installation Bracket (1 1/4” Single) |
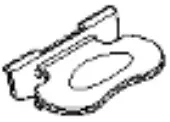 |  |
| Handle | Hold Down bracket (Optional) |
Hardware Standard Quantity
For Cordless:
| Order Width (X) | X≦39″ | 39″< X≦66″ | 66″< X≦86″ |
| Installation Bracket | 2 | 3 | 4 |
| Handle | 1pc for X≦72″ 2pcs for X>72″ | ||
| 1 1/4″ Screw for Installation Bracket | 4 | 6 | 8 |
| Hold Down Bracket (Optional) | 2 | 2 | 2 |
| Spacer Block (Optional) | 1pc to extend distance 3/8” 2pcs to extend distance 11/16” | ||
| 2″ Screw for Installation Bracket with Spacer Block (Optional) | 4 | 6 | 8 |
| 3/4″ Screw for Hold Down Bracket (Optional) | 4 | 4 | 4 |
For Cordless TDBU:
| Order Width (X) | X≦ 39″ | 39″ < X≦66″ | 66″< X≦78″ |
| Installation Bracket | 2 | 3 | 4 |
| Handle | 2pcs for X≦72″ 4pcs for X>72″ | ||
| 1 1/4″ Screw for Installation Bracket | 4 | 6 | 8 |
| Hold Down Bracket (Optional) | 2 | 2 | 2 |
| Spacer Block (Optional) | 1pc for extend distance 3/8” 2pcs for extend distance 11/16” | ||
| 2″ Screw for Installation Bracket with Spacer Block (Optional) | 4 | 6 | 8 |
| 3/4″ Screw for Hold Down Bracket (Optional) | 4 | 4 | 4 |
Note: Optional flat head screws included.
Use as needed.
Step 1: Bracket Installation
• Measure 3” from both ends of the headrail. Mark the bracket location on the mounting surface from both ends of the headrail. Mark the bracket location on the mounting surface.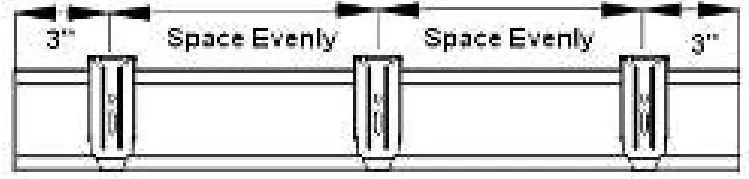 Inside Mount:
Use two 1 1/4” mounting screws to secure brackets.
Use wall anchors for drywall or plaster wall.
Place brackets and align with the wall.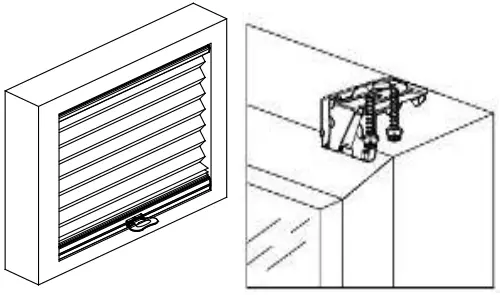
Outside Mount:
Use two 1 1/4’’ mounting screws to secure brackets.
Use wall anchors for drywall or plaster wall.
Allocate a min. distance of 3/16’’ between the end of the brackets and the top of the window frame.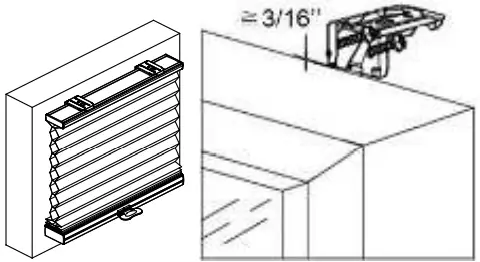 * For shallow mounting, use a flat head screw to secure the bracket at 45°.
 Step 2: Shade Installation
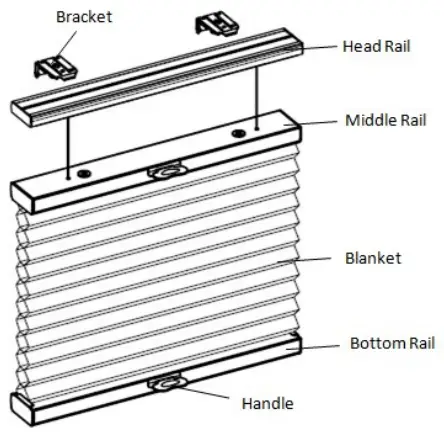
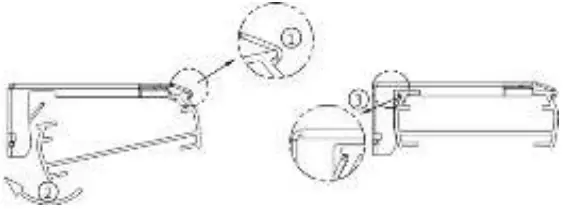
- Position the headrail at an angle so that it hooks into the front of the bracket. Then push upward to snap the headrail into the bracket.
- For proper installation, start by attaching the front of the rail to the bracket.
- For easier installation, lower the middle rail of cordless TDBU away from the headrail before installing the headrail.
Step 3: How to Install Shade Handle
Hook the top part of the handle onto the rail rib.
Push the handle downward so it clips to the bottom of the rail. You will hear a loud click sound once the handle is properly secured.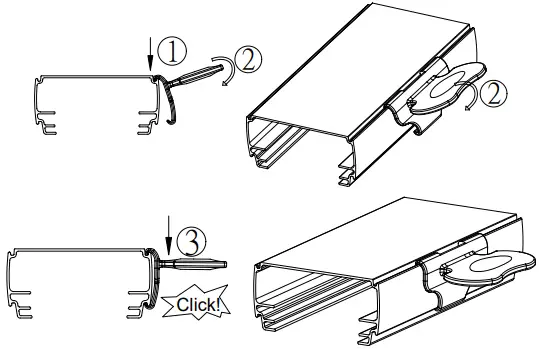
How to Uninstall Shade Handle
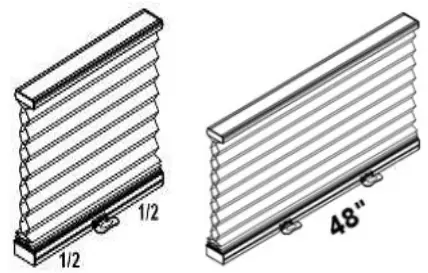
![]() For order width>72″, the distance between the 2 handles should be 48” as below.
For order width>72″, the distance between the 2 handles should be 48” as below. 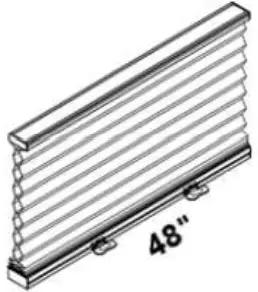 Use a flat head screwdriver to remove the handle from the bottom of the rail.
(To avoid scratching the rail with the screwdriver, please put a piece of adhesive tape on the head of the screwdriver before removing the handle from the rail.) 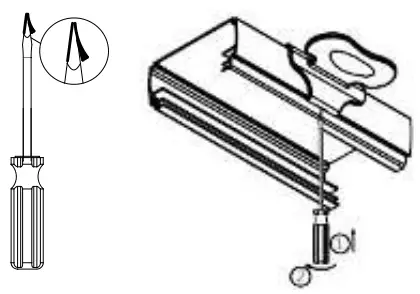
Shade Operation
To lower the shade, gently pull down the shade by the bottom rail handle and stop at the desired location.
For TDBU, pull down the bottom rail first before lowering the middle rail.
To raise the shade, gently raise the shade by the bottom rail handle to desired height.
For TDBU, if the shade will not lift, pull the middle rail down fully to the bottom first and then raise up bottom rail together with middle rail.![]() Do not grasp the rail unevenly. Always lower or raise the shade in the middle, or use even pressure with both hands to operate both handles on the rail.
Do not grasp the rail unevenly. Always lower or raise the shade in the middle, or use even pressure with both hands to operate both handles on the rail.
How to Install Hold Down (optional)
A. For Hold Down Brackets
Use #6 3/4” screw to secure each bracket.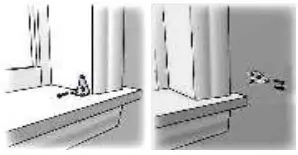 B. For Magnetic Hold Down
Use M3x15mm screw to secure the magnet catch at the below location. Make sure the magnet catch aligns with the pre-installed magnet on shade bottom rail.
Shade Removal
For cordless, fully raise the shade.
For TDBU, lower the middle rail.
Gently pry the bracket off the headrail with a flat screwdriver as pictured below.
Remove the shade. 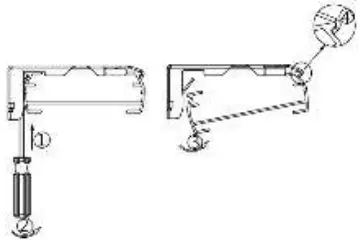
Cleaning the Shade
Routine cleaning will help maintain the beauty of your shade. The shade can be cleaned by using a soft brush, vacuumed with a low suction hand-held vacuum, cleaned ultrasonically (specify that a mild solution must be used and that the headrail should never be immersed in liquid). Spot cleaning is not recommended, but if necessary, dampen a clean cloth with a solution of warm water and mild detergent to dab the spot until it’s gone (do not rub!).
Troubleshooting
| Problem | Solution |
| The shade will not snap into the mounting brackets. | Check if mounting brackets are aligned. Refer to below drawing.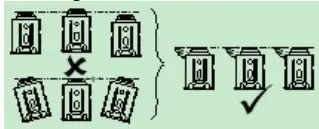 |
| The shade will not lift. | Gently pull down on the bottom rail to reactivate the cordless mechanism. Repeat if necessary. For TDBU, pull the middle rail down fully to the bottom first. Then raise the bottom rail and middle rail up together. |
Check if all brackets are locked in place. Refer to below drawing.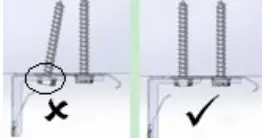 | |
| The shade stacks up unevenly. | Lower the shade completely, and then raise it up to correct it. Repeat if necessary. |
| For Woven fabrics, repeated rubbing or where it comes into contact with the window edge may cause the fabric edges to fray slightly over time. | To remedy, use a pair of fabric scissors to gently trim the fraying. |
 Some options listed may not be applicable.
![]()


