![]()
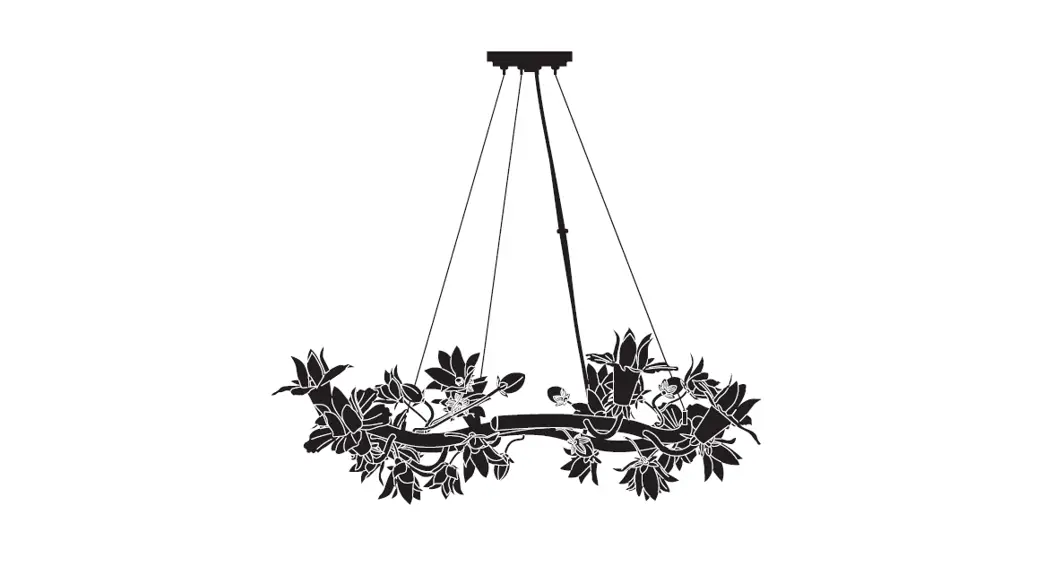
MAGNOLIA 8LT PENDANT
USER GUIDE


Product code 701 422220
| Getting started | Thank you for purchasing this Magnolia pendant. Please read the instructions carefully before use to ensure safe and satisfactory operation of this product. |
| Warnings | For your safety, this product must be installed in accordance with local Building Regulations. |
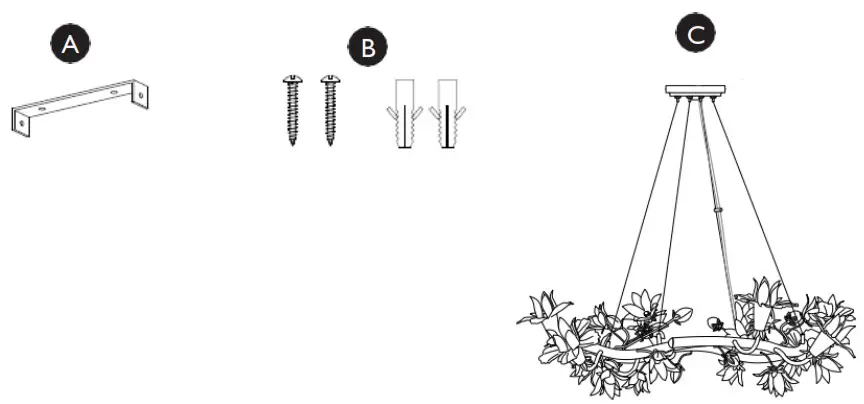
Parts List
Ref | Description | Qty |
A | Mounting bracket | 1 |
B | Screw fixings | 2 |
C | Light fitting | 1 |
Product assembly
The height of the fitting is adjustable prior to electrical installation only. To adjust the length of cable, pull the metal support wire through into the ceiling cup until the desired height is achieved. If you wish to lengthen the wire again simply push the small tube that the wire passes through in on itself (it is spring loaded) and gently pull the wire back through to the desired length, as soon as the tube is released it will automatically lock in position again. With the support wire length achieved pull the supply cable through into the ceiling cup until the desired length is achieved. Ensure that the supply cable is left slack so it is the metal support wire taking all of the strain of the weight once installed and not the supply cable.
Step 1
Remove mounting bracket (A) from fitting by removing the retaining screws and any washers, retain for later. Using the mounting bracket as a template, mark and then drill the fixing holes in the mounting surface. (ensure the screws (B) are firmly fixed into a solid or other suitable mounting and not just the plasterboard) Take care not to damage wiring.
Attach mounting bracket to the mounting surface using suitable fixings. Do not attach fitting to mounting bracket at this stage. Make sure no wires are trapped in the process.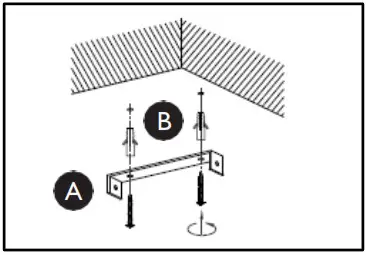 Step 2
Ensuring the power has been isolated, feed the household supply cable through the black rubber sleeve of the terminal block and connect the electrical supply wires to the connector blocks corresponding terminals. Support the fitting weight and Make electrical connections as follows:
- Connect supply live to fitting live (marked “L”) on the terminal block.
- Connect supply neutral to fitting neutral (marked “N”) on the terminal block.
- Connect the supply earth to the earth (marked “
 “) on the terminal block.
Please note that residential wiring can vary, if you are unsure about the correct polarity please consult a qualified electrician. Ensure electrical connections are tight and no loose strands of wire protrude from the terminal block then close connector block cover by snapping back together. Excess cable must be carefully located inside the ceiling cup or within the ceiling cavity itself.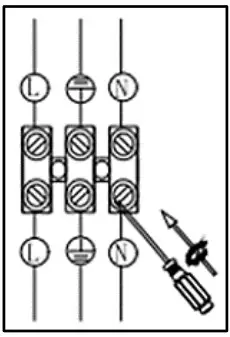 Step 3
Carefully offer fitting (C) over mounting bracket then secure in place with the screws and any washers removed earlier. Take care not to damage the wiring.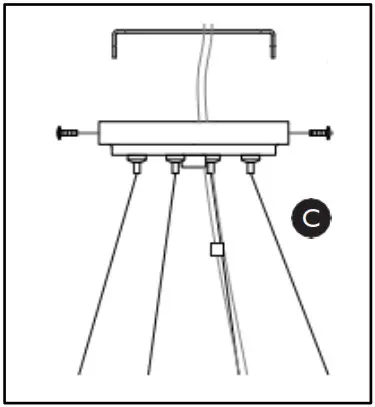 Step 4
Fit the bulb: type and wattage as indicated on the fitting.
The wattage indicated must not be exceeded.
Once installation is complete, the house electricity may be restored at the fuse box.
| Product information | • Indoor use only • Dimmable • Replacement bulbs should be the same type and rating, available from John Lewis • Partners or other established brands Clean the fitting with a soft dry cloth |
| Aftercare and troubleshooting | If you experience any unresolvable technical issues with the product, contact your nearest John Lewis & Partners shop or John Lewis & Partner Technical Support on 03301 230106. Why is the light not working when switched on? Check your power supply is switched on Turn off light and check that the bulb is inserted correctly Check the bulb is still in working order. |
| Specification | Max. power: 4W LED Only (250-400 lumen) Voltage: 220–240V, 50Hz IP rating: 20 Weight: 2.8kg |
| 5-year guarantee | At John Lewis & Partners we test every light to high quality standards so we are able to offer you a 5 year guarantee. |
| Recycling | This symbol |
John Lewis Plc
171 Victoria Street
London SW1E 5NN
johnlewis.com
Made in China
IL4399 Issue 1 05/21
![]() Please retain these instructions for future reference
Please retain these instructions for future reference


