![]() QX118 Receiving Frame
QX118 Receiving Frame
User Guide
©2020 CRU Data Security Group, LLC. ALL RIGHTS RESERVED. CRU® and SHIPS™ (collectively, the “Trademarks”) are trademarks owned by CDSG and are protected under trademark law.
Product Warranty: CDSG warrants this product to be free of significant defects in material and workmanship for a period of three (3) years from the original date of purchase. CDSG’s warranty is nontransferable and is limited to the original purchaser.
Limitation of Liability: The warranties set forth in this agreement replace all other warranties.
CDSG expressly disclaims all other warranties, including but not limited to, the implied warranties of merchantability and fitness for a particular purpose and non-infringement of third-party rights with respect to the documentation and hardware. No CDSG dealer, agent, or employee is authorized to make any modification, extension, or addition to this warranty. In no event will CDSG or its suppliers be liable for any costs of procurement of substitute products or services, lost profits, loss of information or data, computer malfunction, or any other special, indirect, consequential, or incidental damages arising in any way out of the sale of, use of, or inability to use any CDSG product or service, even if CDSG has been advised of the possibility of such damages. In no case shall CDSG’s liability exceed the actual money paid for the products at issue. CDSG reserves the right to make modifications and additions to this product without notice or taking on additional liability.
FCC Compliance Statement: This device complies with Part 15 of the FCC rules. Operation is subject to the following two conditions: (1) This device may not cause harmful interference, and (2) this device must accept any interference received, including interference that may cause undesired operation.
This equipment has been tested and found to comply with the limits for a Class B digital device, pursuant to Part 15 of the FCC Rules. These limits are designed to provide reasonable protection against harmful interference in a residential installation. This equipment generates, uses, and can radiate radio frequency energy and, if not installed and used in accordance with the instruction manual, may cause harmful interference to radio communications. In the event that you experience Radio Frequency Interference, you should take the following steps to resolve the problem:
- Ensure that the case of your attached drive is grounded.
- Use a data cable with RFI reducing ferrites on each end.
- Use a power supply with an RFI reducing ferrite approximately 5 inches from the DC plug.
- Reorient or relocate the receiving antenna.
1000 SE Tech Center Dr. Suite 160
Vancouver, WA 98683
Safety Information
Please read the following before handling this product.
- Do not drop the product, submit it to impact, or pierce it.
- The circuit boards within this product are susceptible to static electricity. Proper grounding is strongly recommended to prevent electrical damage to the product or other connected devices, including the computer host.
- Avoid placing this product close to magnetic devices, high voltage devices, or in an area exposed to heat, flame, direct sunlight, dampness, moisture, or rain.
- To avoid overheating, this product should be operated in a well-ventilated area.
- Before starting any type of hardware installation, please ensure that all power switches have been turned off and all power cords have been disconnected to prevent personal injury and damage to the hardware.
- A damaged cable or device may malfunction and/or overheat and become a fire hazard.
Setup
Receiving Frame Installation
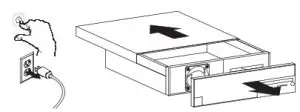
- Turn off your computer. Disconnect the power cord, and remove the computer cover.

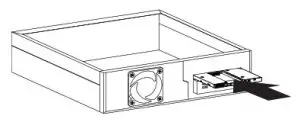
- Slide the QX118 receiving frame into a vacant 9mm or 9.5mm optical drive bay.

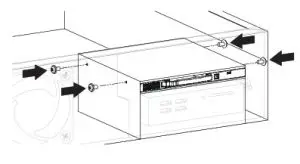
- If necessary, secure the QX118 to the drive bay with M2 screws of your own.

 IMPORTANT
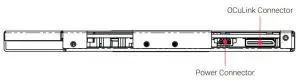
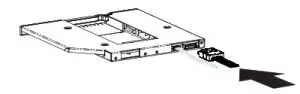
If you are installing the QX118 into a 9.5mm optical drive bay, please note that the forward screw holes on the QX118 will not line up with the screw holes on a 9.5mm bay, but the rear screw holes will. - Connect the included SATA power adapter cable to the rear of the QX118. Then connect SATA power from your computer to the adapter cable.

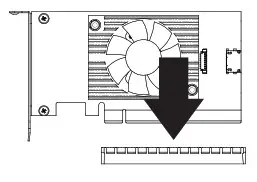
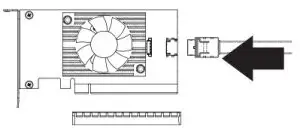
- If necessary, install a host bus adapter card (HBA) with at least one (1) OCuLink port into your computer. Refer to the HBA’s user manual for installation instructions.

- Connect an OCuLink SFF-8611 cable (sold separately) to your HBA.

- Connect the other end of the OCuLink cable to the OCuLink port on the rear of the QX118.

- Replace the computer cover, reconnect the power cord, and turn on your computer.


 NOTE
NOTE
Compatible adapter cards and cables are available for purchase on the QX118 product page at cru-inc.com.
Disable Windows Fast Startup
“Fast startup” must be disabled in Windows 10 and Windows 8.1 to ensure that data from the QX118 is read properly. Here are the instructions for how to do so with Windows 10.
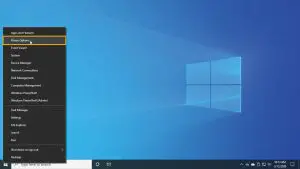
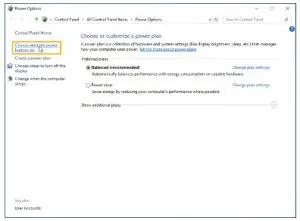
- Right-click on the Start Button and select Power Options.

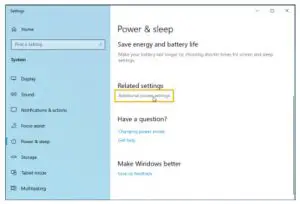
- Under Related Power Settings in the right column, select Additional power settings.

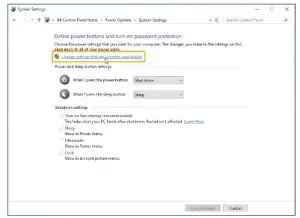
- On the left column of the new window, select Choose what the power buttons do.

- Select Change settings that are currently unavailable.

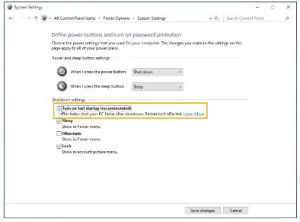
- Uncheck Turn on fast startup (recommended).

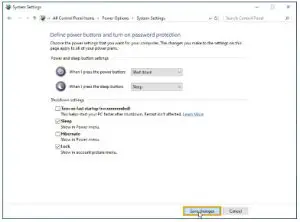
- Click the Save changes button.
Operation
SHIPS Module Installation
 CAUTION
If hot swapping is not available, then failure to turn off your computer before removing or installing a SHIPS module may result in data loss. CRU has designed the QX118 to support hot-swapping. However, your entire system must support hot-swapping, including your motherboard, BIOS/UEFI, CPU, operating system, and host bus adapter. CRU sells hot-swap-capable HBAs and cables to help simplify your installation needs. They are available on the QX118 product page at cru-inc.com.
- Power off your computer. If you have the hot-swapping capability, then you may ignore this step.
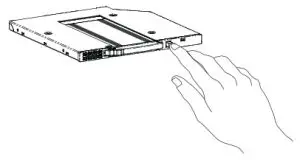
- Unlock the module slot door.
If you have the Push-Button Version: Push the button located on the right side of the QX118 to release the module slot door. Then move the door out of the way. If you have the Lock Version: Firmly place the included key into the square keyhole on the right side of the QX118 to release the module slot door. Then move the door out of the way.
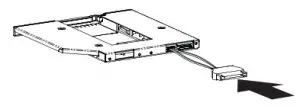
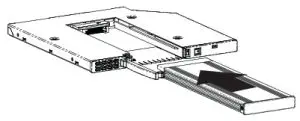
- Orient a SHIPS Module or SHIPS Rugged Module so that its pins are downward and facing the QX118. Insert it into the open slot on the QX118 receiving frame.

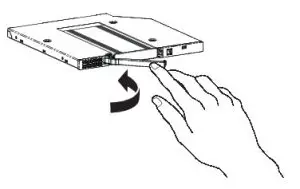
- Close the module slot door. It will snap into place. The module will automatically power on when the computer is turned on.

- Power on the computer if it is powered off.
 If you have the Lock Version: Firmly place the included key into the square keyhole on the right side of the QX118 to release the module slot door. Then move the door out of the way.
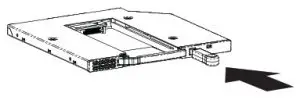
Safe SHIPS Module Removal
CAUTION
If hot swapping is not available, then failure to turn off your computer before removing or installing a SHIPS module may result in data loss.
CRU has designed the QX118 to support hot-swapping. However, your entire system must support hot-swapping, including your motherboard, BIOS/UEFI, PU, operating system, and host bus adapter.
CRU sells hot-swap-capable HBAs and cables to help simplify your installation needs. They are available on the QX118 product page at cru-inc.com.
- Power off your computer. If you have the hot-swapping capability, then you do not need to turn the computer off, but you must make sure that data on the module you wish to remove is not being accessed by your computer.
- Unlock the module slot door.
If you have the Push-Button Version: Push the button located on the right side of the QX118 to release the module slot door. Then move the door out of the way.If you have the Lock Version: Firmly place the included key into the square keyhole on the right side of the QX118 to release the module slot door. Then move the door out of the way.
- Remove the module from the receiving frame.
 If you have the Lock Version: Firmly place the included key into the square keyhole on the right side of the QX118 to release the module slot door. Then move the door out of the way.
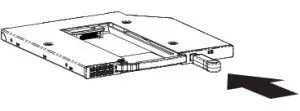

Product Support
Your investment in CRU products is backed up by our free technical support for the lifetime of the product. Contact us through our website,
cru-nc.com/support, or call us at 1-800-260-9800 or +1-360-816-1800.
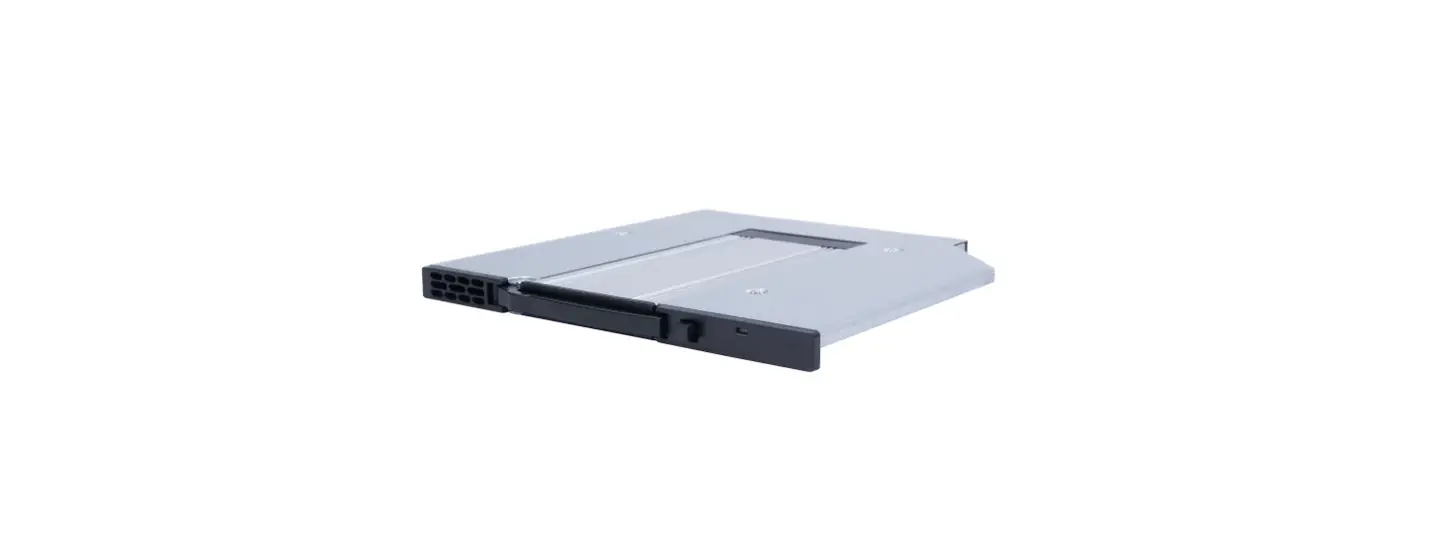
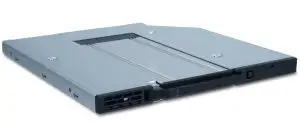
Appendix A. Identifying Parts
Figure A.1. Front
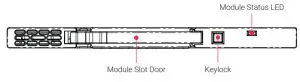
Figure A.2. Rear