
TOPDON OBDAPK1280 Phoenix Pro-Level Scanner
Phoenix/ Phoenix Lite
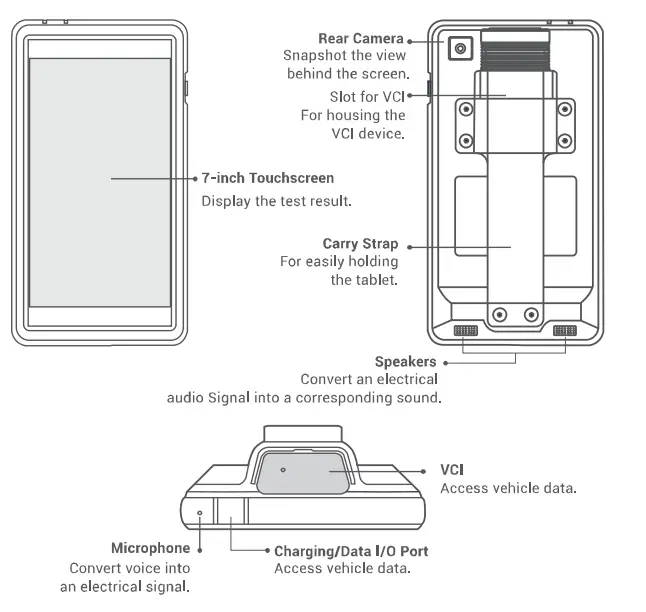
There are two main components to the Phoenix/ Phoenix Lite system:
- Phoenix / Phoenix Lite Display Tablet
- VCI (Vehicle Communication Interface)

IMPORTANT: Read the instruction carefully and use the unit properly before operating. Fail to do so may cause damage and/or personal injury, which will void the product warranty.
Note: This Quick Start Guide is subject to change without written notice.
VCI (Vehicle Communication Interface)

Install the VCI
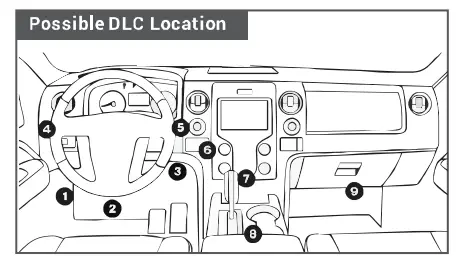
- Locate the vehicle’s DLC port. See”Possible DLC Location’.
- Plug the VCI into the vehicle’s DLC port.
For non-16 pin DLC socket, refer to “Preparation & Vehicle Connection’ for details.
Remember to unplug the VCI from the vehicle while being idle, and exit all diagnostic processes before unplugging.
Register & Update
- Network Setting
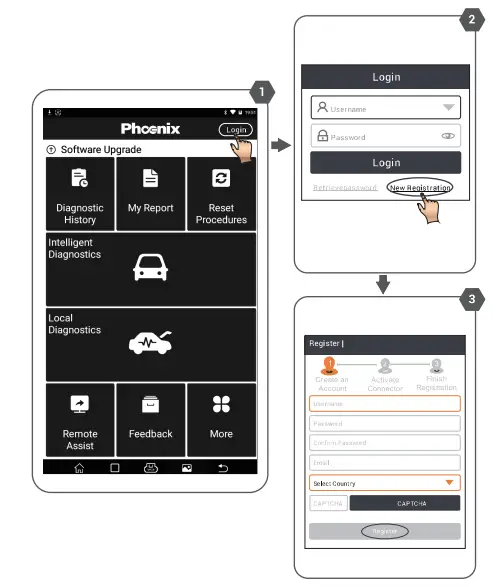
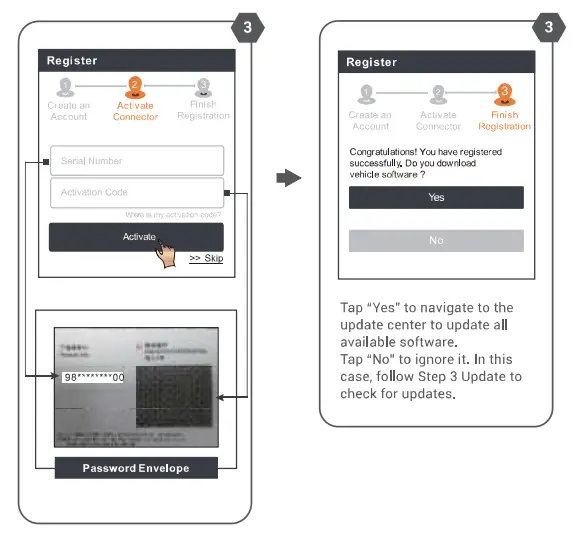
Tap [Settings]-> [Wi-Fi]. select the desired Wi-Fi connection until “connected”. - Launch the Phoenix/ Phoenix Lite application, and register an account:


- Update
All software is updated periodically. It is recommended to check regularly for updates ornd install the latest software version for the best service, functions and experience.
Tap [Software Upgrade] on the main menu.
NOTE: Make sure the Wi-Fi connection is strong and stable while upgrading.
Preparation & Vehicle Connection
Preparation
- The ignition is turned on.
- The vehicle battery voltage is 9-l 8 volts.
- The throttle is in the closed position.
Working Principle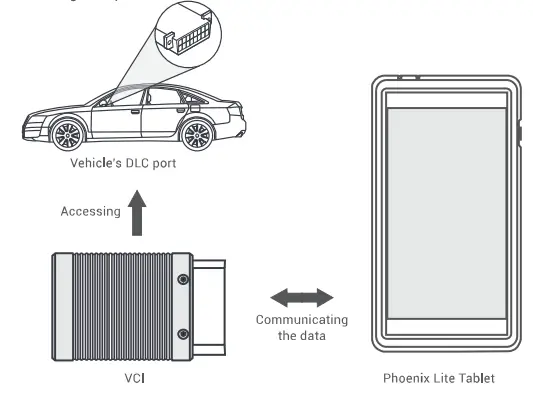
Vehicle Connection
- 0BD II Vehicle Connection
Plug the VCI into the Vehicle’s DLC port directly, or use the OBDII extension cable to connect the VCI with the Vehicle’s DLC port. - Non-OBD II Vehicle Connection
For non-OBD II vehicle, proceed as follows:- Locate vehicle’s DLC port (refer to Section “VCl’1.
- Connect one end of the OBD I adaptor tot he VCI, and the other end to the non-16 pin connector.
- Plug the other end of the non-l 6pin connector into the DLC port.
- To supply power to the OBD I adaptor by one of the following ways:
A. Via battery clamps cable (optional): Connect one end of the battery clamps cable to vehicle’s battery, and the other end to the power jack of the OBO I adaptor. 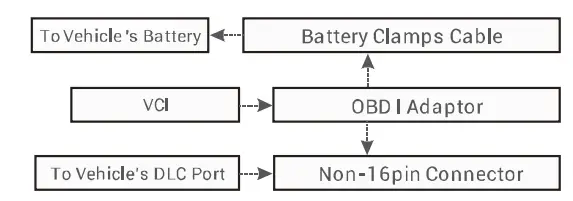
B. Via cigarette lighter cable (optional): Connect one end of the cigarette lighter cable to vehicle’s cigarette lighter receptacle, and the other end to the power jack of the OBD I adaptor.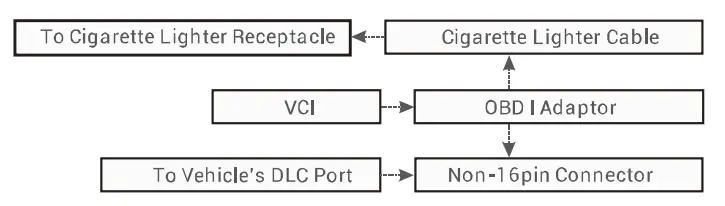
NOTE: Non-OBDII adapters are not included in Phoenix Lite package.
Start Diagnostics
Three diagnostic methods are available:
- Intelligent Diagnostics:
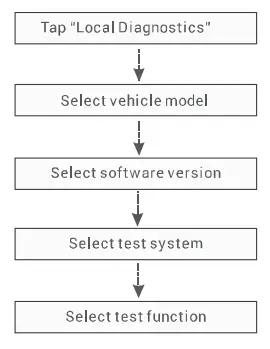
The system will automatically guide you directly to the fix and help you eliminate guesswork. without step-by-step manual menu selection. - Local Diagnostics:
You need to m;mually select the menu-driven command. - Remote Diagnostics:
This helps repair shops or mechanics to diagnose a remote vehicle, and launch instant messages, allowing for improved efficiency and faster repairs.
For new users, the Local Diagnostics is recommended as follows: