![]() How To Install a Server into a Tank G152
How To Install a Server into a Tank G152
Installing Server
![]() CAUTION!
CAUTION!
- Make sure the crane can handle at least 60 KG before installing the server into a tank.
- Only licensed professionals are authorized to access the restricted access location.
- The power supply fan is disabled by default, so the server must be immersed in the fluid before powering on.
- Consult with immersion cooling tank vendor to ensure compatibility and read their tank manual thoroughly.
![]() DANGER!
DANGER!
- Strongly recommended to use gloves when handling the coolant.
- Before handling coolant, handlers must read the material safety data sheet (MSDS) for their safety.
- The thermal pad contains Indium foil, so it is strongly recommended to use gloves when replacing the thermal pad.
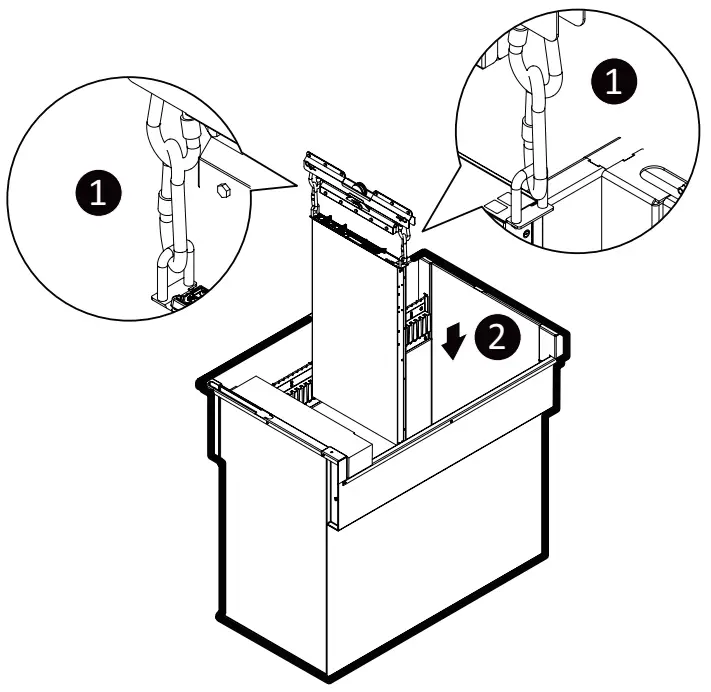
Installation
- Attach the two carabiners to server handles.
- Put the server into the tank vertically.
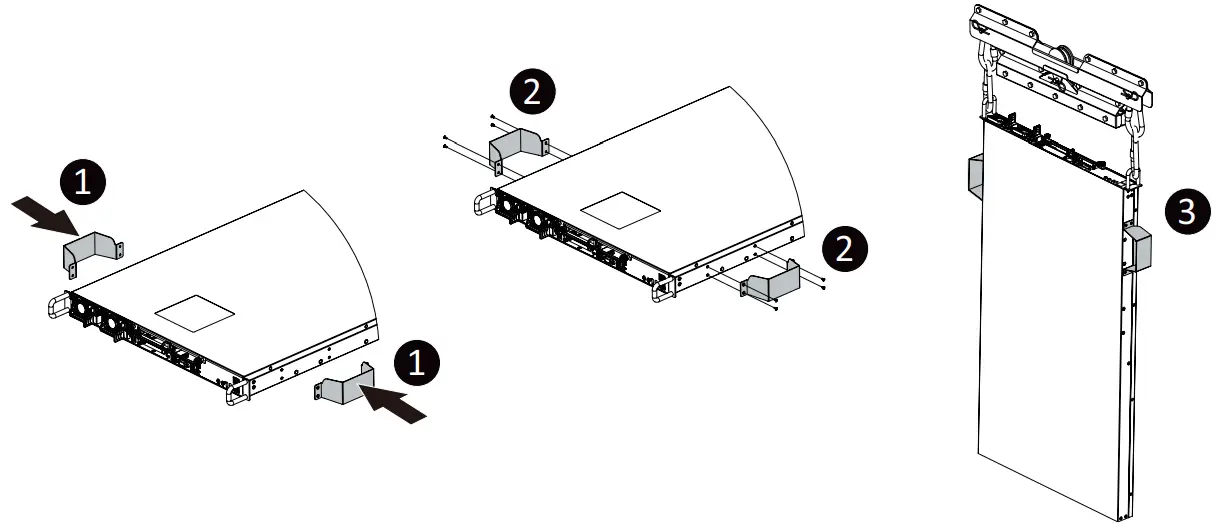
Installing Optional Handles
NOTE! The optional handles are only for Asperitas tank.
- Attach the handles to server.
- Secure the handles with screws.
- Install server into the tank.
How To Install a Thermal Pad to CPU
Installing Thermal Pad
![]() DANGER!
DANGER!
- Strongly recommended to use gloves and mask when handling the thermal pad.
- The thermal pad contains Indium foil, so it is strongly recommended to use gloves when replacing the thermal pad.
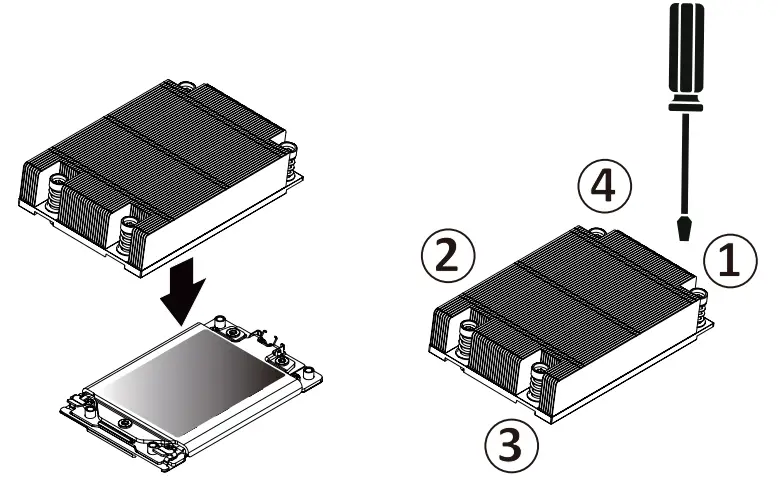
Installation
- Place the thermal pad on the top of CPU.

- Install the CPU heatsink.
When installing the heatsink to CPU, use a Torx T20 screwdriver to tighten 4 captive nuts in sequence as 1-4.
The screw tightening torque: 10 ± 0.5 kgf-cm.

Learn more about GIGABYTE server, visit www.gigabyte.com/Enterprise
* All specifications are subject to change without notice. Please visit our website for the latest information.
* All other brands, logos and names are property of their respective owners.
© 2023 Giga Computing Technology Co., Ltd. All rights reserved.
 https://www.gigabyte.com/Enterprise
![]() Giga Computing
Giga Computing![]() GIGABYTEServer
GIGABYTEServer![]() GIGABYTEofficial
GIGABYTEofficial![]() GIGABYTEChannel
GIGABYTEChannel


 Ti 4gb Gddr5 Graphics Card Quick User Guide")


