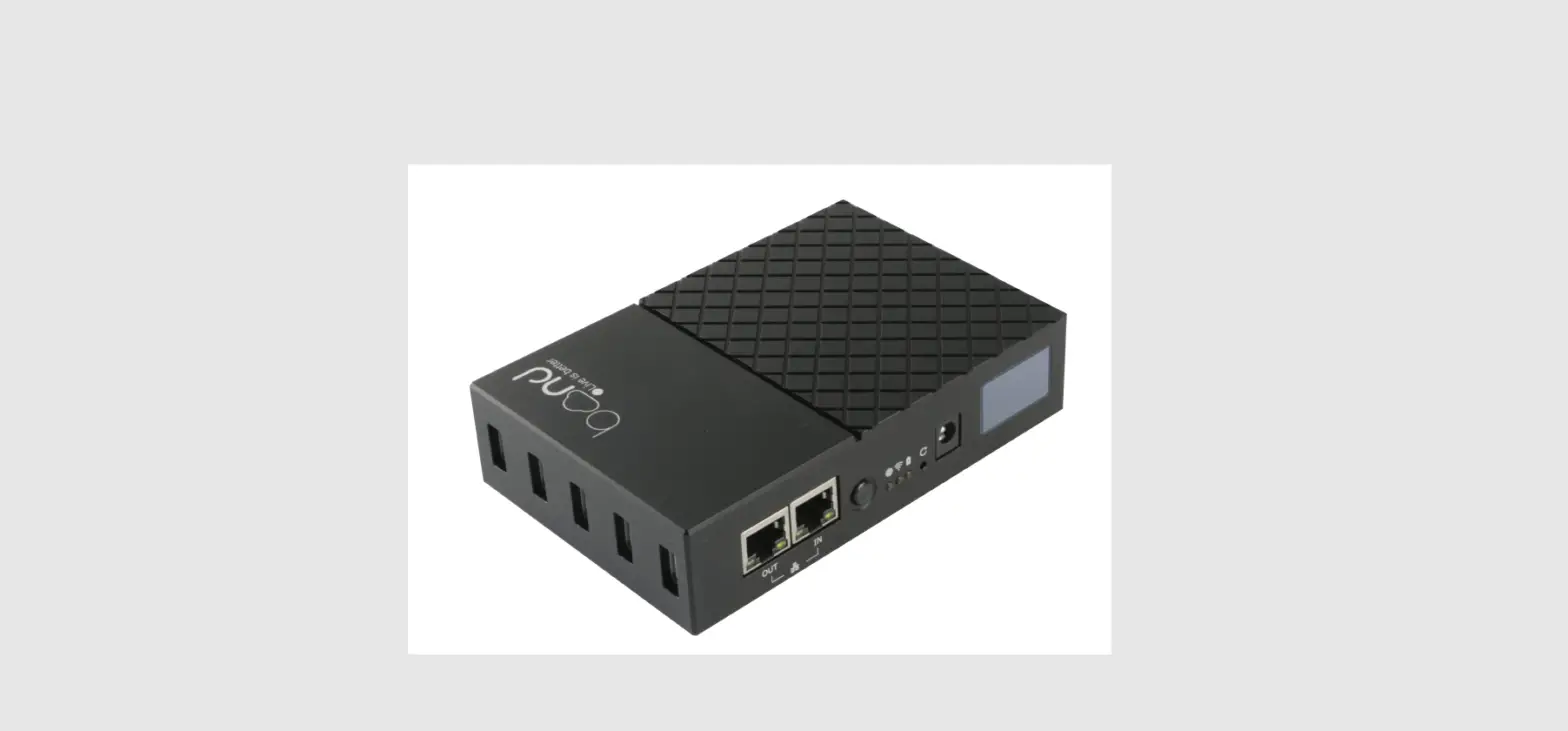
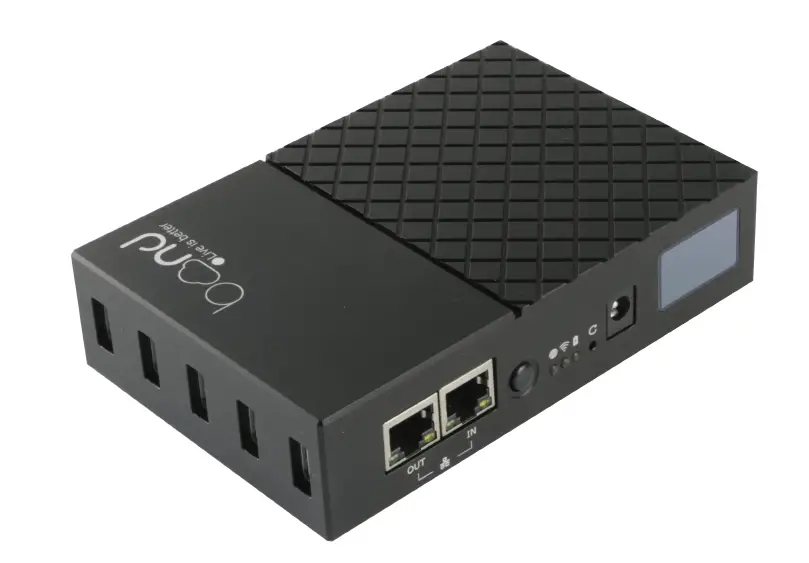
 bond6 RGB Link Network Bonding Router
Key Features
- Bonding Network Router
- 5*USB port for TD-LTE standard Dongle
- Bonding up to 5 Dongle and 1 LAN together
- WAN external broadband bonding
- 2.4GHz+5.8GHz dual-band wifi
- wifi hotspot sharing
- Real-time status on LCD screen
- Optional built-in lithium battery with higher capacity
- 1/4 screw hole for rack mounting
Specification
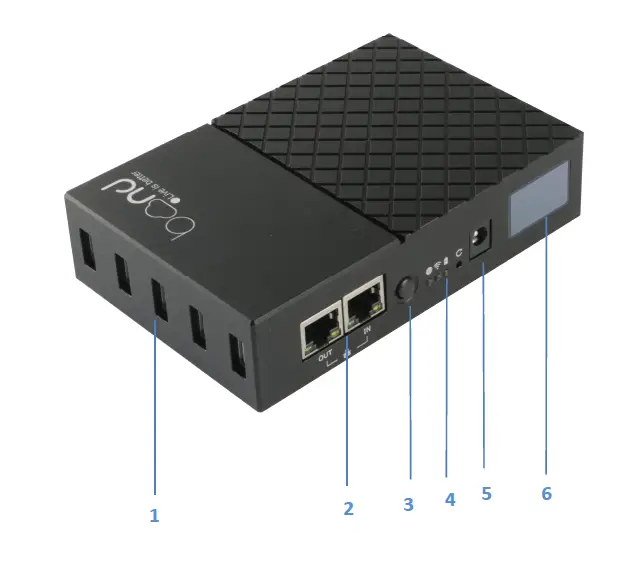
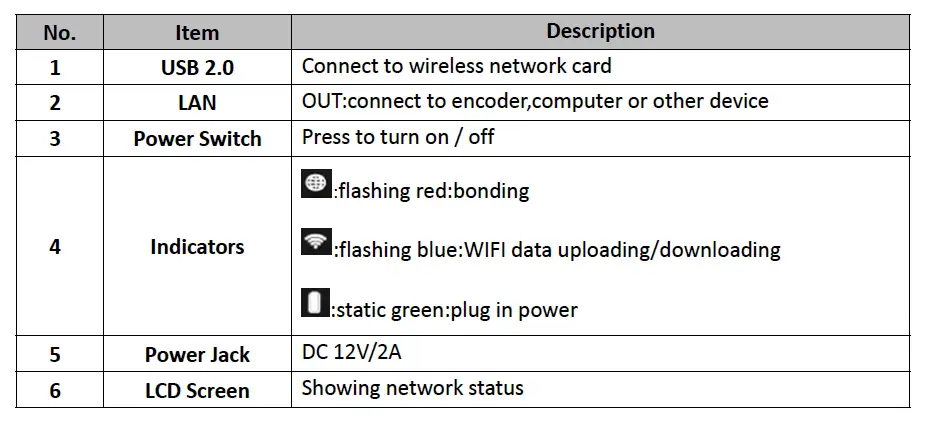
| Connectors | USB 2.0 LAN | 5×USB-A 1×RJ45 |
| Power | 1×DC jack | |
| Performance | CPU RAM EMMC WIFI Bandwidth | Quad-core Cortex-A7 CPU 512MB 8GB 2.4G +5.8G 60Mbps |
| Power | Input Voltage | DC 12V/2A |
| Maximum Battery Capacity | 15000mAh | |
| Supported Battery | SN F550/750/960 | FM50/70/90 | QM91D; PAN VBD1/VBD2; JVC V607U/V617U | |
| Environment | Temperature | -20 ~ 60℃ |
| Humidity | 0 ~ 65% | |
| Physical | Dimension | 135mm×91mm×32mm
|
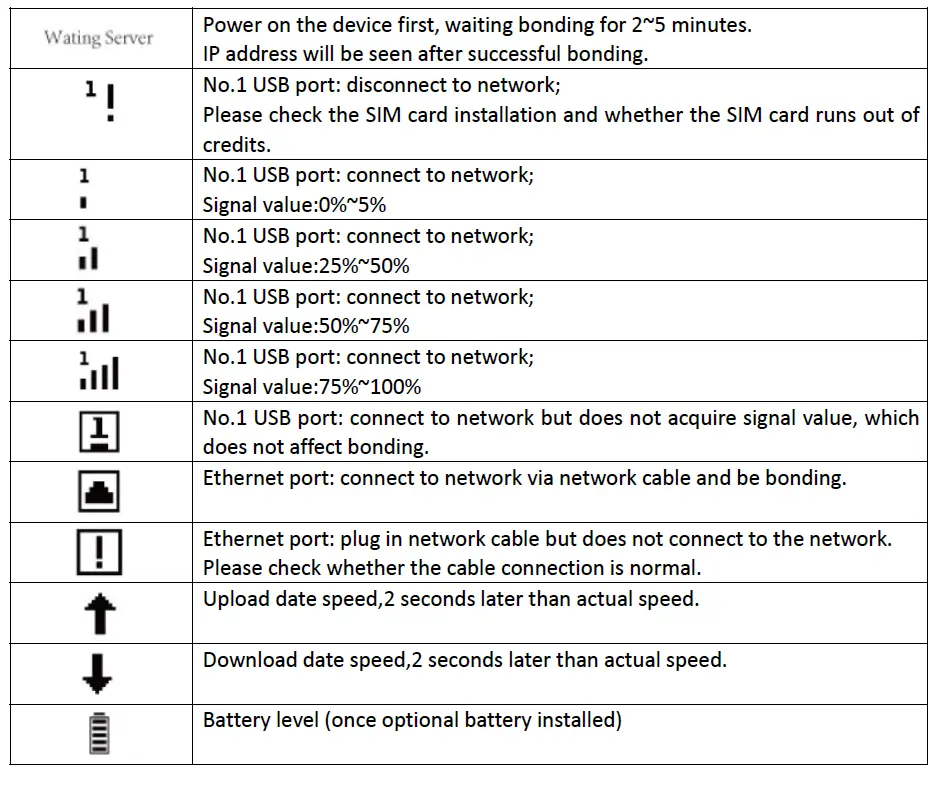
Interface

Screen logo Instruction
How to Config

Step 1: Directly connect a laptop to the bond router via LAN cable. The bond router has a DHCP server and will provide an IP address to a connected laptop that is set for default (DHCP) network configuration. 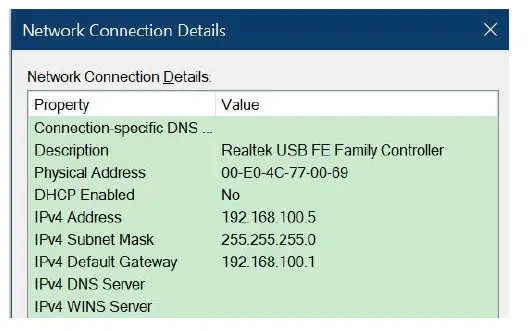
Step 2: Check network settings in the laptop to confirm IP address is in the same subnet as the bond router -192.168.100.xxx.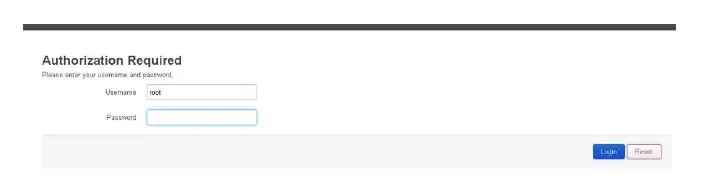
Step 3: Open a browser window and enter 192.168.100.1 in the address bar. This IP address is default, preset IP address of the bond router.
To login use the unique login details provided to you (User name and Password).
Step 4: Plug Dongles with SIM card inside to USB port and then directly connect TAO 1pro to the bond router via LAN cable as shown below.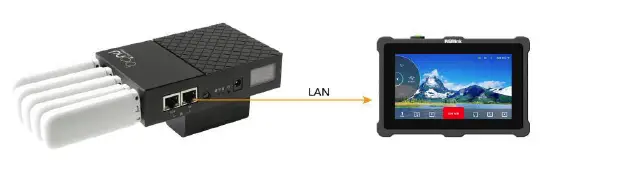
Step 5: Press the power switch .
Step 6: Check network settings in the LCD screen shown as below to confirm the IP address of cloud server. 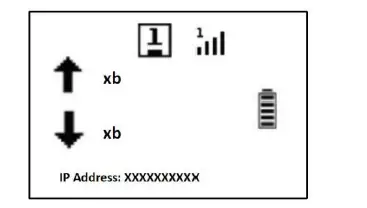
Step 7: Click【Status】to check the bonding status. 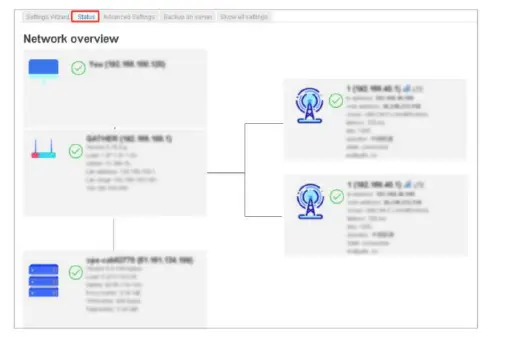
WIFI Connection 
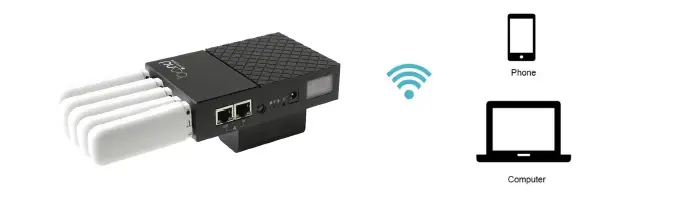
Plug the Dongle to the bond router or connect the bond router to a ethernet router, and connect the wifi in your computer of phone.(name:RGBlink,password:provided to you)
After wifi connection,check the IP address of your laptop/phone and enter it in a browser window,and then settings can be done to the router.(the operation steps as the same with<How to Config>)
How to Change Password 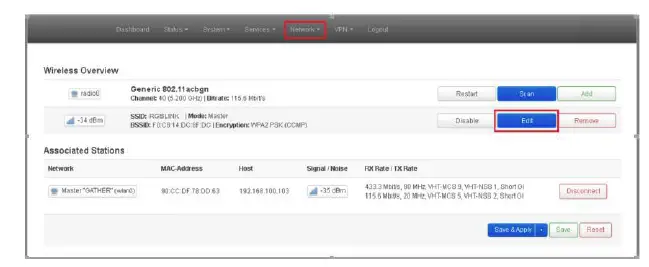
Step 1:Navigate to the【Network】–【Wireless】–【Edit】 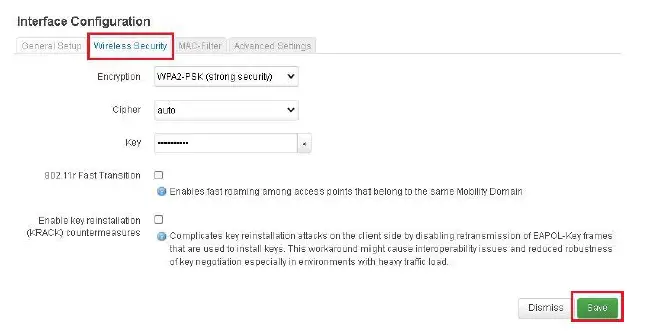
Step 2:Navigate to the【Interface Configuration】–【Wireless Security】, revise the key and then click【Save】.
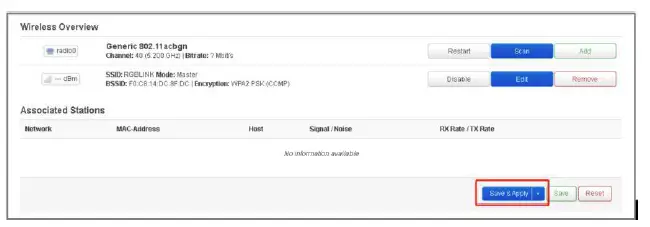
Step 3: Click【Save&Apply】,power off the bond 6 and restart again,the settings will make effect.
How to Apply
The bond router can work with TAO 1pro.
Connect TAO 1pro to the router via LAN port to stream to network platforms, such as YouTube, Twitter and so on. The wiring diagram as shown below:
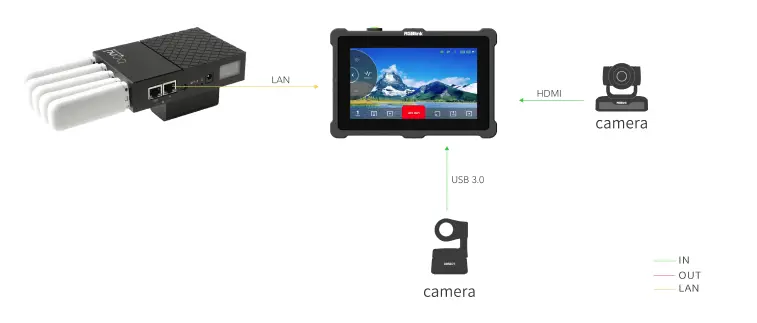
Step 1: Plug a Dongle with SIM card inside to USB port.

Step 2: Directly connect TAO 1pro to the bond router via LAN cable.
Step 3: Press the power switch.
Step 4: Check network settings in the LCD screen to confirm IP address is in the same subnet as the bond router -192.168.100.xxx.