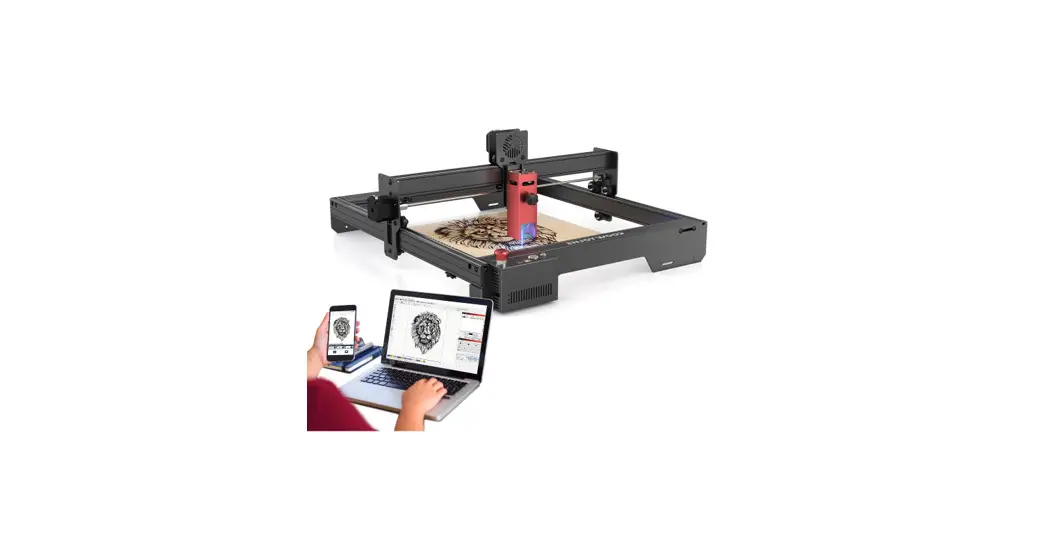
![]() CEL-E10 10W Laser Engraving Machine
CEL-E10 10W Laser Engraving Machine
Instruction Manual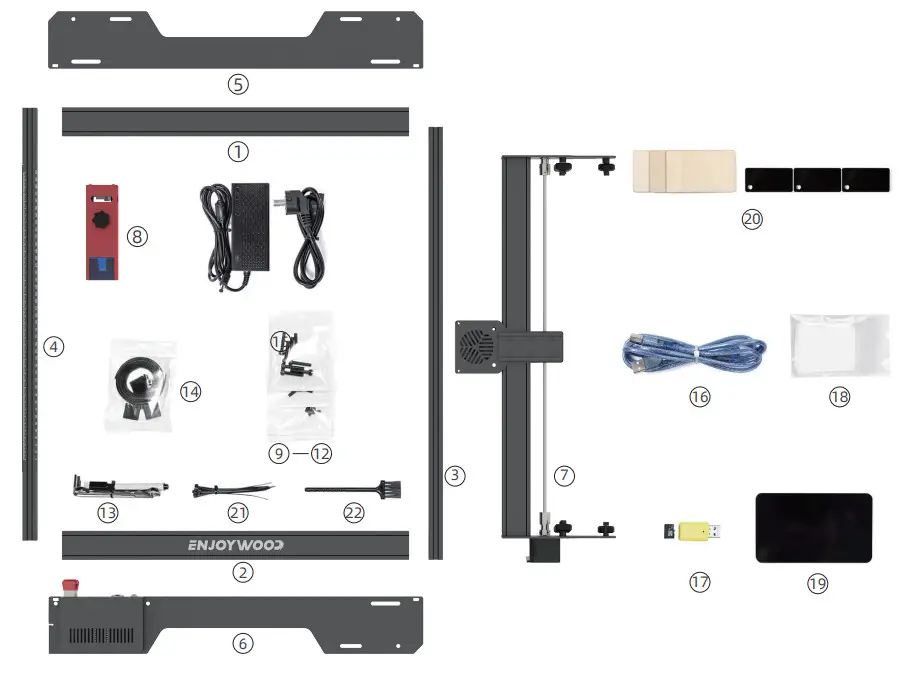
| ① UP-X ② DOWN-X ③ RIGHT-Y ④ LEFT-Y ⑤ UP-STAND ⑥ DOWN-STAND ⑦ X-AXIS ⑧ LASER MOUDLE ⑨ 7× M5*25MM SCREW ⑩ 7× M5*i4MM SCREW ⑪ 5× M5*6 SCREW | ⑫ 4× T NUTS ⑬ 1× WRENCH ⑭ 2× ROLLER BELT ⑮ 1× POWER PLUG ⑯ 1× PC CONNECT CABLE ⑰ 1× TF CARD ⑱ 1×DUST-FREE CLOTH ⑲ 1×FOCUS BOARD ⑳ ENGRAVER MATERIAL ㉑ NYLON ROPE ㉒ CLEANING BRUSH |
STEP 1 FRAME INSTALL
①+②+③+④ ⑨ 8PCS M5*25 SCREW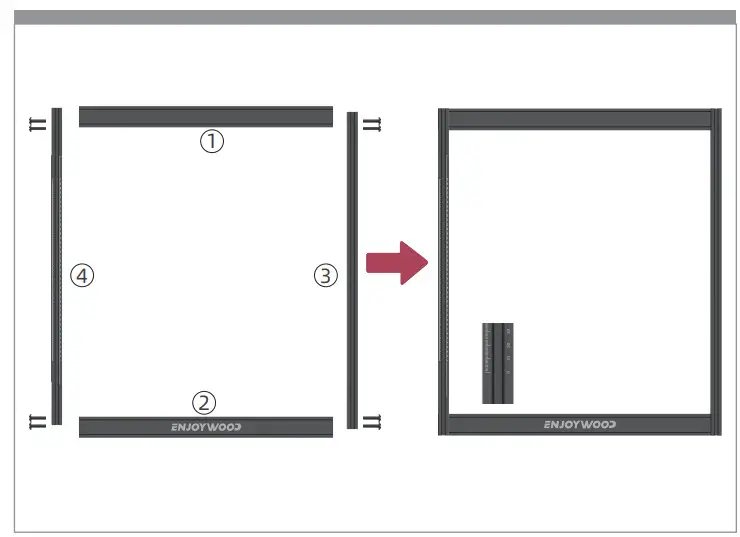
STEP 2 ADJUST THE WHEEL TO LOSE
⑦ X-AXIS ⑬ WRENCH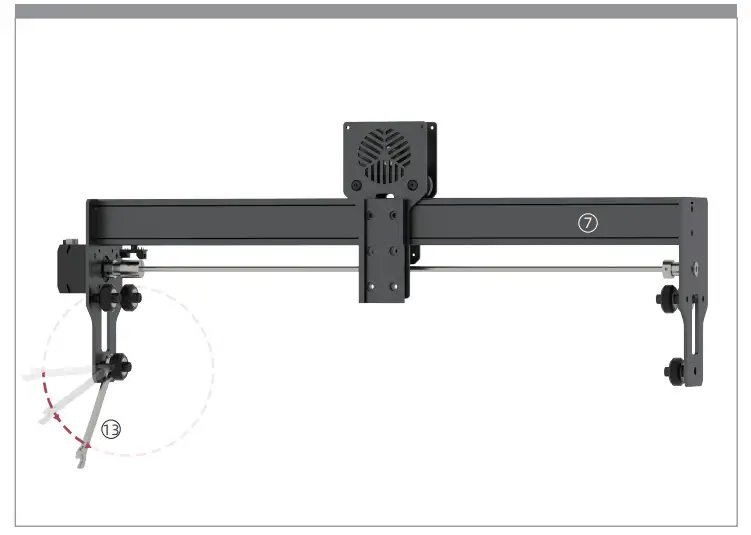
STEP 3 X-AXIS INSTALL
⑦ X-AXIS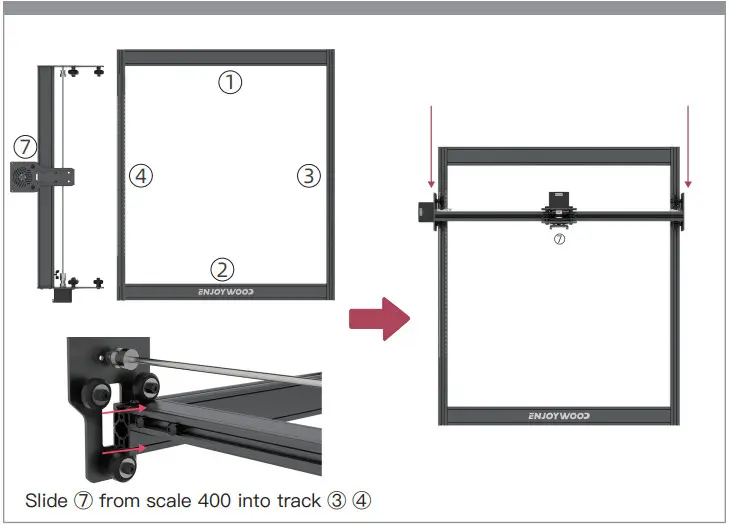
STEP 4 STAND INSTALL
⑤ UP-STAND
⑥ DOWN-STAND
⑩ 7 × M4*i4MM SCREW
⑪ 1 × M5*6MM SCREW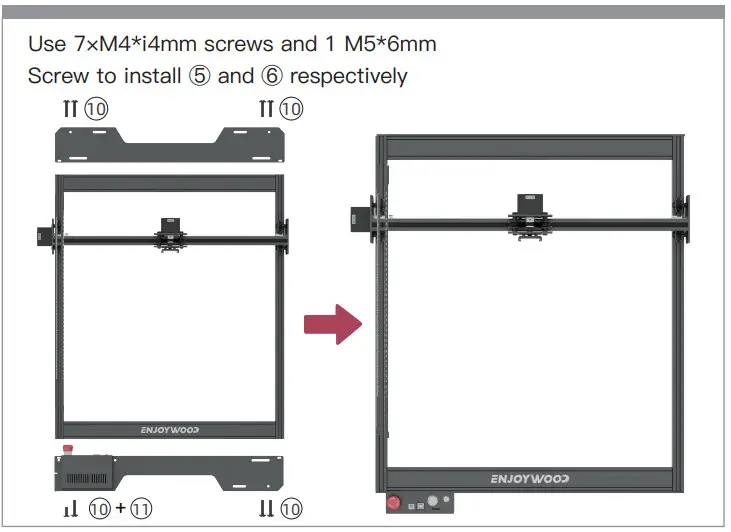
STEP 5 ROLLER BELT INSTALL
⑪ 4× M5*6 SCREW
⑫ 4× T NUTS
⑭ 2× ROLLER BELT
⑭ The sawtooth side is downward, inserted from the small holes at the left and right ends of ⑤ or ⑥.
When the belt slides into the track and passes the pulley, it is wound as shown in the picture
Fixing the belt: put ⑫ into the ③ and ④ chute.
Fix ⑫ with 4×m5*6mm screws, so as to compress the belt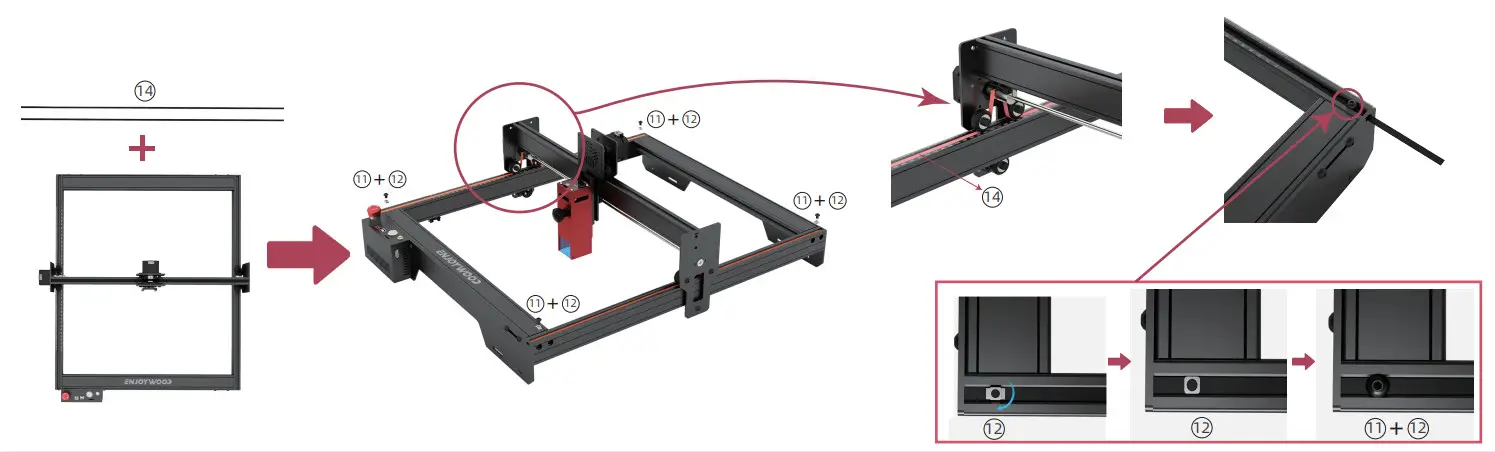
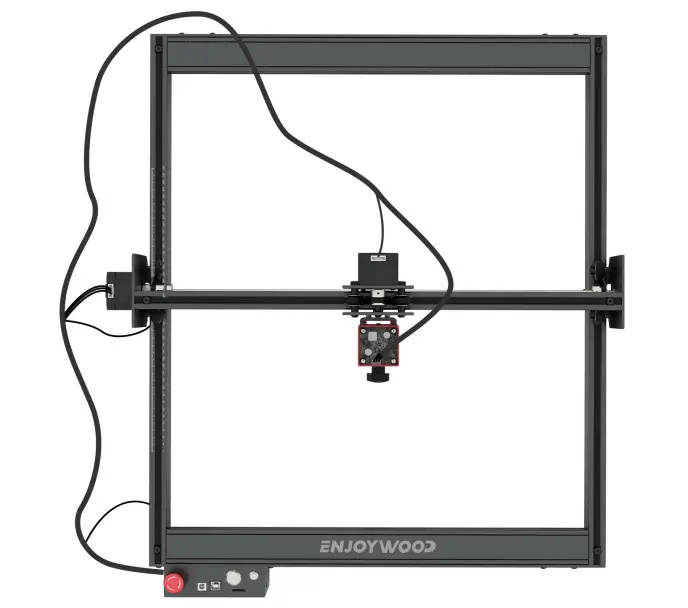
STEP 6 LASER MOUDLE
⑧LASER MOUDLE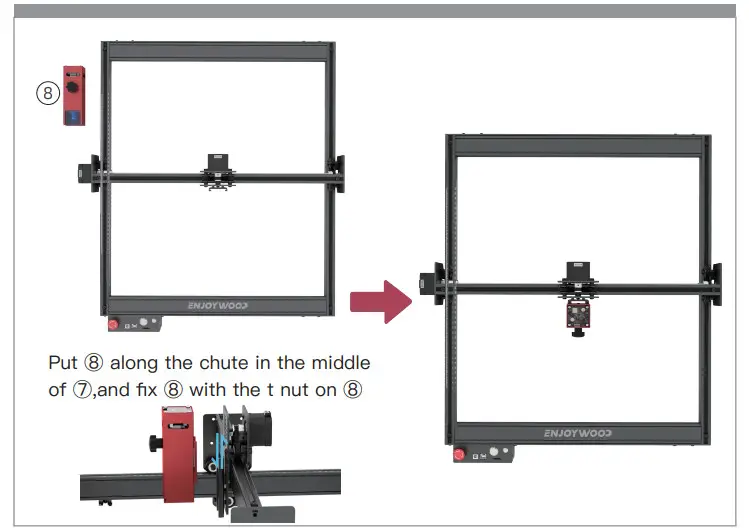
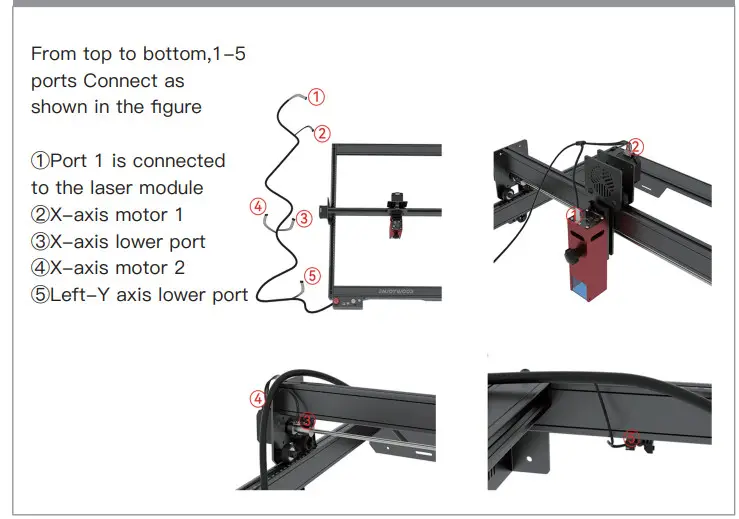
STEP 7 LINE CONNECTION
Finish!
Use ENJOYWOOD CEL-E10 starts to create your works!