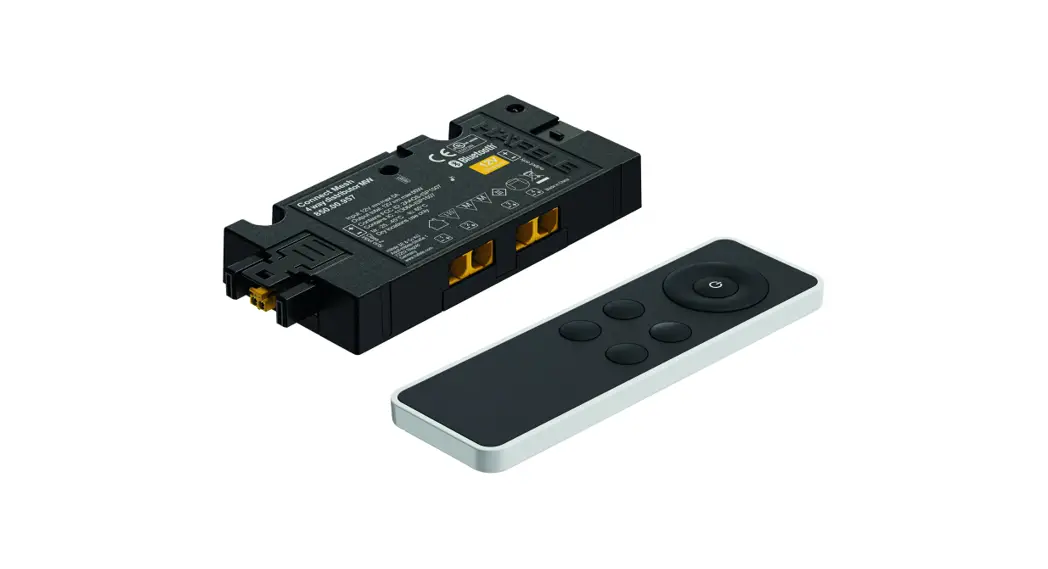
![]() Connect Mesh Eco Set Box RGB or Multi white and Remote Control
Connect Mesh Eco Set Box RGB or Multi white and Remote Control
Instruction Manual
History
| Version | Date | Changes |
| 1.0 | 03/2022 | Initial Documentation |
General Information
2.1 Valid for
| Article Number | Consists of | |
| Set 1 – Multiwhite 12V | 850.00.983 | 1 Remote Control 1 Connect Mesh Box Multiwhite 12 V |
| Set 2 – Multiwhite 24V | 850.00.984 | 1 Remote Control 1 Connect Mesh Box Multiwhite 24 V |
| Set 3 – RGB 12V | 850.00.985 | 1 Remote Control 1 Connect Mesh Box RGB 12 V |
| Set 4 – RGB 24V | 850.00.986 | 1 Remote Control 1 Connect Mesh Box RGB 24 V |
Your Connect Mesh Set is already paired and you can start right away.
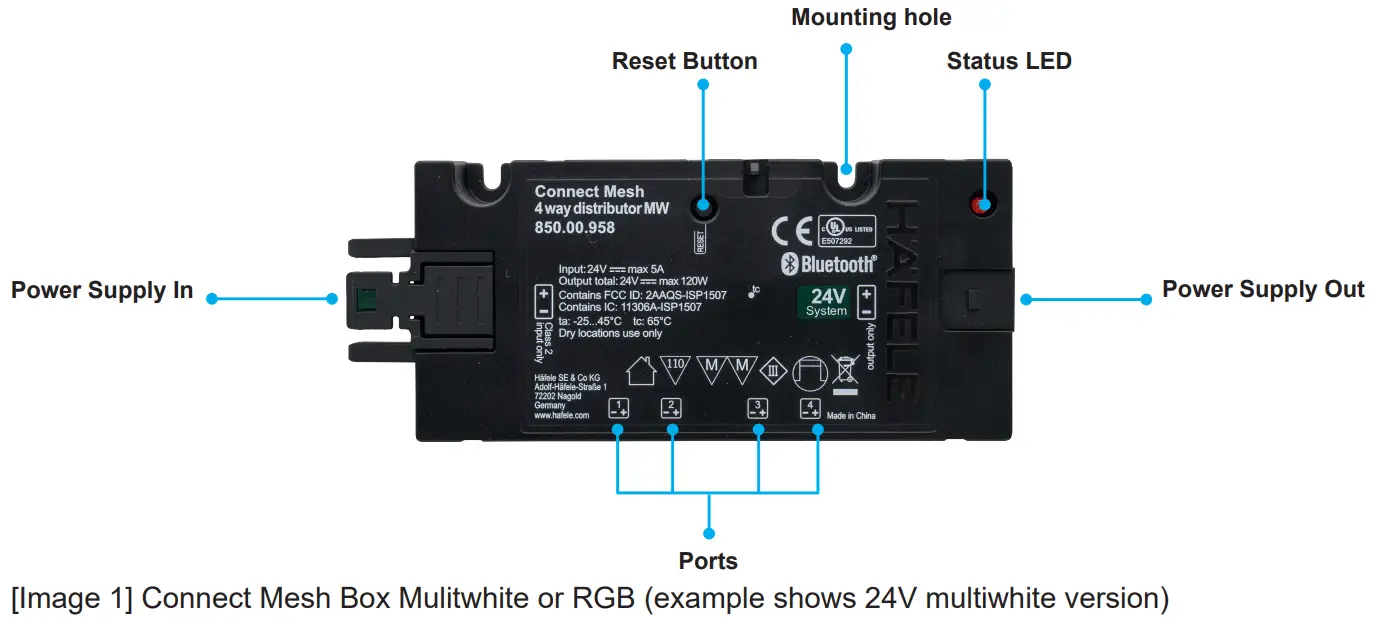
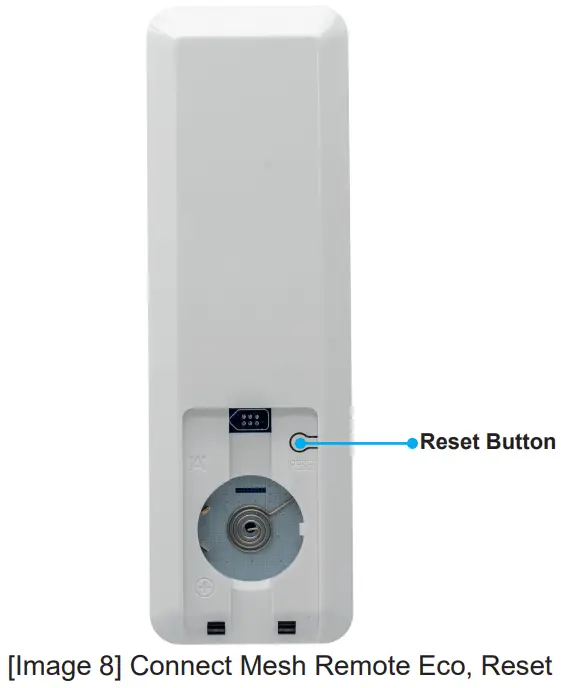
2.2 Connect Mesh Box Multi white/RGB
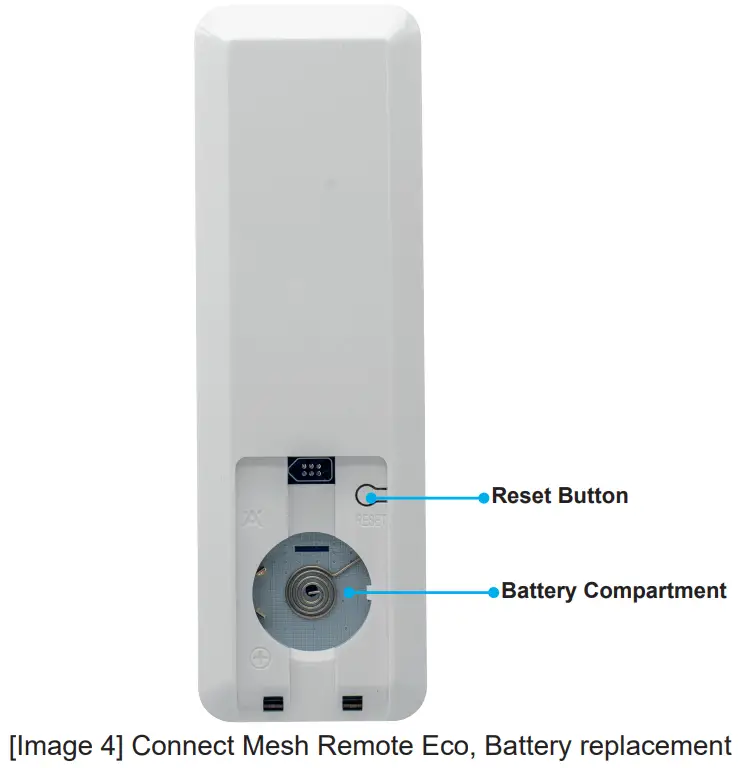
2.3 Connect Mesh Remote Eco

Getting started
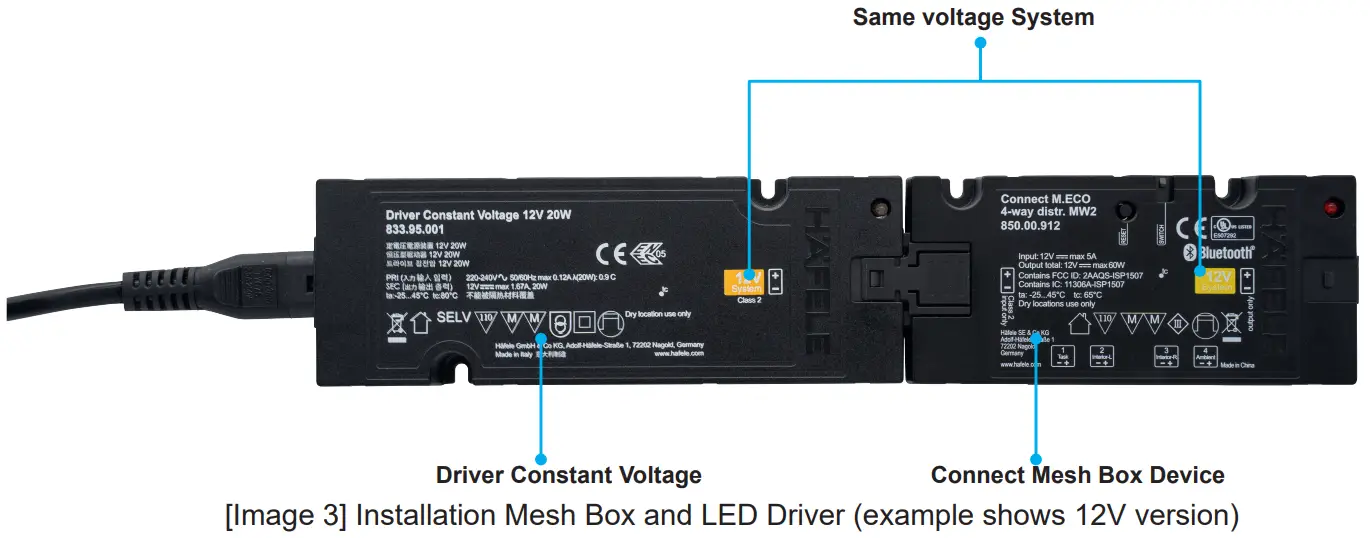
3.1 Installation
- Power the Connect Mesh Box by plugging it into a Häfele Loox LED Driver. Make sure that the power supply unit and the box are from the same voltage system.

- Please insert a new battery to set up the Connect Mesh Remote ECO. In order to do this, open the battery compartment on the back of the device and insert a coin cell battery (CR2032). The devices are already paired so after plugging in the lights you can start.

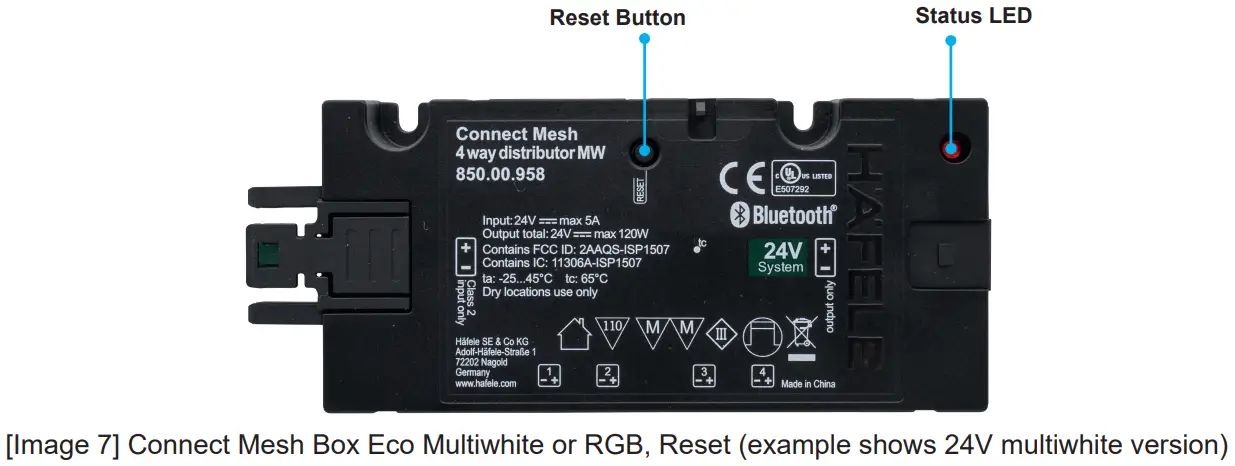
3.2 Functions
3.2.1 Functions general
> By pressing ON/OFF all ports are controlled at the same time.
> By pressing button 1 to 4 the selected Mesh Box turns ON. To turn this Mesh Box OFF press and hold the same button. To control the individual channels press the click wheel within 5 seconds.
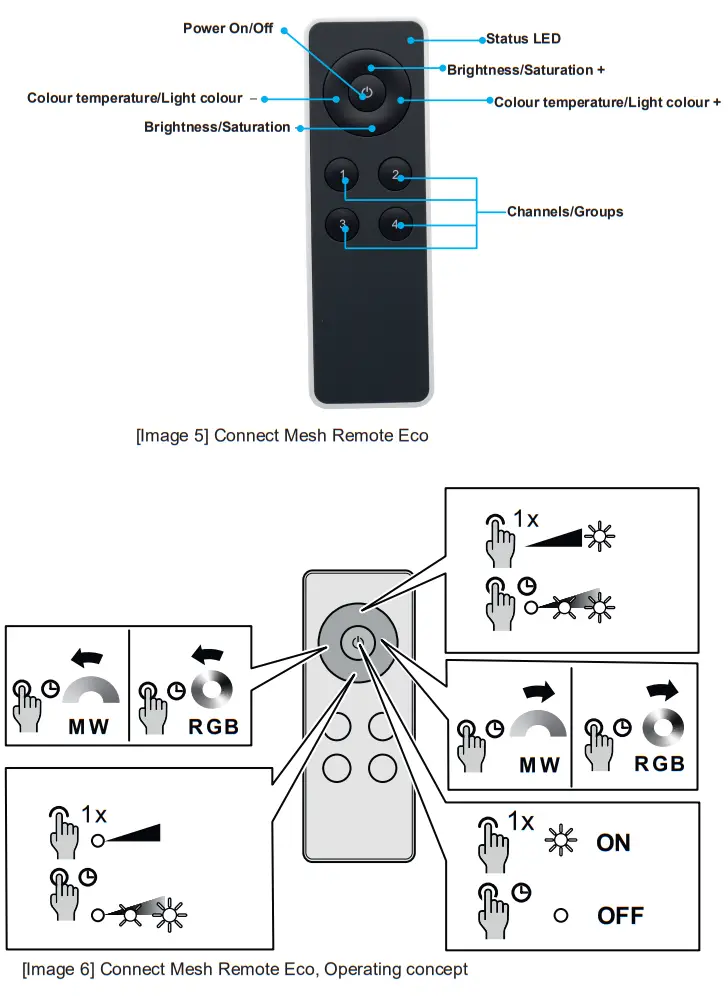
3.2.2 Changing Channels
Every Connect Mesh Remote Eco has 5 channels (channel 0 all, channels 1-4). The integrated battery saving mode makes the device fall asleep after 5 seconds of no button press.
If the user wakes up the Remote Eco by pressing any button, the remote device will control all channels (Channel 0). Use the channel buttons 1-4 under the control wheel to change and directly turn on the active channel of your Connect Mesh Box. After you press one of the channel buttons, the status LED turns solid red. This means that one of the channels is selected and that the Remote Eco now controls the selected channel instead of the default channel. When falling asleep the active channel will be set back to your default group and the LED turns off.
3.2.3 Turning Groups On/Off
You can turn on the active channel/group by pressing the Power button in the middle of the click wheel. To turn a channel/group off, press and hold the same button.
By pressing button 1 to 4 the selected channel turns on. To turn this channel of press and hold the same button.
3.2.4 Changing Brightness
You can control the brightness of devices in the same group by keeping “up” and “down” pressed on the click wheel. “Up” increases the brightness, while “down” reduces the brightness until the lights turn off completely. Releasing the press will set and lock the current state of the lights.
You can jump directly to the maximum or minimum brightness with a single click.
3.2.5 Changing Temperature
You can control the temperature of devices in the same group by keeping “left” and “right” on the click wheel pressed. “Right” makes the light temperature colder, while “left” makes the temperature warmer. Releasing the press will set and lock the current state of the lights. You can jump directly to the maximum or minimum temperature with a single click.
3.2.6 Changing Hue (Light colour)
To control the hue (colour) of RGB lights, you can double press and hold “right” to increase the hue and double press and hold “left” to reduce it. Releasing the second press will stop the transition and lock the current value.
You can jump directly to the maximum or minimum hue value with a double click.![]() Important
Important
Notice that the minimum and maximum hue values are 0 and 360 which both describe the colour red.
3.2.7 Colour run
To start the smooth running change of hue (colour) of RGB lights, you can press and hold „left“ or „right“ to start the change. To lock the running change while holding „left“ or „right“ press the middle „on/off“ button once.
To quit the run, press and hold „left“ or „right“ button shortly.
Resetting
4.1 Reset of Connect Mesh Box Eco
Press the Reset button for at least 8 seconds and release it. This will reset the Connect Mesh device. The Status LED will start blinking.
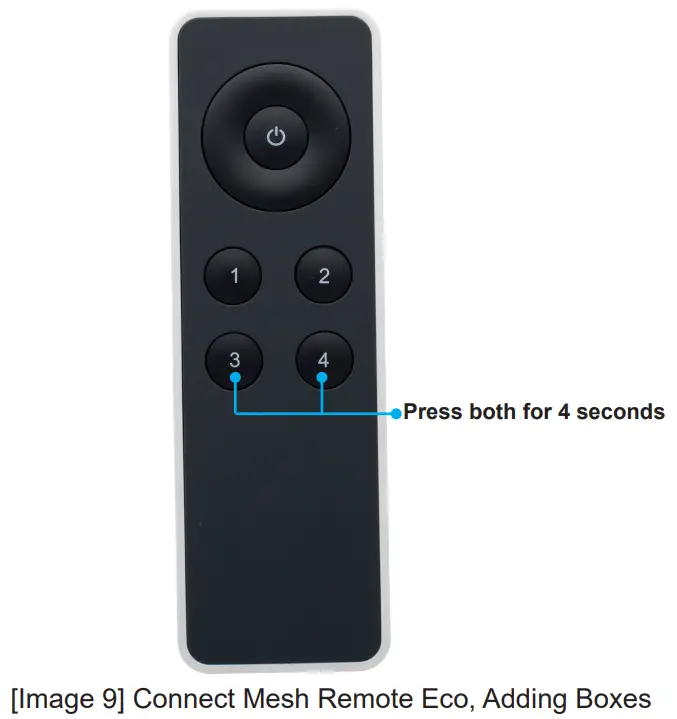
4.2 Reset of Connect Mesh Remote Eco
Press the reset button for at least 8 seconds and release it. This will reset the Connect Mesh device. The Status LED will start blinking.
Provisioning
5.1 Adding Connect Mesh Boxes
For adding boxes press at Connect Mesh Remote Eco the channel buttons 3 and 4 of the Connect Mesh Remote Eco simultaneously for 4 seconds.
The Connect Mesh Remote Eco status LED blinks slowly to indicate the running scan for addable mesh devices. The Connect Mesh Box you would like to add to your network has to be in Provisioning Mode (Status LED blinking). After the remote finds a device in provisioning mode, the status LED of the Connect Mesh Remote Eco starts to flash faster to indicate the current steps of the provisioning process.
During process the Connect Mesh Box starts to double blink. Now you have to assign the box to the channel you would like to set.
After the found Connect Mesh Box was added successfully (Status LED Mesh Box constant on), the Connect Mesh Remote control restarts scanning for the next device to add (status LED blinks slowly).
To finish the process, please press any button on the control wheel
5.2 Creation of a new network (after complete reset of all devices)
Refer to the same process like “adding Connect Mesh boxes” in chapter 5.1.
Status LED
6.1 Status LED Connect Mesh Box Eco
The status LED is located on the top of the device.
| Status LED Behaviour | Meaning |
| Off | The Connect Mesh Box has no power. |
| Repeated blinking frequency with one-second pause | The Connect Mesh Box is in provisioning mode and ready to be provisioned. |
| Solid Red | The Connect Mesh Box is turned on and connected to the BLE Mesh Network. |
| Blinking rapidly | The Connect Mesh Box is in OTA update mode and is ready to be updated. It will remain in OTA update mode for 60 seconds or until the power is interrupted. |
6.2 Connect Mesh Remote Eco
The status LED is located in the upper right corner of the device and is not visible if turned off.
| Status LED Behaviour | Meaning |
| Off | The Connect Mesh Remote Eco is either in normal operation mode or its battery is empty. |
| Blinking | The Connect Mesh Remote Eco has a low battery. Please change the battery soon. |
| Repeated blinking frequency with one-second pause | The Connect Mesh Remote Eco is in provisioning mode and shows a blinking frequency. |
| Solid Red | One of the four channel/group buttons was pressed. The selected channel can now be controlled until the Remote Eco falls back asleep. |
| Blinking rapidly | The Connect Mesh Remote Eco is in OTA update mode and is ready to be updated. It will remain in OTA update mode for 60 seconds or until the power is interrupted. |
![]() Subject to alteration
Subject to alteration
© 2022 by Häfele SE & Co KG
Adolf-Häfele-Str. 1
D-72202 Nagold
www.hafele.com
732.28.436
HDE 23.06.22


