![]() PRODUCT ASSEMBLY INSTRUCTIONS
PRODUCT ASSEMBLY INSTRUCTIONS
Item#: ASTORIA QUEEN BEDFRAME
SETAHBDQN3A Astoria Series 3 Piece Bedroom Set
Helpers needed to assemble: 2
Estimate time frame to assemble: 1 Hour
Tools Needed not Included: Phillips Screwdriver
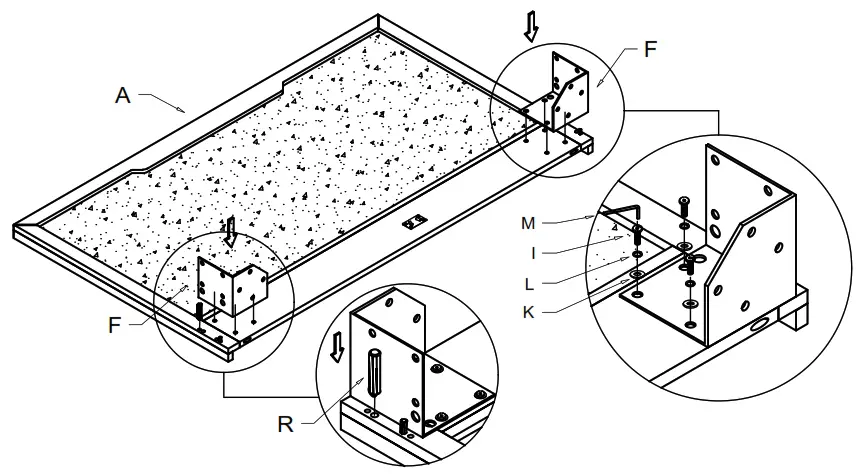
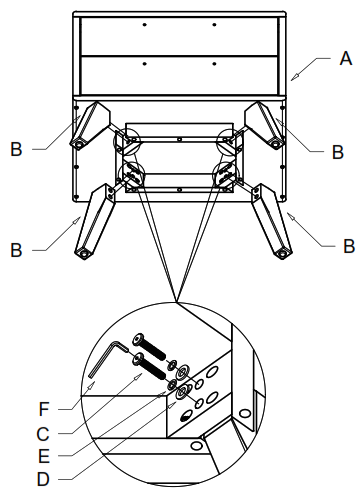
- Step 1: Make sure it’s on a safe surface where the bedframe cannot be scratched and or damaged and close enough to the location
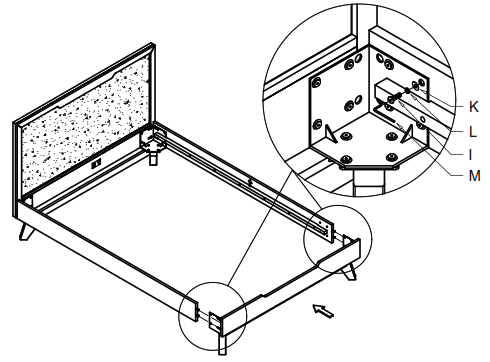
- Step 2: Locate the headboard and the two frame brackets, as these will be the first to be attached.
- Step 3: Using the Allen Key you will screw in the headboard and the frame brackets using (4 Bolt – M8 x 20mm; 4 Lock Washer -Ø12mm; 4 Washer – Ø19mm) for each bracket. First place the two washers and bolt on the interior of the frame using the Allen Key.
i. Repeat for each bracket and make sure it’s firmly attached to the headboard.
ii. Locate the dowel, and place 1 on each bracket on the outside of the bracket.

| # | Picture | Description | Quantity |
| A |  | Headboard | 1 |
| B |  | Siderail | 2 |
| C |  | Footboard | 1 |
| D | Middle Support Bar | 1 | |
| E |  | Slat | 16 |
| F |  | Frame Bracket | 4 |
| G |  | Leg Set | 2 |
| H | Middle Leg | 2 | |
| I |  | Bolt – M8 x 20 | 48 |
| K |  | Washer – Ø19 mm | 48 |
| L | Lock Washer – Ø12 mm | 48 | |
| M | 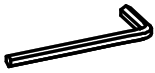 | Allen key Wrench V4 | 1 |
| N | 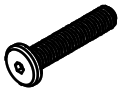 | Bolt – M8 x 40 mm | 2 |
| O |  | Bolt – M6 x 90 mm | 4 |
| P |  | Insert Nut – M6-thread | 4 |
| Q |  | Srew – M4 x 30 | 8 |
| R |  | Dowel – Ø10 x 30 | 8 |
| S |  | Washer – Ø16 | 4 |
| T |  | Lock Washer – Ø12 | 4 |
- Step 4: Locate the leg set as this will be assembled onto the preassembled heard board and rails.
- Step 5: Using the Allen Key you will screw in the headboard and the one set of leg using (4 Bolt – M8 x 20mm; 4 Lock Washer -Ø12mm; 4 Washer – Ø19mm) for each bracket. First place the two washers and bolt on the interior of the frame using the Allen Key.
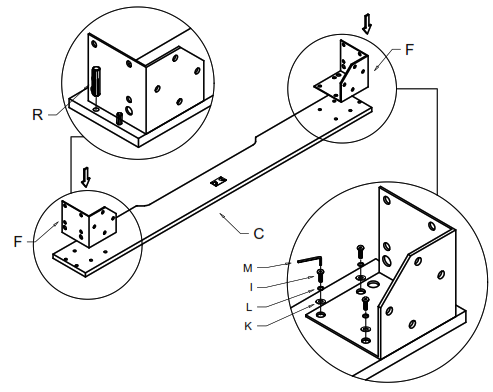
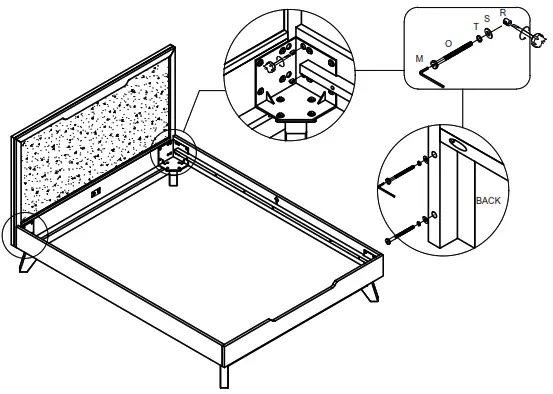
- Step 6: Proceed to locate the end and the two brackets.
- Step 7: Using the Allen Key you will screw in the end and the frame brackets using (4 Bolt – M8 x 20mm; 4 Lock Washer -Ø12mm; 4 Washer Ø19mm) for each bracket. First place the two washers and bolt on the interior of the frame using the Allen Key.
- Step 8: Locate the dowel, and place 1 on each bracket on the outside of the bracket.
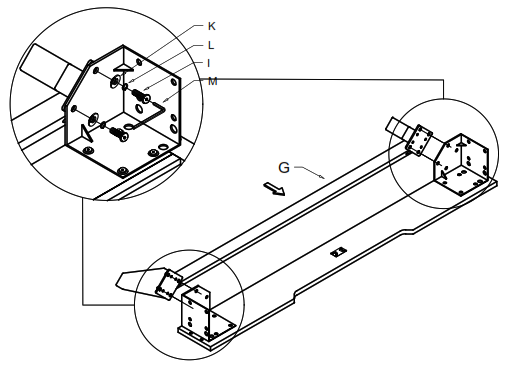
- Step 9: Locate the leg set as this will be assembled onto the preassembled footboard.
- Step 10: Using the Allen Key you will screw in the footboard and the one set of leg using (4 Bolt – M8 x 20mm; 4 Lock Washer -Ø12mm; 4 Washer Ø19mm) for each bracket. First place the two washers and bolt on the interior of the frame using the Allen Key.
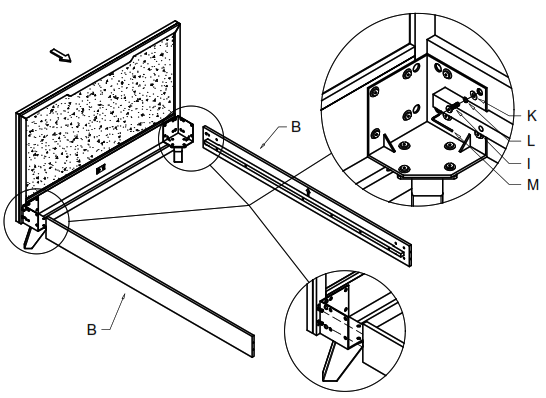
- Step 11: Now that we’ve preassembled parts, we will connect the headboard and the siderails.
- Step 12: Locate the 2 siderails as this will be assembled onto the preassembled footboard and headboard.
- Step 13: Using the Allen Key you will screw in the headboard and the one side rail (4 Bolt – M8 x 20mm; 4 Lock Washer -Ø12mm; 4 Washer Ø19mm) for each bracket. First place the two washers and bolt on the interior of the sideboard frame using the Allen Key.
- Step 14: Now that we’ve preassembled parts, we will connect the footboard and the siderails.
- Step 15: Using the Allen Key you will screw in the footboard and the one side rail (4 Bolt – M8 x 20mm; 4 Lock Washer -Ø12mm; 4 Washer Ø19mm) for each bracket. First place the two washers and bolt on the interior of the sideboard frame using the Allen Key.
- Step 16: Now that we’ve connected the headboard and footboard with the side rails, we will proceed to reinforce.
- Step 17: Using the Allen Key you will screw in the side rail from the inside and outside of the frame using (2 Bolt – M6 x 90mm; 2 Lock Washer -Ø10mm; 2 Washer – Ø16mm) for each bracket. At the same time, you need to place a (Insert Nut – M6 thread) on the inside of the frame where the bolt will lock into. And repeat for another side.
i. Repeat Step 16-17 for each bracket connecting on the headboard and side rails frame.
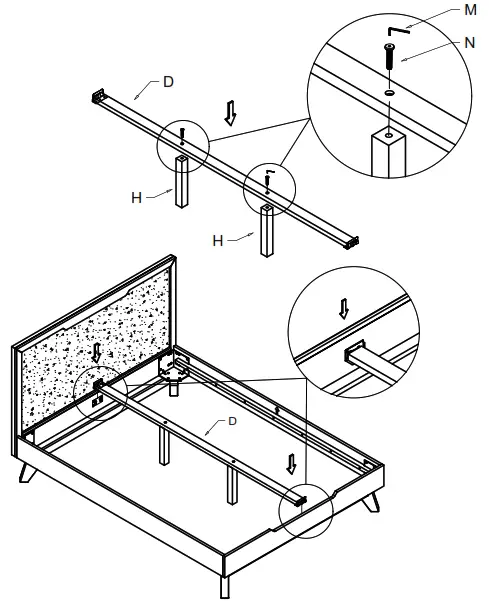
- Step 18: Now that we’ve connected the headboard and footboard and reinforced the frame, we will start to insert the middle support bars.
- Step 19: Locate the middle supports bar and 2 middle legs as this will be assembled onto the preassembled frame.
- Step 20: Using the Allen Key you will screw in the leg down onto the middle support bar (Bolt – M8 x 40mm) for each leg.
i. Repeat Steps 19-20 for each leg. - Step 20: Once assembled, place the preassembled middle support bar on the frame to set evenly equal on both the headboard and footboard.
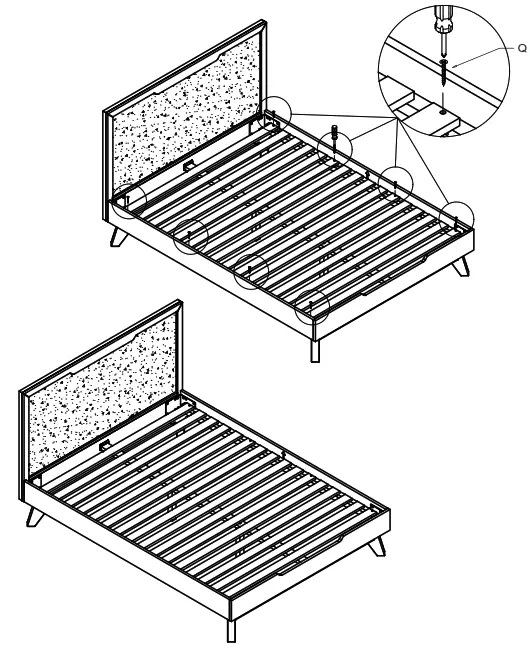
- Step 21: Locate the slats as they will be assembled onto the preassembled frame.
- Step 22: Using a Phillips Screwdriver you will screw down the slats down onto the side rails (Screw – M4 x 30mm) for every 4 slats.
- Step 23: Test that the bedframe is firmly on the ground and the bedframe does not wiggle.
- Step 24: Enjoy your new bedframe.
PRODUCT ASSEMBLY INSTRUCTIONS
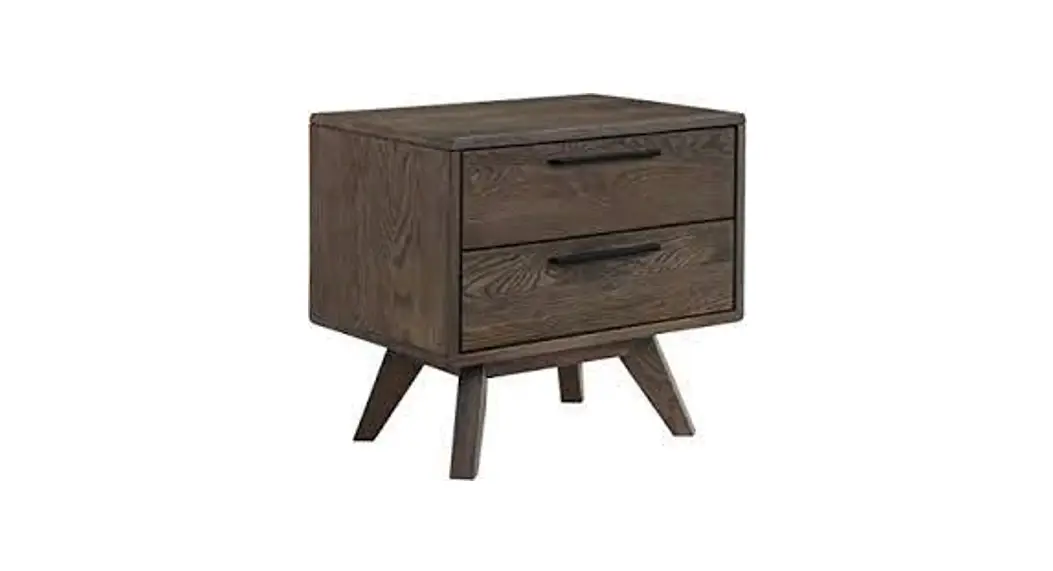
Item#: ASTORIA NIGHSTAND
Helpers needed to assemble: 1
Estimate time frame to assemble: 30 minutes
Tools Needed not Included: Phillips Screwdriver
| # | Picture | Description | Quannity |
| A |  | Nighstand | 1 |
| B | Leg | 4 | |
| C | | Bolt – M8 x 40 | 8 |
| D | | Flat Washer Ø19 mm | 8 |
| E | | Lock Washer Ø12 mm | 8 |
| F | | Allen Wrench V4 | 1 |
| G | | Bolt – M4 x 40 | 4 |
| H |  | Handle | 2 |
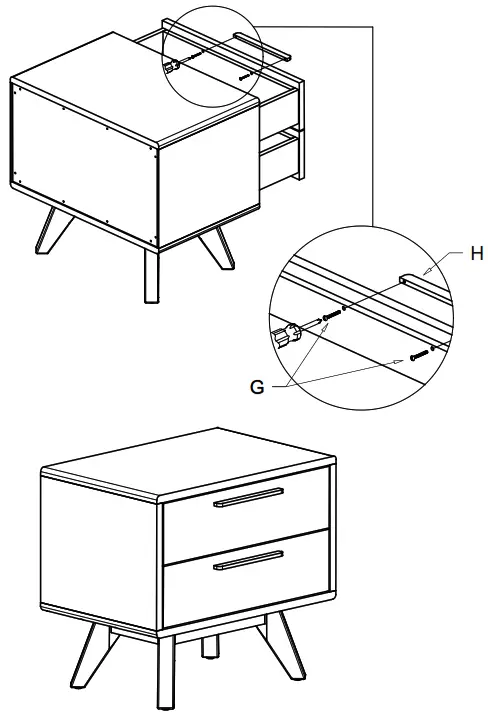
- Step 1: Place the nightstand on its length side on the floor as seen. Make sure it’s on a safe surface where the table cannot be scratched and or damaged.
- Step 2: Align the leg with the nightstand holes as seen.
- Step 3: Identify the first leg and the bolt in using the Allen Key as follows (2 Bolt – M8 x 40mm; 2 flat washers; 2 lock washers) per leg.
- Step 4: Using the Allen Key you will tighten the bolts until the leg is firmly attached.
i. Repeats Steps 2-4 for each leg.
- Step 5: Proceed to flip the dresser back upright.
- Step 6: Identify the handles that will be screwed into the drawers.
- Step 7: Bolt in the handles using the Phillips Screwdriver as follows (2 Bolt – M4 x 40mm) per handle.
- Step 8: Using the Phillips Screwdriver you will tighten the bolts until the handle is firmly attached.
- Step 9: Test the nightstand is firmly on the wall and ground and the dresser does not wiggle.
- Step 10: Enjoy your new nightstand.
![]()


