![]() 019915 LED Strip
019915 LED Strip
Instruction Manual
LED STRIP
LED-LIST
![]()
 OPERATING INSTRUCTIONS
Important! Read the user instructions carefully before use. Save them for future reference. (Translation of the original instructions)
Jula reserves the right to make changes.
For the latest version of operating instructions, see www.jula.com
 |  |
 |  |
 |  |
SAFETY INSTRUCTIONS
Carefully read the instructions before use!
- Save them for future reference.
- Check that all connections are properly made before switching on the product.
- If the product does not work, check that the circuit is supplied with voltage.
- Keep children at a safe distance from the product when it is in use.
- Exceeding the permitted maximum voltage can damage the product, or reduce its life span.
- If the permitted maximum temperature is exceeded this can also damage the product, or reduce its life span.
SYMBOLS
| Read the instructions. | |
| Only intended for indoor use. | |
| Safety class II. | |
 | Approved in accordance with the relevant directives. |
| ecycle discarded products in accordance with local regulations. |
TECHNICAL DATA
| Rated voltage | 230 V ~ 50 Hz |
| Protection rating | IP20 |
| Operating temperature | -20 to 40°C |
| Storage temperature | -20 to 45°C |
| Energy class | F |
| Life span | 30000 h |
019915
| Output | 4.5 W |
| No. of LEDs | 60 |
| Color temperature | 2700 K |
| Luminous flux | 450 lm |
| Size | 2000 x 8 x 2 mm |
019916
| Output | 16 W |
| No. of LEDs | 180 |
| Color temperature | 2700 K |
| Luminous flux | 1200 lm |
| Size | 3000 x 8 x 3 mm |
019917
| Output | 20 W |
| No. of LEDs | 300 |
| Color temperature | 2700 K |
| Luminous flux | 1600 lm |
| Size | 5000 x 8 x 3 mm |
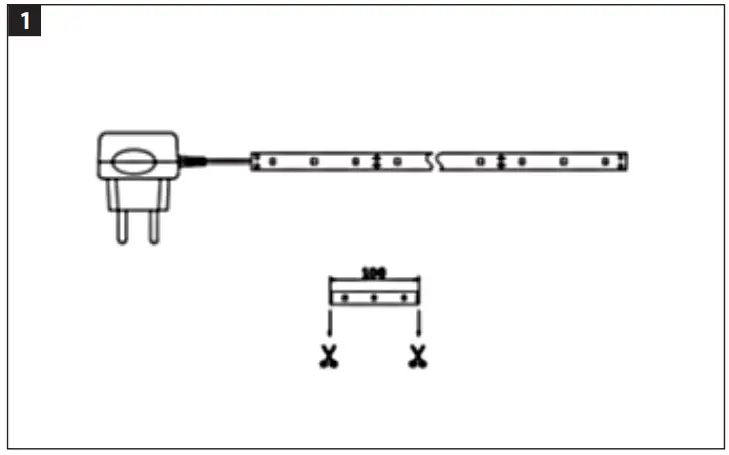
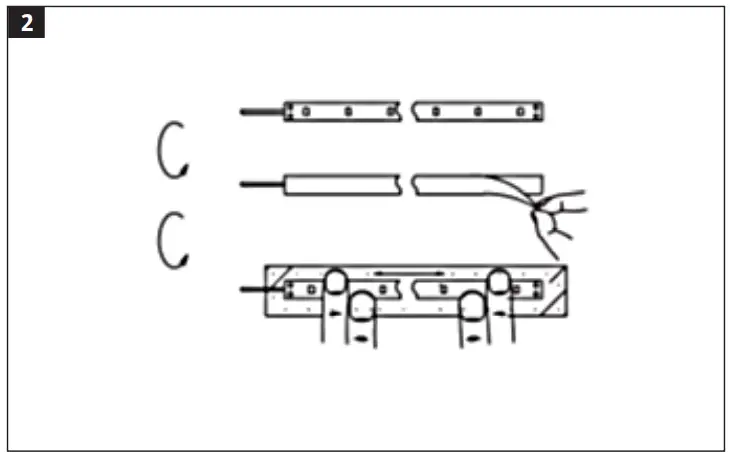
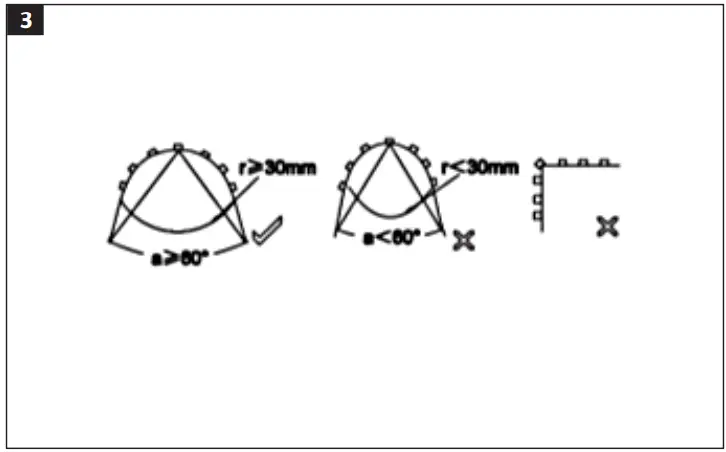
INSTALLATION
FIG. 1
FIG. 2
FIG. 3
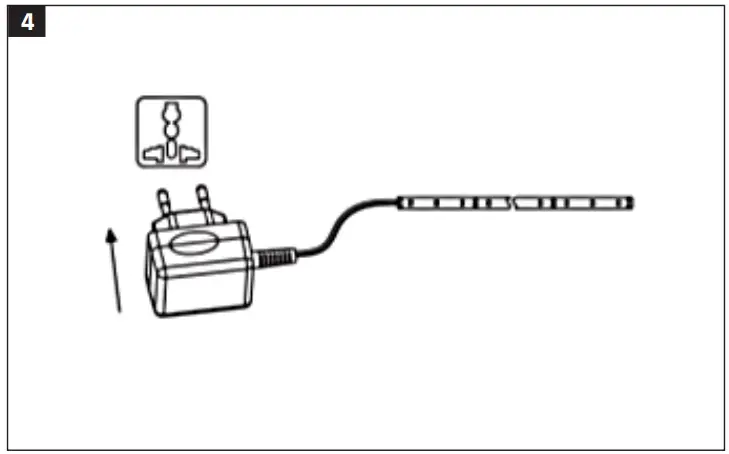
FIG. 4
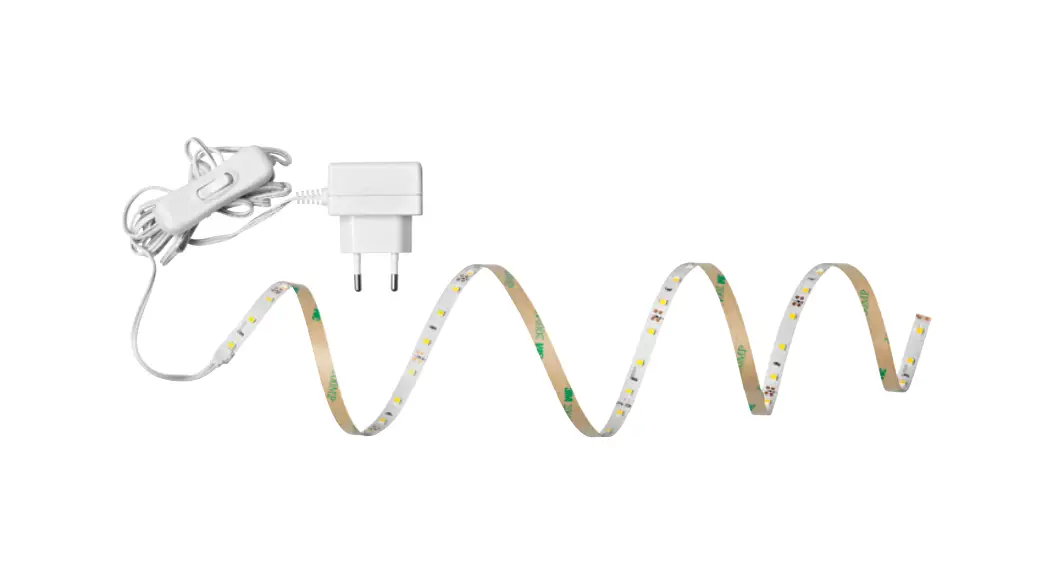
USE
- Remove the protective paper and attach the LED strip to the required place.
- Plug the plug into a powerpoint.
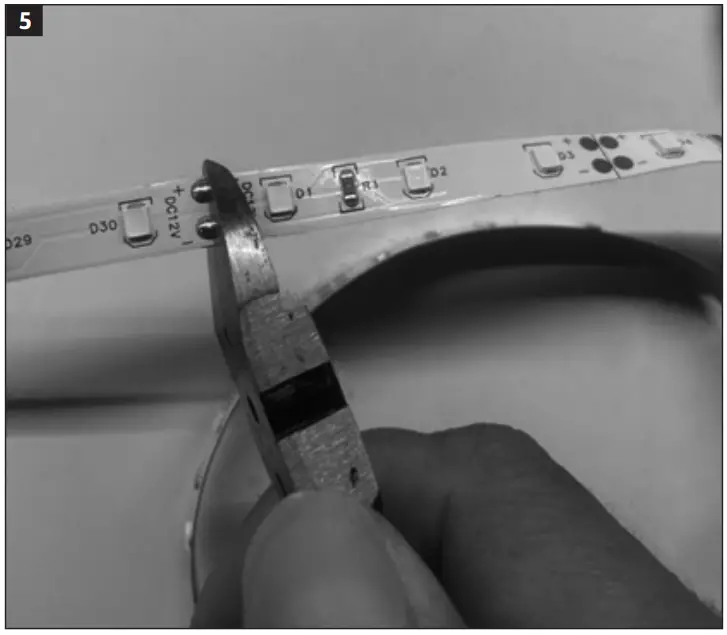
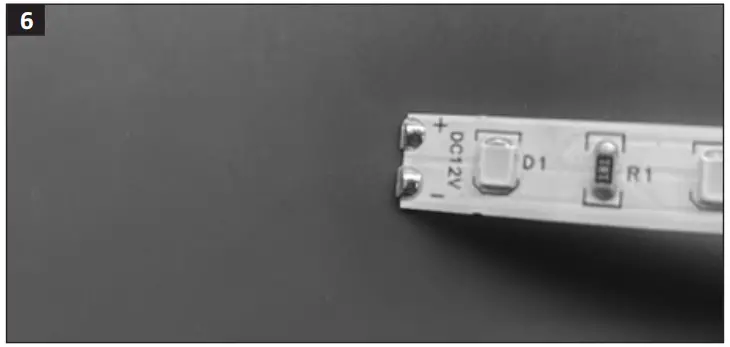
REMOVAL
- Cut off in the middle of the 50 mm long soldered joint.
- Test the light source by connecting to 12 VDC.
FIG. 5
FIG. 6
2022-03-16
© Jula AB
JULA AB, BOX 363, SE-532 24 SKARA


