![]() SLIDEDRIVER II FIRE AND EMERGENCY ACCESS LOCK BOX
SLIDEDRIVER II FIRE AND EMERGENCY ACCESS LOCK BOX
User Guide
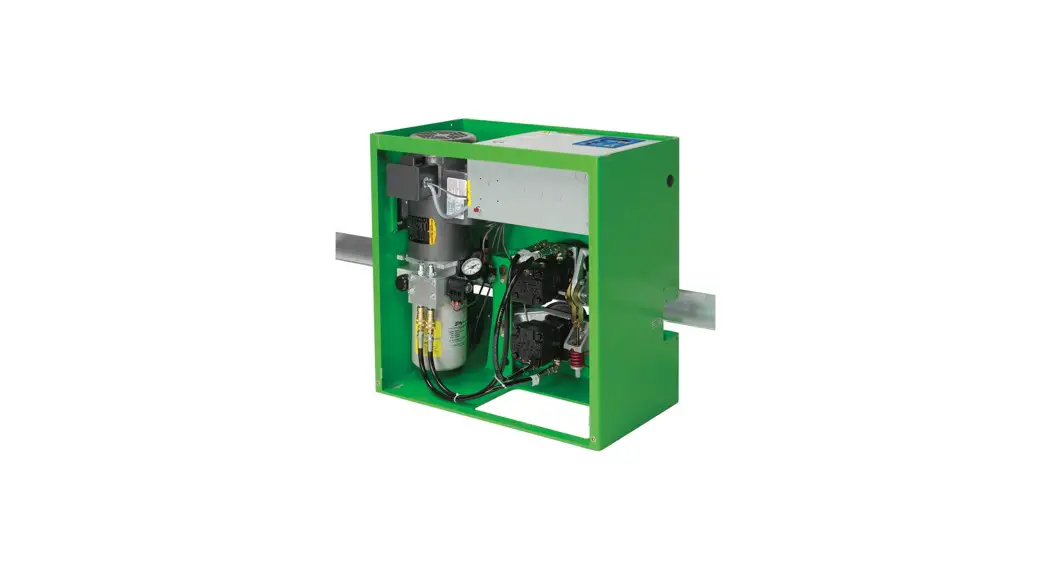
SlideDriver II D1159 Fire and Emergency Access Lock Box
The Fire and Emergency Access Lock Box provides a manual release mechanism for the gate and a microswitch that can be wired to the Smart Touch 720/725 Controller inside the SlideDriver II gate operator for Fire Department OPEN functionality.
PARTS
- Fire and emergency access lock box and microswitch
- Drive wheel compression spring
- Handle release assembly
- Pull cable and handle
- Cable jacket
- Cable jacket ferrule (x2)
HARDWARE
- 1/4-20 x 1/2 in bolt
- 1/4 in washer
TOOLS REQUIRED
- Phillips-head screwdriver
- Standard hex key set
- Standard socket wrench set
- Standard socket set
- Needle nose pliers with wire cutter
![]() CAUTION
CAUTION
Turn OFF power to the SlideDriver II and take the necessary precautions to avoid electrical shock.
INSTALL THE EMERGENCY ACCESS LOCK BOX
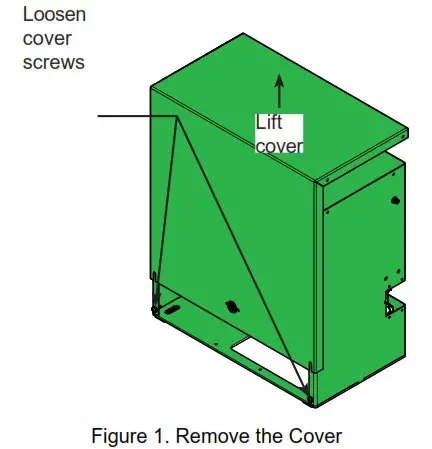
- Remove the cover (Figure 1).
- Open the gate.
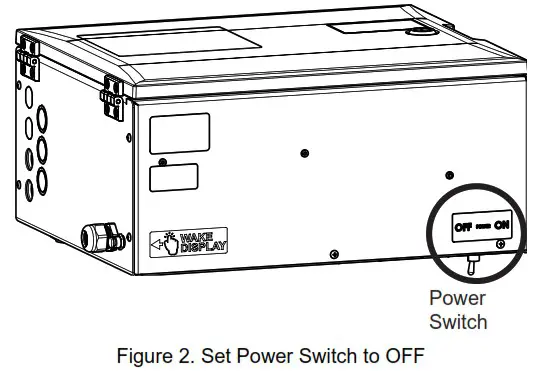
- Set power switch to OFF (Figure 2).
- Carefully release the drive wheels.
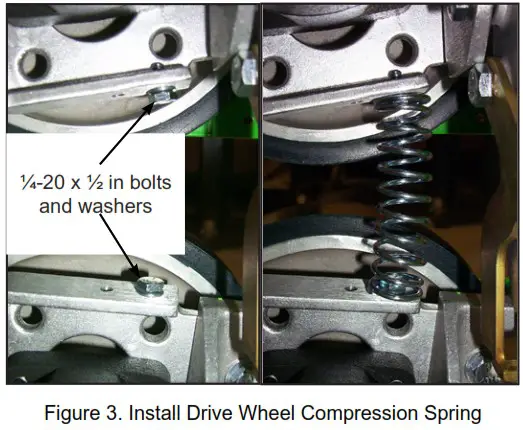
- Install the drive wheel compression spring (Figure 3).
- Assemble cable release bracket (Figure 4).
 a. Install cable clamp and loosely attach nut.
b. Assemble cable ferrule and tighten.
c. Assemble cable release bracket hinge and ensure that cable release still rotates. - Install the cable release bracket (Figure 5).
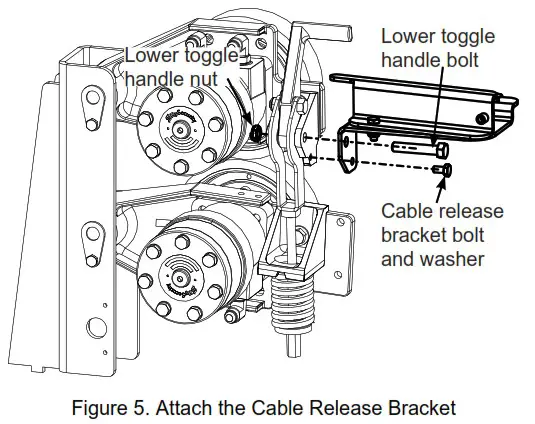 a. Remove the lower toggle handle nut and bolt.
b. Put the cable release bracket in place and install the lower toggle handle bolt/nut and the cable release bracket bolt/washer.
c. Make sure that the cable release bracket is securely attached. - Carefully engage the drive wheels.
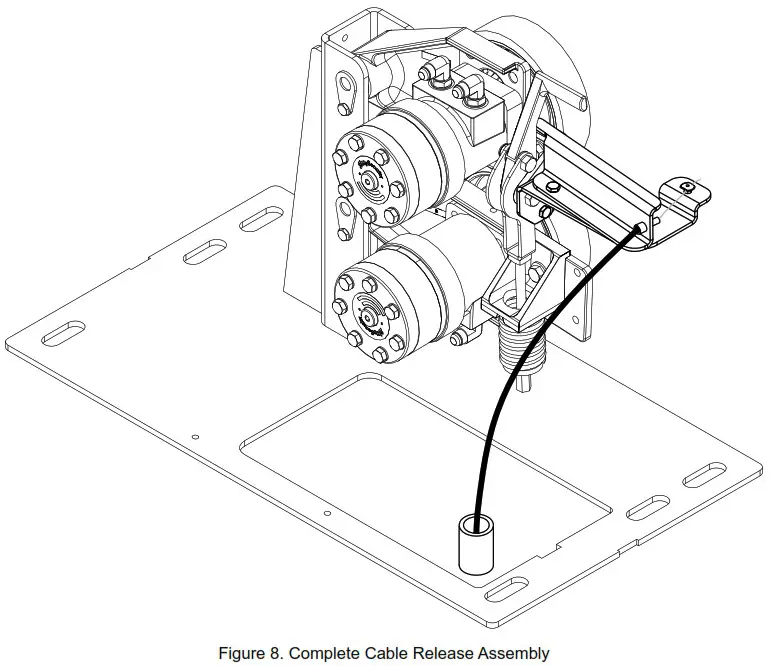
- Mount the Fire and Emergency Access Lock Box with the hardware provided, in an appropriate location, and with conduit to the SlideDriver II chassis.
- Measure and cut cable jacket to length.
- Feed cable through cable jacket. Stop when the cable reaches the end of the cable jacket.
- Feed cable and cable jacket through conduit to the cable ferrule in the release bracket.
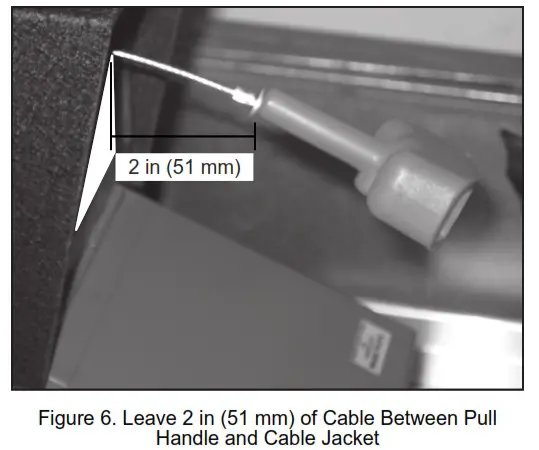
- Leave 2 in (51 mm) of cable between the handle and the lock box cable ferrule. Leave 3 in (75 mm) of cable past the cable ferrule in the cable release bracket and cut the excess cable (Figure 6).
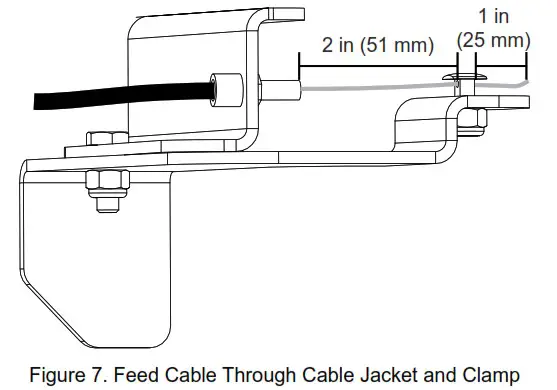
- Route the cable through the cable clamp with 1 inch (25 mm) extending past the clamp (Figure 7).
- Tighten the cable clamp.
- Optional: connect microswitch COM and NC (the switch is held down by the lock box door) to Smart Touch 720/725 Controller Emergency Input (Figure 9) or wire to external access control system.
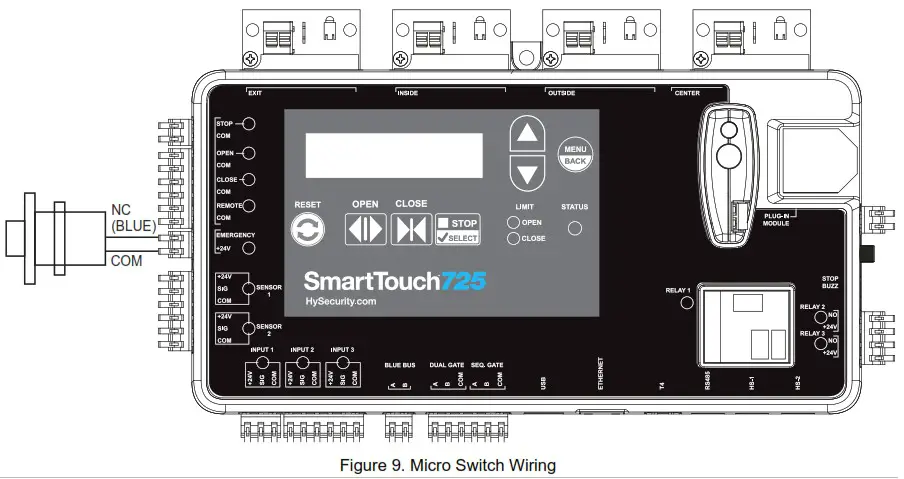 Note: Emergency Input is set to Fire Department Open by default. See Slide Driver II Digital Installation Manual for additional details.
 - Check red compression spring and adjust to 2 in if necessary.
- Test the cable release and microswitch (if connected).
- Reset the toggle handle and return Slide Driver II to normal operation.


