![]() Installation Procedures
Installation Procedures
Jet Package Kits
PKG-1-4SD Jet Package Kits
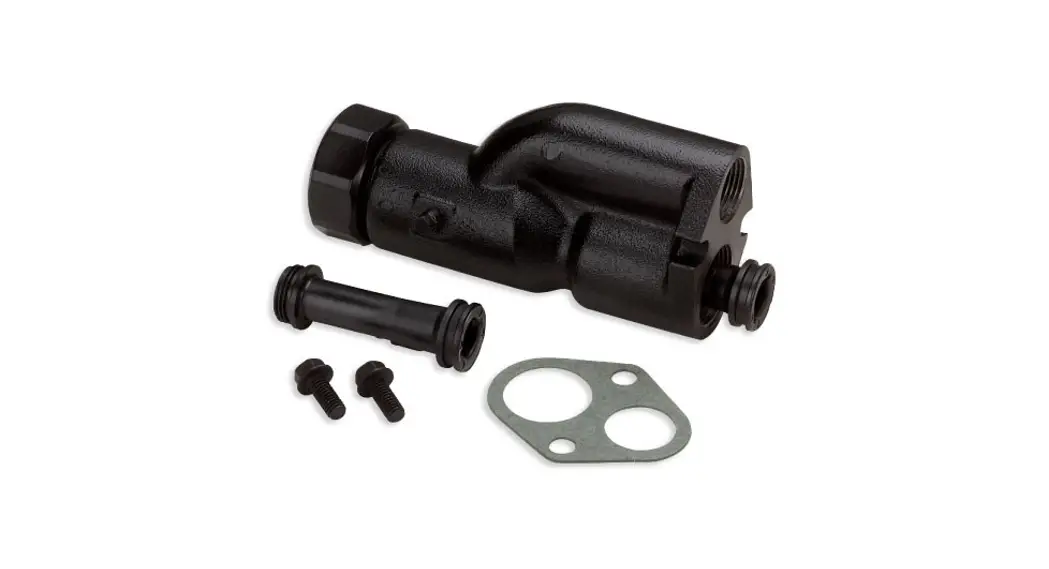
Inspect kit to ensure all parts are included. Select the proper venturi and install as shown in Figure 1.
Nozzle is installed at the factory and ordinarily does not require change.
Parts which may vary from Kit to Kit
| Jet Kit No. | Nozzle Key No. 3 | Venturi Key No. 4 | Replaces Pkg No. |
| Pkg 1-4SD Pkg 2A-4SD | #51(J34P-41) | J32P-24 | Pkg 1-4EP |
| Pkg 1-10SD | #54(J34P-44) | N32P-67B | Pkg 1-10N2 |
| Pkg 1-11SD | #54(J34P-44) | N32P-68B | Pkg 1-11N2 |
| Pkg 1-12SD | #54(J34P-44) | N32P-65 | Pkg 1-12N |
| Pkg 1-15SD Pkg 2A-15SD | #52(J34P-42) | J32P-18 | Pkg 1-15EP |
| Pkg 1-23SD Pkg 2A-23SD | #52(J34P-42) | J32P-24 | Pkg 1-23EP |
| Pkg 1-27SD | #51(J34P-41) | N32P-75B | Pkg 1-27N |
| Pkg 1-29SD | #51(J34P-41) | N32P-66B | Pkg 1-29E2 |
| Pkg 1-54SD Pkg 2A-54SD | #54(J34P-44) | J32P-22 | Pkg 1-54E P |
| Pkg 1-55SD Pkg 2A-55SD | #53(J34P-43) | J32P-18 | Pkg 1-55EP |
| PKG CK1 | #53(J34P-43) | J32P-20 J32P-22 N32P-72 N32P-72E Pkg 1-14EP | Pkg 1-42EP |
| Pkg 1-14EP | |||
| Pkg 1-52E | |||
| Pkg 1-28N | |||
| PKG CK2 | #54(J34P-44) | J32P-29 J32P-24 N32P-64 | Pkg 1-16EP |
| Pkg 1-17EP | |||
| Pkg 1-29N | |||
| PKG CK3 | #51(J34P-41) | J32P-26 J32P-32 N32P-78B | Pkg 1-8EP |
| Pkg 1-6EP | |||
| Pkg 1-50E,EB | |||
| PKG CK4 | #55(J34P-45) | J32P-28 J32P-32 J32P-38 | Pkg 1-11EP |
| Pkg 1-10EP | |||
| Pkg 1-9EP | |||
| PKG CK5 | #55(J34P-45) | *N32P-66B *N32P-67B | Pkg 1-51E,EB |
| Pkg 1-30E2 |
* Poly pipe adapter will not fit over venturi. Use galvanized pipe.
Parts common to all Jet Kits
| Key No. | Part Description | Qty. | Part No. |
| 1 | Pipe Nipple (Pkg CK Series Only) | 1 | U37-67P |
| 2 | Jet Body | 1 | N40-92N |
| 5 | 3/8-16×7/8” Hex Washer Hd. Cap Screws* | 2 | U30-961PS |
| 6 | Gasket* | 1 | N20-25 |
* Not included with Kit Nos. PKG1-4SD, -15SD, -23SD, -54SD, -55SD or PKG 2A-4SD, -15SD, -23SD, -54SD, -55SD
Accessory Package 2A Parts
(Also included with all PKG 2A- Series Jet Kits)
| Key No. | Part Description | Qty. | Part No. |
| 7 | Poly Pipe Adapter | 1 | U11-104P |
| 8 | Foot Valve | 1 | U212-94DB |
Repair Parts
Pkg 2A-SD Series includes Key Nos. 2 – 8.
Pkg 1-SD Series includes Key Nos. 2 – 6.
Pkg CK Series includes Key Nos. 1 – 6.
Accessory Pkg 2A includes Key
Nos. 7 – 8.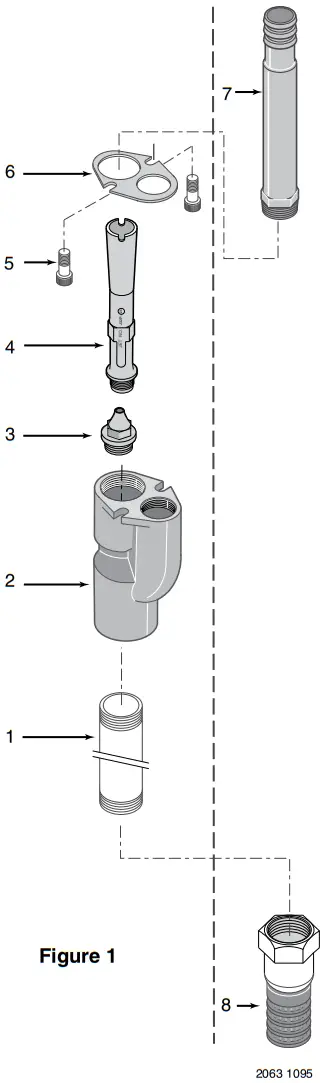
Shallow Well Installation
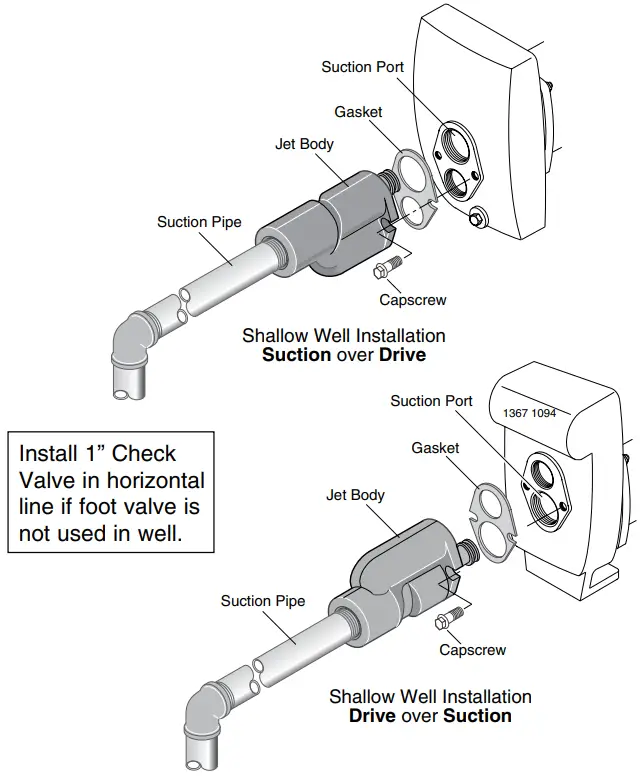 Figure 2 – Shallow Well
When your pump is installed as a Shallow Well pump (25 feet or less to the drawdown water level*), attach the jet tothe pump as shown in Figure 2. Insert the venturi end of the jet in to the larger (suction) port in the pump. Use the gasket and washer head capscrews included with the jet. Tighten the screws evenly and firmly.
* The “drawdown water level” is the distance from the pump to water while the pump is running.
Deep Well Installation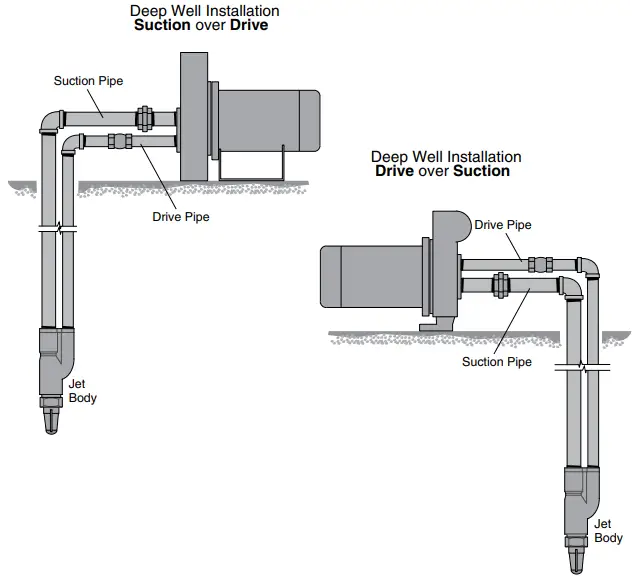 Figure 3 – Deep Well
TABLE I – In-well Pipe Sizes
| HP | Installation | Suction | Drive |
| 3/4 | Multi-Stage Jet Pump | 1-1/4” | 1” |
| 1 | Multi-Stage Jet Pump | 1-1/4” | 1-1/4” |
| 1-1/2 | Multi-Stage Jet Pump | 1-1/4” | 1-1/4” |
| All | Horizontal Jet Pump | 1-1/4” | 1” |
For long horizontal runs of piping, consult your owner’s manual for recommended piping size increase.
When your pump is installed as a Deep Well pump (more than 25 feet to the drawdown water level), install the jet in the well as shown in Figure 3. The gasket and capscrews included with the jet package are not needed for a deep well installation.
Refer to Figure 4 for typical Deep Well installations and fittings required. Refer to your pump owner’s manual or insert sheet WC80-188 for specific performance and depth setting information.
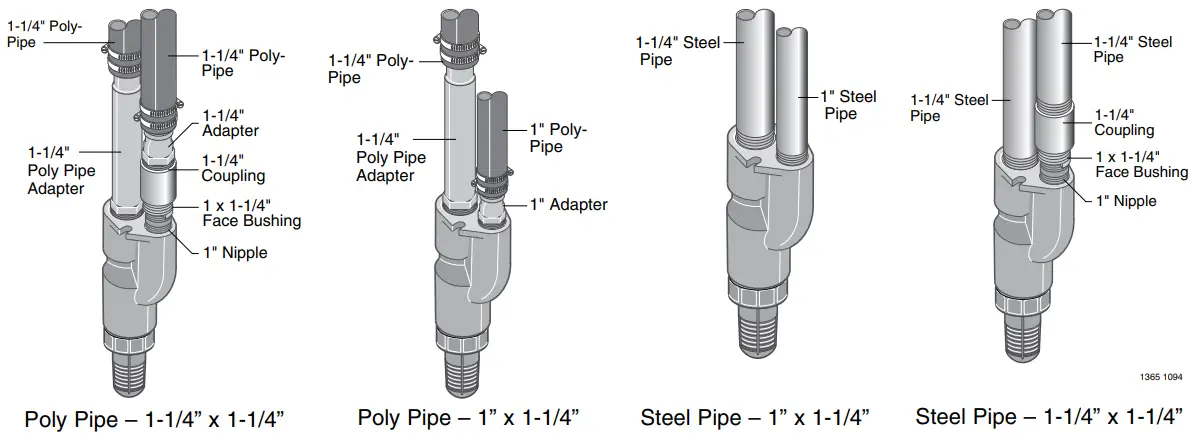 Figure 4 – Typical Deep Well Installations
![]()


