
JENSEN JE3221S Smart TV Instruction Manual
Safety Instruction
WARNING
To reduce the risk of fire or electric shock, do not expose this product to rain or moisture.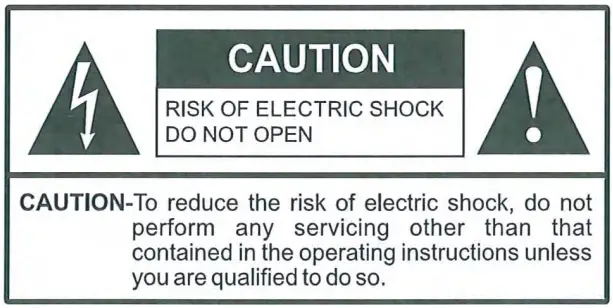
![]() This symbol is intended to alert the user to the presence of uninsulated “ dangerous voltage” within the product’s enclosure that may be of sufficient magnitude to constitute a risk of electric shock to persons.
This symbol is intended to alert the user to the presence of uninsulated “ dangerous voltage” within the product’s enclosure that may be of sufficient magnitude to constitute a risk of electric shock to persons.
![]() This symbol is intended to alert the user to the presence of important operating and maintenance (servicing) instructions in the literature accompanying the appliance.
This symbol is intended to alert the user to the presence of important operating and maintenance (servicing) instructions in the literature accompanying the appliance.
This product utillizes tin-lead solder, and fluorescent lamp containing a small amount of mercury. Disposal of these materials may be regulated due to environmental considerations. For disposal or recycling information, please contact your local authorities or the Electronic Industries Alliance: www.eia.org.
FCC STATEMENT
This product has been tested and found to comply with the limits for a Class B digital device, pursuant to part 15 of the FCC Rules. These limits are designed to provide reasonable protection against harmful interference when the equipment is operated in a commercial environment. This product generates, uses, and can radiate radio frequency energy and, if not installed and used in accordance with the instruction manual, may cause harmful interference to radio communications. Operation of this equipment in a residential area is likely to cause harmful interference in which case the user will be required to correct the interference at his own expense.
FCC CAUTION:
Pursuant to 47CFR, Part 15.21 of the FCC rules, any changes or modifications to this monitor not expressly approved by the manufacturer could cause harmful interference and would void the user’s authority to operate this device.
WARNING
This is a CLASS B product. In a domestic environment, this product may cause radio interference, in which cause
the user may be required to take adequate measures to counter interference.
IMPORTANT SAFETY INSTRUCTIONS
- Read these instructions.
- Keep these instructions.
- Heed all warnings.
- Follow all instructions.
- Do not use this product near water.
Apparatus should not be exposed to dripping or splashing and no objects filled with liquids, such as vases, should be placed on the product. - Clean only with a dry cloth.
- Do not block any ventilation openings. Install in accordance with the manufacturer’s instrutions.
- Do not install near any heat sources such as radiators, heat registers, stoves, or other apparatus(including
amplifiers) that produce heat.
- Do not defeat the safety purpose of the polarized or grounding-type plug. A polarized plug has two blades with one wider than the other. A grounding type plug has two blades and a third grounding prong. The wide blade or the third prong are provided for your safety.
If the provided plug does not fit into your outlet, consult an electrician for replacement of the obsolete outlet. - Protect the power cord from being walked on or pinched, particularly at plugs, convenience receptacles, and the point where they exit from the apparatus.
- Only use attachments / accessories specified by the manufacturer.
- Use only with the cart, stand, tripod, bracket, or table specified by the manufacturer or sold with the apparatus. when a cart is used, use caution when moving the cart / apparatus combination to avoid injury from tip-over.

- Unplug this apparatus during lightning storms or when unused for long periods of time.
- Refer all servicing to qualified service personnel. Servicing is required when the product has been damaged in any way, such as power-supply cord or plug is damaged, liquid has been spilled or objects have fallen into the product, the product has been exposed to rain or moisture, does not operate normally, or has been dropped.
- Where the mains plug or an appliance coupler is used as the disconnect device, the disconnect device shall remain readily operable.
Before using your TV, please read these instructions completely, and keep this manual for future reference,
Carefully observe and comply with all warnings, cautions and instructions placed on the unit or described in the operating instructions or service manual.

WARNING
To guard against injury, the following basic safety precautions should be observed in the installation, use and servicing of the unit.
Power Sources
This unit should be operated only from the type of power source indicated on the information label. If you are not sure of the type of electrical power supplied to your home, consult your dealer or local power company.
Grounding or Polarization
This unit is equipped with a polarized AC power cord plug (a plug having one blade wider than the other), or a DC power connection, for use in a vehicle. Follow the instructions below:
For the unit with a polarlzed AC power cord plug
This plug will fit into the power outlet only one way. This is a safety feature. If you are unable to insert the plug fully into the outlet, try reversing the plug. If the plug still fails to fit, contact your electrician to have a suitable outlet installed. Do not defeat the safety purpose of the polarized plug by forcing it in.
For the unit with a DC power connector
For installation in a vehicle, connect the red wire to the 12V accessory line and the black wire to ground terminal.
Wall outlet
Do not use a poor fitting outlet.
Insert the plug fully into the outlet. If it is loose, if may cause arcing and result in fire. Contact your electrician to have the outlet changed.
Wiring
For your safety, unplug the power cord when wiring cables.
Electric shock
Do not touch the AC power cord or the unit with a wet hand. If you plug / unplug the AC power cord from the unit with a wet hand, it may cause electric shock.
Never attempt to move the unit unless the AC power cord is disconnected.
Cleaning
Clean the power plug regularly.
If the plug is covered with dust and it picks up moisture, its insulation may deteriorate and result in fire.
Unplug the power plug and clean it regularly.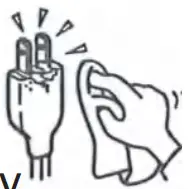
Unplug the power cord when cleaning this unit. If not, it may result in electric shock.
Clean the cabinet of the TV with a dry soft cloth. To remove dust from the screen, wipe it with a soft cloth.
Stubborn stains may be removed with a cloth slightly dampened with a solution of mild soap and warm water. Never use strong solvents such as thinner or benzine for cleaning.
If using a chemically pre-treated cloth, please follow the instructions provided on the package.
Overloading
Do not overload wall outlets, extension cords or convenience receptacles beyond their capacity, since this can result in fire or electric shock.
Power
Always turn the unit off when it is not being used.
When the unit is left unattended and unused for long periods of time, unplug it from the wall outlet as a precaution against the possibility of an internal malfunction that could create a fire hazard.
Sound
If a snapping or popping sound from the TV is continuous or frequent while the TV is operating, unplug the TV and consult your dealer or service technician. It is normal for TV’s to make occasional snapping or popping sounds, particularly when being turned on or off.
Power Cord
If you damage the power cord, it may result in fire or electric shock.
Do not pinch, bend, or twist the cord excessively. The core lines may be bared and cut and cause short-circuit, resulting in fire or electric shock.
Do not convert or damage the power cord.
Do not put anything heavy on the power cord.
Do not pull the power cord.
Keep the power cord away from heat sources.
Be sure to grasp the plug when disconnecting the power cord.
If the power cord is damaged, stop using it and replace with a new one.
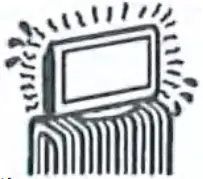
Ventilation
The slots and openings in the TV are provided for necessary ventilation. To ensure reliable operation of the unit, and to protect it from overheating, these slots and openings must never be blocked or covered. Unless proper Ventilation is provided, the unit may gather dust and get dirty. For proper ventilation, observe the following:
Do not install the unit turned backward or sideways.
Do not install the unit turned over or upside down.
Never cover the slots and openings with a cloth or other materials.
Never block the slots and openings by placing the unit on a bed, sofa, rug or other similar surface.
Never place the unit in a confined space, such as a bookcase or built-in cabinet, unless proper ventilation is provided.
Leave some space around the unit. Otherwise, adequate air-circulation may be blocked, causing overheating, and may cause fire or damage the unit.
Heat sources
Do not install near any heat sources such as radiators, heat registers, stoves, or other apparatus (including amplifiers) that produce heat.
POWER: Turn ON/OFF Power.
CH+/-: Selecting Channel.
VOL +/-: Adjusting Volume.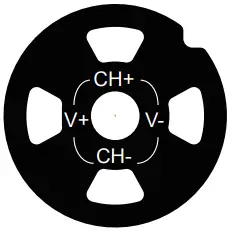
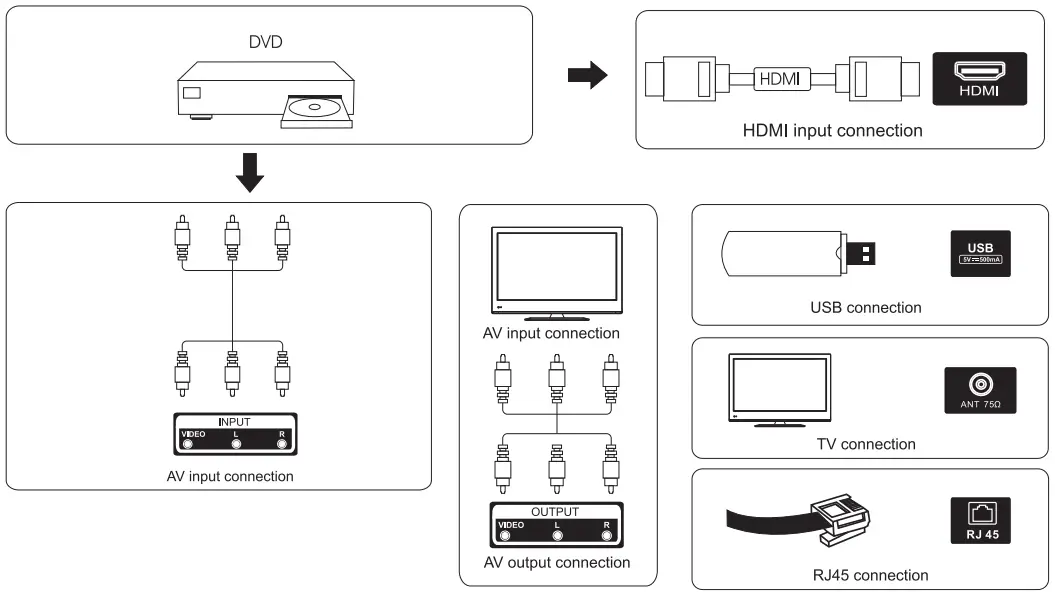
Terminal Interface
Note: The following are the various terminal interface, the actual position and arrangement, the number of different models may be different.
| AV input External AV Signal Input |
| HDMI input Digital signal input from HDMI video connector. |
| ANT75 Connect the antennal/cadle Iv input (75NHF/UHF) |
| RJ45 Connect the Internet. |
| EARPHONE output When earphones are plugged in, speakers are disabled |
| USB input Connect a USB device here to play its media files or to record programs via the PVR function. |
| OPTICAL output Connect the SPDIF receiver. |


Accessories
Note: The configuration of the components may look different from the following illustration.
- Battery 1.5V(AAA X2)

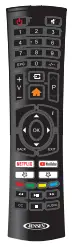
- Remote Control

External device connection diagram
TV Install
Mounting on a Desktop

Your LED TV can be mounted on a desktop with the base installed.
This is not a floor-standing unit.
Installation Precautions
Wall Mounting
Please ensure enough space for safe use. Please refer to diagrams A and B.
Installation of the LED TV in an improperly ventilated location can cause damage to the LED TV due to increased temperature.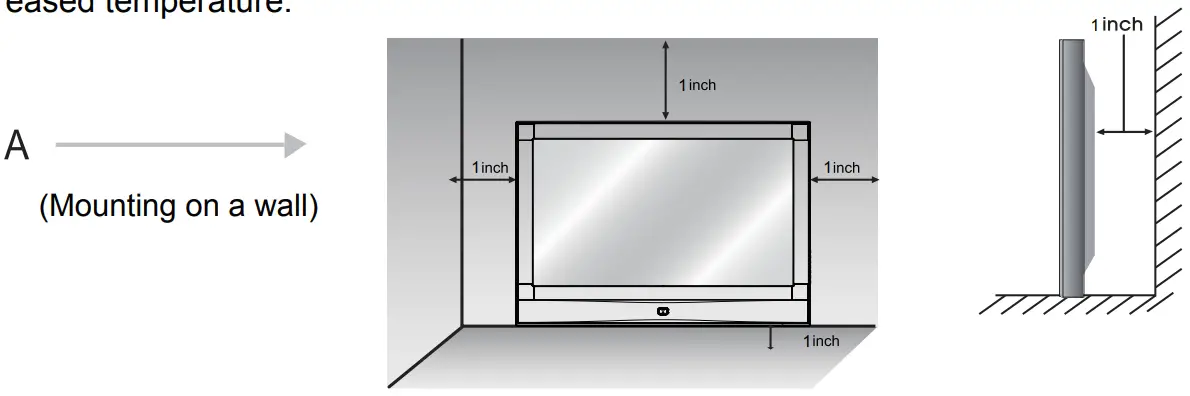
Contact your dealer to purchase the Adjustable-angle wall mount required for wall-mounted installation.
Using the Stand
Do not install on an unstable location with a support area smaller than the LED TV.
Please refer to the desktop stand user' s manual for details of installation.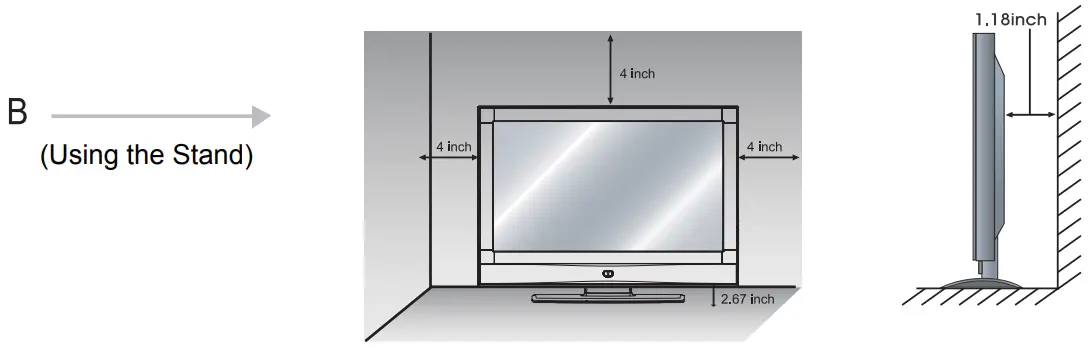
OSD
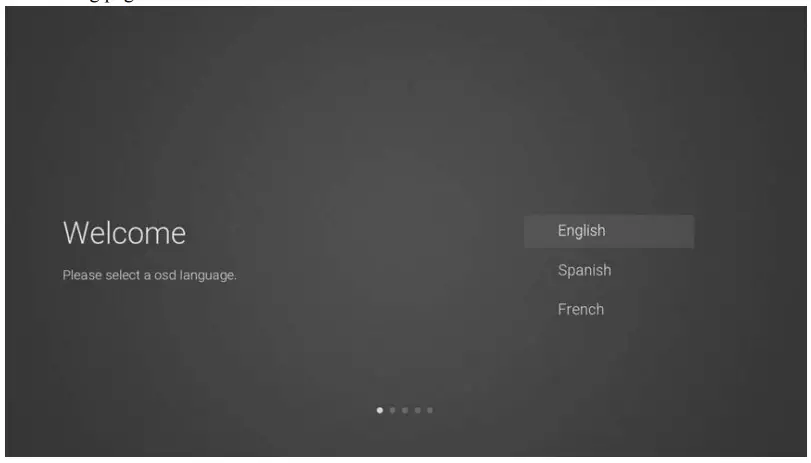
Installation Guide
- Show the Installation Guide page after booting up for the first time
Press the [Up and Down] button to switch the OSD Language and press [OK] button to enter the next setting page.
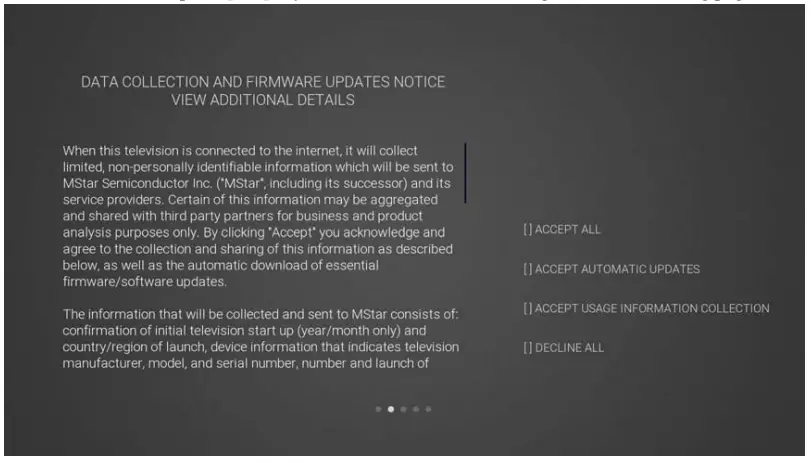
- Data collection and firmware updates notice page
Press the [Up and Down] button on the remote control to switch the options, and the [OK] button to confirm the selection. It is recommended to select [ACCEPT].Items Method Directions [VIEW ADDITIONAL DETAILS] [OK] button See more detailed firmware/software network download update instructions. [ACCEPT] [OK] button Accept all agreements and agree to the firmware/software network to automatically download updates - If you press [OK] key in the [VIEW ADDITIONAL DETAILS] box,it will go to the data collection and firmware updates notice view additional details page. Default focus text section, [Up and Down] key pulls down the text to the bottom and press the [Down] key to switch to the [] DECLIN ALL box, press [OK] key to confirm the selection and go to the next setting page.
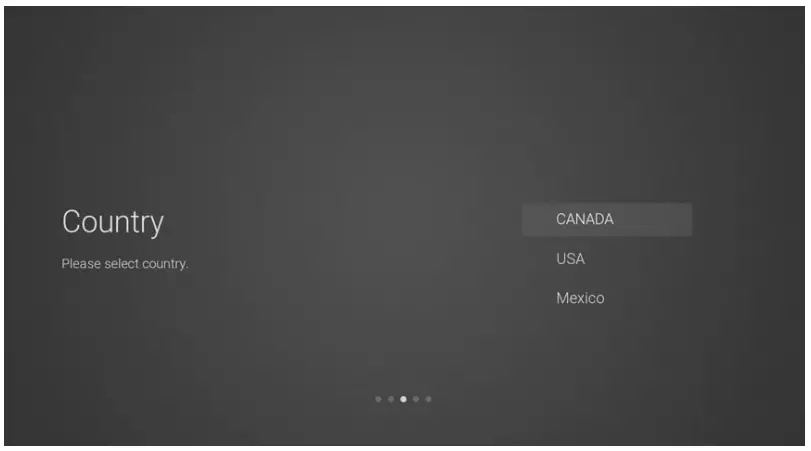
Items Method Directions [ACCEPT ALL] [OK] button Accept all agreements and agree to the firmware/software network to automatically download updates. [ACCEPT AUTOMATIC UPDATES] [OK] button Accept all protocol parts and manually select whether to agree to the firmware/software network download update if there is a firmware/software update [ACCEPT USAGE INFORMATION COLLECTION] [OK] button Accept the agreement and agree to collect some non-personal user information. [DECLINE ALL] [OK] button Reject all protocols and disable firmware/software network updates. - The default country channel tuning settings page
Press the [Up and Down] button on the remote control to select the menu option, [OK] button to confirm the selection and go to the next setting page.
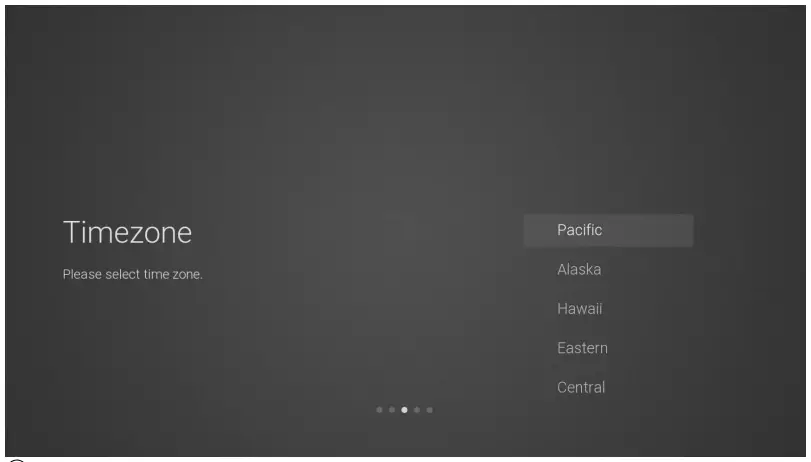
- The time zone setting page
Press the [Up and Down] button on the remote control to select the menu option, [OK] button to confirm the selection and go to the next setting page.
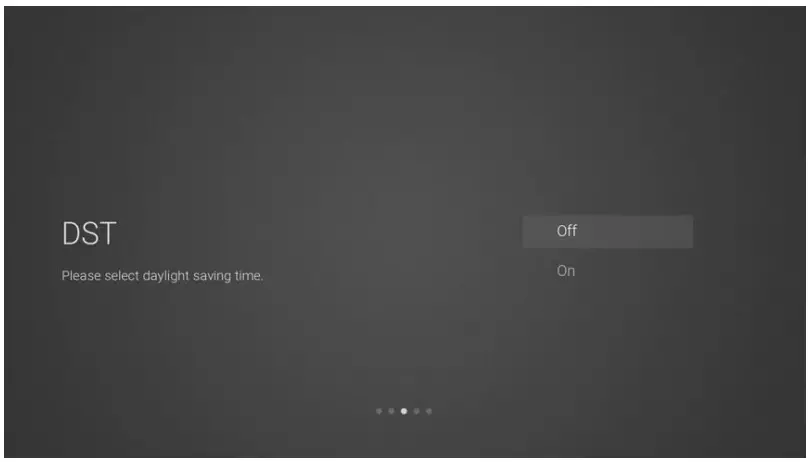
- The daylight saving time setting page
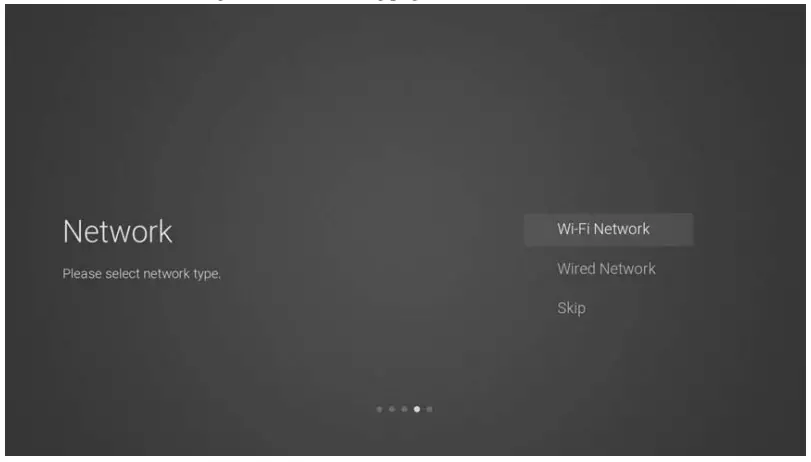
Press the [Up and Down] button on the remote control to select the menu option, [OK] button to confirm the selection and go to the next setting page. - The network type setting page
Press the [Up and Down] button on the remote control to select the menu option, [OK] button to confirm the selection and go to the next setting page.Items Method Directions Wi-Fi Network [OK] button Go to the wireless network connection page (automatically search for attachment wifi) Wired Network [OK] button Go to the wired network connection page Skip [OK] button Skip the network settings and go to the next level settings page. - If you do not need to connect to the network, select the “Skip” option, press [OK] button to confirm, and you will be taken to skip the network settings page.

Items Method Directions Set up network [OK] button Go back to the network settings page Skip [OK] button Confirm to skip the network settings and enter input source setting page.
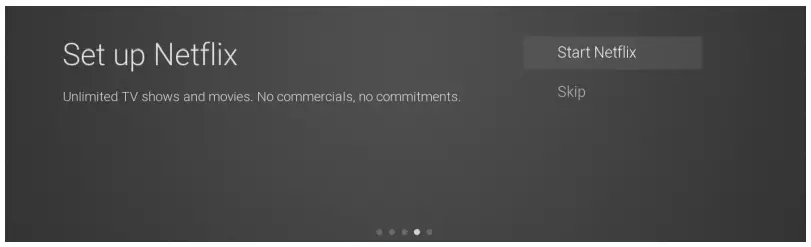
IF you set up network the next screen is

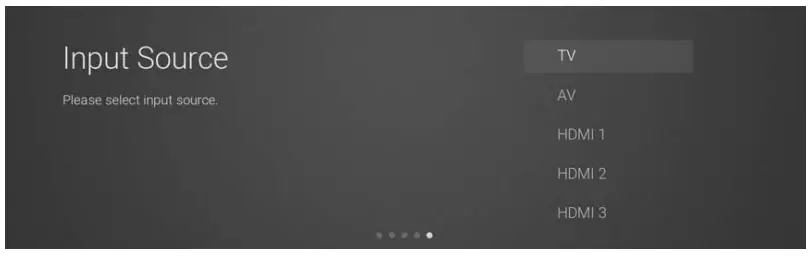
Items Method Directions Start Netflix [OK] button Start Netflix takes you to Netflix app Skip [OK] button Skip takes you to Input Source - The input source setting page
Press the [Up and Down] button on the remote control to select the menu option, Press the [OK] button to confirm the selection and go to the next setting page. Pressing the [DOWN] button all the way will turn the page to the USB source.
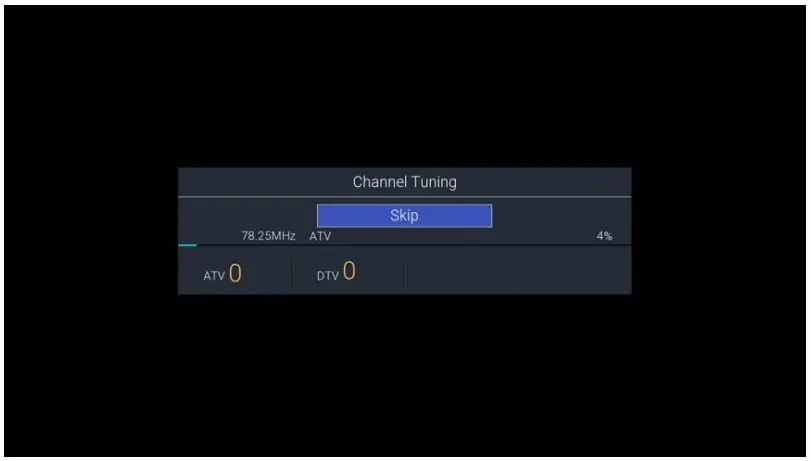
Items Method Directions TV [OK] button Go to the channel tuning page AV HDMI1 HDMI2…USB [OK] button Switch the source channel - The channel tuning page
The UI default focus the “Skip” option, Press the [OK] button to skip the DTV channel tuning then enter the ATV channel tuning.


HOME
Press the [Home] button to display the home page, Press the [Up and Down] button to switch between the Apps, NETFLIX, Input souce, and Settings options, Press the [Left and Right] button to select the corresponding sub-option and press the [OK] button to confirm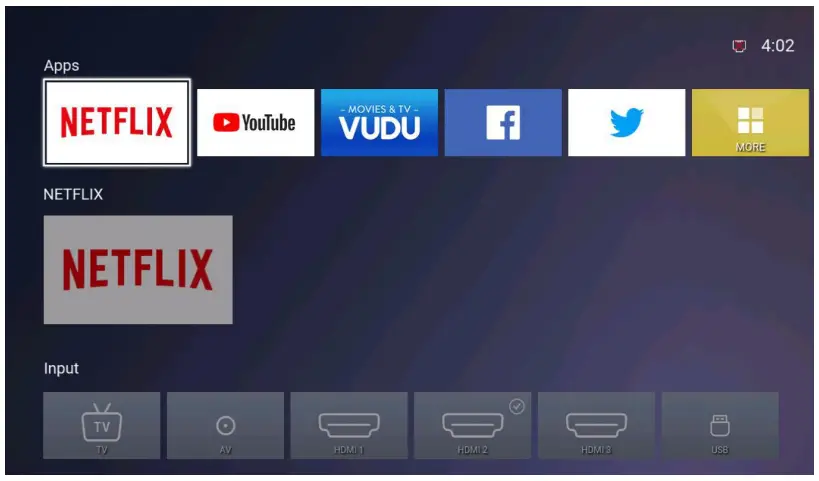
| Items | Directions |
| Apps | All APPS:Netflix、YouTube、Vudu 、Facebook 、Twitter 、Smart TV Apps、 Youtube Kids、Screencast、Browser、There may be some custom differences Apps. |
| NETFLIX | Netflix account recommendation information |
| Input | All input source:TV、AV、HDMI1/2/3、USB |
| Setting | All menu settings:Picture、Sound、Setting、Lock、Programme、 Network、About |
Press the [ ] button to display the main menu. Press the [Up and Down] but ton to switch between the options of Picture, Sound, Setting, Lock, PVR Option, Programm, Network, About.
Press the [Right] button to jump to the sub-option on the right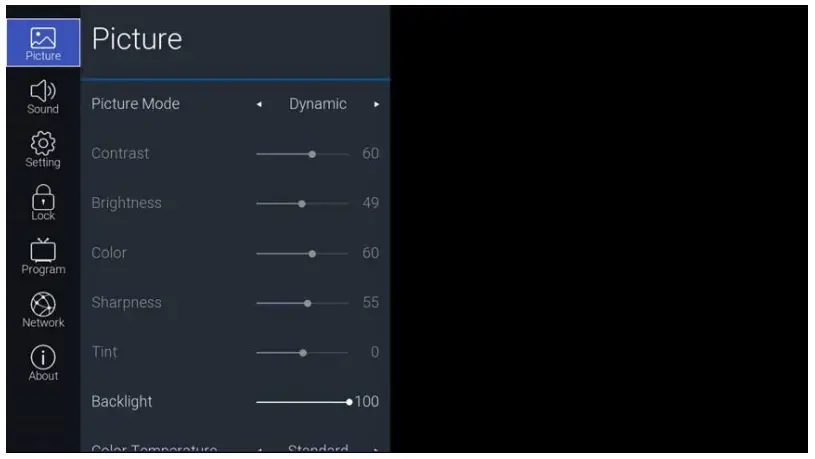
Picture
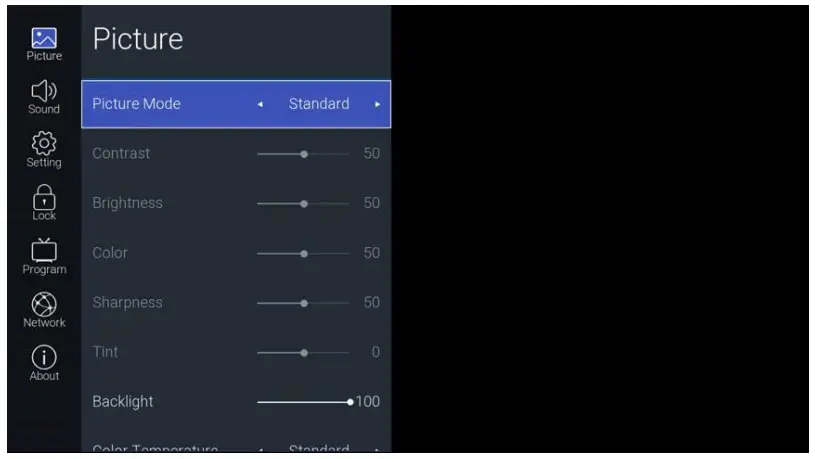
| Items | Adjustable mode | Directions |
| Picture Mode | Standard->Movie->User->Power Saving-> Dynamic | Picture mode adjustment |
| Contrast | Picture Mode is adjustable in User mode 0-100 | Contrast adjustment |
| Brightness | Picture Mode is adjustable in User mode 0-100 | Brightness adjustment |
| Color | Picture Mode is adjustable in User mode 0-100 | Color adjustment |
| Sharpness | Picture Mode is adjustable in User mode 0-100 | Sharpness adjustment |
| Tint | Picture Mode is adjustable in ATV NTSC mode | Tint adjustment |
| Backlight | 0-100 | Backlight adjustment |
| Color Temperature | Standard -> Warm -> Cool | Color adjustment |
| Aspect Ratio | Standard->Wide->Wide Zoom->Zoom | Aspect Ratio |
| Noise Reduction | Low->Middle->High-> Auto->Off | Noise Reduction adjustment |
Sound
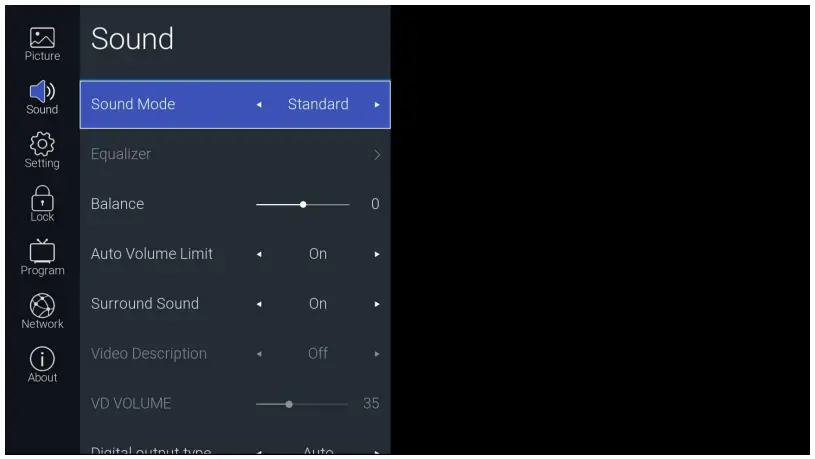
Function Description:
| Items | Adjustable mode | Directions | ||||||
| Sound Mode | Standard ->Music -> Movie -> Sport -> User | Sound Mode adjustment | ||||||
| Equalizer (on show only when the Sound Mode is user mode) | 120Hz | 0-100 | 120Hz frequency range sound amplitude gain adjustment. | |||||
| 500Hz | 0-100 | 500Hz requency range sound amplitude gain adjustment. | ||||||
| 1.5KHz | 0-100 | 1.5KHz requency range sound amplitude gain adjustment. | ||||||
| 5KHz | 0-100 | 5KHz requency range sound amplitude gain adjustment. | ||||||
| 10KHz | 0-100 | 10KHz requency range sound amplitude gain adjustment. | ||||||
| Balance | (-)50—50 | Volume balance adjustment | ||||||
| Auto Volume Limit | Off->On | Auto Volume Limit adjustment | ||||||
| Surround Sound | On/Off | Surround Sound adjustment | ||||||
| Video Description | Off->On(on show only for DTV channel) | Video Description adjustment | ||||||
| VD Volume | 0-100 | Video Volume adjustment | ||||||
| Digital output type | Auto->Dolby DD-> Dolby DD+ ->PCM | SPDIF port output mode adjustment | ||||||
| Audio Delay | SPDIF Delay | 0-250 | SPDIF volume delay time adjustment | |||||
| Speaker Delay | 0-250 | Speaker volume delay time adjustment | ||||||
| HDMI ARC Delay | 0-250 | ARC volume delay time adjustment | ||||||
| Audio Languages | English->French->Spanish | Audio Languages adjustment | ||||||
Setting
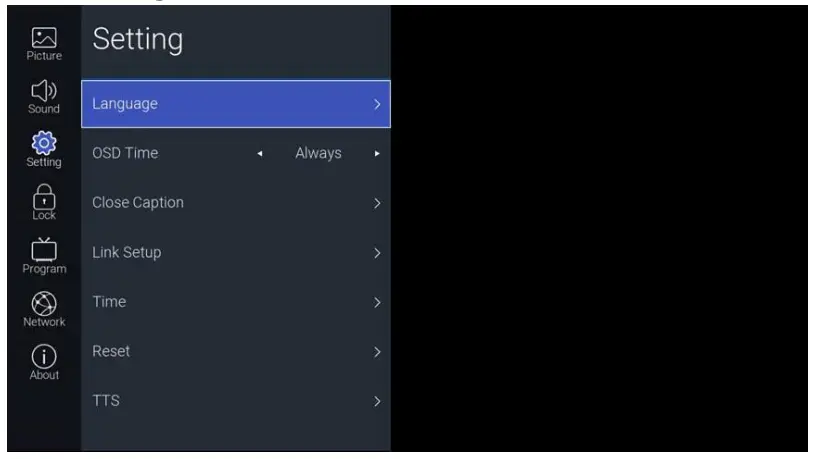
Function Description :
| Items | Adjustable mode | Directions | |
| Language | OSD Language | English->Spanish->French | OSD menu language selection adjustment |
| OSD Time | Always->5 Seconds->10 Seconds ->15 Seconds | OSD menu display time adjustment | |
| Close Caption | CC MODE | CC off->CC On Mute ->CC On | CC MODE adjustment | |
| Basic Slection | Off->CC1->CC2->CC3->CC4-> Text1->Text2->Text3->Text4 | CC channel adjustment | ||
| Advanced Selection | Off->Service1->Service2-> Service3->Service4->Service 5->Service6 | CC Service adjustment | ||
| Option | CC font display effect adjustment page | |||
| Link Setup | Link-CEC | On/Off | HDMI CEC adjustment | |
| HDMI ARC | On/Off | HDMI ARC adjustment | ||
| Auto Power | On/Off | Whether the TV is automatically turned on when the related DVD device is turned on | ||
| Auto Standby | On/Off | When the TV is turned off, the CEC device is turned off. | ||
| Time | Auto Sync | On/Off | System time setting switch | |
| Clock | System time display box, optional when Auto Sync is off, [Right] key to enter the system time setting page | |||
| Sleep Timer | Off->10min->20min->30min ->60min->90min->120min-> 180min->240min | Sleep time setting | ||
| Time Zone | Time Zone adjustment | |||
| DST | Off/On | The daylight saving time setting page | ||
| Reset | Yes or No | User reset | ||
| TTS | Enable | On/Off | Set TTS Enable or Disable | |
| Verbosity | Low->High | TTS Verbosity adjustment | ||
| Rate Support | Slow->Middle->Fast | TTS Rate Support adjustment | ||
| Pitch Support | Low->Middle->High | TTS Pitch Support adjustment | ||
| Speaker | Betty Say->Anita Say | TTS Speaker adjustment | ||
Lock
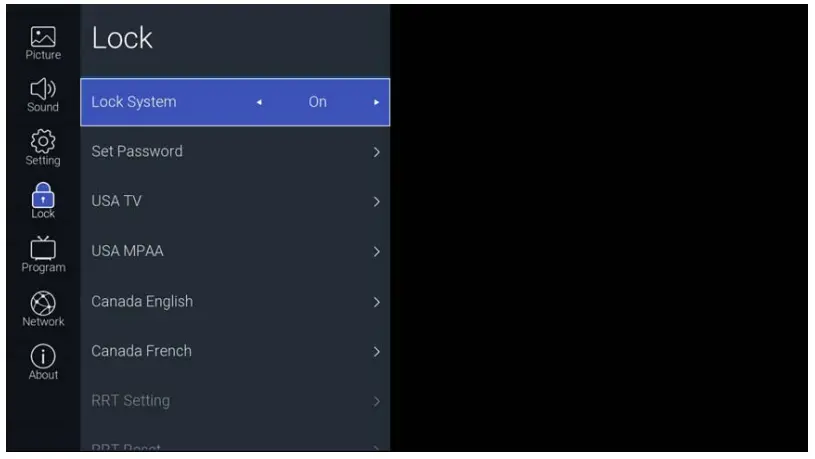
Function Description:
| Items | Adjustable mode | Directions | ||
| Lock System | On/Off | Control Set Password, USA and Canada Tv Rating Switch | ||
| Set Password | Please Enter Old Password | Default password “0000” | Set the system password. Press the [number] button on the remote control to set the new system password. Please enter the password before and after the New Password and Confirm New Password. The inconsistency will indicate that the Password not match setting fails. After the setting is successful, it will automatically return to the previous layer. | |
| Please Enter New Password | ||||
| Confirm New Password | ||||
| USA TV | USA TV rating channel lock adjustment page | |||
| USA MPAA | USA MPAA rating channel lock adjustment page | |||
| Canada English | Canada English rating channel lock adjustment page | |||
| Canada French | Canada French rating channel lock adjustment page | |||
| RRT Setting | RRT Setting page(This feature is only available on special channels.) | |||
| RRT Reset | Reset RRT (This feature is only available on special channels.) | |||
| Block Unrated TV | On/Off | Block Unrated TV adjustment | ||
Program
TV channel can be accessed by [Right] button.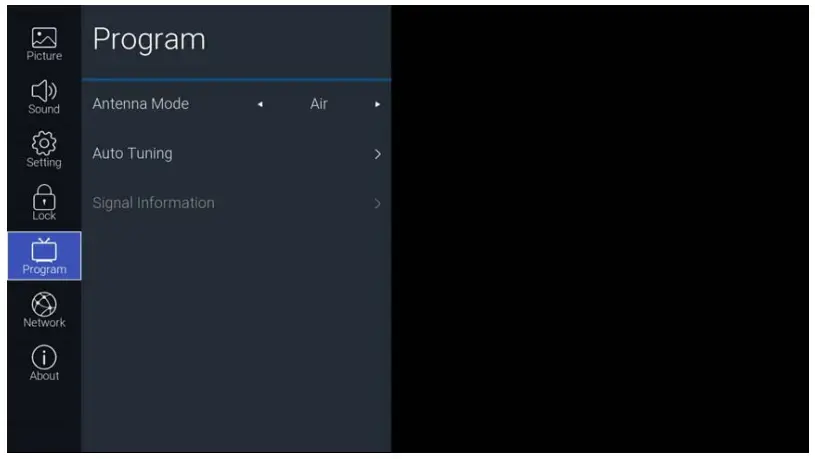
Function Description:
| Items | Adjustable mode | Directions |
| Antenna Mode | Air->Cable | Antenna Mode adjustment |
| Auto Tuning | Start auto tuning | |
| Signal Information | View channel signal strength (In the DTV channel can be focused) | |
Network
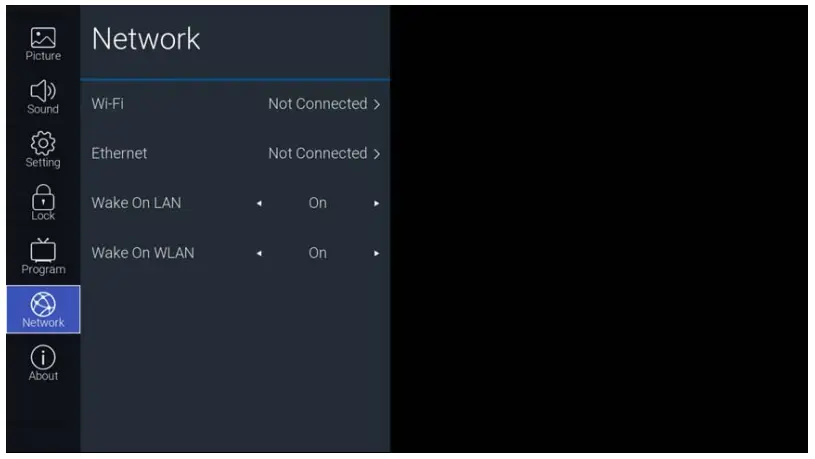
Function Description:
| Items | Adjustable mode | Directions | |
|
Wi-Fi | AUTO Scan | Automatically search for nearby wireless networks | |
| Manual Input | Manually enter the wifi that needs to be connected | ||
| IP | Wireless network ip address prompt box | ||
| Netmask | Wireless network subnet mask prompt box | ||
| Gateway | Wireless network gateway prompt box | ||
| DNS | Wireless network DNS prompt box | |||
| Ethernet | Protocol | IPv4->IPv6 | Wired network protocol selection | |
| Configuration | DHCP->Static | Wired network ip acquisition method selection | ||
| IP | Wired network ip address, Configuration is set to Static optional | |||
| Prefix | The number of bits in the wired network subnet mask is set, and the Configuration is set to Static. | |||
| Gateway | Wired network gateway, Configuration is set to Static optional | |||
| DNS | Wired network DNS, Configuration is set to Static optional | |||
| Connect | Connect to a wired network | |||
| Wake On LAN | On/Off | Wired network wake up TV enable switch | ||
| Wake On WLAN | On/Off | wireless network wake up TV enable switch | ||
About
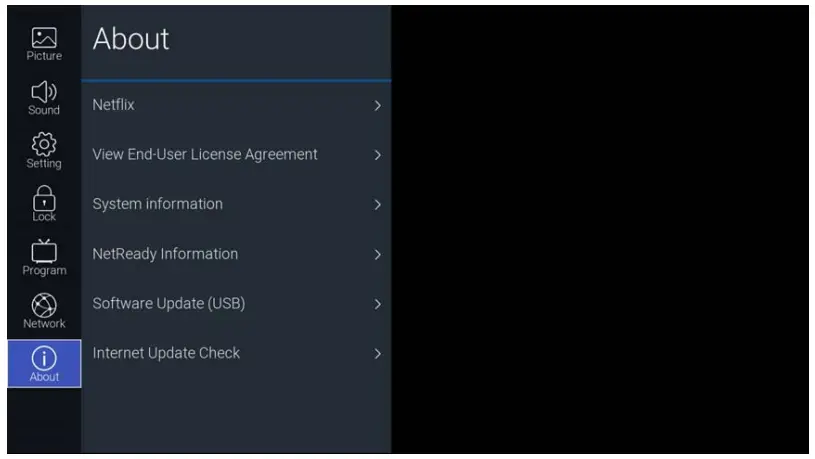
Function Description:
| Items | Directions | |
| NETFLIX | Netflix Deactive | Clear Netflix login account |
| Terminate Netflix | Exit Netflix | |
| Netflix ESN | Check out the View ESN key | |
| Netflix Version | Check out the Netflix version | |
| View End-User License Agreement | View End-User License Agreement | |
| System information | Check out the system information | |
| Net Ready Information | Check out the NetReady Device ID information | |
| Software Update(USB) | USB Software Update | |
| Internet Update Check | Check out the Internet Update | |
USB
Insert the USB flash drive and press the [OK] button in the USB menu of the input source page to enter the Media menu.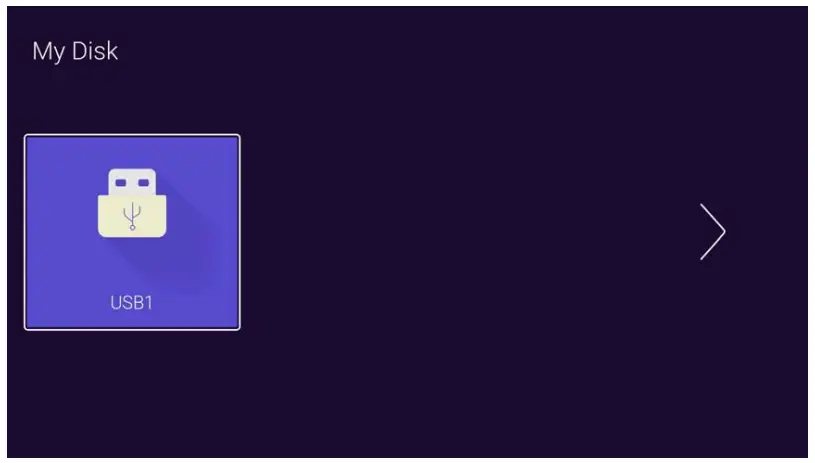
Press the [Left and right] button Select the inserted USB flash device, press the [OK] button to enter the following page.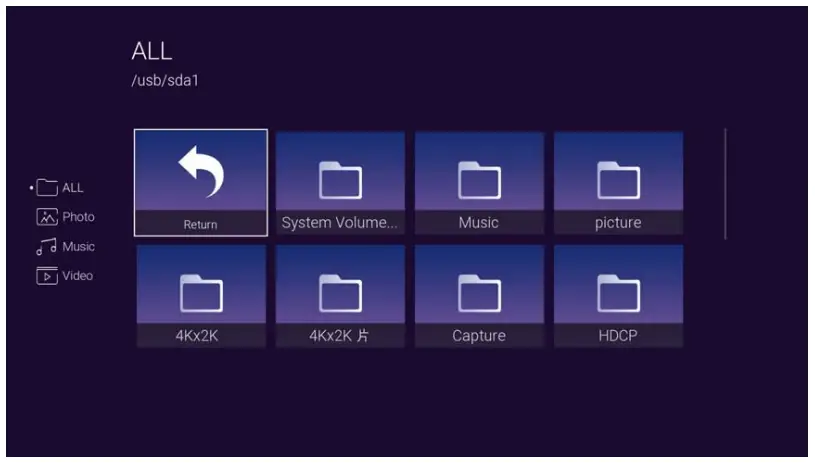
Press the [Left and right] buttons can be selected ALL, Photo, Music, Video options, press the [OK] button to select the file type, “Return” box to press [OK] to return to the previous directory, select a file press the [OK] button to enter the video file.
Help
| No power |
|
| Signal not received properly |
|
| No picture |
|
| Video appears with no audio |
|
| Audio is present, but video does not appear or is discolored |
|
| Static noise affects video and audio quality |
|
| Broken lines on screen |
|
| Remote doesn’t work |
|
| No video (PC mode) |
|
| Vertical line blinking (PC Mode) |
|
| Horizontal tearing (PC Mode) |
|
| Screen is too bright or dark (PC Mode) |
|
| No response from the PC |
|
| Lines appearing when a device is connected to the RCA port |
|
| Problems are unresolved |
|
Do not leave your TV displaying a static image, whether it is from a paused video, menu screen, etc. for an extended period of time, doing so will damage the display and may cause image burn-in.
Remote Control
 : Turn on the TV or enter standby mode
 : Turn off the sound and turn on when press again
- O ~ 9 : FiguresQ-9are used to directly input channel number
 : Press to display Electronic Program Guide and select the favorite channel
- +- Press to Change the channel which name contains”-“
 : Input source selection button
 : Press to enter the Home Page
- V+ : Increase the volume
- V- : Decrease the volume
- P :Increase the program
- P : Decrease the program
 : Start system menu
 : Press to display the source and channels display
 : To confirm the choice with the highlighted menu item
 : Press these buttons to select items
 : Press these buttons to select and adjust items
- BACK : Go back to the previous step
- EXIT : Press to exit the OSD menu
 : Press to launch the Netflix
 : Press to launch the You Tube
 : Press to launch NetRange app store
- : Press to enter mode
- GREEN/RED/YELLOW/CYAN button: Press these buttons according to different prompts
 : Press to fast reverse in USB mode
- : Press to fast forward in USB mode
 : Press to play the video and press again to pause the video
- CC : Closed Captions
 : Hold on or off for current page display
 : Press to change the language when playing the stream which contains multi-language.
 : Turn on the TV or enter standby mode
 : Turn off the sound and turn on when press again
 : Press to display Electronic Program Guide and select the favorite channel
 : Input source selection button
 : Press to enter the Home Page
 : Press these buttons to select items
 : Press these buttons to select and adjust items
 : Press to launch NetRange app store
 : Press to enter mode
 : Press to fast reverse in USB mode
Battery Installation:
Remove the battery compartment lid on the rear of the remote control by sliding the lid down, then off. Put two AAA batteries inside the battery compartment with their+ and – ends aligned as indicated. Do not mix old and new batteries or different types of batteries Refax the battery compartment lid. Slide the lid until you hear it click into place.
Using the Remote Control:
Unless stated otherwise, the remote control can operate all the features of the TV.
Always point the remote control directly at the remote sensor in the front of the TV.
Specifications
| LED Panel | Panel Size | 32” TFT LED | |
| Brightness | 200 | ||
| Contrast Ratio | 4000:1 | ||
| Viewing Angle | 1780/1780 | ||
| Max. Resolution | 1366 x 768 | ||
| INPUT | VIDEO | 1 | |
| LAN | 1 | ||
| HDMI | 3 | ||
| RF | 1 | ||
| USB | 2 | ||
| OUTPUT | OPTICAL | 1 | |
| EARPHONE | 1 | ||
| Power Source | AC | ||
| Power Consumption | 55W | ||
| Dimension | 28.8” x 17.2” x 3.2” inch | ||
| Weight | 7.91lbs | ||
- The cabinet design and electronics specifications may be modified without prior notice for performance improvement.
- Weight and dimensions are approximate


