
![]()
 8845-000 Quickstart Guide
In the box

 | |
| #6-32 x .375” spanner security screw Option 1: Secures the top and bottom casing together | #6-32 x .375” Phillips flat head screw Option 2: Secures the top and bottom casing together |
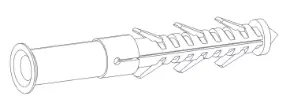 |  |
| Nylon wall plugs Used to brace the screws inside the wall | Sheet metal screw SCR PTP, 2X6MM BLUE, ZINC CR3 For mounting to wall |
What you’ll need
- A working internet connection
- Cable, 5-12 conductors (Wiegand), 4 conductors Twisted Pair Over-All Shield and
- UL approved, Belden3107A or equivalent (OSDP)
- Linear DC power supply
- Metal or plastic junction box
- Drill with various bits for mounting hardware
Installation
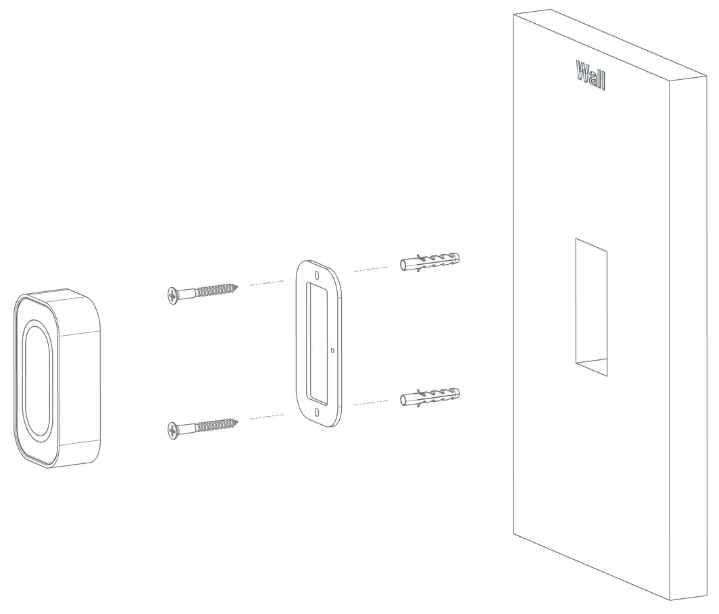
For a wall-mounted installation, beginby pre-drilling your holes and inserting the nylon screw plugs provided to support the weight of the reader. Once secured to the wall, you can fix the black plate to the wall using the screws (SCR PTP, 2X6MM BLUE, ZINC CR3) provided.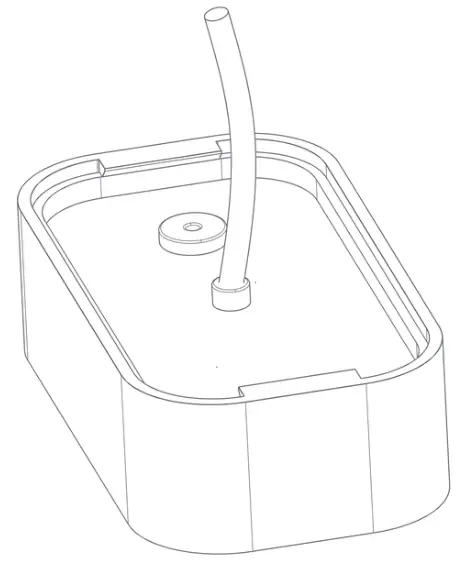
Wire Colors
| Ground | Black | |
| Wiegand Output D0 | White | |
| Wiegand Output D1 | Green | |
| Buzzer Input | Yellow | |
| Tamper Out | Purple | |
| Green LED Input | Orange | |
| Relay Out | Blue | |
| Relay In | Grey | |
| RED LED Input | Brown | |
| RS485 B | Pink | |
| RS485 A | Aqua | |
| 12 VDC | Red |
The next step is to connect the wires as per the wiring table above.
 Once the back plate has been fitted and the wiring is complete, the top casing can be inserted onto the bottom casing as shown above.

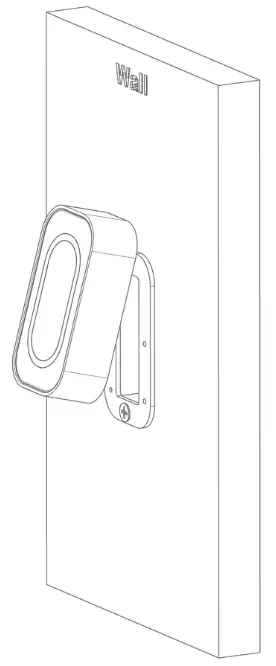
Complete the hardware installation by fixing either the snake eye screw (SMF #632X5/16″SS) or a Phillipsscrew (SMF #6-32X5/16″ SS)to the bottom casing.
Configuration
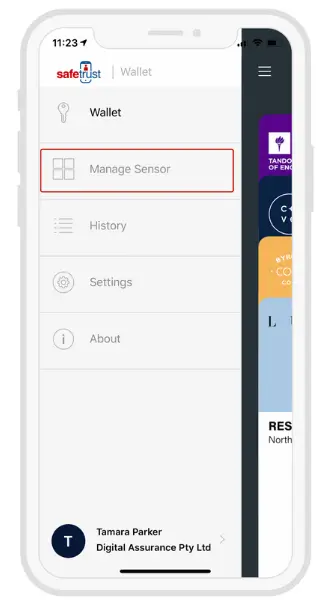
Open the Safetrust Wallet APP and select the Manage Sensor tab. Make sure your system admin has set you up with this role.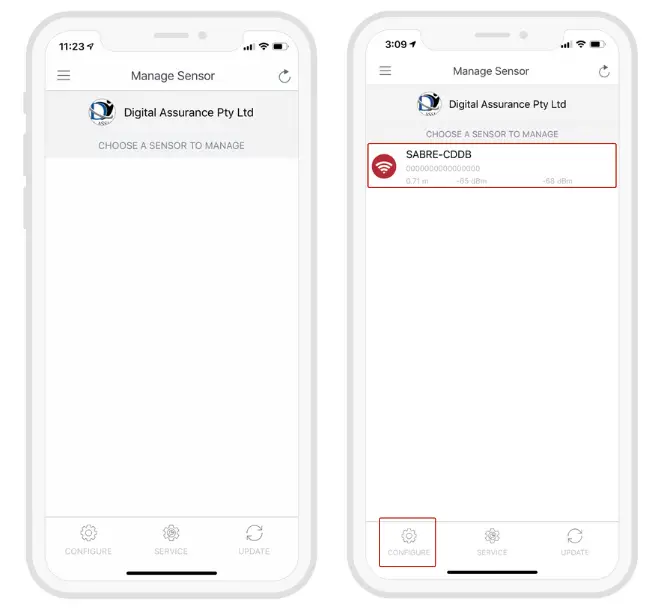
With the Admin Installer tab open from the App, bring the phone in range of the IoT Sensor, and once visible from the App, highlight and select “Configure”.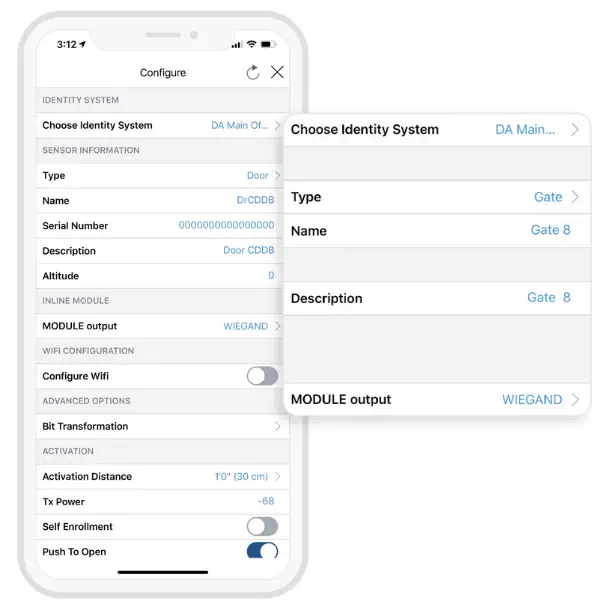
- Choose an Identity System.
- Specify the Type of access from the dropdown (eg. Door, Gate, etc.)
- Assign a short Name and Description using alphanumeric characters.
- Choose an Output for the sensor (the default is set to Wiegand).
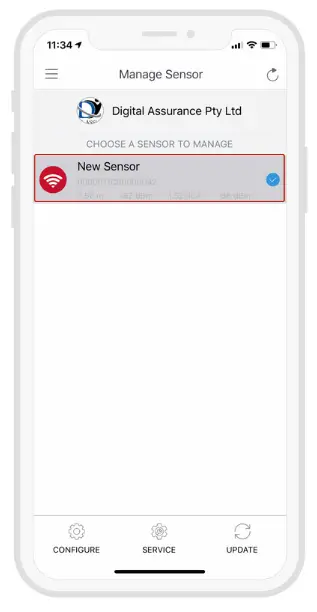
When the IoT Sensor information is saved successfully to the Credential Manager and assigned to the Identity System, the new description will appear in the Manage Sensor tab with a unique serial number assigned.
Testing
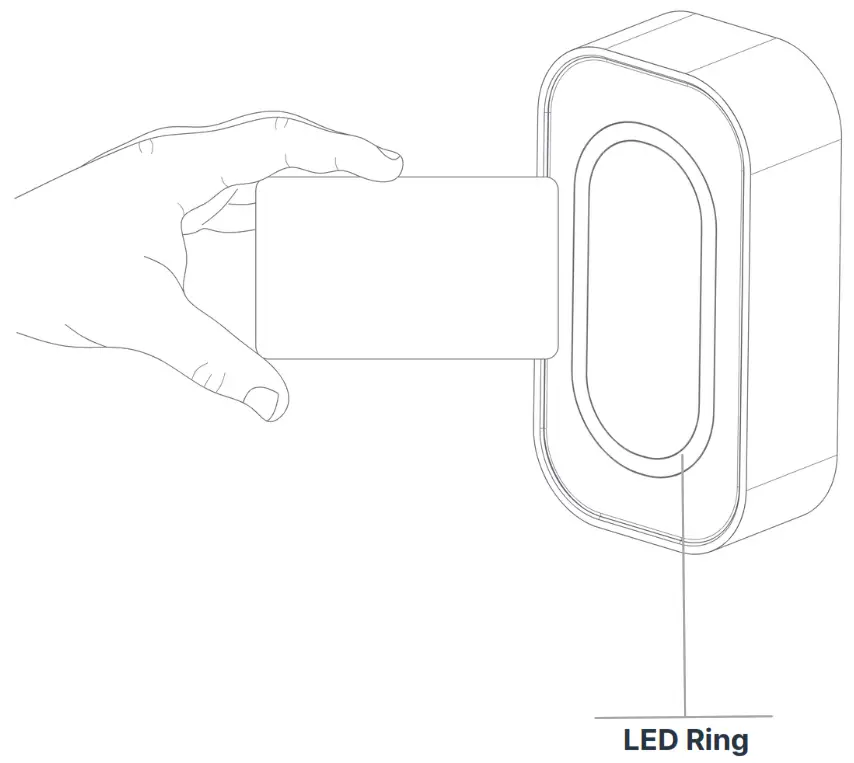
Access with cards
Status LED
Solid red Indicates idle mode | Solid green Success |
 Flashing red Powering up |  Flashing green Flashing greenThe credential is read and access is granted |
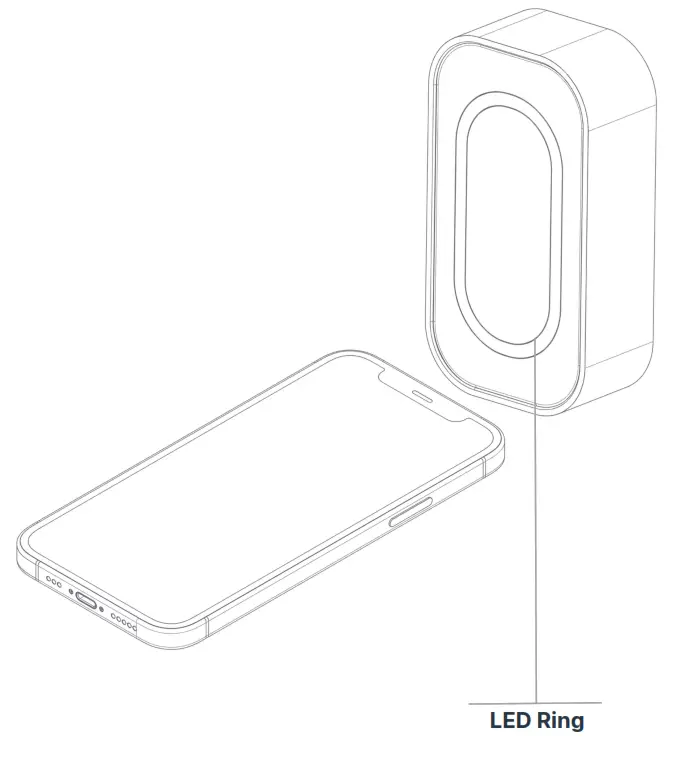
Access with mobile
Status LED
Solid red Indicates idle mode | Solid Blue Success |
Flashing red Powering up |  Flashing Blue The credential is read and access is granted |
Regulatory Information
FCC: This device complies with part 15 of the FCC Rules. Operation is subject to the following two conditions:
- This device may not cause harmful interference, and
- this device must accept any interference received, including interference that may cause undesired operation.
Canada Radio Certification: This device complies with Industry Canada license-exempt RSS standard(s). Operation is subject to the following two conditions:
- this device may not cause interference, and
- this device must accept any interference, including interference that may cause undesired operation of the device.
CE Marking: Safetrust hereby declares that these proximity readers are in compliance with the essential requirements and other relevant provisions of Directive 1999/5/EC.
Support
Thank you for purchasing the Safetrust IoT Sensor Mini Mullion.
If for any reason you need assistance with your installation, please contact your local Sales representative . Sincerely The Safetrust Team
Safetrust Inc. | safetrust.com
[email protected]


